The remote connection was not made because the attempted VPN tunnels failed error on Windows 10 may appear due to a wrong VPN app setting, some issues with your internet connection, etc. Some users have also got another error message saying The remote connection was not made because the name of the remote access server did not resolve. Whether you get the first or second error on your Windows computer, the solutions are the same since both are VPN-related issues appearing on your Windows 10 computer.
Fix The Remote Connection Was Not Made Because the Attempted VPN Tunnels Failed
These aforementioned error messages appear when a user tries to connect to a manual VPN profile in Windows 10. Even if you have a dedicated app for your VPN and are still getting this message, the following solutions should help you.
1. Restart Computer
Restarting the computer solves various minor issues, and if you are lucky, a simple restart might resolve VPN problems too. Therefore, before trying other complex solutions, it is better to restart your PC once if you haven’t done it already.
1: Press Alt+F4 when on desktop and choose the Restart option from the drop-down list.

2: Click the OK button to restart Windows 10 computer.
2. Check Internet Connection
Virtual Private Network or VPN works only when you have a good internet connection as it requires you to connect to a remote server first to provide anonymity. In other words, a slow internet connection can be the root of this error message. To check if the internet is working correctly or not, follow these steps:
1: Press Win+R, type the following command:
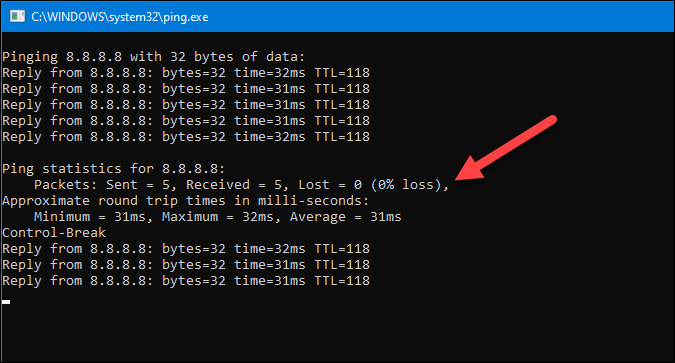
ping 8.8.8.8 -t2: Press the Enter button to use the ping command.
If it shows continuous results with a ping time, it means you have an internet connection that works. However, it is also recommended to check the percentage of packet loss. In simple words, let’s assume that your ISP sends the internet connection to your computer as packets. If they send 50 packets and you receive less than that (e.g., 40 or 30), it implies that there is some internet connection issue. However, the Command Prompt shows the packet loss in percentage, and you can press Ctrl+Pause Break as it shows the ping time to check the packet loss.
You can then report the problem to the ISP for further assistance.
Read: How to test your Internet speed from command line using Ping
3. Connect to a Normal Server
This solution works only when you are getting those error messages for a dedicated VPN app. Different VPN companies provide different features, such as Obfuscated Servers, Double VPN, etc., so that users can get better security and user experience. However, at times, they might create problems such as the one you are facing right now. To check whether those additional servers or features are causing VPN tunnel remote connection error, connect to a regular server and check if that solves your issue or not. If yes, it is time to contact the VPN support team. Official contact details can be easily found on VPN’s official support/contact page.
4. Disable Firewall Software
As firewall software monitors all incoming and outgoing connections, a conflict between it and the VPN service can cause this problem as well. Therefore, if you are using third-party firewall software, turn it off temporarily and check if the problem persists.
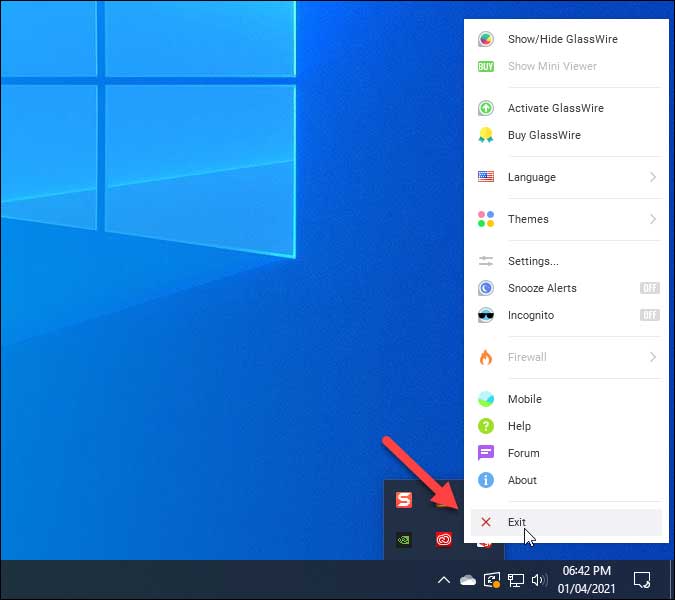
You may find an option to disable firewall in the system tray itself but options may vary based on the app you are using. Expand your system tray visible on the bottom-right side of the Taskbar, right-click on the firewall software, and choose the Quit/Close/Exit option.
5. Connect VPN from Network Connections
If Windows Settings has some internal problems and is not opening or working fluently as it should, there is a chance of getting this message. The alternative to establishing this connection is the Network Connections panel. It stores all the previously and presently connected networks, including VPN, so that you can manage or organize them according to your requirements. Follow these steps to connect the VPN from Network Connections:
1: Press Win+R to open the Run prompt.
2: Type ncpa.cpl and press the Enter button.

3: Right-click on the VPN name and select the Connect / Disconnect option.

6. Change Default DNS Servers
By default, your internet service provider provides a set of DNS servers, which can be altered to get better download and upload speeds. The same workaround can solve VPN remote connection tunnel error if there are some internet connection-related problems on your computer. Whether you are using an Ethernet connection or Wi-Fi, you can change DNS on Windows 10 using the following steps.
1: Press Win+R, type ncpa.cpl, and press the Enter button.
2: Right-click on the network you are using and select the Properties option.

3: Double-click on the Internet Protocol Version 4 (TCP/IPv4) and select the Use the following DNS server addresses option.

4: Enter 8.8.8.8 in the Preferred DNS server box and 8.8.4.4 in the Alternate DNS server box.
5: Click the OK button to save all changes.
6: Restart your computer and check if you can connect to the VPN now.
7. Flush DNS Cache
At times, you might not get any relief even after changing the DNS server, and that is when you need to flush the DNS cache on Windows 10. As the name says, it clears old cached data so you can keep using refreshed internet connection.
1: Search for cmd in the Taskbar search box.
2: Click the Run as administrator option visible on your screen.

3: Enter the following command-
ipconfig /flushdns
If it shows “Successfully flushed the DNS Resolver Cache,” you can restart your computer and connect to the VPN.
8. Check VPN Service
When you install a VPN app on your computer, a VPN-specific service gets added automatically which can be viewed in the Services panel. If that background service doesn’t run all the time, you won’t connect to the VPN server. To verify if it is running or not, follow these steps-
1: Search for services in the Taskbar search box and click on the respective result.
2: After opening the Services panel on your screen, search for the service named after your VPN app. For example, if you are using NordVPN, you can see nordvpn-service. Double-click on this service to open it.
3: If the Service status appears as Running, you do not have to do anything. Otherwise, click the Start button.

4: At last, click the OK button and check if VPN is working on Windows or not.
9. Change VPN Proxy Settings and Type
If you are using a proxy alongside VPN, it is better to disable it for the time being. Also, there are different types of VPN, such as Point to Point Tunneling Protocol (PPTP), IKEv2, L2TP/IPsec with certificate, etc. While setting up your VPN profile, if you selected the wrong type, there is a chance of getting The remote connection was not made because the attempted VPN tunnels failed error message.
To verify or rectify settings, follow these steps.
1: Press Win+I to open Settings and go to Network & Internet.
2: Switch to the VPN tab and click on the VPN name on your right-hand side.
3: Click on the Advanced options button.

4: Click the Edit button > expand the VPN type drop-down list, and choose Automatic.

5: Click the OK and Save button.
6: Expand the VPN proxy settings drop-down menu, and choose the None option.

7: Click the Apply button.
Now try connecting to the VPN server again.
10. Delete VPN Profile and Reconnect
Your Windows 10 computer may mess things up after a software/Windows update, malware attack, etc. The easiest way to bypass that issue is by deleting your VPN profile and add it again. For that, you can use the Windows Settings panel.
1: Press Win+I to open Windows Settings on your computer and go to Network & Internet > VPN.
2: Click on the VPN profile and select the Remove button.

3: Confirm the removal by clicking the Remove button again.
4: Click the Add a VPN connection option.

5: Enter all the required details such as VPN profile, Connection name, Server name or address, VPN type, etc. In case you do not know them already, it is required to contact the VPN provider. They can assist you better as there are countless VPN companies and different providers have different ways to set things up.
6: Once done, click the Save button to try to connect to the VPN server.
11. Perform Clean Boot
A bug or virus could mask itself in different ways and most of them run at system boot automatically. Performing a clean boot can help weed out such services/apps.
1: Press Win+R, type msconfig, and hit the Enter button.
2: Switch to the Services tab and check the Hide all Microsoft services option.
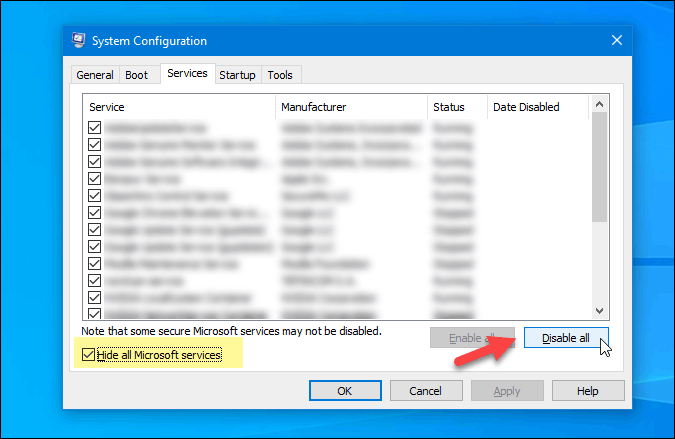
3: Make sure all the options are checked and click the Disable all button.
4: Restart your computer, open the Task Manager, and go to the Startup tab.
5: Select each Enabled process and click the Disable button.

6: Open the same msconfig or System Configuration window and enable all Microsoft services.
7: Restart your computer and check if the problem remains or not.
Wrapping up: The Remote Connection Was Not Made Because the Attempted VPN Tunnels Failed
‘The remote connection was not made because the attempted VPN tunnels failed’ or ‘The remote connection was not made because the name of the remote access server did not resolve’ are common issues when the VPN server is down or there are some other issues on your computer. Deleting the VPN profile and re-adding it solves the issue quickly, but it is recommended to check all the other solutions one after one.