The Files app on iOS13 is more powerful than ever, you can compress files, share folders using iCloud, scan documents, and of course access Samba servers. This is useful not only when you have to connect to a NAS but also when you want to only transfer files between Windows and iPhone/iPad. In this article, I’ll show you, an easy way to transfer files from Windows to iPhone using the Samba server. All you need is both your Windows computer and iPhone on the same Wi-Fi network and enable Windows File Sharing. Let’s begin.
Note: I’ll use a Windows 10 computer to demonstrate the steps but you can follow the steps on Windows 7, 8, 8.1, as well.
How to Access Shared Windows Folder on an iPhone
1. Turn on Network Sharing on Windows
The first step is to turn ON File Sharing on your Windows computer, you can skip to the next step if it is already enabled.
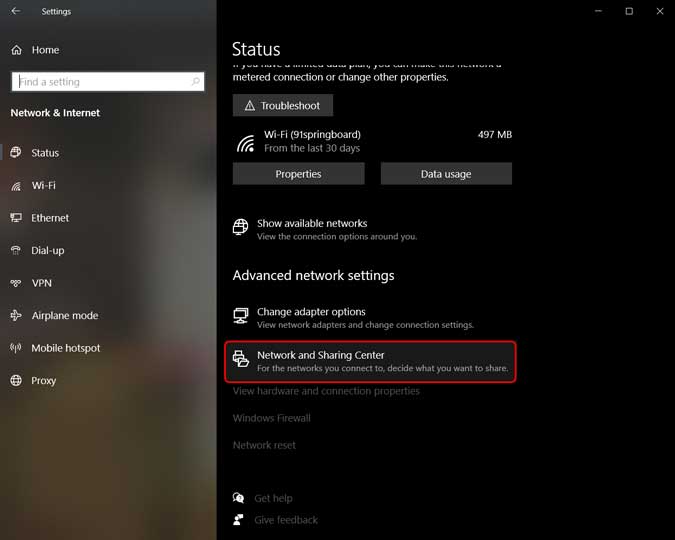
To do so, go Settings and open the ‘Network and Sharing Center’.
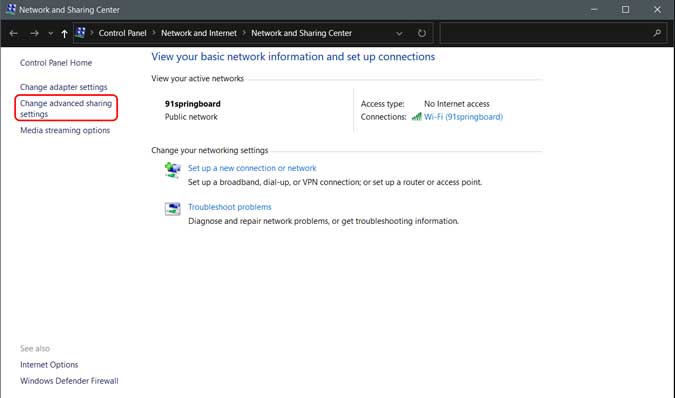
It would open a new window, look on the left pane and click ‘Advanced Sharing Settings‘ to open Sharing Settings.
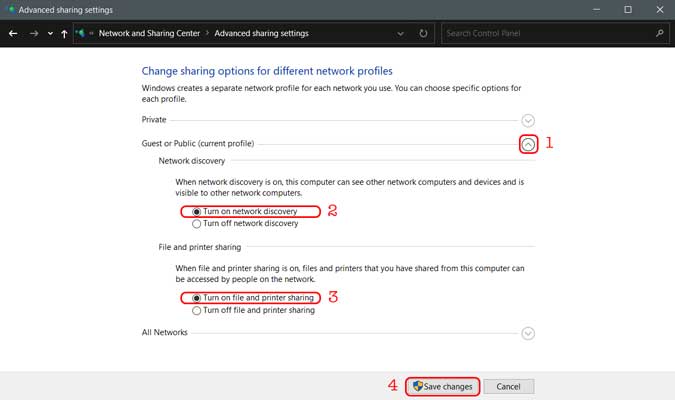
On this page, you’ll see three different Network Profiles; Private, Public, and All Networks. Turn Network Discovery and File Sharing on all the three profiles. If you’re worried about your privacy then you can do this on your current profile and it should still work. Click ‘Save Changes‘.
2. Share a Folder on Windows
To share a folder, open your computer and navigate to the directory which you want to be shared. To demonstrate, I’ll share a folder from C drive but you can share any other folder of your choice.
Right-click on the folder, and click properties.

Go to the Sharing tab and click the Share button under Network File and Folder Sharing.
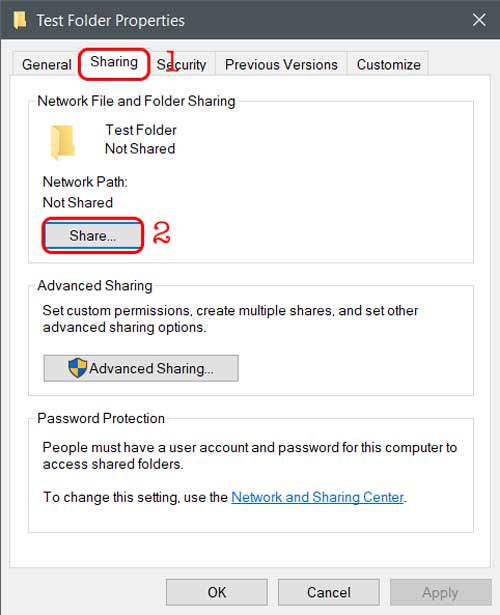
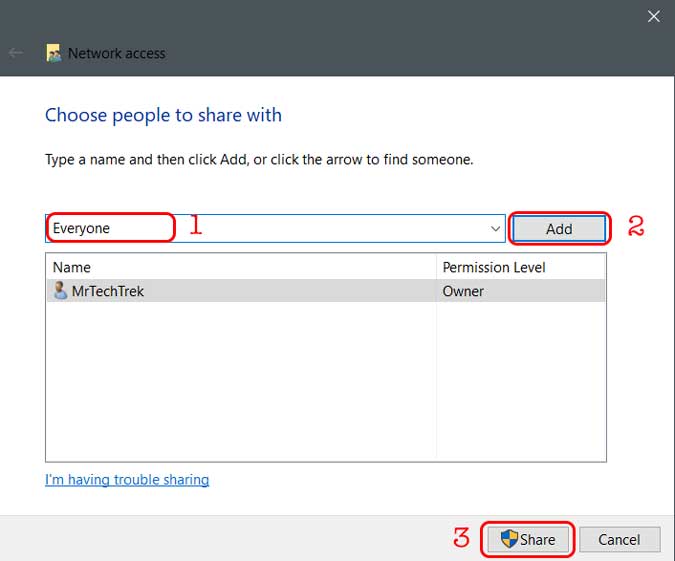
Here you can add people who can access the shared folder. Type “Everyone”, click ‘Add’ and then click ‘Share’. Your folder is now shared.
3. Find the Hostname of your Windows Computer
Before we can access the shared folder on the iPhone, we’ll have to find out the IP address of your Windows computer.
In a typical home network, a dynamic IP address is assign to your devices, which means every time you restart your computer, it gets a different IP address, this will make the sharing a bit troublesome. Thankfully, you can fix this, by using Workgroup name instead of IP address, which remains the same irrespective of IP address.
To find your Windows workgroup, open Command Prompt on your Windows Computer and type “hostname” and press enter.

Note down the hostname of your computer, we’ll need it to access the shared folder on the Files app.
4. Access the Shared folder on iPhone
Make sure your iPhone and Windows computer are connected to the same Wi-fi network.
Open the Files app, and tap the three-dot button on the top right corner. Select ‘Connect to a Server‘ and proceed.

It would prompt you to enter the server address, type “smb://YOUR-HOSTNAME.local”. Replace ‘YOUR-HOSTNAME’ with your computer’s hostname and tap ‘Connect‘. Enter the username and password, the credentials you use to unlock the Windows computer would be the username and password for this step. Tap ‘Next‘.

It would take a few seconds and then open a new page with the shared folder. You can access all the files in the shared folder and copy it to your iPhone.
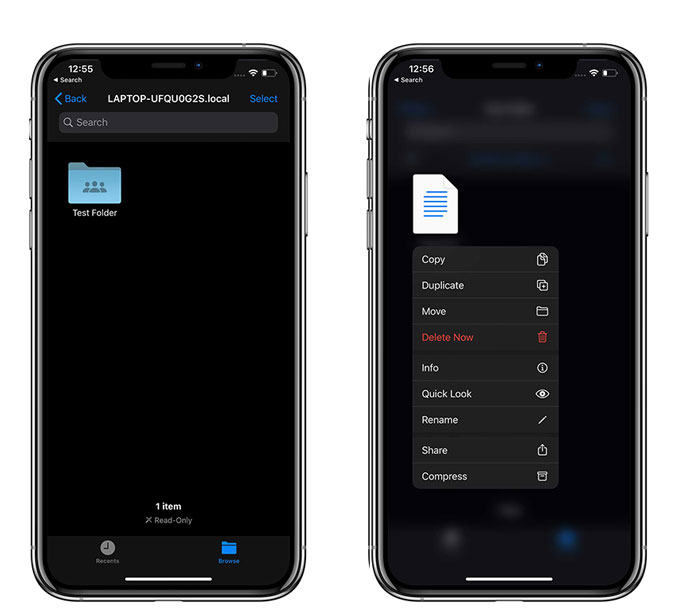
That’s all you need to do to access the Shared folder on your iPhone. It works with any kind of Samba Server which means you can even access your NAS from your iPhone. However, the method is not foolproof, I tried to copy large files from the Computer to the local storage on the iPhone but the app froze a few times. It easily works with small files such as images and text files. It probably would be fixed in a later update, hopefully. What do you think? Does this method work for you? Let me know in the comments below.