Windows supports plug-and-play devices so you can connect audio peripherals and use them directly. However, many users encounter the ‘No Audio Output Device Is Installed’ error on their Windows PC. Common reasons include physical connection and driver issues, interfering programs, glitched services, and problematic Windows updates. Here are all fixes tried and tested that can help you.
Table of Contents
1. Check Physical Connections
Before diving into software fixes, inspect the physical connection of the audio device. Unplug and plug all the connecting cables, including the USB connection and audio port connections.
Check the connecting end of wires for fraying and severe damage and replace the cables, if necessary. You can also connect the audio device to another spare system and check if the audio output works or not to rule out hardware issues.
2. Enable the Correct Audio Device
If you have selected the wrong audio device for playback, you must switch to the correct audio device using the Sound settings. Here’s how:
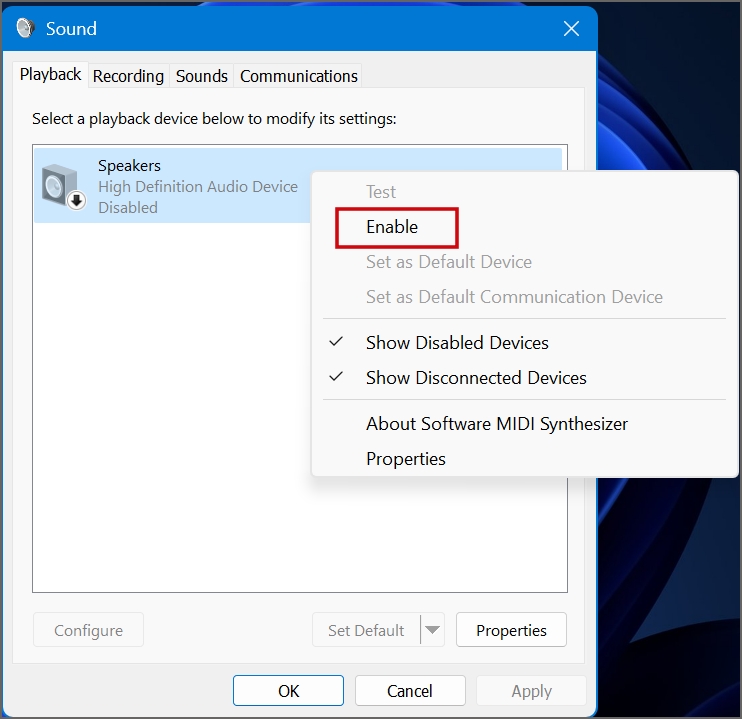
1. Press the Windows key, type mmsys.cpl, and press Enter to open the Sound utility.

2. Find the audio device in the list and check its status. If it is disabled, right-click on it and select the Enable option.
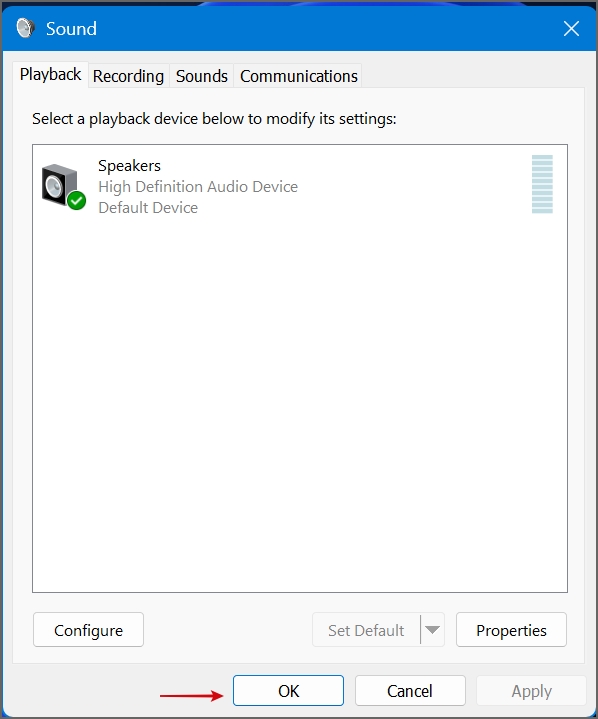
3. Click on the OK button.
3. Inspect Audio Services
Windows uses the Windows Audio and Windows Audio Endpoint Builder services to manage audio devices. If these two services glitch, you may experience audio output issues. So, you must check and restart these services:
1. Press the Windows key, type services, and press Enter to open the Services app.

2. Find the Windows Audio service in the list and right-click on it. Select the Restart option.

3. Similarly, right-click on the Windows Audio Endpoint Builder service. Click on the Restart option.

4. Close the Services utility.
4. Remove Meddlesome Programs
Many users resolved the issue by removing certain apps from their PCs and restoring the audio output to normal. Avast Driver Program is one such culprit that causes the ‘No Audio Output Device Is Installed’ error. So, if you use it or any other third-party driver update utility, uninstall it using the Settings app or Control Panel.
5. Use the Audio Troubleshooter
Windows Audio Troubleshooter can help you identify and fix underlying issues with your audio devices. Here’s how to use it:
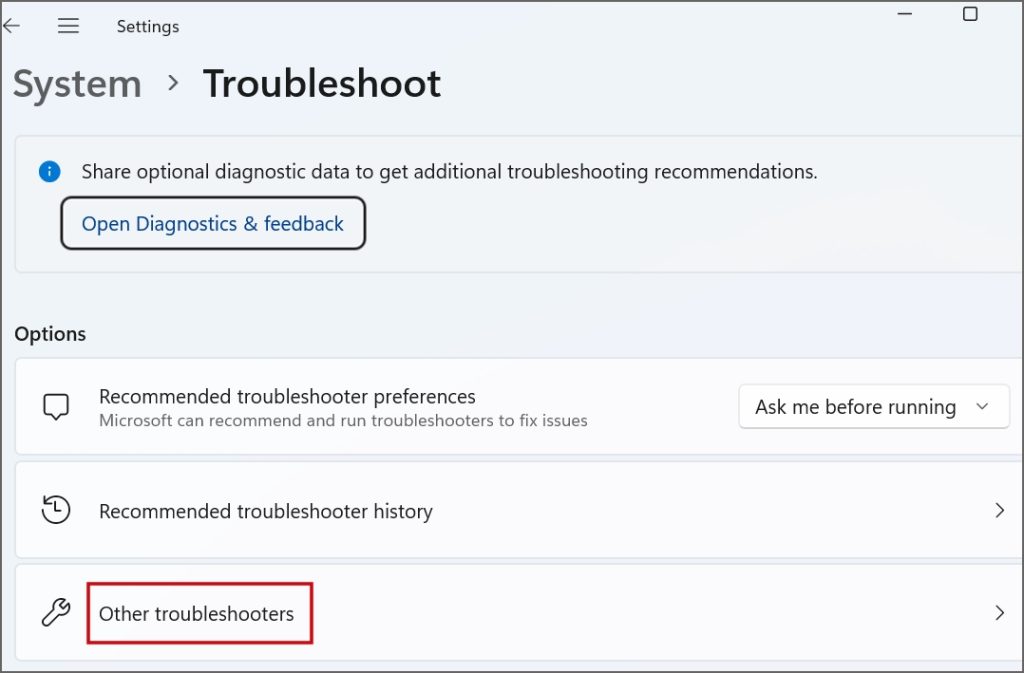
1. Press the Windows key, type troubleshoot, and press Enter.

2. Click on the Other troubleshooters option.
3. Find the Audio troubleshooter and click on the Run button.

4. Click on the Yes button.

5. Follow the on-screen instructions to apply the suggestions made by the audio troubleshooter.
6. Update the Audio Driver Using Device Manager
Outdated audio drivers can be a reason behind the issue. So, update the audio drivers using the Device Manager. Here’s how:
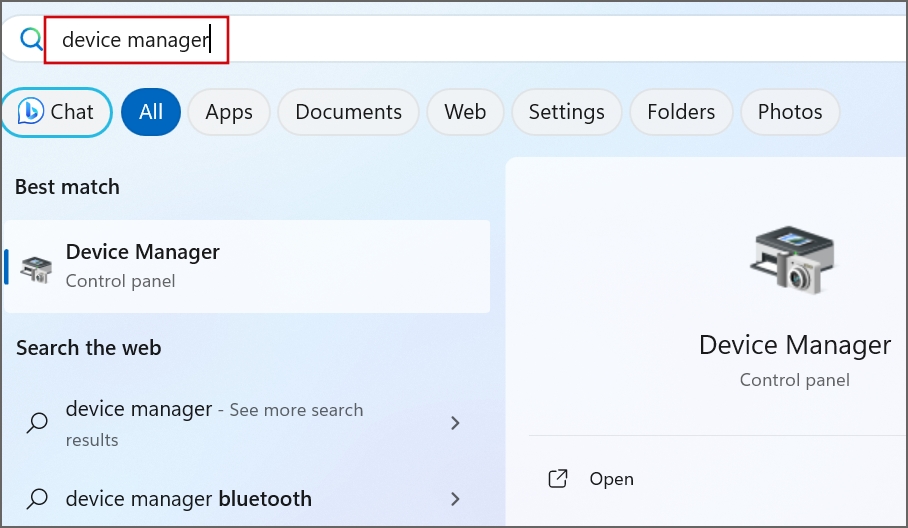
1. Press the Windows key, type Device Manager, and press Enter.
2. Right-click on the audio device and click on the Update driver option.

3. Click on the Search automatically for drivers option. Wait for the tool to find and install the latest available drivers on your PC.

4. Close the Device Manager app.
7. Reinstall the Audio Driver
If updating the Audio driver doesn’t fix the audio issue, you must reinstall the driver. Here’s how:
1. Open the Device Manager.
2. Right-click on the audio device and click on the Uninstall device option.

3. Click on the Uninstall button.

4. Close the Device Manager and restart your PC.
Windows will automatically find and install the available audio drivers and then boot to the desktop.
8. Tweak System Registry
The missing or misconfigured ConsoleSecurity value in the WinStations registry key due to a faulty Windows monthly patch can cause the audio output error. So, you must fix this issue by modifying the system registry. Make sure to backup your system registry to an external storage drive beforehand.
Follow the below-mentioned steps:
1. Press the Windows key, type Notepad, and press Enter.
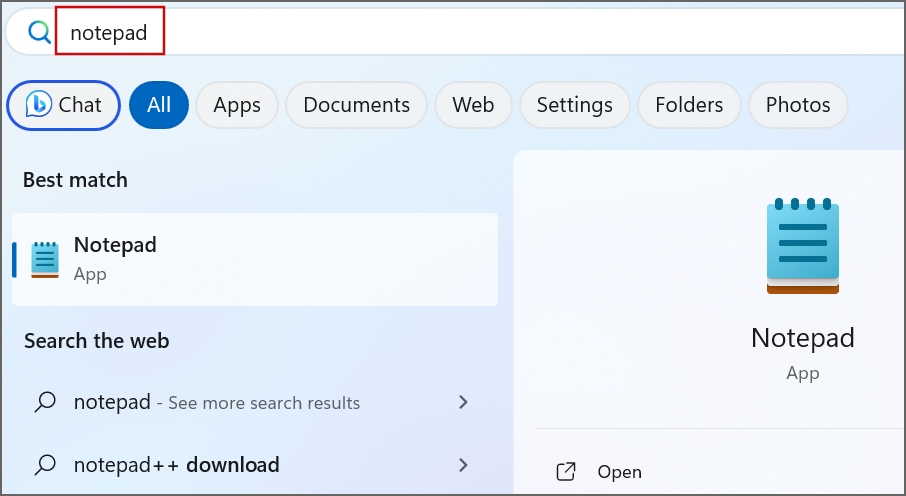
2. Paste the following code in the Notepad window:
Windows Registry Editor Version 5.00

[HKEY_LOCAL_MACHINE\SYSTEM\CurrentControlSet\Control\Terminal Server\WinStations]
"ConsoleSecurity"=hex:01,00,14,80,9c,00,00,00,a8,00,00,00,00,00,00,00,14,00,00,\
00,02,00,88,00,06,00,00,00,00,00,14,00,01,00,00,00,01,01,00,00,00,00,00,05,\
04,00,00,00,00,00,14,00,bf,03,0f,00,01,01,00,00,00,00,00,05,12,00,00,00,00,\
00,14,00,89,00,0f,00,01,01,00,00,00,00,00,05,13,00,00,00,00,00,14,00,81,00,\
00,00,01,01,00,00,00,00,00,05,14,00,00,00,00,00,18,00,bf,03,0f,00,01,02,00,\
00,00,00,00,05,20,00,00,00,20,02,00,00,00,00,18,00,21,01,00,00,01,02,00,00,\
00,00,00,05,20,00,00,00,2b,02,00,00,01,01,00,00,00,00,00,05,12,00,00,00,01,\
01,00,00,00,00,00,05,12,00,00,00
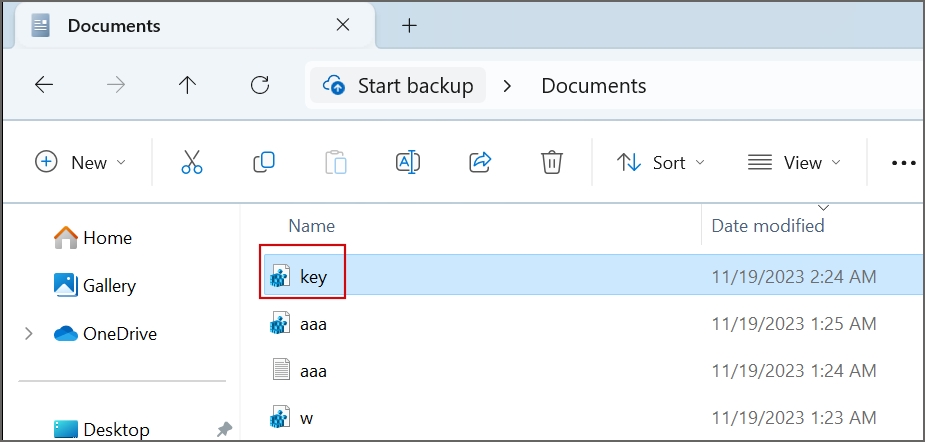
3. Press the Ctrl + Shift + S keys to open the Save as window. Type the file name as key.reg and click on the Save button.

4. Navigate to the location where you saved the registry file using File Explorer. Double-click on the file.
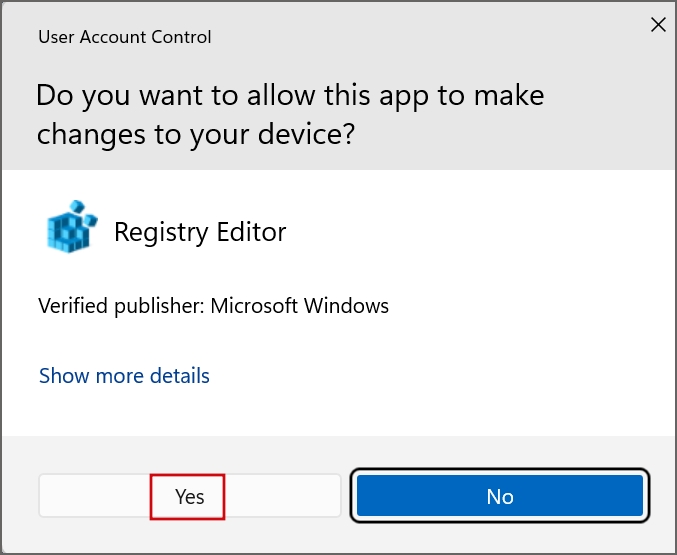
5. The User Account Control window will open. Click on the Yes button.
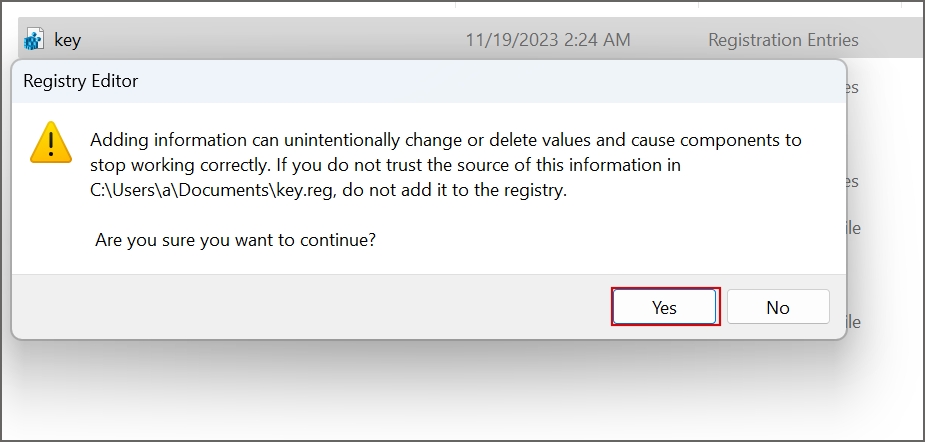
6. Windows will confirm your action before importing the registry file. Click on the Yes button.
7. Click on the OK button.

8. Restart your PC to apply the changes.
9. Switch to Generic Audio Driver
Generic drivers come in handy when the device-specific drivers stop working. If reinstalling the audio driver doesn’t work, you can switch to the generic audio driver in Windows. Here’s how:
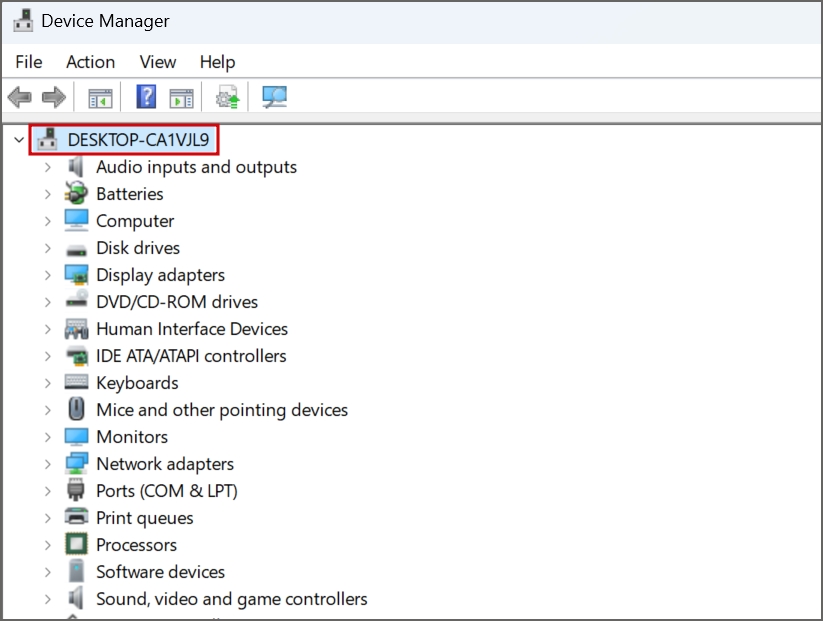
1. Open Device Manager.
2. Click on the PC name to select it.
3. Click on the Action button in the top menu and then click on the Add legacy hardware option.

4. Now, click on Next.

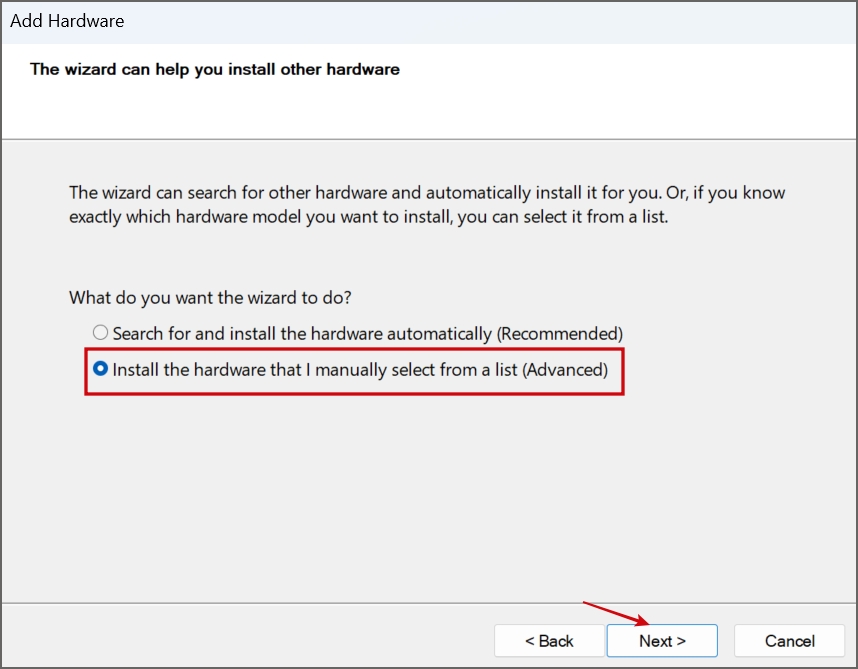
5. Select the Install the hardware that I manually select from a list (Advanced) radio button. Click on Next.
6. Select the Sound, video, and game controller option in the list. Click on Next.

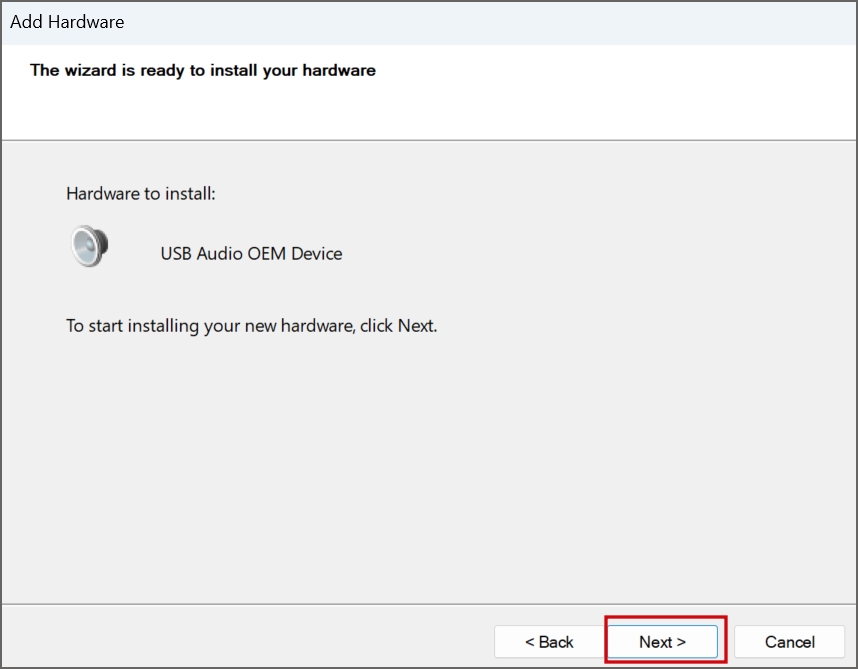
7. Select the Generic USB Audio option under the manufacturer section. Then select the USB Audio OEM Device option and click Next.

8. Follow the on-screen steps to complete the installation.
9. Restart your PC.
10. Try OEM Specific Solutions
You can use OEM driver download and update utilities. This method applies to all users who use laptops or desktop rigs from DELL, HP, or other such popular OEMs. Download the correct driver management utility from the manufacturer’s website (Dell offers the SupportAssist application). Or you can simply download the updated version of the drivers for your audio device compatible with the Windows version you use.
11. Roll Back Windows Update
Windows updates can break features on your PC. So, you must roll back the update if the audio issue pops up after installing a recent Windows update. Here’s how:
1. Press the Windows key, type uninstall updates, and press Enter.

2. Find the update in the list and click on the Uninstall button.

3. Click on Uninstall once again to remove the update.

4. Restart your PC.
12. Run an SFC and DISM Scan
DISM scan can fix problems with the Windows component store while SFC scan replaces all the missing or corrupt system files. Run these scans one after another. Here’s how:
1. Open the Command Prompt with admin privileges.
2. Type the following command and press Enter to execute it:
DISM.exe /Online /Cleanup-image /Restorehealth3. After that, run an SFC scan by executing the following command:
sfc /scannow4. Wait for the scans to complete and restart your PC.
13. Add Services to the Administrator Group
If the DISM and SFC scans didn’t fix the issue, you must add these services to the administrator group using an elevated Terminal window. Here’s how:
1. Open the Command Prompt with admin privileges.
2. Type the following commands and press Enter to execute them one by one:
net localgroup Administrators /add networkservice
net localgroup Administrators /add localservice
3. Close the Command Prompt window.
14. Perform an In-place Upgrade
The last resort to fix this bothersome audio error is to perform an In-place upgrade, which keeps all your files, apps, and settings intact. It is much better than doing a system reset, which wipes all the installed apps. So, if you don’t have any available system restore points or if System Restore is ineffective, you can reinstall Windows without losing anything with an In-place upgrade. Here’s how:
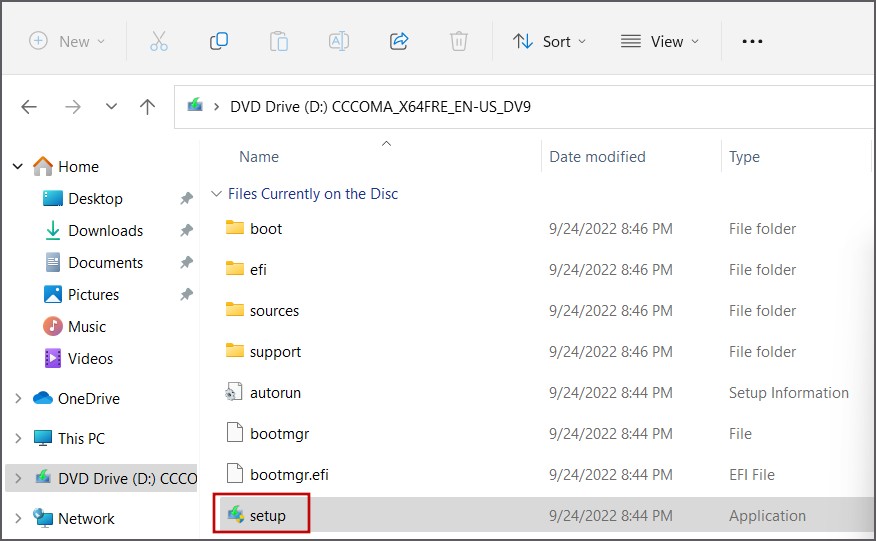
1. Download the Windows ISO file.
2. Double-click on the ISO file to mount it. Open the mounted ISO file and click on the setup.exe file.
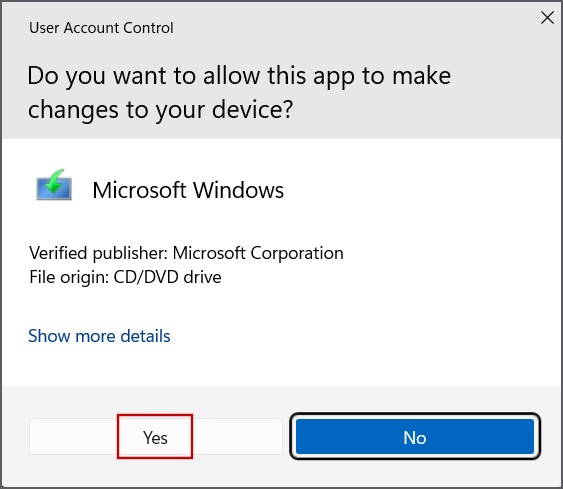
3. The User Account Control window will launch. Click on the Yes button.
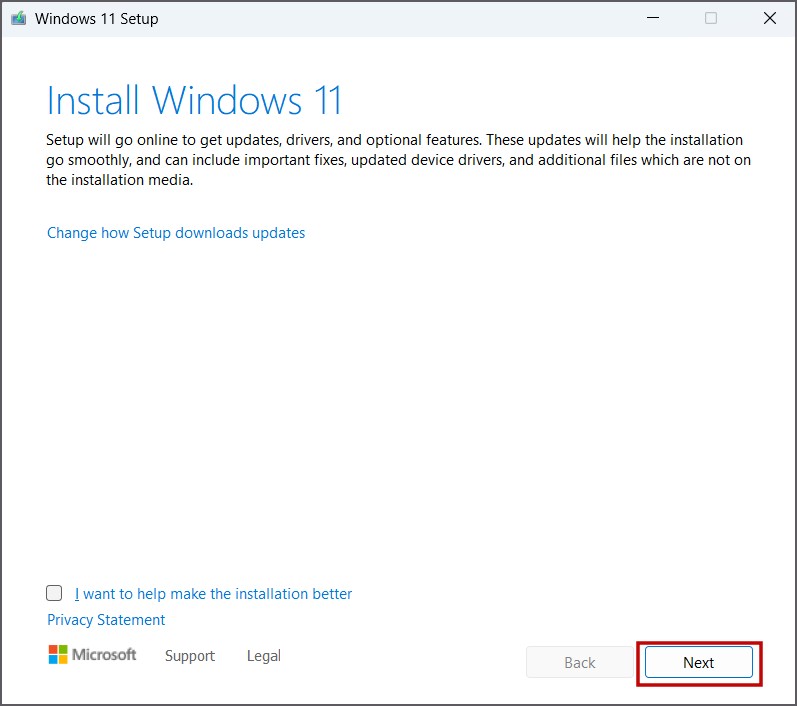
4. Click on the Next button.
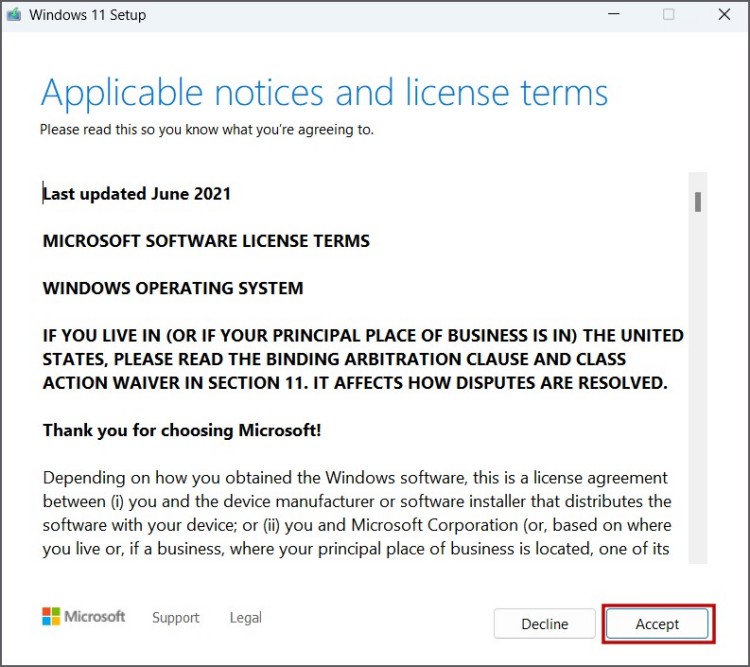
5. Now, click on the Accept button.
6. Select the Keep personal files and apps option. Click on Next.
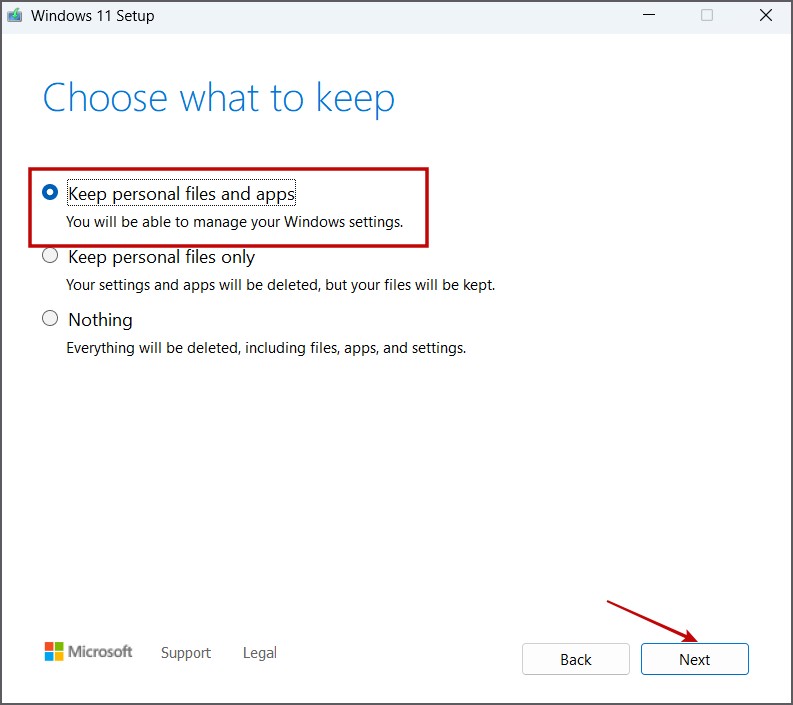
Follow the on-screen instructions to complete the In-place upgrade. It can take 30-60 minutes to reinstall Windows on your PC.
Restore Audio on Your PC
The ‘No Audio Output Device Is Installed’ error on your Windows PC should be fixed by now. Start with audio hardware inspection, restart system services, and apply driver fixes. After that tweak the system registry, use SFC and DISM scans, and use an In-place upgrade as a last resort.