It’s really easy to take screenshots on your Android phone. That quickly turns painful when you need to transfer them to your Windows PC. Luckily, the Snipping Tool in Windows 11 notifies you every time you take a screenshot or photo on your Android phone. After that, you can open that Android screenshot in Snipping Tool to edit and annotate it. Here’s how to enable the Snipping Tool to show recent Android screenshots and photos on your Windows 11 computer.
Enable Snipping Tool Setting to Show Recent Android Screenshots
You can use Phone Link to transfer images from your Android phone to a Windows 11 PC but that is a multi-step process. The latest Windows 11 build will let the Snipping Tool show the recent Android screenshots directly on your computer. This feature made a debut with Windows 11 Insider Preview Build 23619 and will be part of the public release build of Windows 11.
There are a few prerequisites before you can use this feature.
- Install and set up Phone Link on your Windows PC.
- Update Phone Link and Link to Windows app on Windows PC and Android phone if you have already set it up.
- Update Windows and Android OS to the latest version.
After everything is set up and updated, you will need to enable a setting from Windows 11.
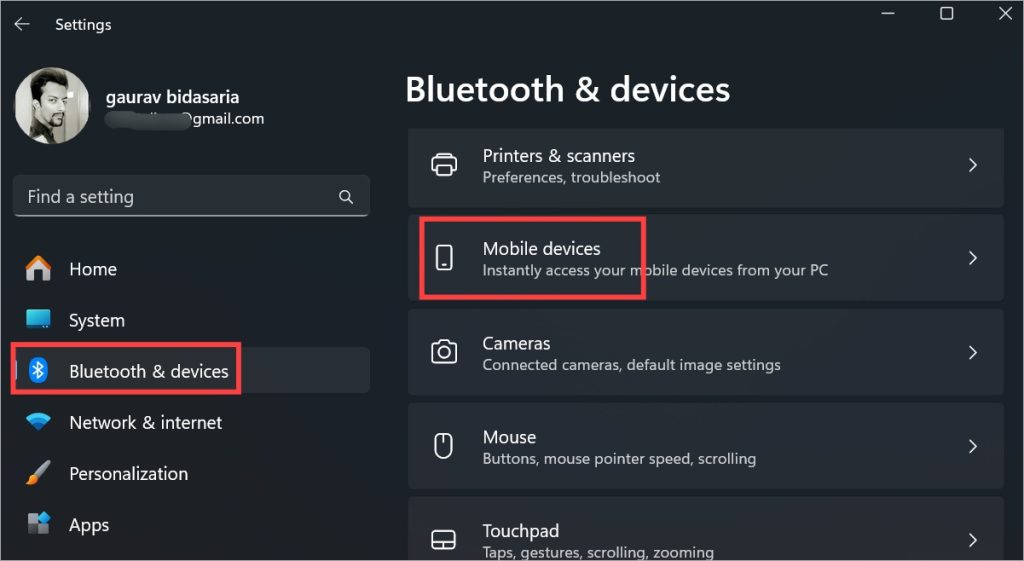
1. On Windows PC, press Windows+I keyboard shortcut to open the Settings app.
2. Go to Bluetooth & devices in the left sidebar and select Mobile devices from the right pane.
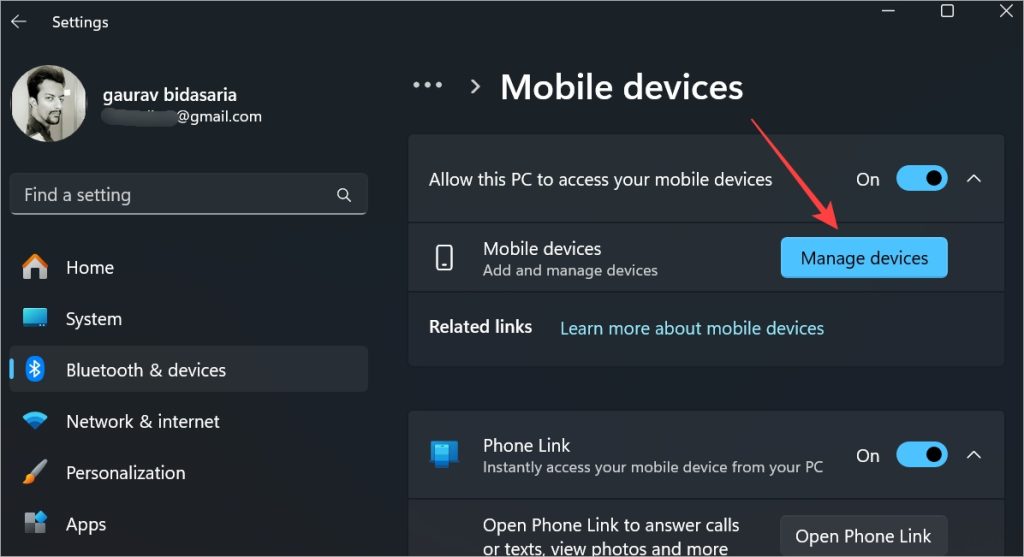
3. Turn on the toggle next to Allow this PC to access your mobile devices option.

4. Tap the Add device button if you link your Android phone for the first time. If you have already added one, you will see Manage devices option. Click on that button.
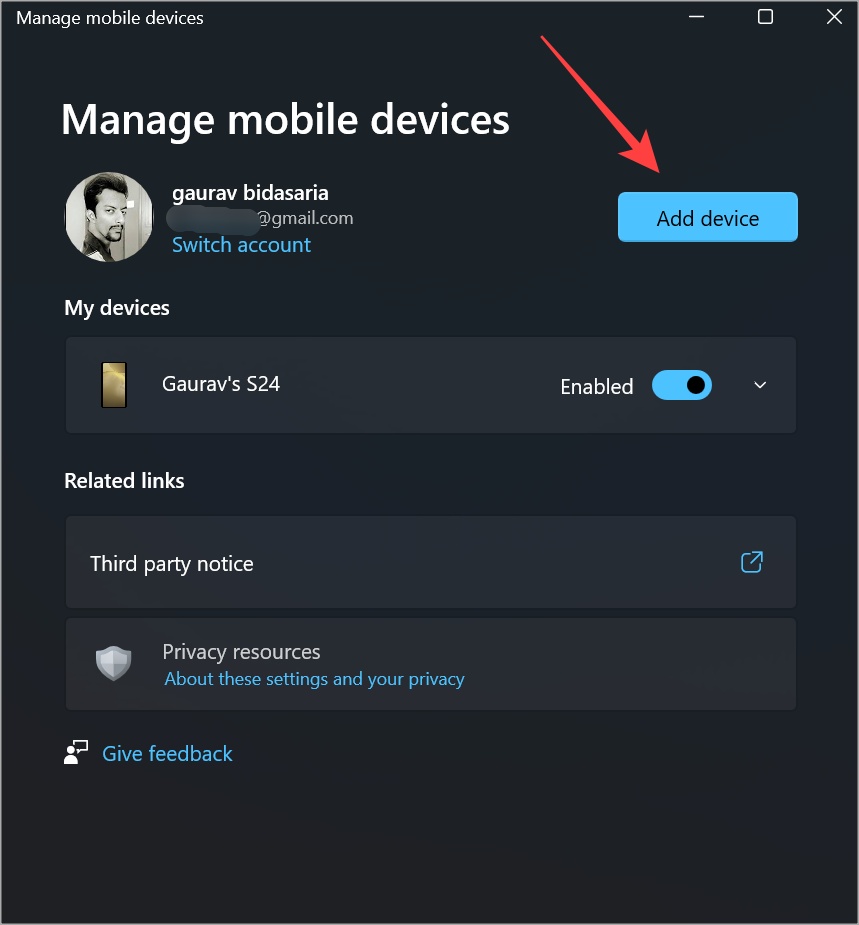
5. A pop-up will open. For the first time, you’ll get the Add device option. Otherwise, you’ll get Manage Device option. Click on that and scan the generated QR code using your phone’s camera to pair it to the PC. Then, follow the on-screen instructions.
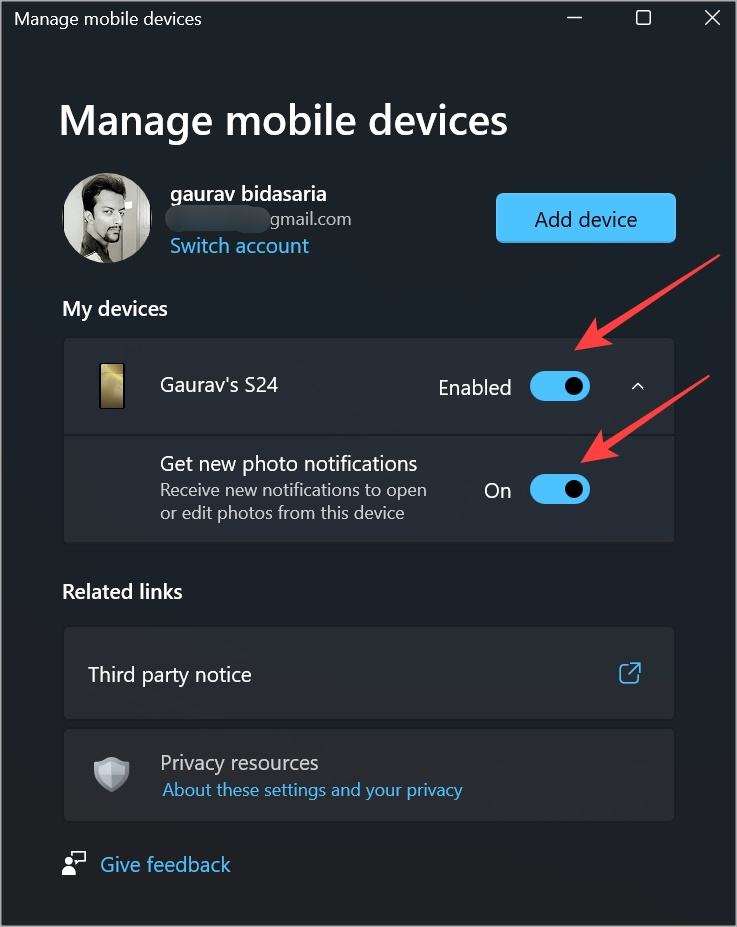
6. When your device is listed, enable the toggle next to the added phone to Enabled. Then, click the drop-down menu next to that toggle and enable the Get new photo notifications option.
Use Snipping Tool to Edit Android Screenshots on Windows 11
The best part of Snipping Tool’s feature is that it automatically fetches screenshots and photos from your Android phone. You don’t have to transfer those photos or copy-paste anything between Android and Windows. Take a screenshot on your Android phone and you will see a notification appear in the lower-right corner of the Windows 11 PC screen.
Note that you won’t receive any notifications for mobile screenshots if you have DND enabled in the Action Center on Windows. In that case, press Windows+N keyboard shortcut to open the Notification Panel. You will find the screenshot notification there.
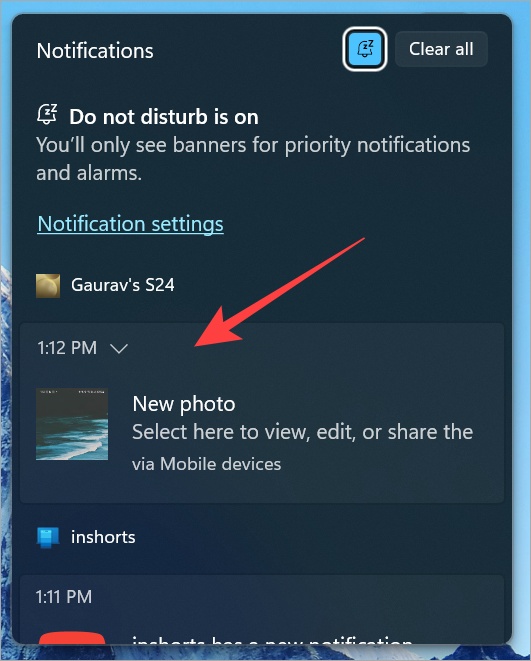
The name of the Android phone is also listed which is useful in case you have multiple devices added. Clicking on the notification will open the screenshot in the Snipping Tool.

It is ready to edit and annotate. This seamless integration has another benefit. The screenshot is also added to the Windows clipboard. That means you can copy-paste it in chat apps, photo editing apps, or file transfer apps.
Tip: Click on the Edit in Paint button at the top-right corner to edit the screenshot in the Paint app without having to copy-paste.
Seamless Image Transfers for Edits
Samsung and Microsoft have been working on adding such seamless features to make Android with smoothly with Windows 11. This is good news for users who rely on their Windows PCs and Android smartphones to transfer, edit, and share screenshots and photos. Did you discover an unwanted object in those pictures? Here is a quick and easy way to remove objects from images in Windows Photos.