The Snipping Tool is a great way to capture screenshots or record your screen on your Windows computer. However, what if the tool itself stops working? Well, that’s what we’re here for. We have collected solutions to help you resolve the Snipping Tool issue on your Windows 10 or 11 PC.
Table of Contents
1. Check if Your Windows Key Is Not Locked
Most gaming keyboards can lock your Windows key to prevent accidental interruptions or disruptions while playing games. If you also have one, ensure that it’s not enabled. For example, when we pressed the Windows key + Shift + S keyboard shortcut to launch the Snipping Tool, it wouldn’t open because the Windows key lock was disabled on our gaming keyboard.
However, as soon as we disabled the Windows Key Lock and tried it again, the Snipping Tool appeared.

On the other hand, if you have a normal keyboard, try the following solution.
2. Reset the Snipping Tool App
With each Windows update, various issues may arise, and the Snipping Tool could be one of them. In that case, repairing or resetting the app may help resolve the issue. Here’s how:
1. Launch the Windows Search (Windows Key + S) and look for the Snipping Tool app.
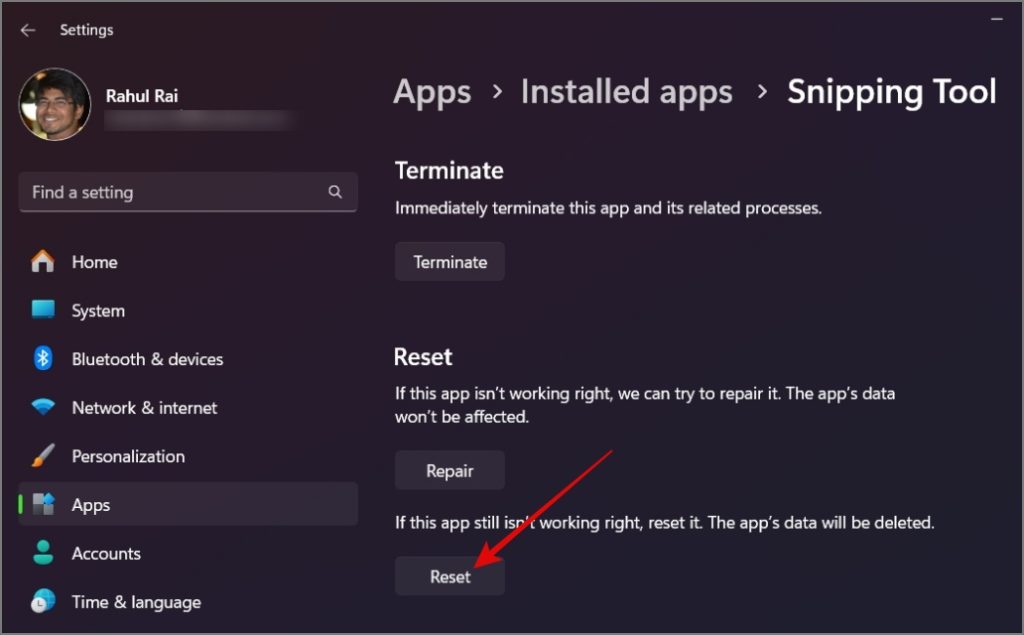
2. Once found, right-click on the app and select the App settings from the Context Menu.

3. Click the Reset button to clear the app data. If asked for confirmation, click the Reset button again.
This will most probably fix the Snipping Tool not working on Windows issue.
3. Reinstall Snipping Tool
If resetting the Snipping Tool also didn’t work, try reinstalling the app. This will ensure a clean and updated installation and potentially resolve any underlying issues.
1. Press Windows Key + S keyboard shortcut to open the Windows Search to find the Snipping Tool and right-click on it to go to App settings.
2. After that, click the Uninstall button, and if prompted, hit the Uninstall button again.
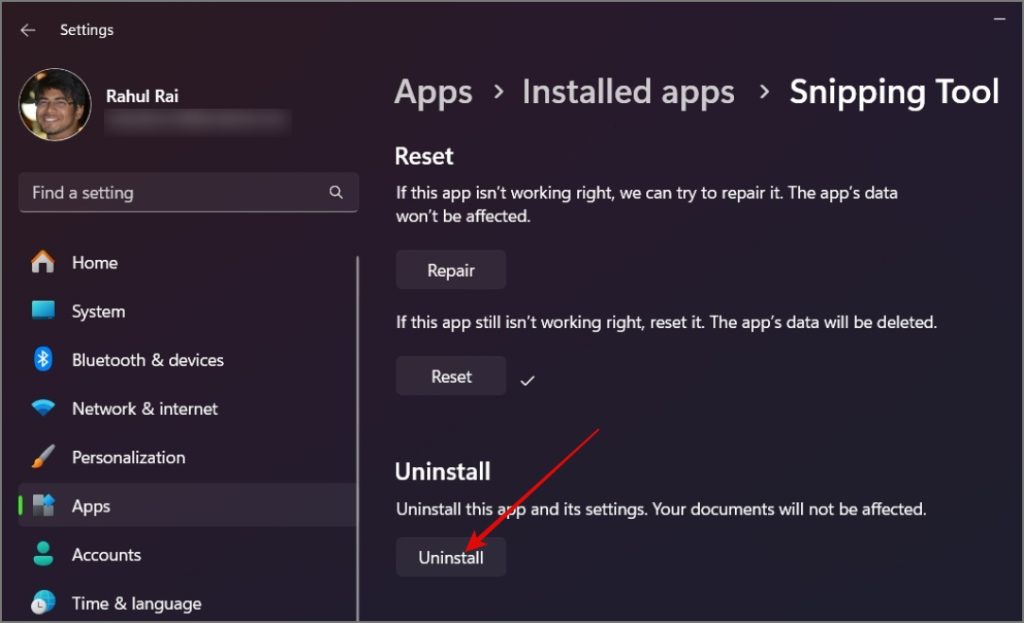
3. Later, you can get the Snipping Tool from the Microsoft Store and see if this fixes the issue.
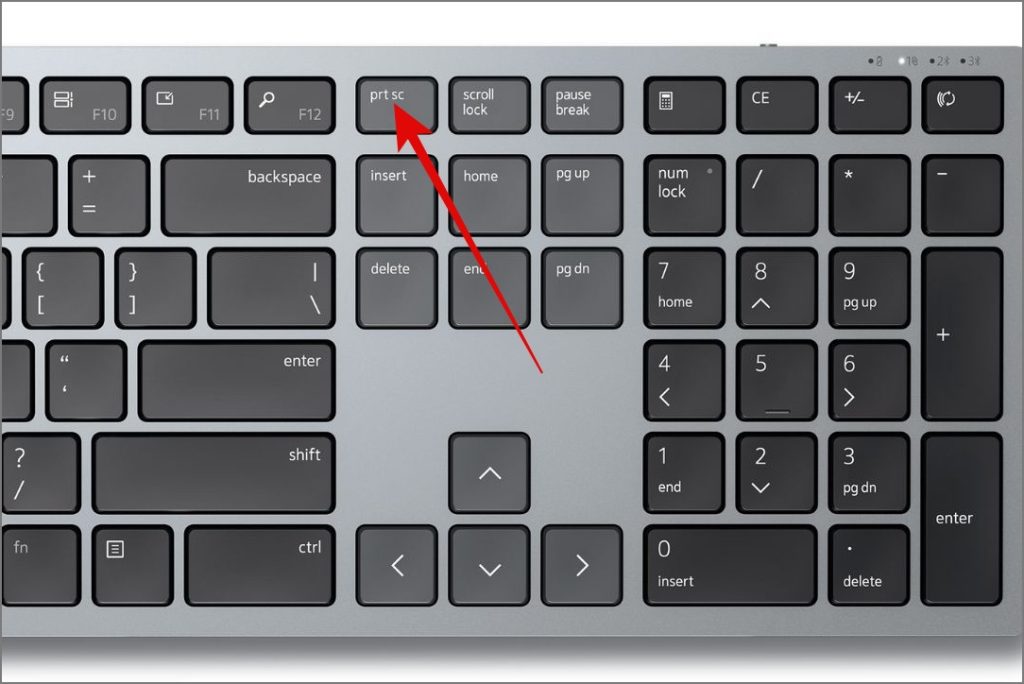
4. Use the Printscreen Key
In the newer builds of Windows 11, the Snipping Tool can be invoked the default shortcut (Windows Key + Shift + S), and with the PrtSc (Print Screen) key on your keyboard. This provides a great alternative if your default shortcut is not working.
5. Restart Your PC
An app or program might conflict with the Snipping Tool, and cause it to stop working. Therefore, a PC restart will probably fix this issue. If it doesn’t, follow the next troubleshooting method.
6. Check for Incorrect Configurations
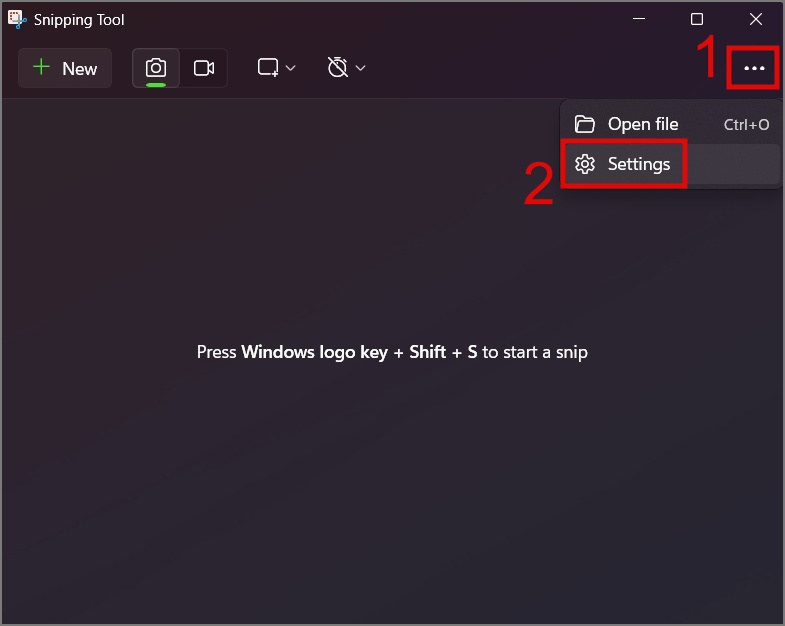
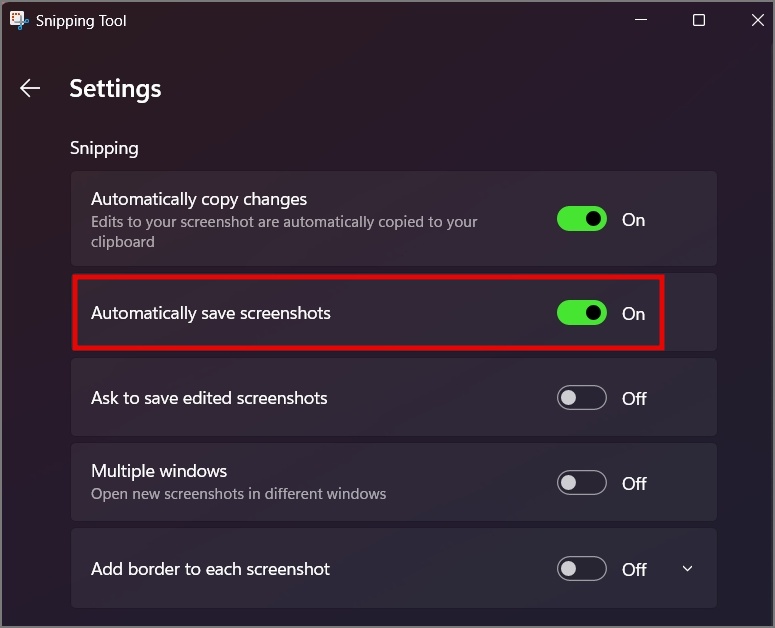
If you are unaware, the Snipping Tool can disable the automatic saving of screenshots or screen recordings. If you have disabled this feature purposely or unintentionally, it may create the false impression that the Snipping Tool is not functioning properly. To verify the correct configuration, open the Snipping Tool app, click the three-dotted icon (Meatball Icon), and choose Settings.
Ensure that the ‘Automatically save screenshots’ is turned on.
7. Use SFC Scan
Another reason why the Snipping Tool is not working on your Windows computer can be corrupt system files. You can run a SFC (System File Check) scan to check that. Here’s how:
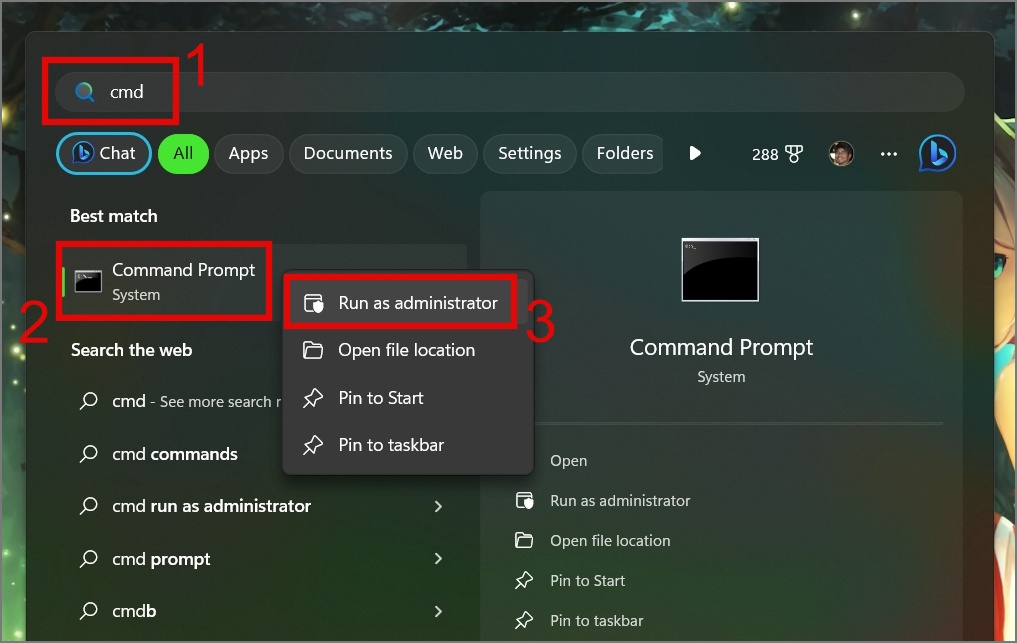
1. Press Windows Key + S keyboard shortcut to open the Windows Search and look for Command Prompt. After that right-click on it and select the Run as administrator option.
2. Next, enter below the command and hit the Enter:
sfc /scannow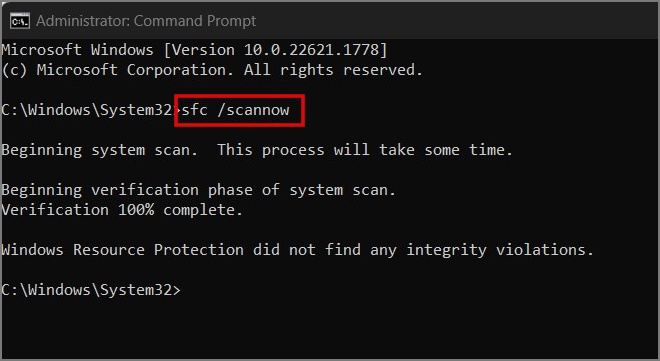
8. Restart Windows File Explorer
Have you tried restarting File Explorer on Windows? Since numerous core Windows apps and features are closely tied to File Explorer, restarting it may bring your Snipping Tool back to life. Here’s a step-by-step process:
Press Ctrl + Shift + Esc keyboard shortcut open the Task Manager on your Windows PC, right-click the Windows Explorer app, and select the Restart option.

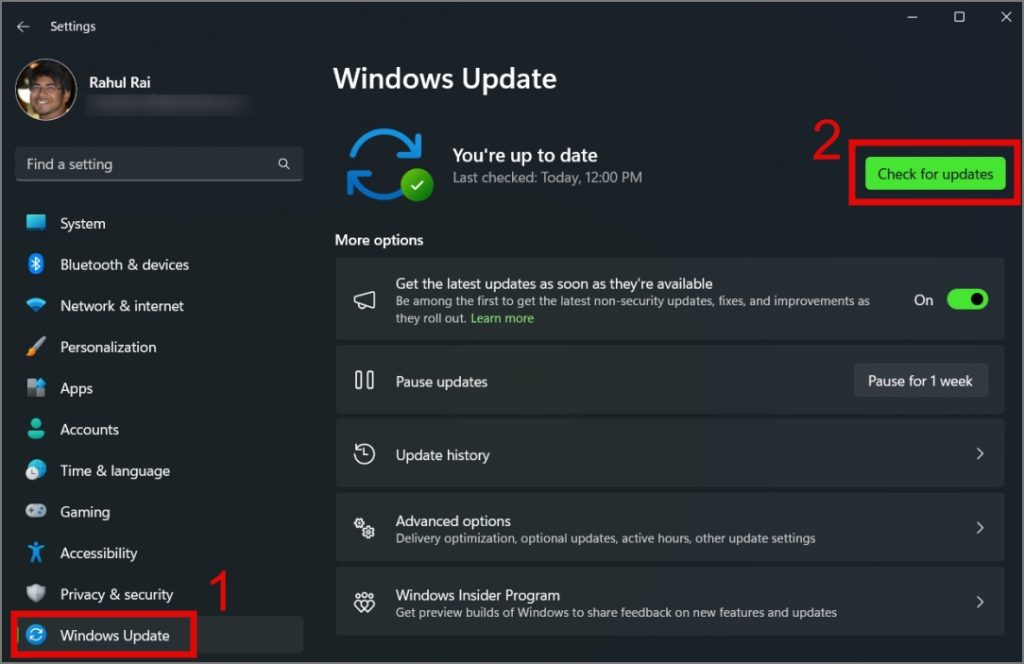
9. Update Windows
Did you check for a new Windows Update? There might be a pending Windows OS build in updates. It’s possible that the fix for the Snipping Tool could be included in the next Windows Update.
Head over to Settings > Windows Update and click the Check for updates button.
10. Reset Windows
While you can always rely on third-party screenshot-taking apps, if you insist on using the Snipping Tool app, the only remaining option is to reset your Windows PC. You can follow our in-depth guide on how to reset Windows.
FAQs
1. How do I take a screenshot on Windows without the Snipping Tool?
There are many Snipping Tool alternatives available. For instance, you can use an app called LightShot, which is compatible with both Windows and Mac devices.
2. Where are Snipping Tool files saved?
By default, the screenshots are saved in the Pictures folder. However, you can also choose a different location to save screenshots each time you use the Snipping Tool.
Resume Your Screenshot Love Story
We understand that not everyone may be willing to install third-party screenshot-capturing apps, which is why you’re here seeking a solution to address the Snipping Tool issue on your Windows PC. We hope one of the above solutions resolves the issue and will help you fix the Snipping Tool issue. Before you leave, you can learn how to extract text from an image using the Snipping Tool.