The default screen capture app on Windows 11—Snipping Tool—has improved significantly with recent updates, making it a capable option for fulfilling basic screenshot needs. However, you can replace the Snipping Tool on Windows 11 if you want to use a third-party screenshot tool with more advanced features. Follow this guide to replace Snipping Tool in Windows 11.
Table of Contents
Why Should You Ditch the Snipping Tool on Windows 11
Windows 11’s Snipping Tool offers all the basic capture modes, including the ability to extract text from images. However, there are good reasons for opting for an alternative.
For instance, Snipping Tool lacks the option to capture scrolling screenshots like ShareX and does not support multi-monitor capture like Snagit. And while the Snipping Tool can create screen recordings, it doesn’t let you capture audio. This can be a dealbreaker if you want to record narrations, live commentary, audio-related content, and screen recordings.

Aside from the above, switch to a third-party screen capture tool for enhanced customization and image editing options.
How to Replace Snipping Tool With a Third-Party Screenshot App Like Lightshot or Greenshot
Replacing the Snipping Tool with a third-party app on Windows 11 is easier than you might think. Here’s how you can go about it.
1. Press the Windows key + I to open the Settings app.
2. Use the left pane to switch to the Accessibility tab and click on Keyboard.
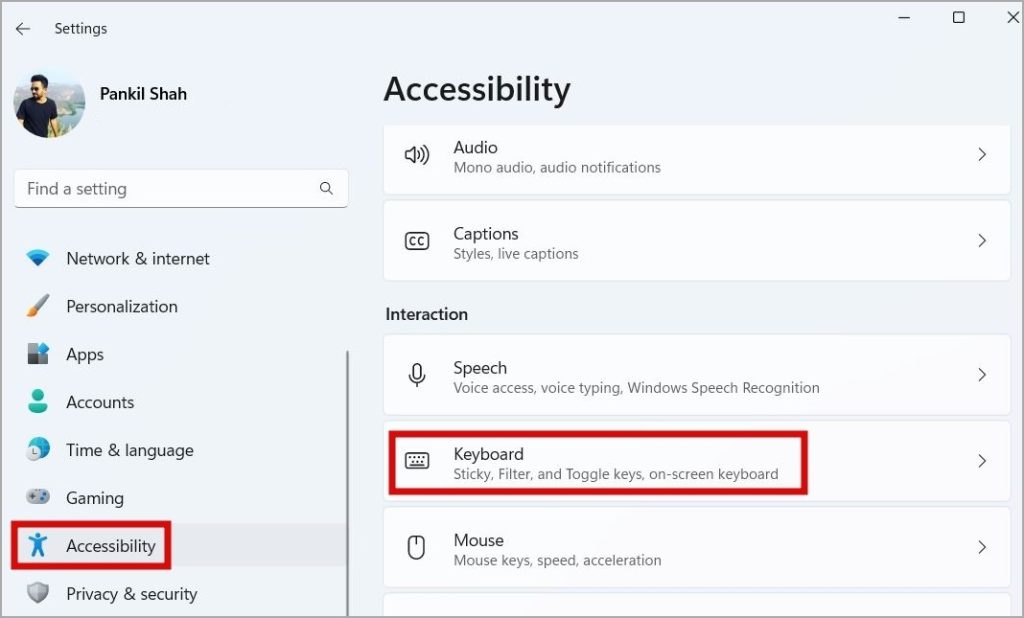
3. Turn off the toggle next to Use the Print screen button to open screen capture.

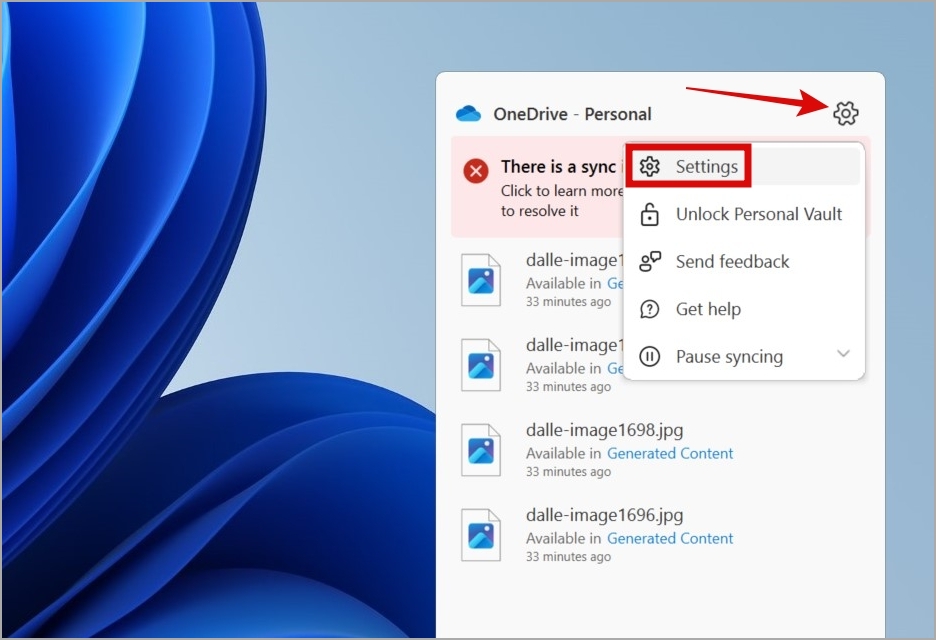
4. Next, find and click the OneDrive icon on the taskbar.
5. Click the gear-shaped icon at the top and select Settings.
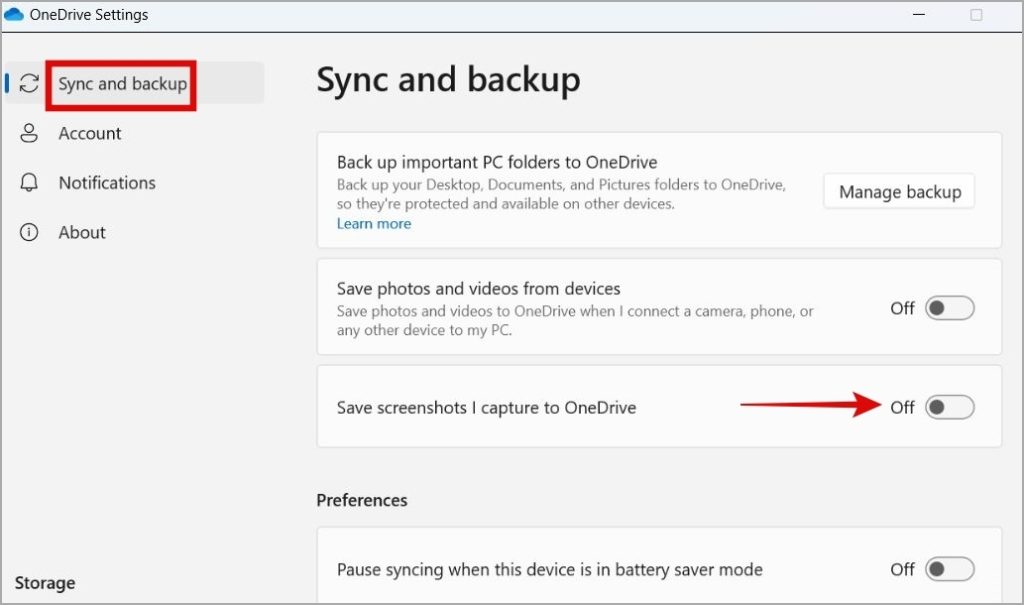
6. Switch to the Sync and backup tab and turn off the toggle next to Save screenshots I capture to OneDrive.
7. Download and install the screenshot tool that you want to use.
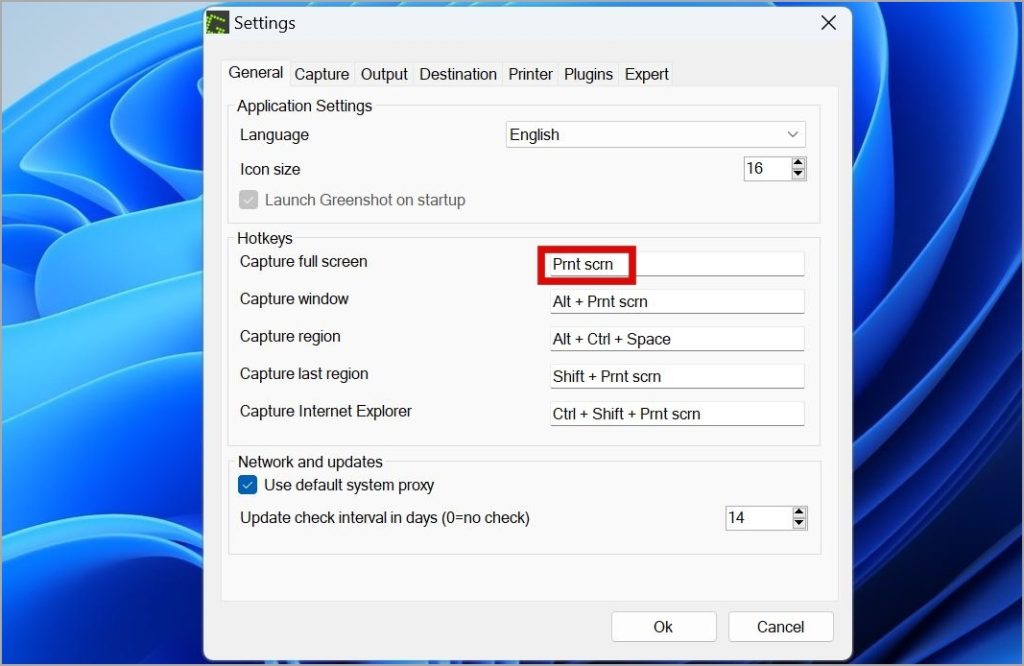
8. Open the Settings or Preferences menu of your screenshot app and set the Print screen button for capturing the screenshot.
After that, press PrtSc or Fn + PrtSc to access your set screenshot app instead of the default Snipping Tool on Windows 11. Note that you will still be able to access the Snipping Tool with the Windows key + Shift + S keyboard shortcut.
How to Disable or Uninstall the Snipping Tool in Windows 11
By default, the Snipping Tool has a dedicated keyboard combination to use it on Windows 11. But if you don’t plan to use it, you can disable the Snipping Tool entirely. Here are a couple of ways you can do that.
Disable the Snipping Tool on Windows 11 Using the Group Policy Editor
If you are running the Professional, Education, or Enterprise edition of Windows 11, you can use the Group Policy Editor to disable the Snipping Tool quickly. Here’s how:
1. Press the Windows key + R to open the Run dialog box. Type gpedit.msc in the box and press Enter.

2. In the Local Group Policy Editor window, use the left pane to navigate to User Configuration > Administrative Templates > Windows Components > Tablet PC > Accessories folder.
3. Double-click the Do not allow Snipping Tool to run policy on your right.
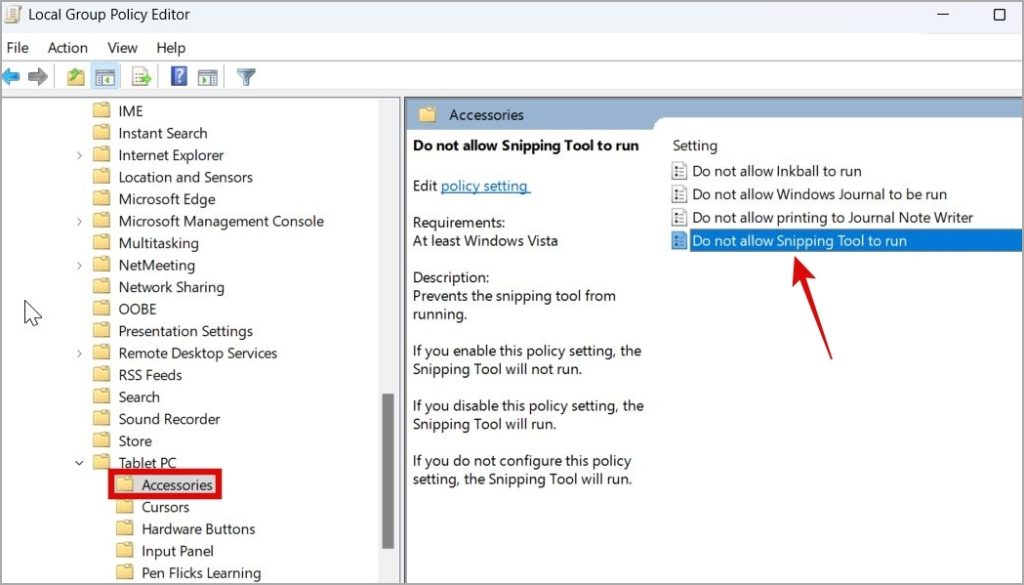
4. Select Enabled and then hit Apply followed by OK.
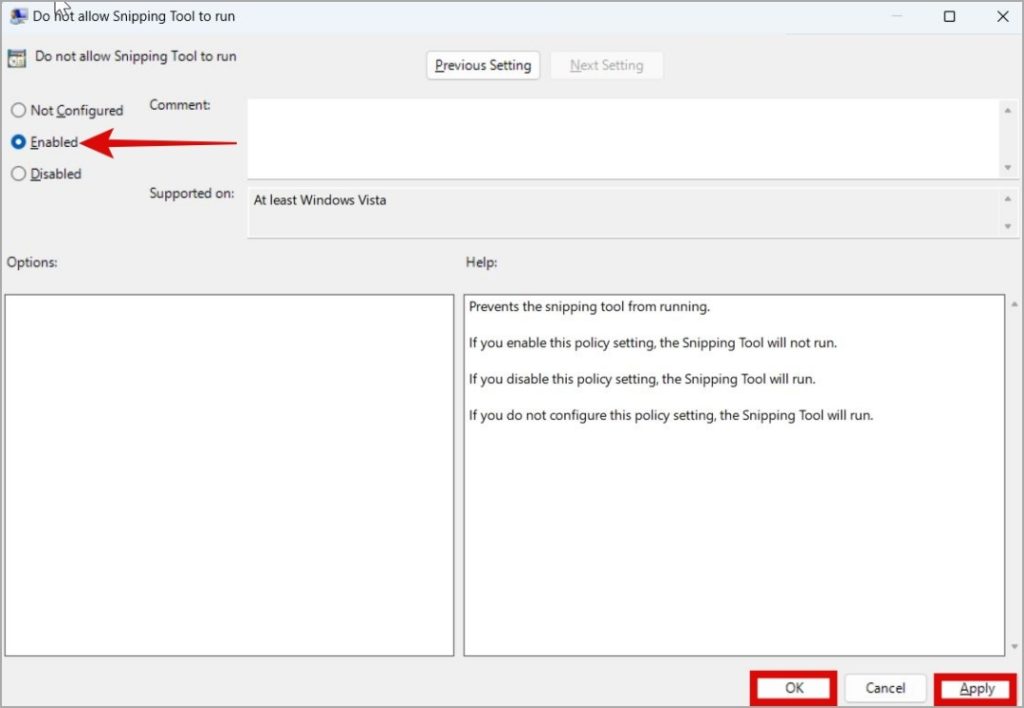
Restart your PC for changes to take effect. After that, when you try to open the Snipping Tool, you will see a prompt that states – Windows cannot open this program because it has been prevented by a software restriction policy.
Disable the Snipping Tool on Windows 11 Using Registry Editor
If you are comfortable tinkering around the Registry Editor, it will serve to disable the Snipping Tool on Windows 11. Here are the steps to modify registry files to disable Snipping Tool.
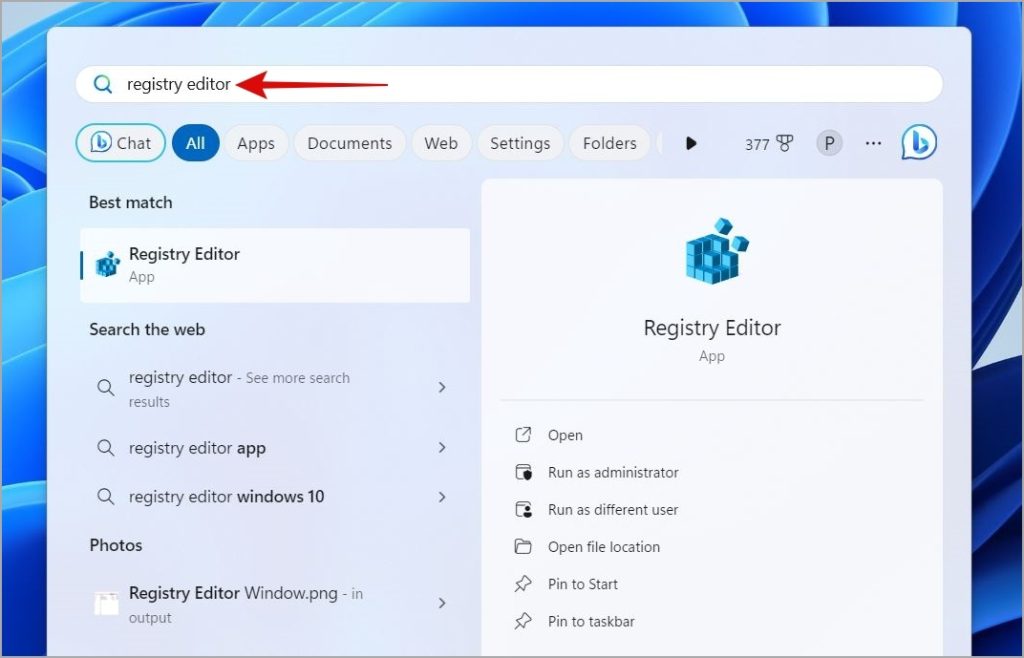
1. Press the Windows key + S to open the search menu. Type registry editor in the box and press Enter.
2. In the address bar at the top, paste the following path and press Enter.
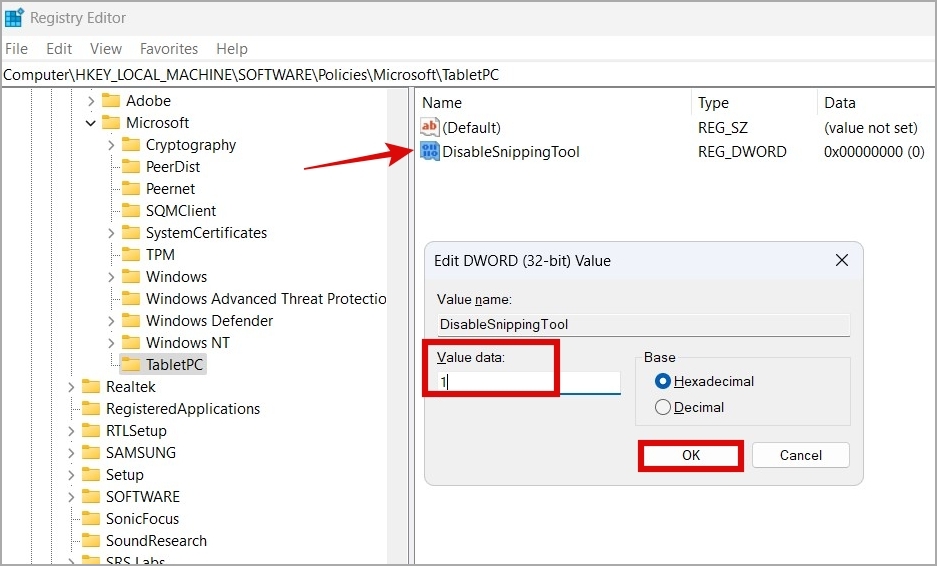
HKEY_LOCAL_MACHINE\SOFTWARE\Policies\Microsoft
3. Right-click on the Microsoft key and select New > Key. Name it TabletPC.

4. Right-click on the TabletPC key and select New > DWORD (32-bit) Value. Name it DisableSnippingTool.
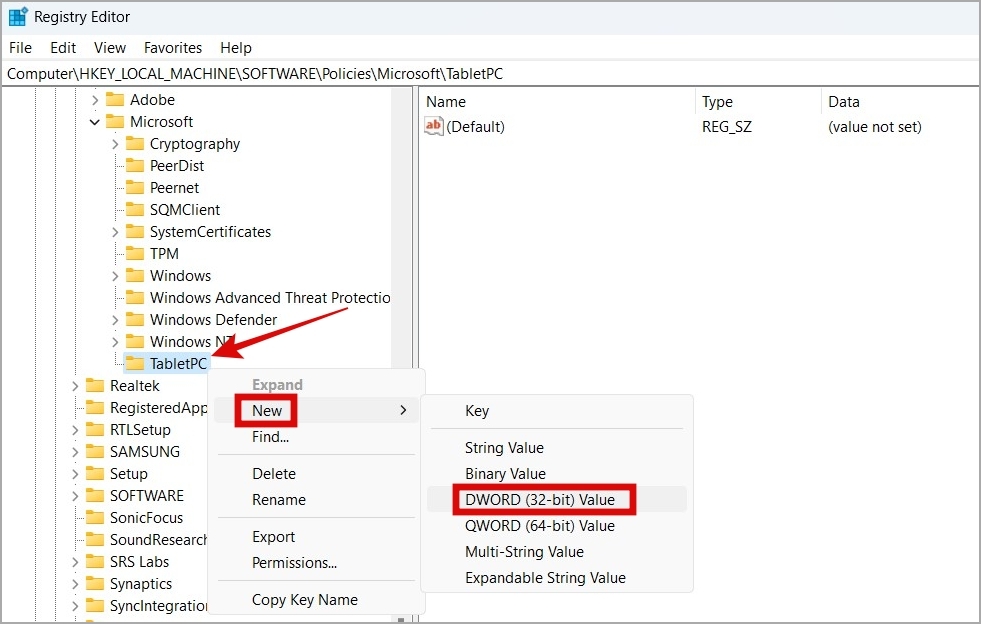
5. Double-click on the newly created DWORD, type 1 in the text box, and click OK to save your changes.
Restart your PC to apply the changes and the Snipping Tool will be disabled.
Uninstall the Snipping Tool From Windows 11
You can uninstall Snipping Tool just like any other app on Windows 11. Here are the steps.
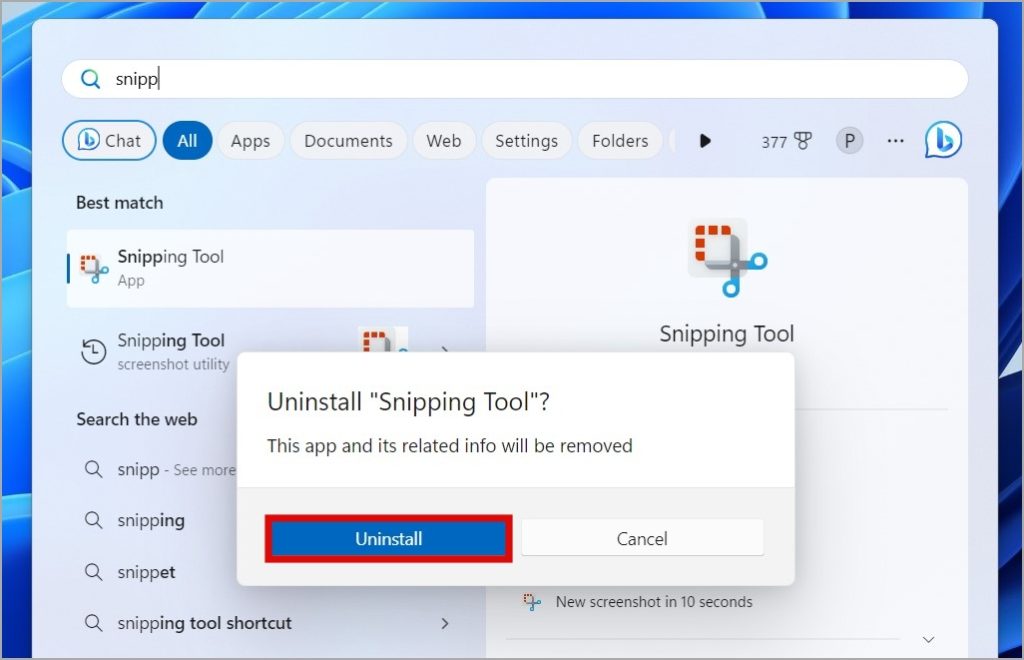
1. Press the Windows key + S to open the search menu. Type snipping tool in the box, right-click on the first result, and select Uninstall.

2. Select Uninstall again to confirm.
Snipping Tool will be removed from your PC. Of course, you can download the Snipping Tool from the Microsoft Store again.
Upgrade Your Capture Game
If your work involves frequent screenshot-taking and screen recording, replacing the Snipping Tool on Windows 11 with a more feature-rich app makes sense. Thankfully, the process isn’t complicated at all if you follow the steps outlined above.