Canva has emerged as a popular designing tool in recent times. Whether you wish to create eye-catching Instagram posts or interesting GIFs, Canva is your one-stop solution. One such crucial element when creating those designs is the ability to edit the text. In this post, we’ll show you how to add and edit the text in Canva to make your posts more descriptive and attractive. So, without further ado, let’s get right to it.
Table of Contents
Getting Started
Open up your preferred web browser on your PC and navigate to Canva’s website. Next, open an existing design or create a new one by clicking on the Create a design button.

Once you’re in the Project window, you’re all set to add and edit the text in Canva.
Adding Text Box in Canva
To insert a Text box in Canva, click on the Text tab in the side panel. Then choose from the available heading type to add a text box to your design.
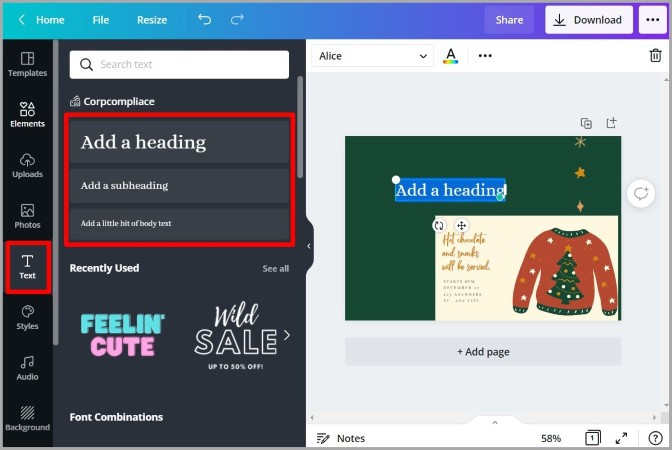
Alternatively, you can also explore various Font Combinations in Canva to use them directly.

After adding the text box, edit the text inside it. Once done, you can resize and move the text box as you see fit.
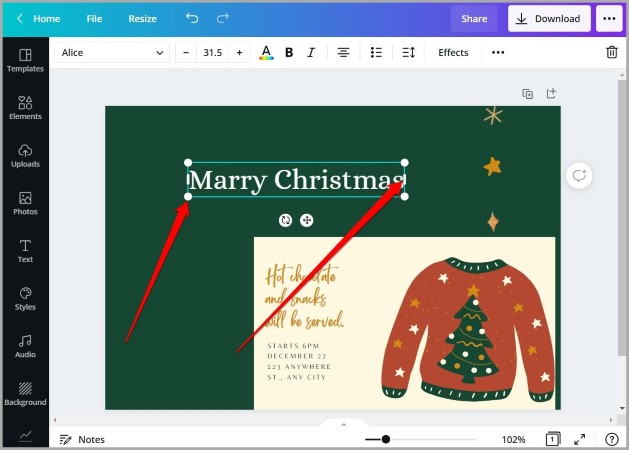
Format Text in Canva
Canva offers a few different formatting options, allowing you to change font type, color, size, and more.
To change the font type in Canva, select the text box and use the drop-down menu from the toolbar to scroll through various font styles.

Similarly, you can use the toolbar to change the font size, color, alignment, and more. There is also an option to create lists.
Curve Text in Canva
Aside from the basic formatting options, Canva also allows you to curve your text. Here’s how.
1. Select your text box and click on the Effects option at the top.
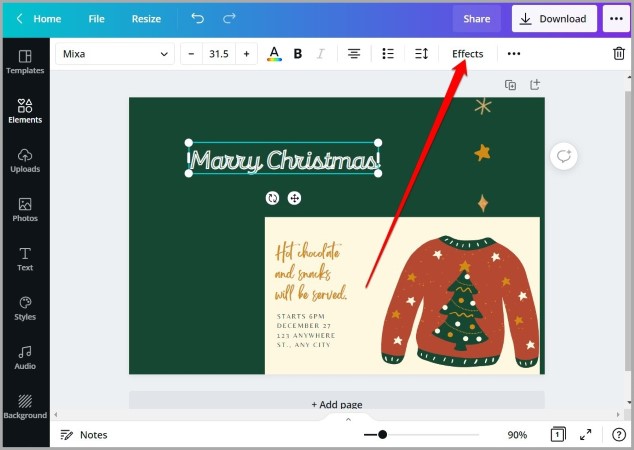
2. In the Effects panel that appears on your left, go to Shape and select the Curve option. You can use the slider underneath it to define the curvature.

Animate Text in Canva
If you’re adding a text box to your GIF or a video, then you can take advantage of various text animations in Canva to make your design more attractive.
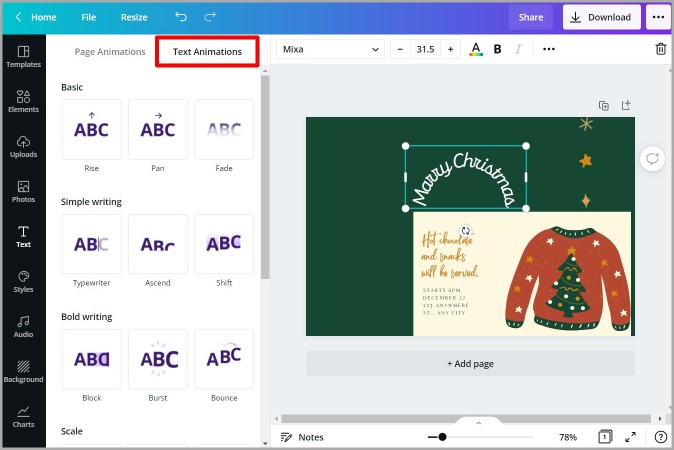
1. Select the text box and click on the Animate option from the toolbar.
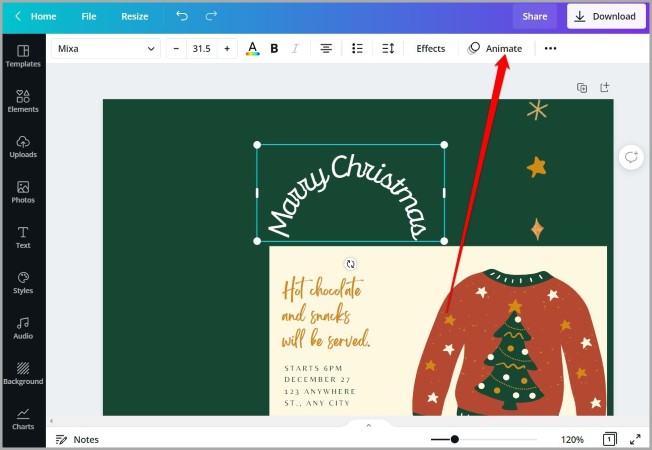
2. In the Text Animation menu that appears on your left, you can scroll through various text animations. Move your cursor over the animation to preview it.
Highlight Text in Canva
If your design is filled with different kinds of texts such as heading, subheading, body, etc., then you can also highlight a text box in Canva using various elements. Here’s how.
1. Click on the Elements tab in Canva and explore the Lines & Shapes.

2. Go through various shapes and click on the one you like.
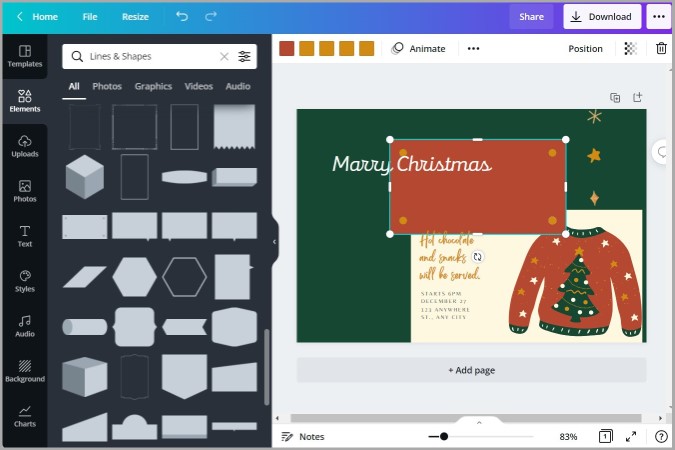
3. Once added, resize and move the element to place it behind your text.
4. Lastly, you can also change the color of the element to highlight your text better.

Add Custom Background to Text
Apart from using an element, you can also use an image or your company logo to highlight the text. Here’s how.
1. Click on the Photos tab on your left and scroll through Canva’s library of photos to find the one you like. Alternatively, you can also upload a photo from your computer using the Uploads tab.

2. After adding a photo to your design, resize and move the photo to place it behind your text.

FAQs
Why won’t Canva let me move the text box?
Canva allows you to lock elements and text boxes in your design so that you don’t accidentally make changes to them. So, if you’re unable to move a text box, select the text box and click on the lock icon in the toolbar at the top to unlock it.
Can I add fonts to Canva?
Yes. If you have a Canva Pro account then you can upload up to 100 fonts to your account.
Wrap Up: Add and Edit Text in Canva
With this, it’s a wrap. As we just learned, Canva provides you with plenty of options to edit the text, helping you create striking designs. And the best part is that you won’t be needing a Canva Pro membership to use most of the features above.
Also Read: How to Make Background Transparent In Canva