Windows OS supports a wide variety of apps and installing them is an easy feat. But some users face the ‘This App Has Been Blocked for Your Protection’ error when they try to launch the Device Manager or another app, or while installing a new app on their Windows PC. The main reasons for this error include missing privileges, a meddlesome antivirus program, or SmartScreen settings. Try these eleven methods to fix the bothersome error.
Table of Contents
1. Restart Your PC
Before trying out advanced fixes, restart your PC if you haven’t done it already. It will clear the RAM, close all the background processes and services, and restart everything. Then, reattempt launching the app to check if the issue persists anymore.
Deep Dive: Why Turning Off and On Again Works in Devices – TechWiser
2. Grant Administrator Privileges to the App
If you cannot run the concerned app by clicking on it, try granting it administrator privileges. Here’s how:
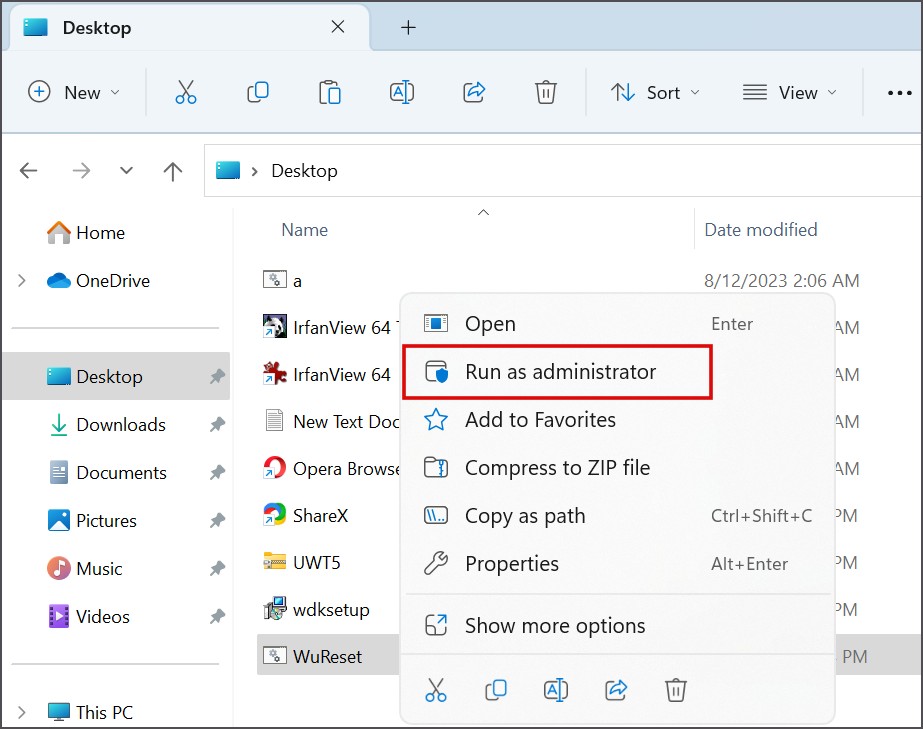
1. Press the Windows key + E to open the File Explorer and navigate to the app’s executable file location.
2. Right-click on the app icon. Then, click on the Run as administrator option in the right pane.
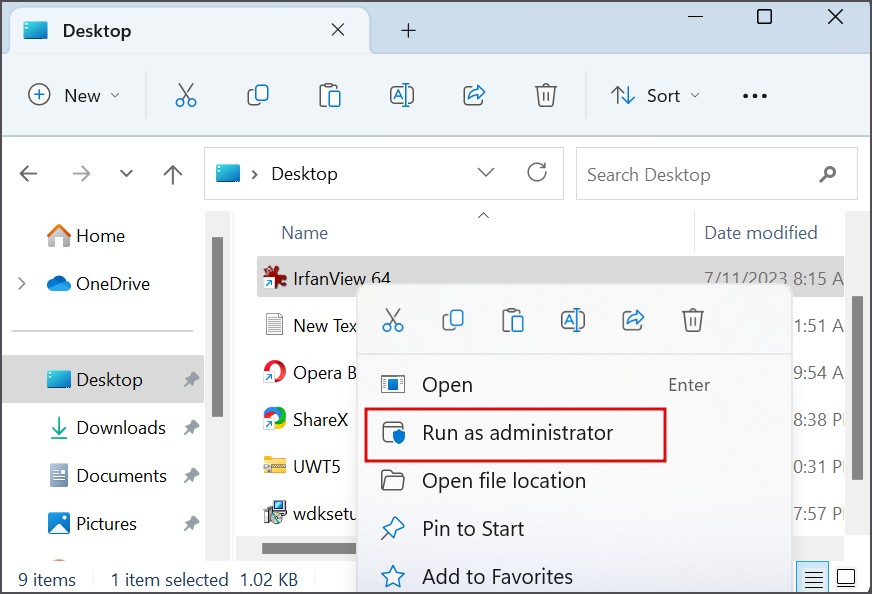
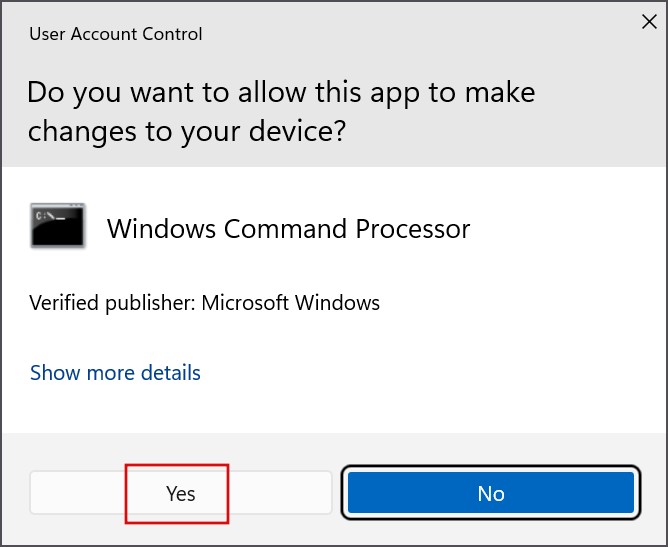
3. The User Account Control window will open. Click on the Yes button to open the app with administrator privileges.
3. Temporarily Disable User Account Control
User Account Control can be overprotective at times and prevent launching apps. To rule out this possibility, temporarily disable the User Account Control and try launching the app:
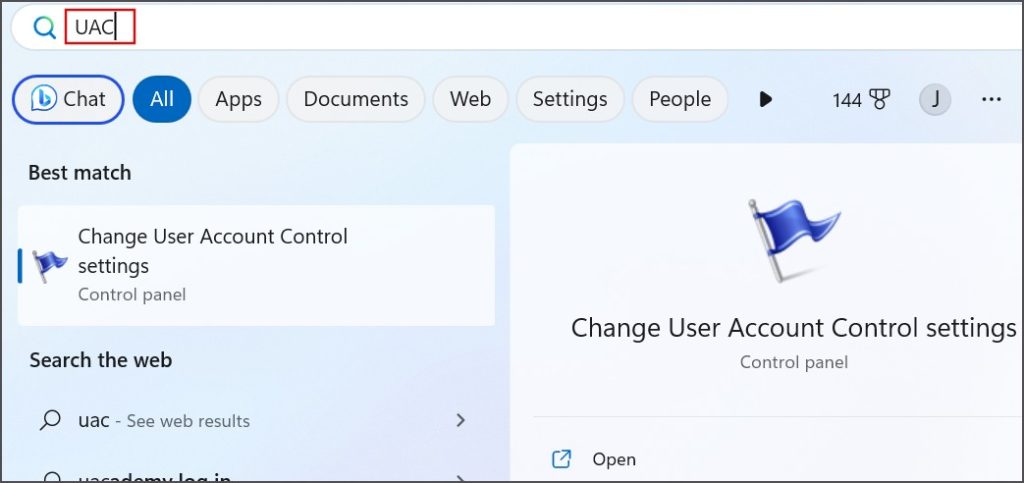
1. Press the Windows key, type UAC, and press Enter.
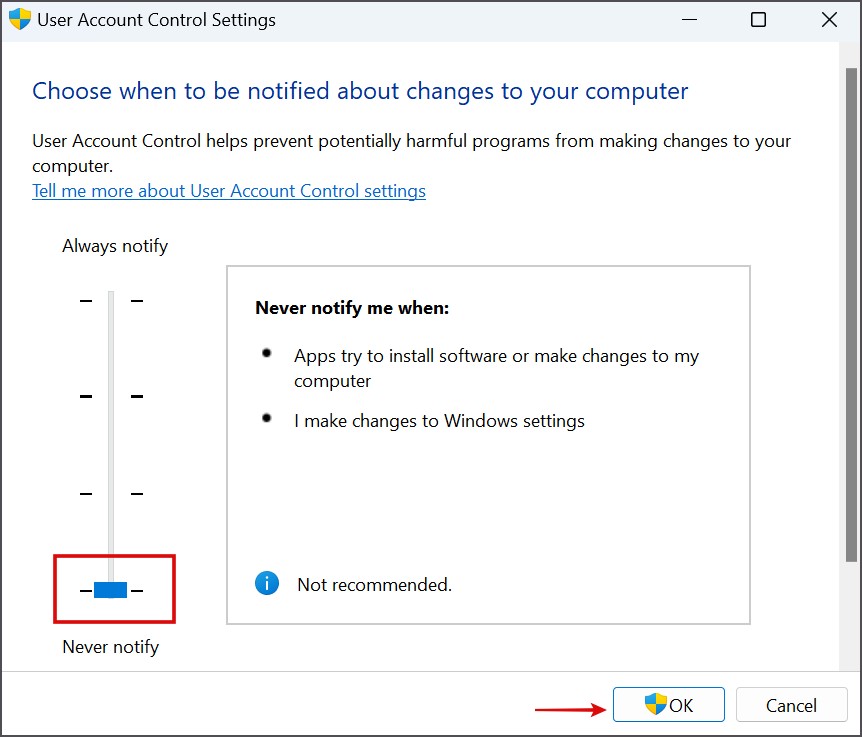
2. Drag the slider to the bottom and click on the OK button.
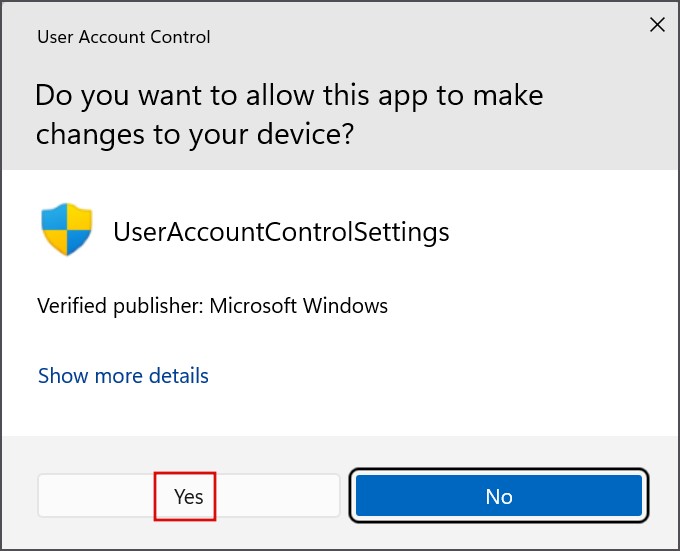
3. The User Account Control window will pop up. Click on the Yes button.
4. Now, try to launch the app and check if the error pops up again.
Remember to restore UAC to its default settings afterward.
4. Switch to the Built-In Admin Account
You can try switching to the inbuilt admin account in Windows 11. It will grant you almost complete control over the OS components. Here’s how:
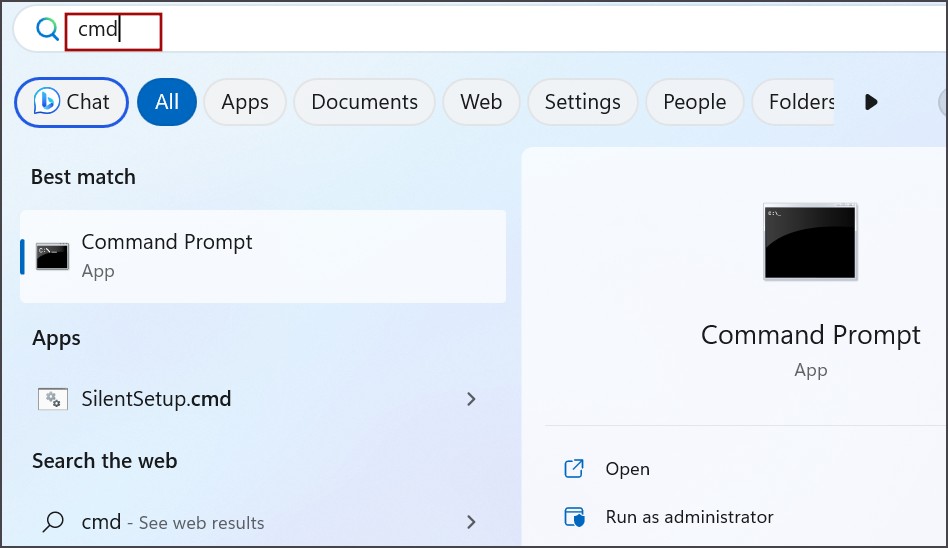
1. Press the Windows key, type cmd, and press Ctrl + Shift + Enter keys simultaneously.
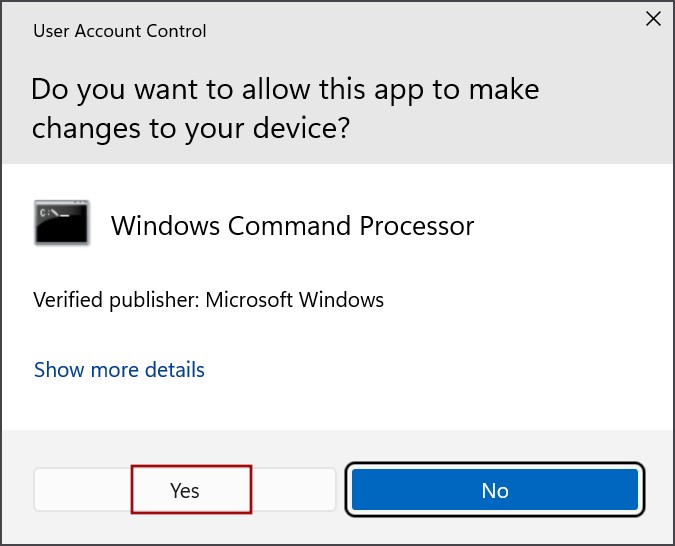
2. The User Account Control window will pop up. Click on the Yes button.
3. Input the following command and press Enter to execute it:
Net user administrator /active:yes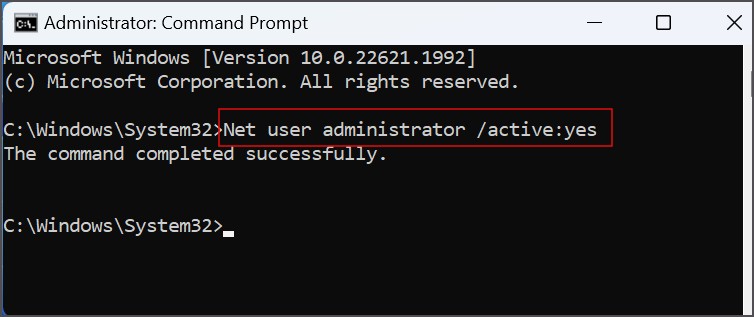
4. Close the Command Prompt window.
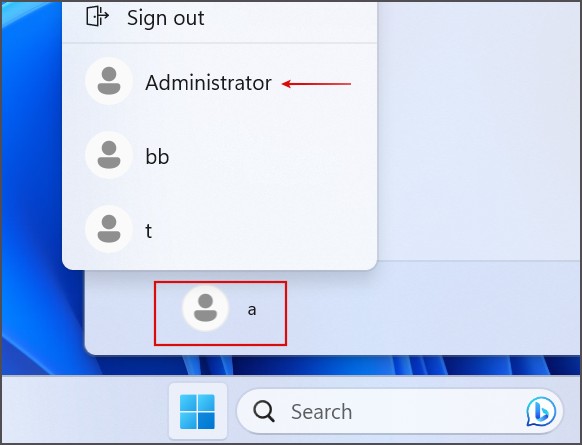
5. Press the Windows key to open the Start menu. Click on the User icon and then select the Administrator account.
6. Log in to the account and check if the app launches or not.
5. Check System Services
The error message can arise if some necessary services glitch and stop working properly. So, you must restart these services. Here’s how to do it:
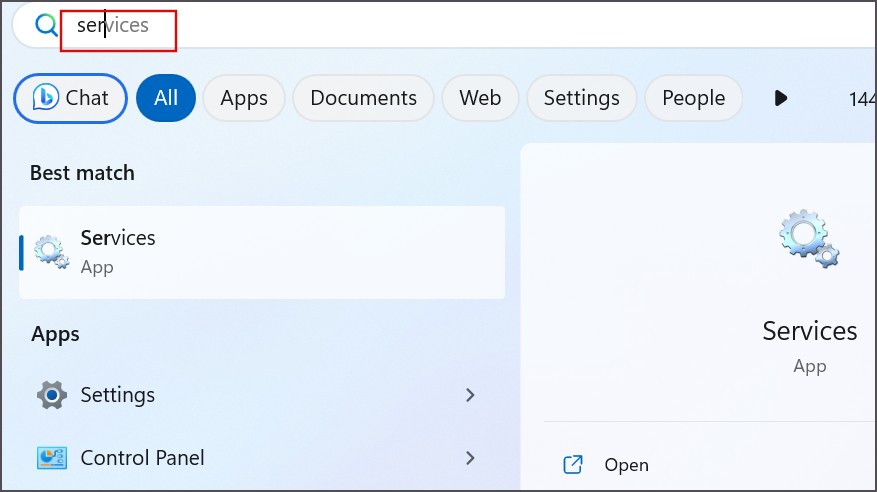
1. Press the Windows key, type services, and press Enter.
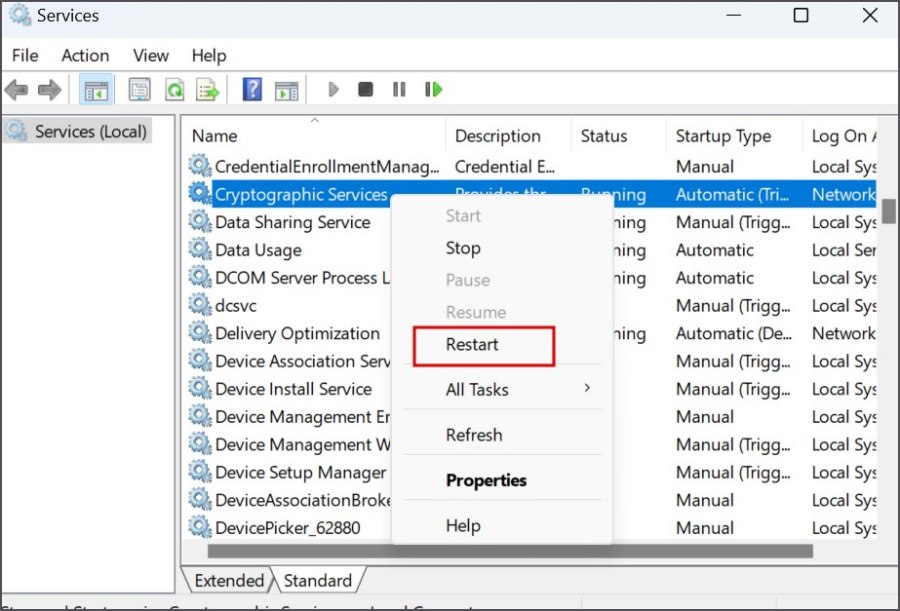
2. Scroll down and locate the Cryptographic Services. Right-click on it and select the Restart option.
3. Close the Services window.
6. Unblock the App From Antivirus Program
The antivirus program can block apps that it deems potentially harmful. Firstly, check the app installer for malware and re-download it from a trusted source. If that isn’t the case and the antivirus is blocking a legitimate app from running, you must unblock it. Here’s how:
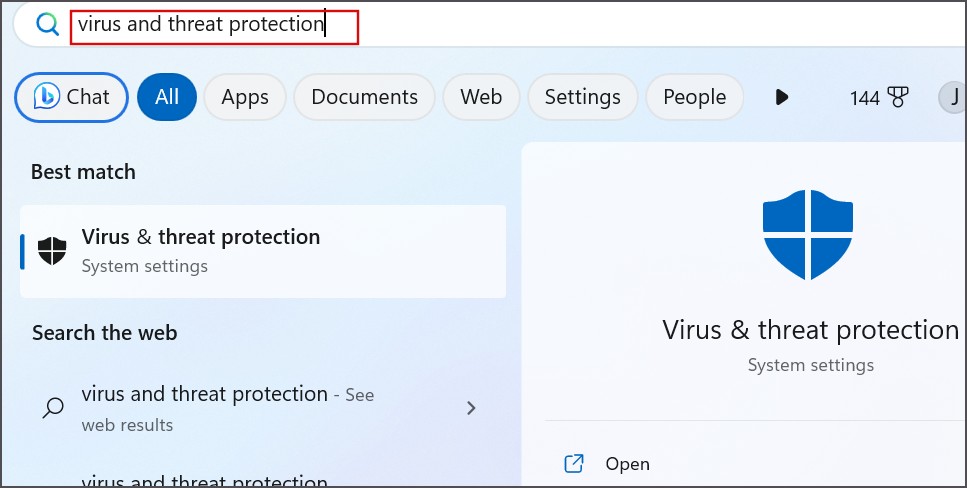
1. Press the Windows key, type virus and threat protection, and press Enter.
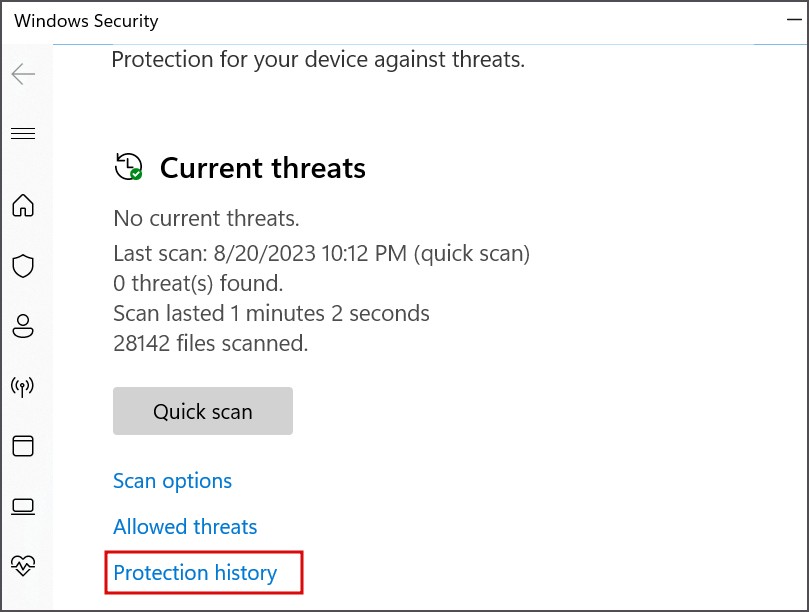
2. Click on the Protection History option.
3. Find the blocked app in the list and click on the arrow icon.
4. The User Account Control window will pop up. Click on the Yes button.
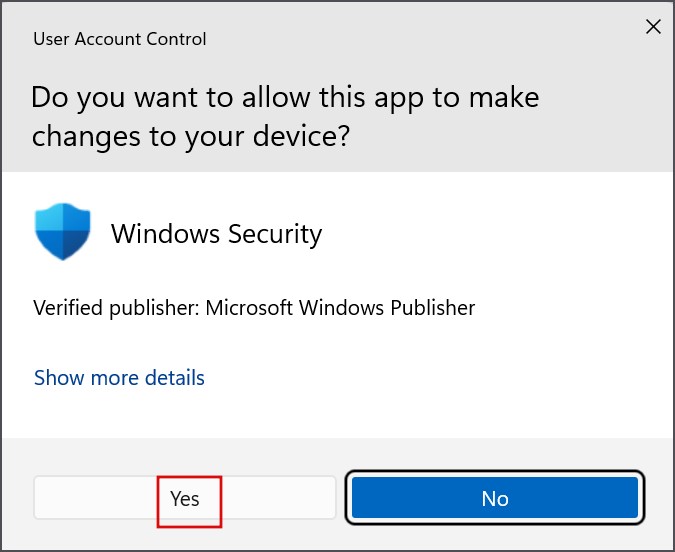
5. Click on the Actions button and then click on the Allow on device option.
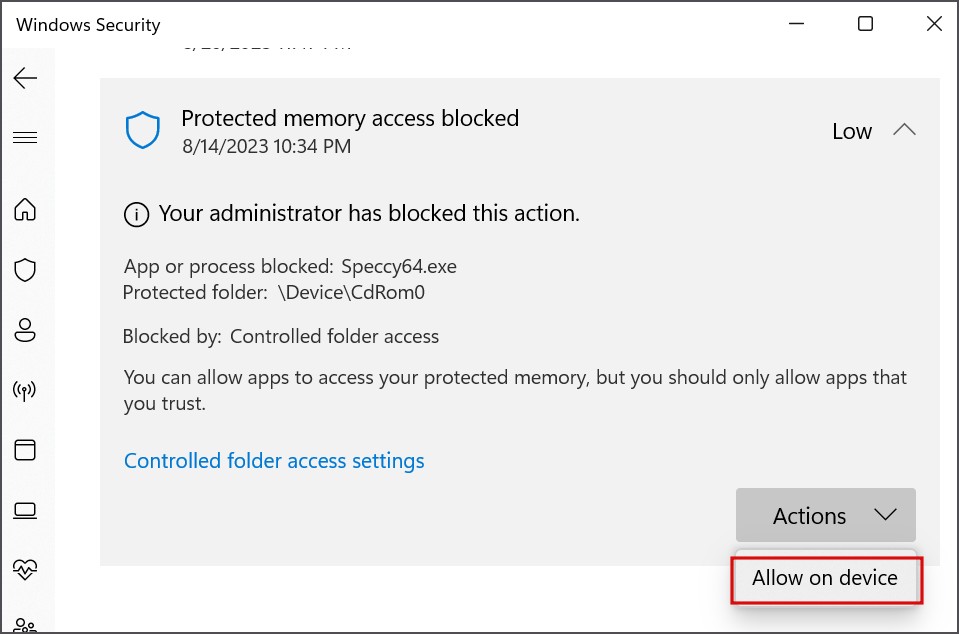
6. Close the Windows Security app.
7. Remove a 3rd Party Antivirus Program
Many users also faced this issue where a third-party antivirus program blocked legitimate apps, sometimes even system apps for no reason. So, you must remove the antivirus program and then try launching the app again. Don’t worry because when you remove the 3-rd party antivirus program, Windows Defender will turn on automatically. Here’s how:
1. Press the Windows key, type appwiz.cpl, and press Enter.
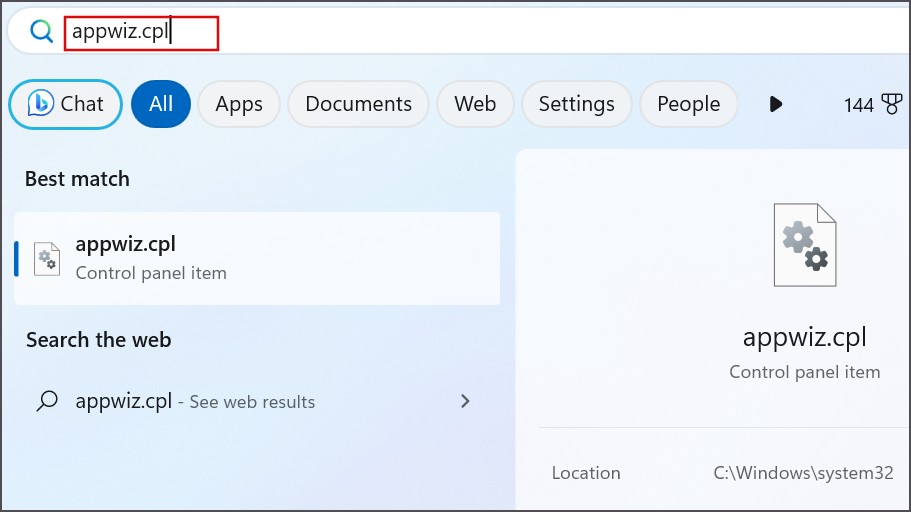
2. Find the antivirus program installation in the list and right-click on it. Select the Uninstall option.
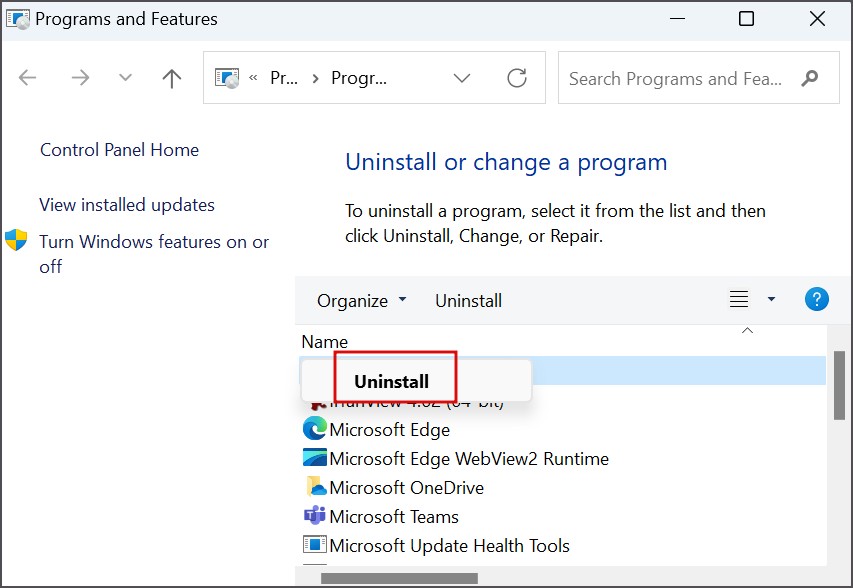
3. Follow the on-screen instructions to remove the program.
8. Tweak SmartScreen Settings
SmartScreen prevents unwanted and malicious apps from running on your PC and is even integrated into the Edge browser. But it can often block many safe apps from running on your PC. Here’s how to tweak its settings:
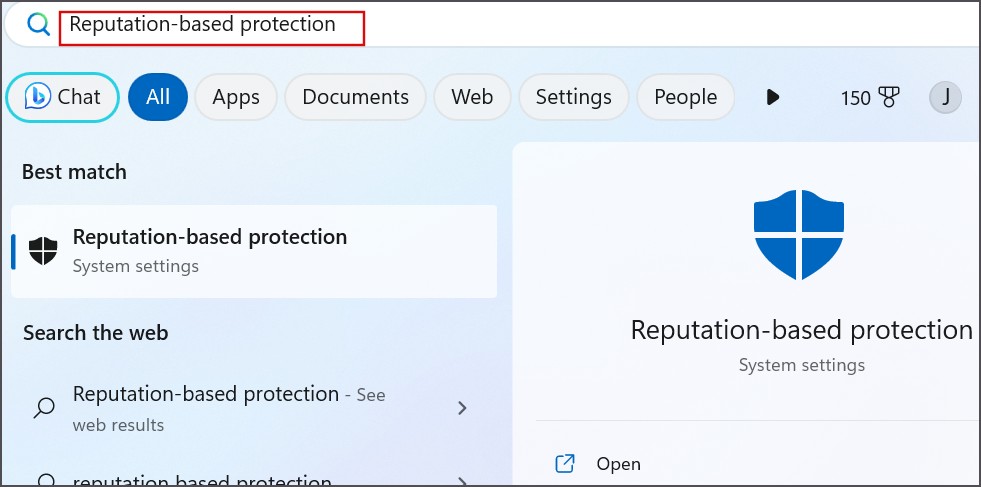
1. Press the Windows key, type Reputation-based protection, and press Enter.
2. Scroll down to the Potentially unwanted app blocking section and click on the toggle to disable it.
3. After that, click on the SmartScreen for Microsoft Store apps toggle and disable it as well.
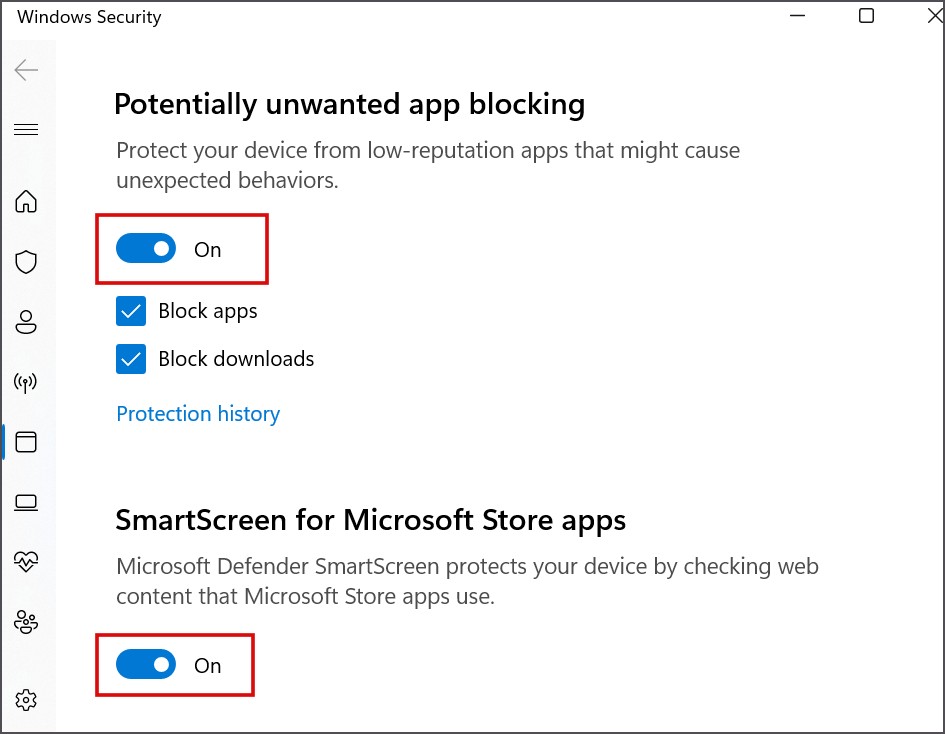
4. Both features will be inactive on your PC now.
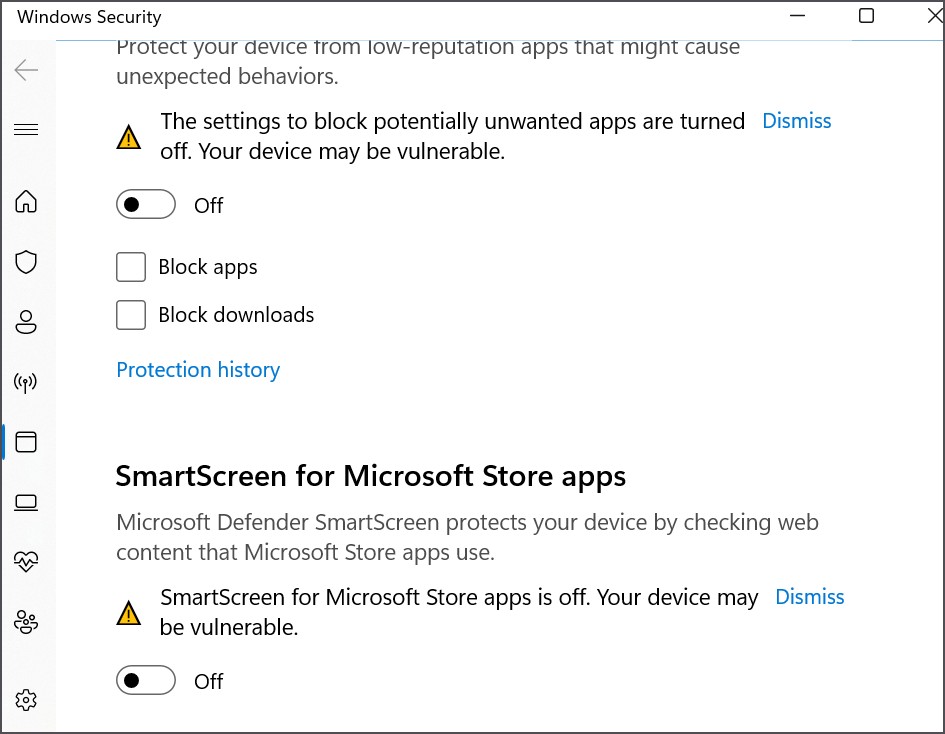
5. Close the Windows Security app.
9. Tweak Group Policy Editor Settings
A misconfigured policy can also be the reason for the app block. As such, you must disable the policy to unblock the app. Here’s how:
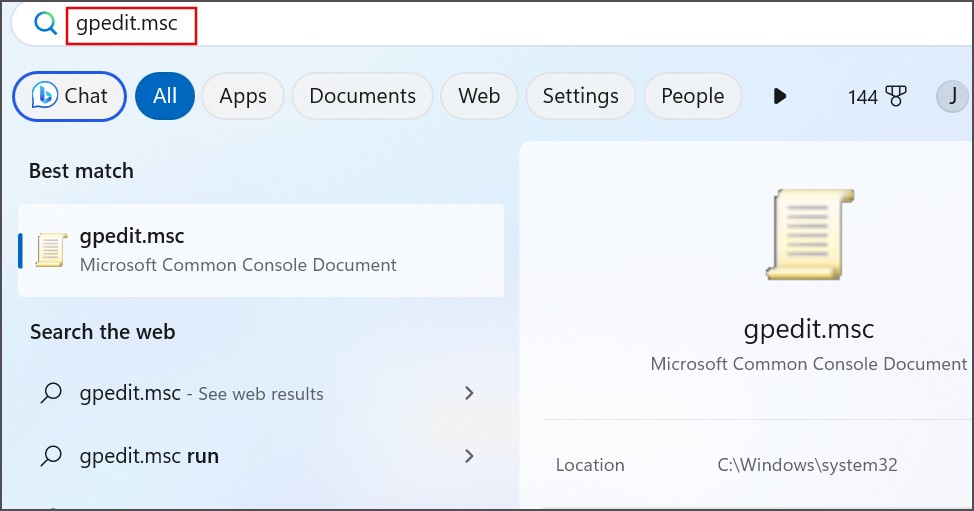
1. Press the Windows key, type gpedit.msc, and press Enter.
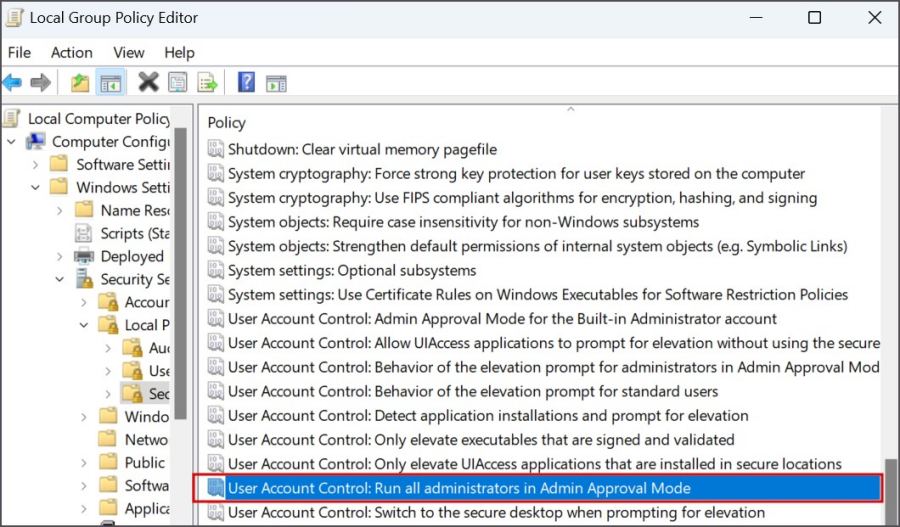
2. Navigate to the following section:
Computer Configuration > Windows Settings > Security Settings > Local Policies > Security Options.3. Double-click on the User Account Control: Run all administrators in Admin Approval Mode policy.
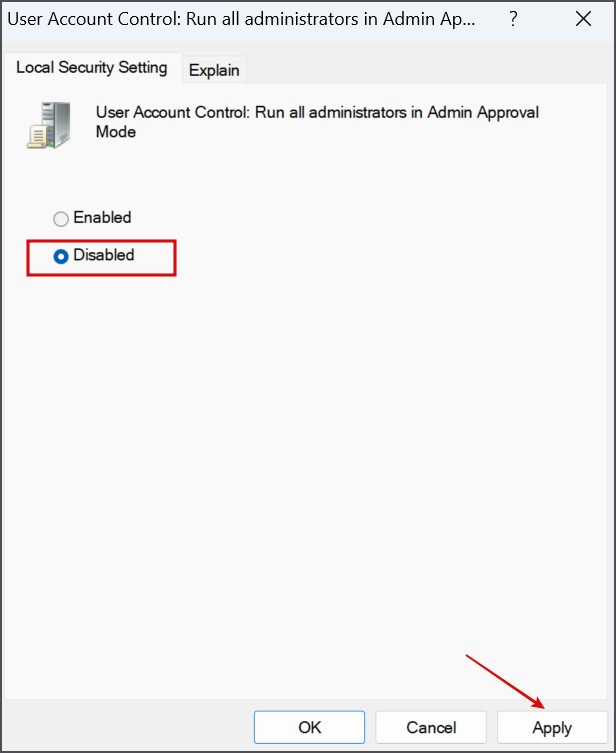
4. Click on the Disabled option and then click on the Apply button
5. Lastly, click on the OK button.
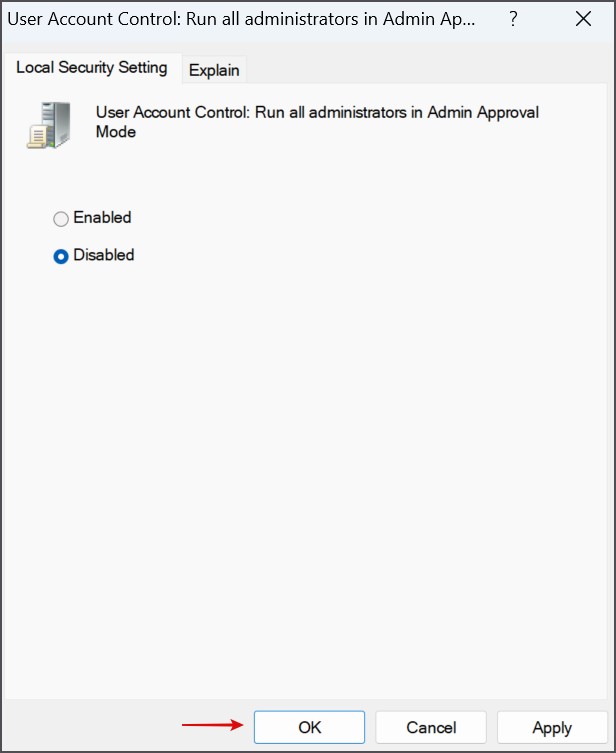
6. Close the Group Policy Editor and restart your PC to apply the changes.
10. Reset Windows Update Components
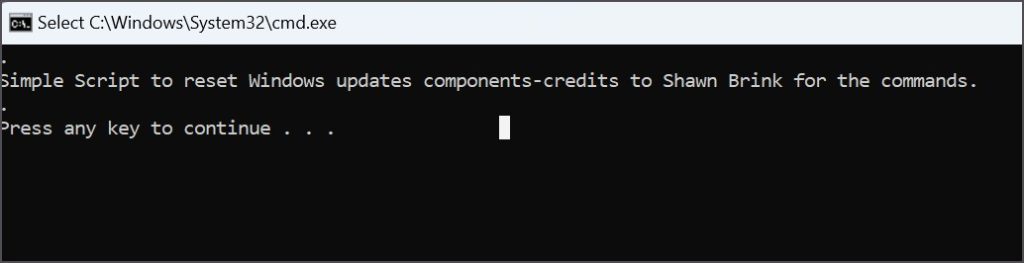
If the app still doesn’t install or launch, you must reset Windows update components. It involves running multiple commands, so to save the effort and make it less complicated, you can use a batch file instead. Firstly, download the batch file (which is created by a Microsoft MVP) and then extract the contents of the archive. Then repeat the following steps:
1. Right-click on the extracted batch file and select the Run as administrator option.
2. The User Account Control window will pop up. Click on the Yes button.
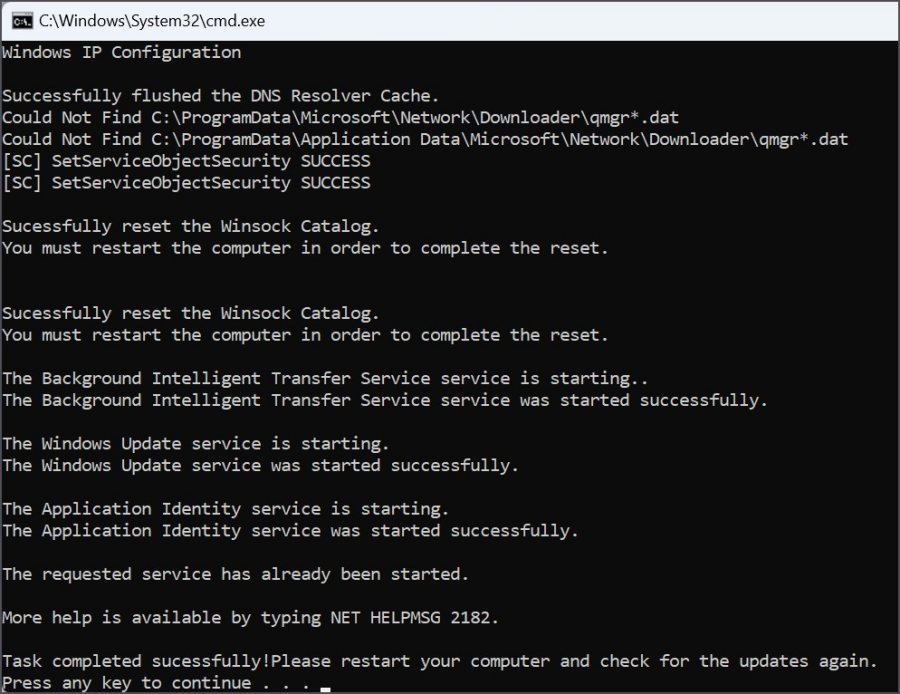
3. A Command Prompt window will open. Press any key to launch the reset process.
4. After all the commands finish executing, close all the open apps and then restart your PC.
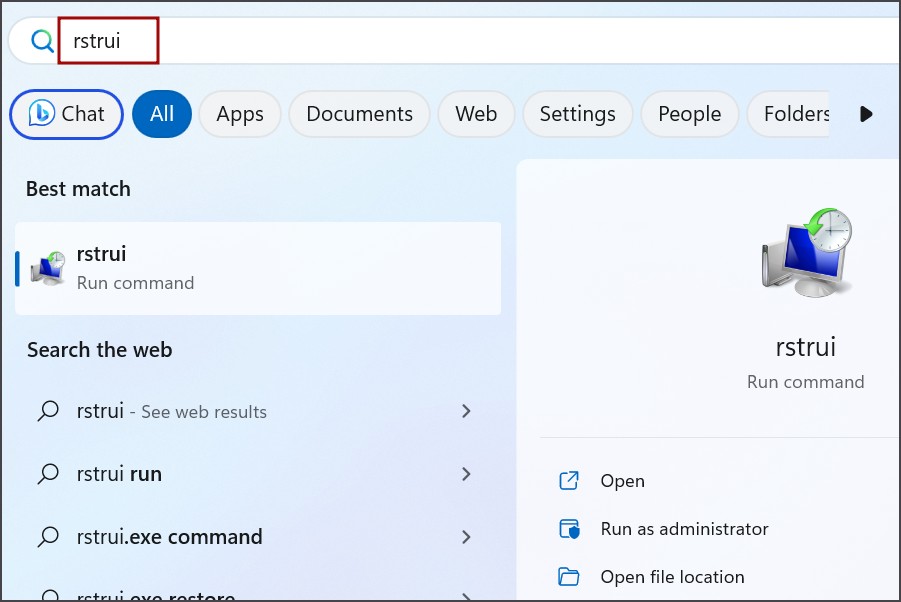
11. Use System Restore
The last option to fix this bothersome error is to use System Restore. Unlike System Reset, it will revert your PC to a point in time when everything worked fine while not purging your personal files. Here’s how:
1. Press the Windows key, type rstrui, and press Enter.
2. Click on the Next button. Pick a restore point from the list and follow the on-screen instructions to apply the restore point on your PC.

Solve App Issues on Windows
These were the eleven methods to fix the ‘This App Has Been Blocked for Your Protection’ error in Windows 11. Start with basic troubleshooting methods and disable UAC. Enable the inbuilt admin account, unblock the app, and tweak SmartScreen settings. After that, configure a group policy, reset Windows update components, and use System Restore.