After working on a document in Microsoft Word, it’s natural for you to save the progress. But it’s unusual to get a pop-up window stating ‘Word Cannot Complete the Save’ when you want to save the document. So you’d want to save your progress in the document on your computer or copy the text to another file. Before doing the latter, you can fix this problem. We have compiled solutions to fix ‘Word Cannot Complete the Save’ error in Microsoft Word on Windows 11.
Table of Contents
Things to Try First
Before you start panicking, the first course of action is to perform the basic checks to save the document on your Windows 11 PC. Here are some common checks and reasons why you get the ‘Word Cannot Complete the Save’ error in Word:
- You may see the ‘Word cannot complete the save’ error if the Word file is open on another computer.
- You can copy the text to another Word file on your PC and save it there instead. Note that while copying, don’t copy section breaks. If unsure, change the document view to Draft before copy-pasting.
- For Microsoft 365 users, check your internet connection to ensure your PC is connected.
- If you are using a third-party antivirus program, it could be blocking Word from creating a new document on your Windows PC.
- You may disable your third-party antivirus temporarily or remove it to let Microsoft Defender take the protection charge.
- Your Microsoft 365 plan may have expired and your last payment didn’t go through. But, it is fairly easy to check your plan’s status.
1. Change File Name and Save Location
You may not have the necessary permission to save the Word document in a particular folder, partition or drive on your Windows 11 PC. So, you can save the Word file in a different folder location with a new name. Avoid using symbols or special characters in the file name.
To change the name of the saved file, right-click and select Rename. After that, move the file elsewhere – preferably a different drive.
2. Grant Full Permissions to Word File
You need editing rights to make any changes to the Word file and save it. You need to have editing rights if you did not create the Word document. However, if the Word file was created by someone else, then send them a message to check permissions.
You can also check the current permission status from the ribbon menu. When you click the button next to Share button at the top-right corner, the drop-down will offer you three options – Editing, Reviewing, or Viewing.
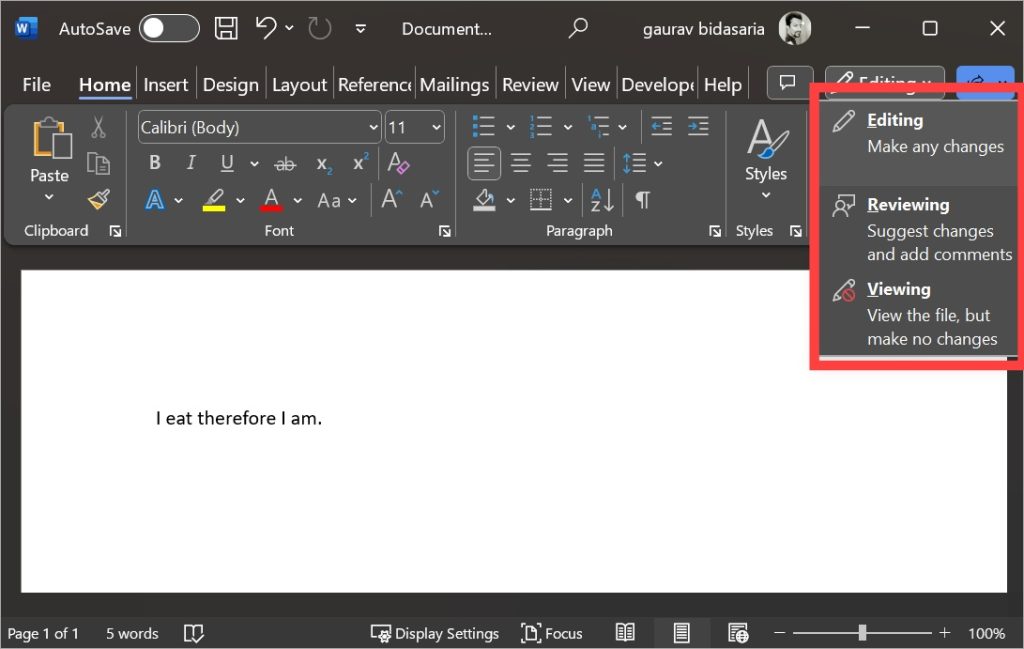
- Editing – edit the document and save changes
- Reviewing – review the document and leave comments with feedback
- Viewing – read-only the document and can’t make any changes
Select the Editing option. If it is greyed out, you need the necessary permissions to make changes and need to contact the admin.
3. Disable Document Protection
If the document was shared with you, the sender may have applied document protection on the Word file. When that is enabled, it will restrict anyone from making changes to the document. If you have editing permissions, you can disable document protection. Here’s how.
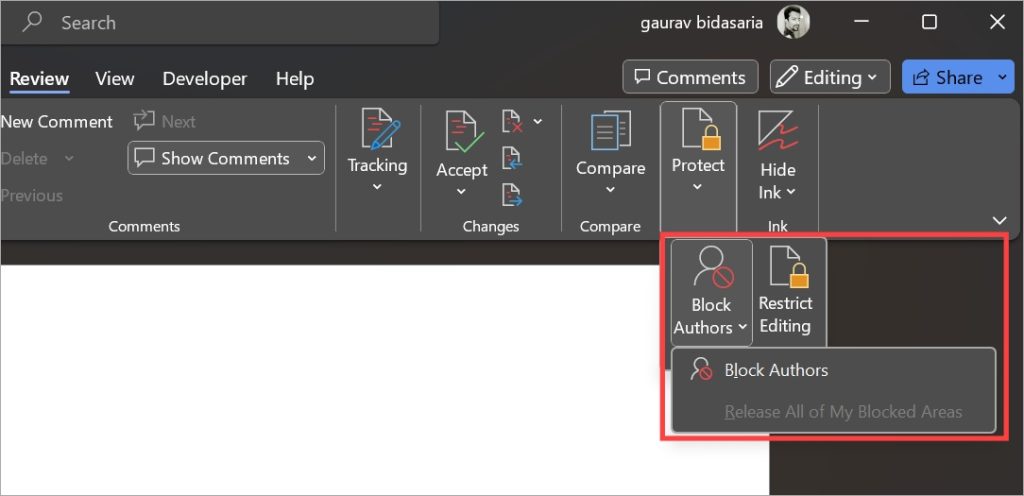
1. Click on the Review tab. Click on Protect and you will see two options — Block Authors and Restrict Editing.

2. Under Block Authors, unselect Release All of My Blocked Areas.
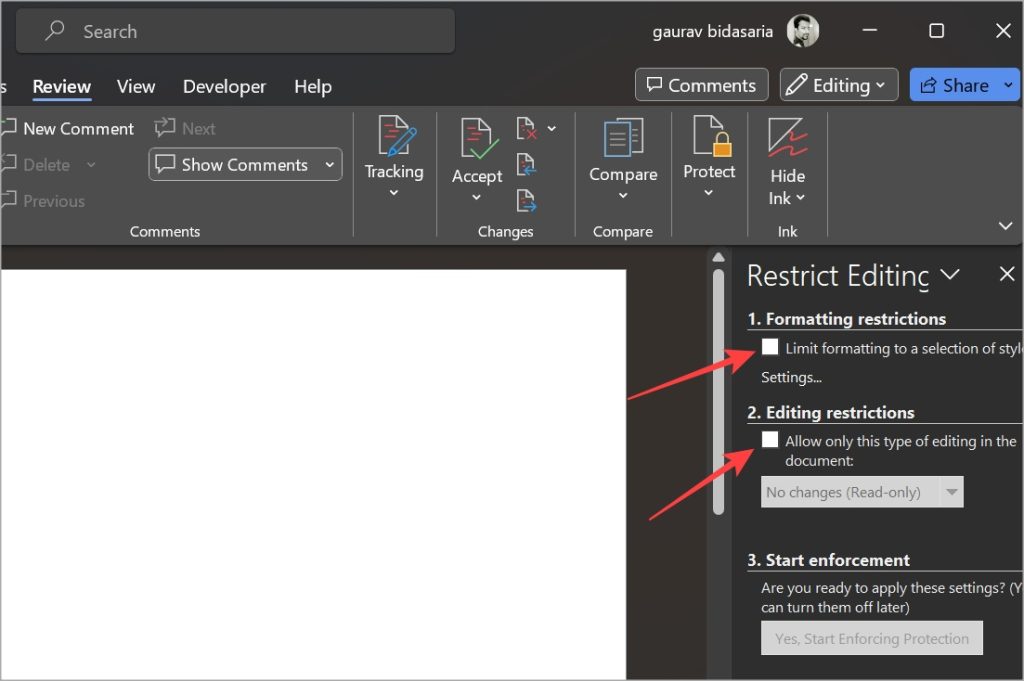
3. Under Restrict Editing, uncheck Limit formatting to a selection of style and Allow only this type of editing in the document options.
Tip: After drafting invoices, agreements, contracts, and similar documents, Microsoft even lets you add your signature to the Word document.
4. Open Word in Safe Mode
Unlike booting your Windows 11 PC in safe mode, you can start the Microsoft Word app in safe mode without restarting your computer. Here’s how you can do that.
1. Press Windows key+R to open the Run prompt.
2. Type the following command:
winword /safe
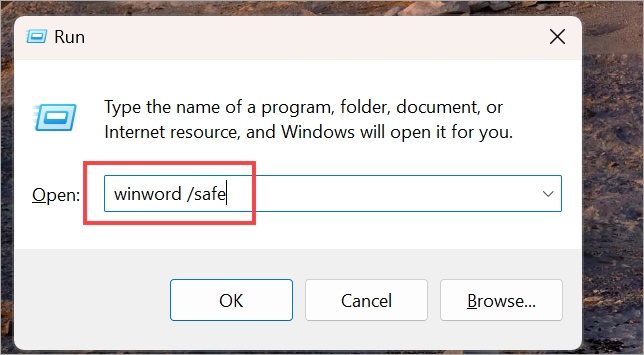
3. Word will open with Safe Mode appearing in the title.
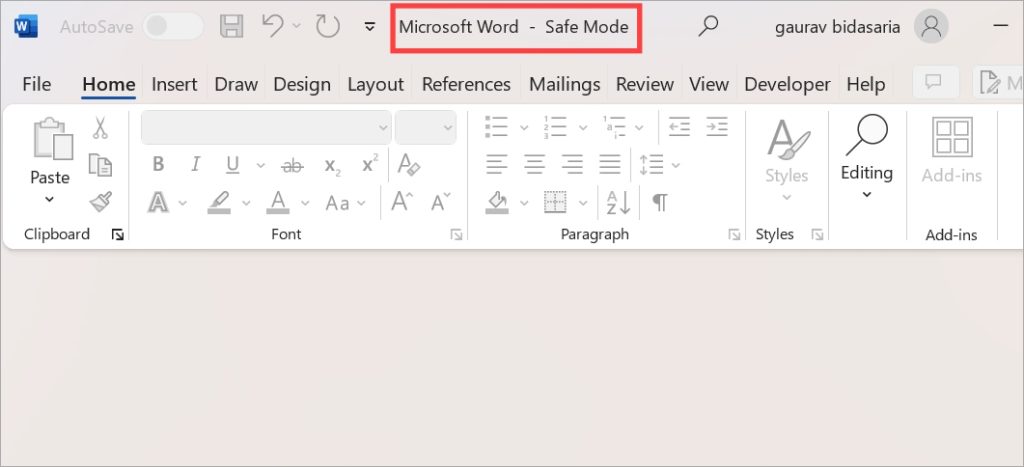
4. Click on the File menu icon and locate the Word file you want to open. It will automatically open in Safe Mode too. Check if you can save the file or still see ‘Word Cannot Complete the Save’ pop-up error.
5. Check the Word Add-Ins
If you still can’t save the file, one of the add-ins could be at fault. So if you’re using Add-ins in Word to help you, you might want to check if one of them is misbehaving.
In a Word document, click on File > Options > Add-ins. Click on Go next to Manage Com Add-ins.
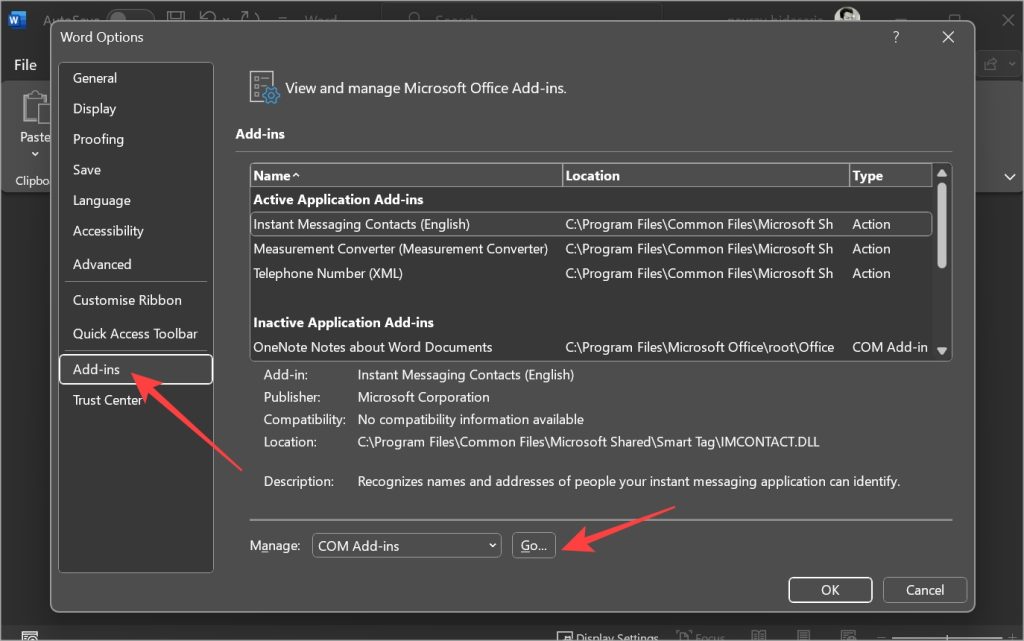
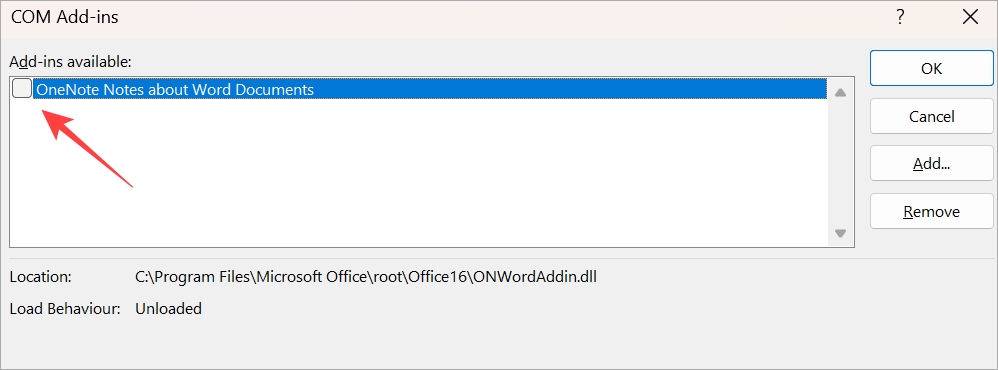
In the pop-up that follows, uncheck all the add-ins and try again. If you can save the Word file, re-enable add-ins one at a time to eliminate the one causing the error.
6. Modify Word Compatibility Settings
One of the issues with Microsoft Office is the number of versions that are concurrently available. There is Office 2013, 2016, 2019, 365, and so on. Compatibility mode is useful when trying to edit and save a file created in one version while using another. If that’s the case, the Word file won’t be compatible with the current version to throw the ‘Word Cannot Complete the Save’ error. Here’s how you can change the file’s compatibility setting:
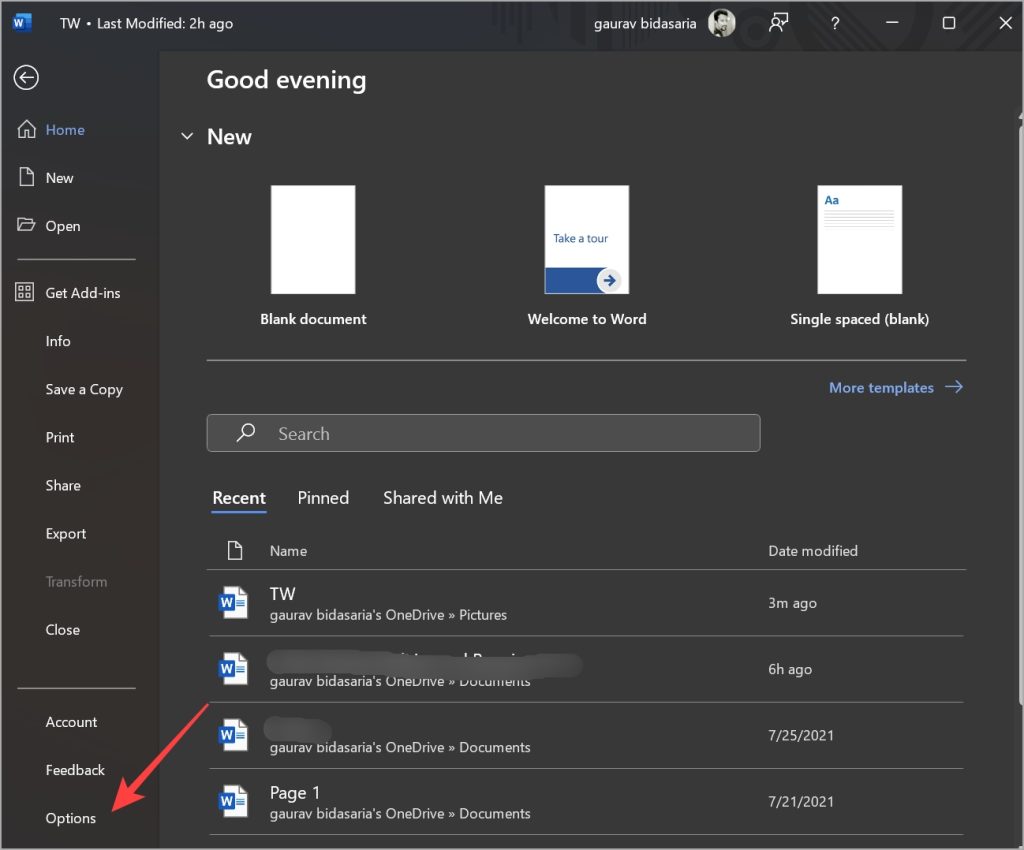
1. Click on File menu.
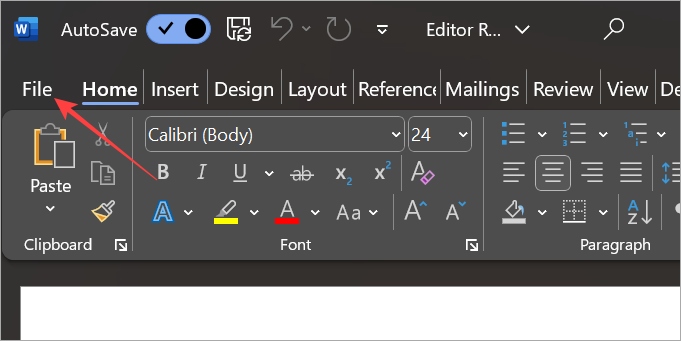
2. Click on Options in the bottom-left corner.
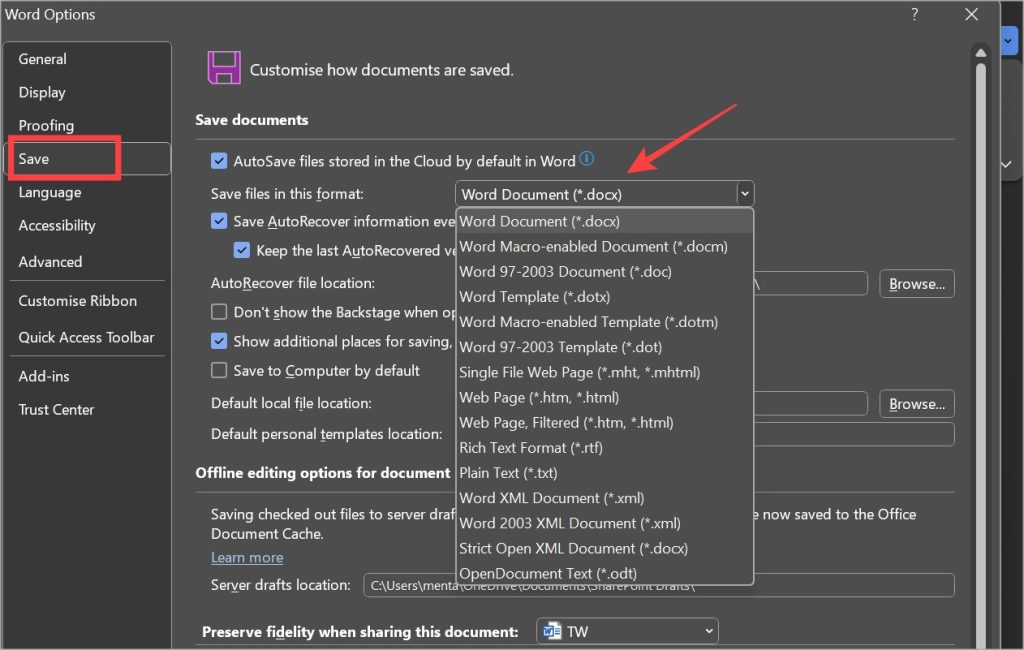
3. Select Save tab from the left sidebar. From the drop-down next to Save files in this format, select Word Document (*.docx). You will notice there are some other versions of Word also listed and if one applies to you, try selecting that.
7. Repair Word File and Microsoft Office
Repairing a Word file or even an app doesn’t erase the file or the associated data. So, you can repair the file or the Microsoft Office installation on your Windows PC without worrying about data loss. Over time, documents and even app files may get corrupted, and there are a few reasons behind it, like cache, code, bug, etc. So, it is easy to repair files and apps in Windows.
Repair Word File
1. Open any Word file.
2. Click on File in the top-left corner of the screen.

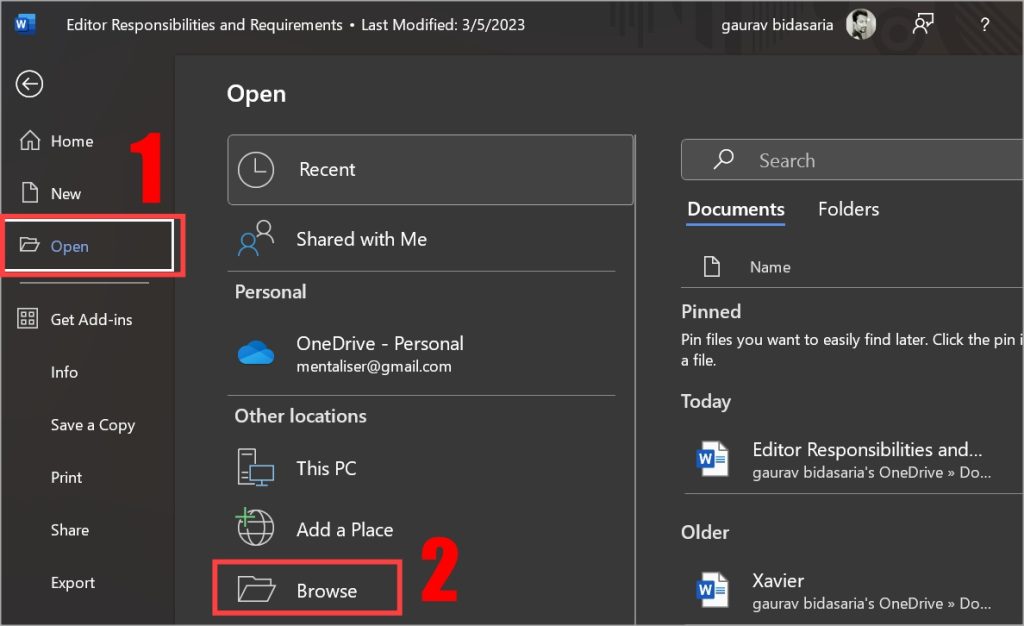
3. Select the Open tab from the left sidebar and click on Browse button.
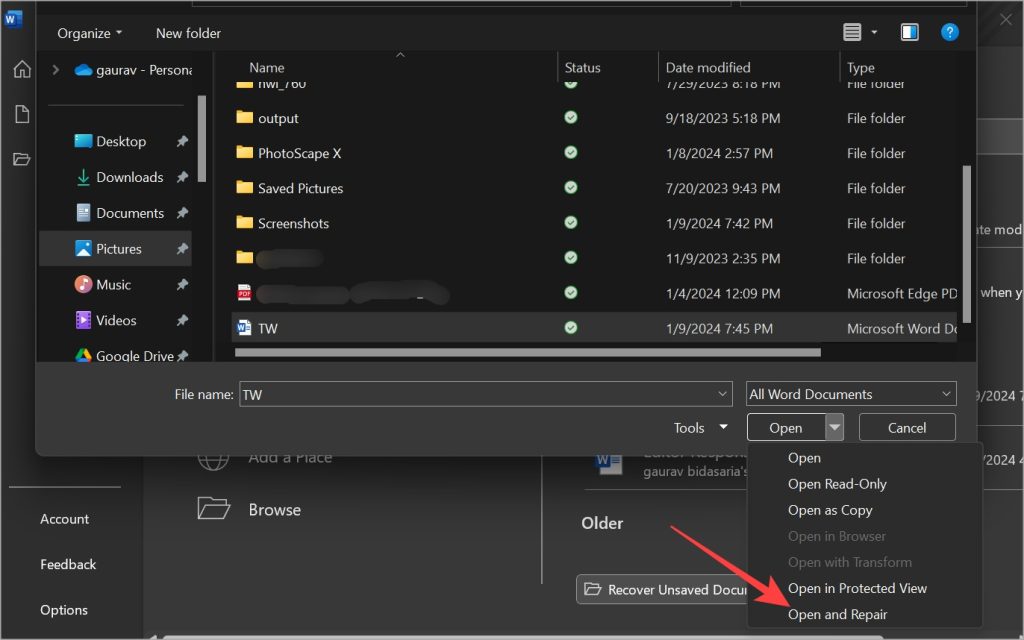
4. Select the file you need to repair and select Open and Repair from the menu.
Repair Microsoft Office App
1. Press Windows key+I to open Settings.
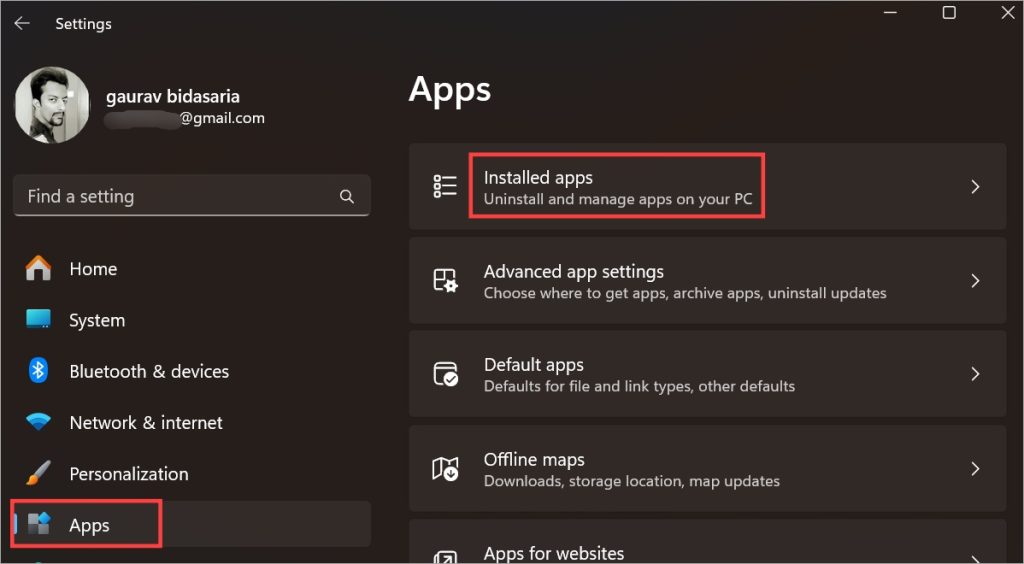
2. Click on Apps in the left sidebar and then Installed apps on the right side.
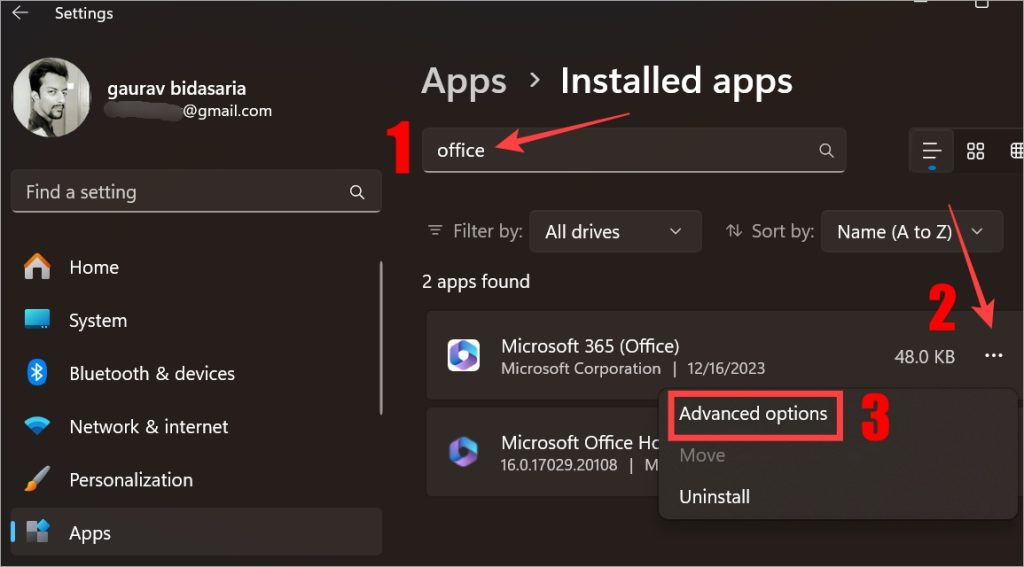
3. Use the search bar to find the Office app. Then click on the three-dots menu icon next to it and select Advanced options.
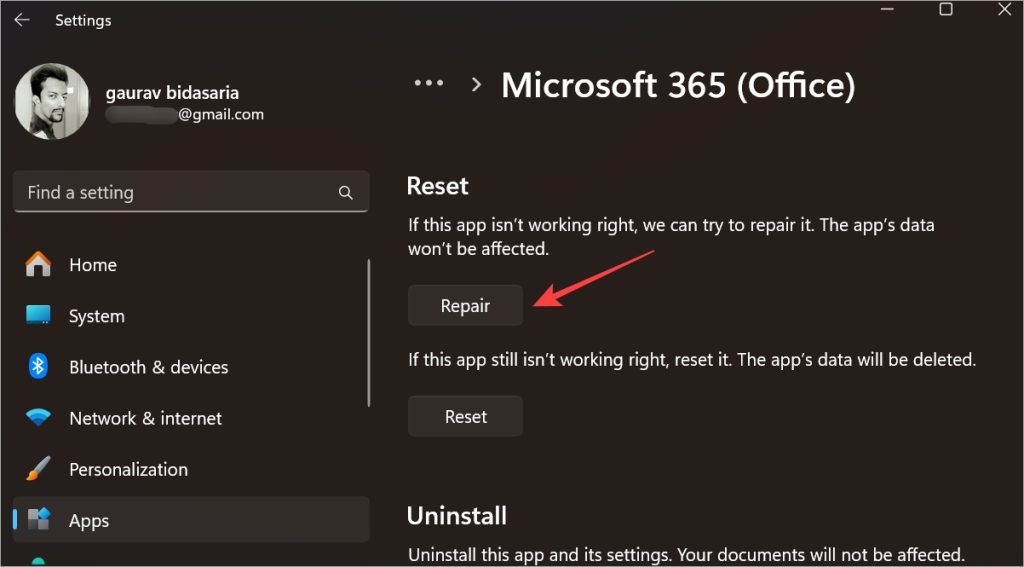
4. Click on the Repair button and follow the on-screen instructions.
8. Reset Word
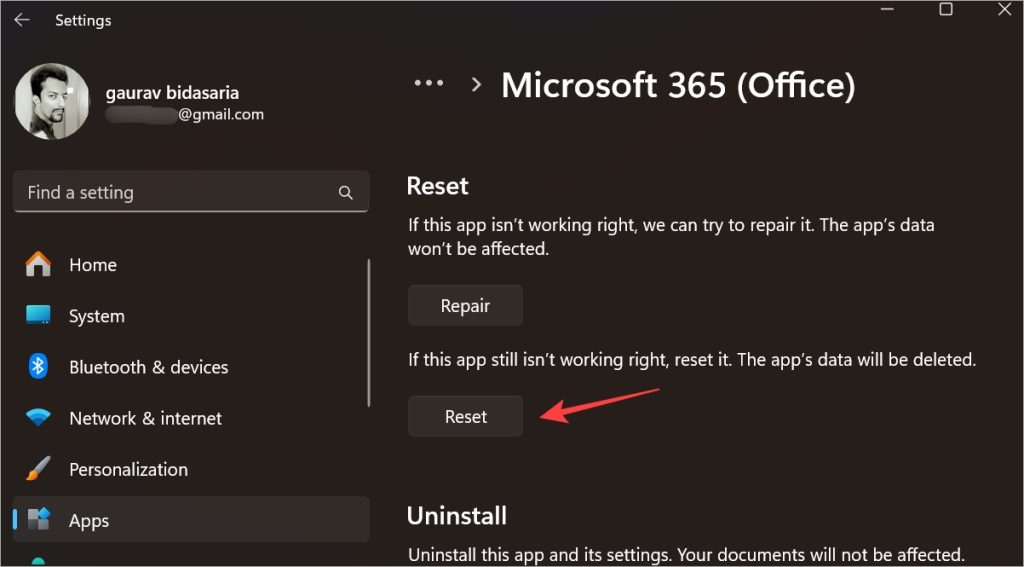
If Word won’t let you save the file despite following the above solutions, you may want to reset the Word app. However, that will delete all app data. So, take a backup of all the Word files to an external drive or upload them to cloud storage before you proceed. Otherwise, you will lose all data.
Follow Steps 1 to 4 in the above section to repair the Office app. In the same window, you will also have the Reset option.
9. Update Word App and Windows OS
Though updates are automatic on Windows 11, they might not happen for some reason. If that’s the case, you’ll need to update the Word app and Windows OS. Updates carry fixes to common bugs that might resolve several bugs and bring improvements. Here’s how to update the Word app and Windows Update.
Update Word App
1. Open the Microsoft Store app.
2. Click on the Library icon in the left sidebar.

3. Click on Get updates.

4. Check if there is an update showing for Word app and if yes, download and install it.
Update Windows OS
Similarly, updating Windows is easy and can be done from the Settings app.
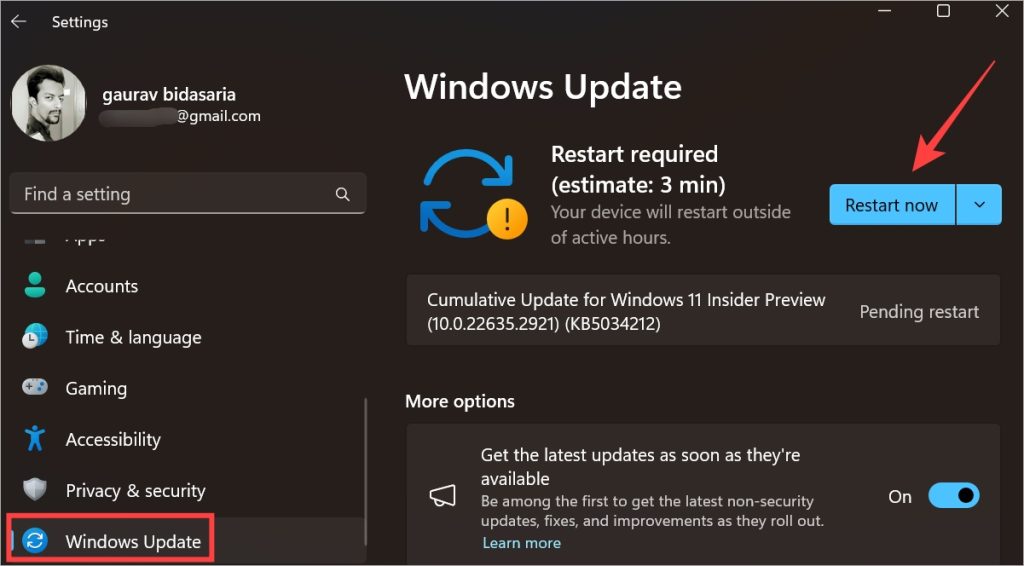
1. Press Windows key+I to open Settings.
2. Select Windows Update from the sidebar and then check for an update. After installing an update, you’ll need to restart your PC to apply it.
Save the Document Peacefully
Microsoft Word is a good app but the problem is that there many versions of the app are floating around. Most Microsoft apps have had multiple versions over the years. Skype is another example. Using the web version simplifies this problem.
Did you know that word allows you to create fillable forms too? Some organizations and companies need employees to use Word exclusively for this purpose.