Instagram has capped the upload size to 1080p, however, it still compresses the media reducing the quality further. If you don’t want your story, post, or reels to appear blurry on Instagram then you should know how to upload them in high quality from the iPhone, Android, and PC. Instagram UI has recently changed with an update, moving many settings and options around. Make sure you have all the right settings turned on to upload media in high quality.
Upload in High Quality on Instagram on Mobile
The steps to upload your story, post, and reels on Instagram in high quality are similar for both iPhones and Androids. Hence you can follow our guide irrespective of the device you’re using.
Note: Turning this option on may take more time while posting and consume more mobile data. Be sure to keep an eye out on your data consumption while using Instagram if you’re not on an unlimited mobile data plan.
1. To upload your media in high quality, open Instagram on your iPhone or Android and head to the profile page. Tap on the sandwich icon (three-line icon) at the top-right of the screen to switch to Settings and Privacy.

2. On Android, scroll down to find Data usage and media quality and tap on it. On the iPhone, Look for Media quality and tap on it.

3. Now turn on Upload at the highest quality by tapping the flip switch. With this option, all your stories, posts, and reels will be uploaded at the highest quality possible irrespective of your network conditions.

Pro Tip: Alternatively, you can also turn on Data Saver which will not load videos in advance to save you some data if you’re low on mobile data.
Like the dynamic island in the new iPhones? There is a little trick that will let you get this feature on your Android phones.
Upload in High Quality on Instagram on PC
While uploading to Instagram in high quality is easy on Android and iPhone, it tends to be a bit tricky if you use a browser. There’s no one-touch setting as seen previously, but there is a workaround that has been known to work for many PC users (including us).
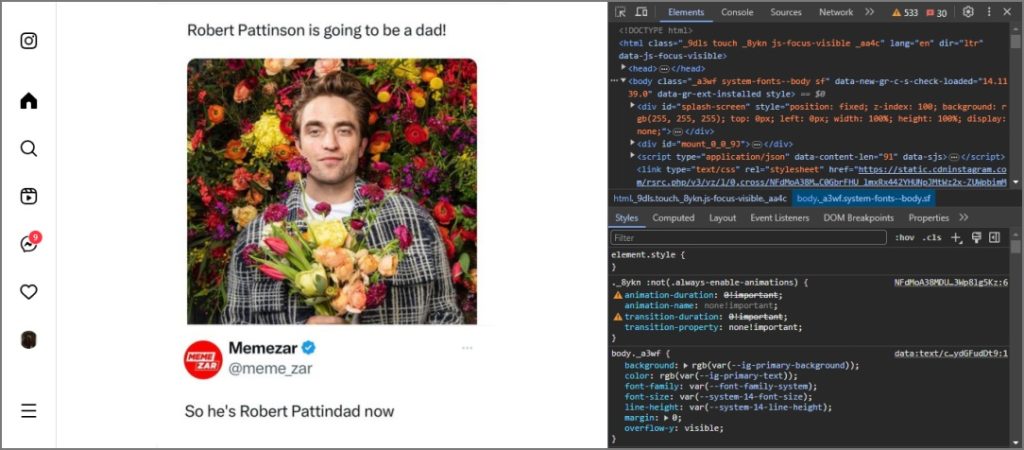
1. Open Instagram in the Google Chrome browser on your PC, then press F12 to open the dev tools window. Alternatively, you can also try pressing the function Fn key + F12 if it doesn’t work.

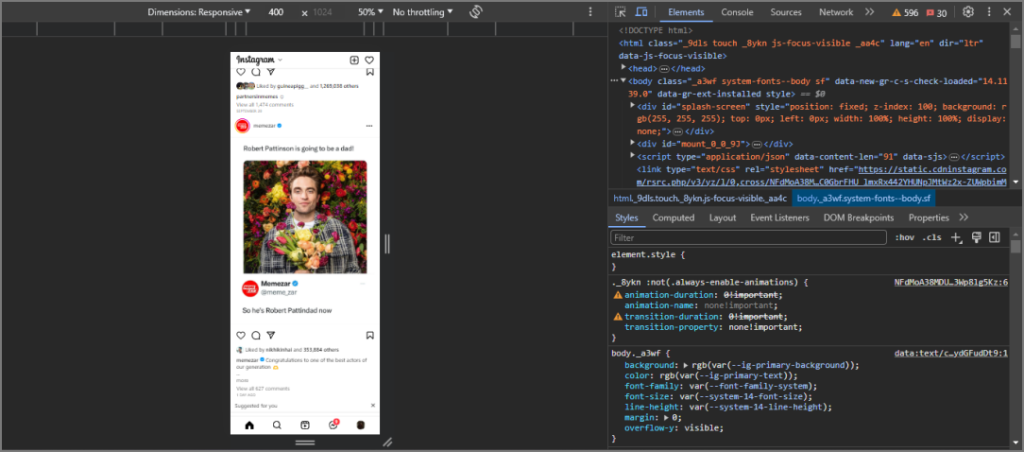
2. You’ll see a lot of code towards the right of your screen. Now press Ctrl + Shift + M while the dev tools window is open. This will toggle the device toolbar.

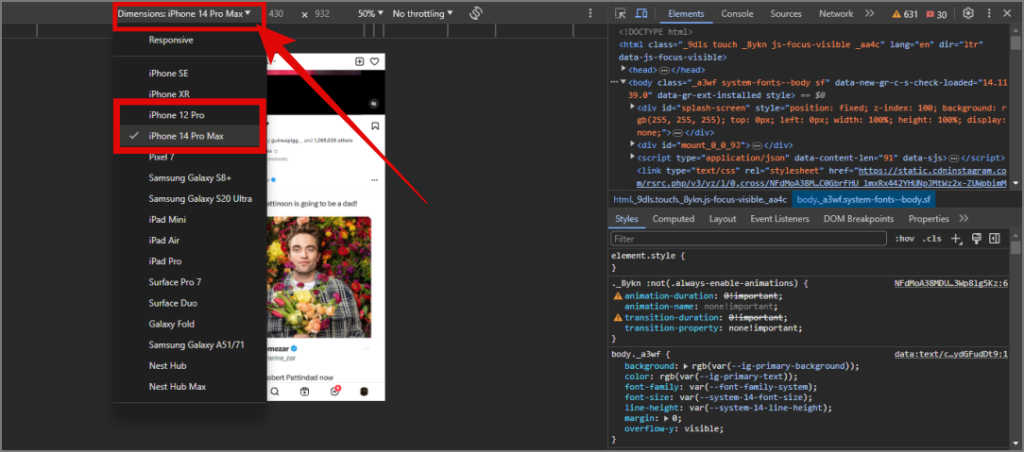
3. Select iPhone 14 Pro Max or iPhone 12 Pro from the Dimensions drop-down menu. This will change the Instagram page view similar to the iPhone resolution.

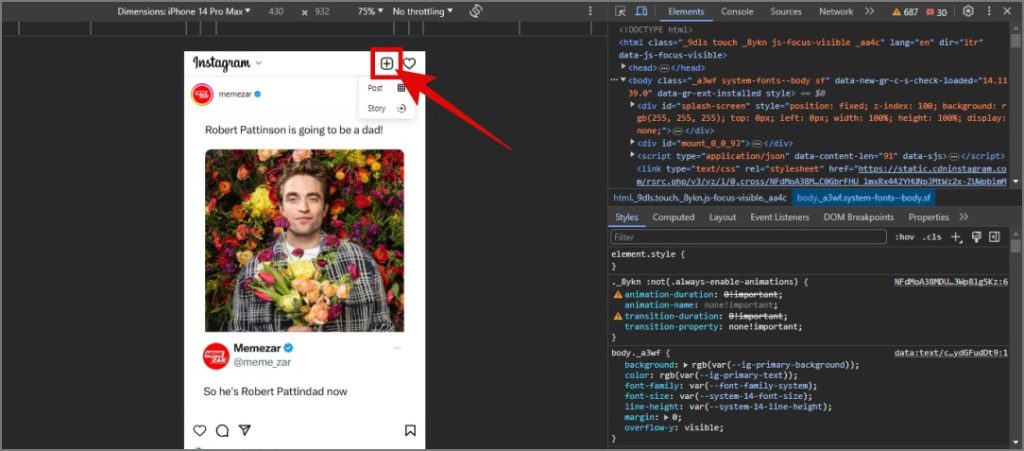
4. Now upload any story, post, or reel to your Instagram account as usual and it should upload the media in high quality automatically. You can close the dev tools by pressing the F12 key again (or Fn key + F12).

Strange, right? We don’t exactly know the reasoning behind this, but it is most probably related to Instagram thinking we’re using an iPhone, therefore it uploads in high quality automatically.
Stories, Posts, and Reels on Instagram
It is important to get the media size and quality right when uploading to Instagram. Your followers want to see the best version of you.
In case you do not want to share your posts or reels with everybody on Instagram, this is how you can share them only with your close friends.