Are you planning to share the latest sales results or company quarter data using an Excel file? Of course, you won’t want any unauthorized access to such sensitive data besides the top management. The best way to protect such files is via password protection. You can easily add a password to an Excel file on Windows and OneDrive. Here’s how.
Password Protect an Excel File on Windows
There are two ways to password protect an Excel file on Windows. You can either use the default Excel desktop app or opt for OneDrive to add password protection before sharing a link to the file. We will discuss both methods, but first, we will start with the desktop.
Use Microsoft Excel App
After you are done making changes to the Excel file, you have an option to add password protection before saving a copy to your computer. Follow the steps below to password protect an Excel file.
1. Open Microsoft Excel software on Windows.
2. Open the file you want to password-protect.
3. Make necessary changes and click on File at the top.

4. Select Info from the sidebar.

5. Click on Protect Workbook.
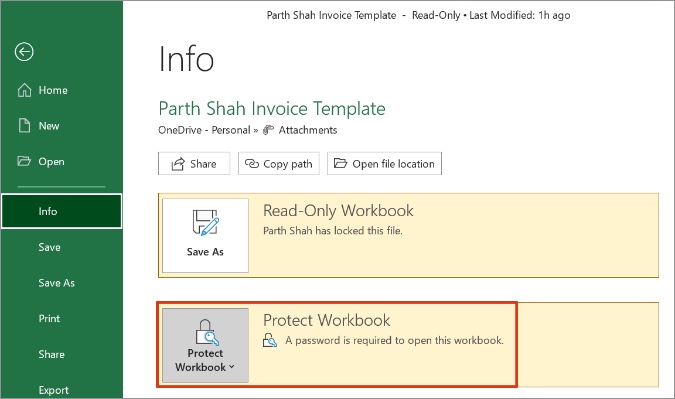
6. Select Encrypt with Password.

Add a password to encrypt the contents of this file and hit OK at the bottom. Do note that if you lose or forget the password, it cannot be reset or recovered.

Reenter the password again and click OK. From now on, whenever you or anyone tries to access the Excel file, the app will present you with a dialog box to enter the password. Type the correct password and hit OK to access the file data.
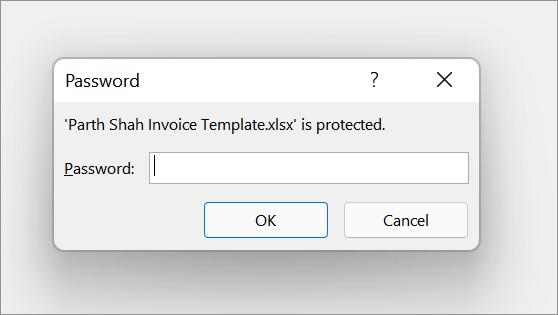
Office 2016-2019 uses secure AES-256 encryption that is unbreakable within a reasonable time.
We would advise you to keep a list of passwords and their corresponding document names in a safe place. You can opt for a dedicated password manager such as 1Password, Dashlane, or LastPass to store sensitive data securely.
Use OneDrive Web to Password Protect an Excel File
Since you are using Excel on Windows 10 or Windows 11, chances are, you are already paying for one of the Microsoft 365 plans.
All Microsoft 365 plans come with 1TB OneDrive storage as well as other goodies for paid subscribers. One such feature is the ability to password protect a sharable OneDrive link. So, instead of sending the file via email, for example, you store it in your OneDrive account and simply share a link to the file that’s protected by a password.
Using that, you can even add an expiry date after which, the file will no longer be available.
Besides, all Microsoft Office apps tightly integrate with OneDrive cloud storage. It is the default storage for every Excel file. Follow the steps below to password protect an Excel file using OneDrive.
1. Visit OneDrive on the web and sign in using your Microsoft account credentials.
2. Find an Excel file from OneDrive and select it.
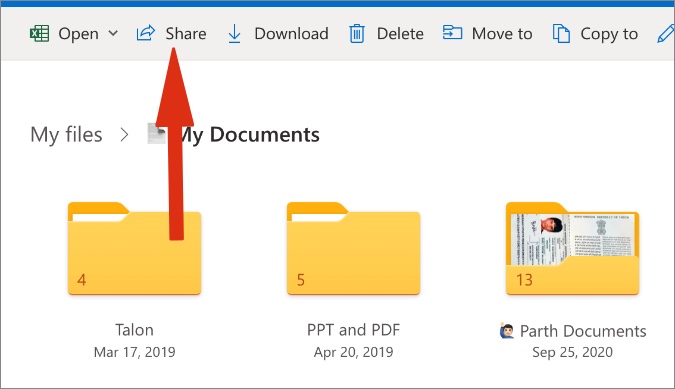
3. Select the Share button at the top.
4. From the Share link menu, click on the Edit button.

5. Select Link settings.
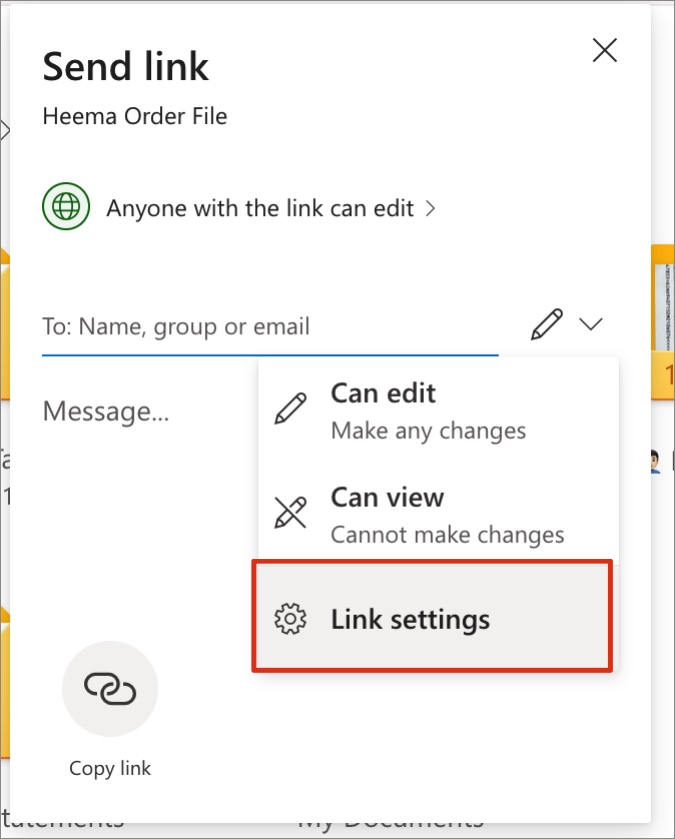
6. From the following menu, you have an option to Set a password.
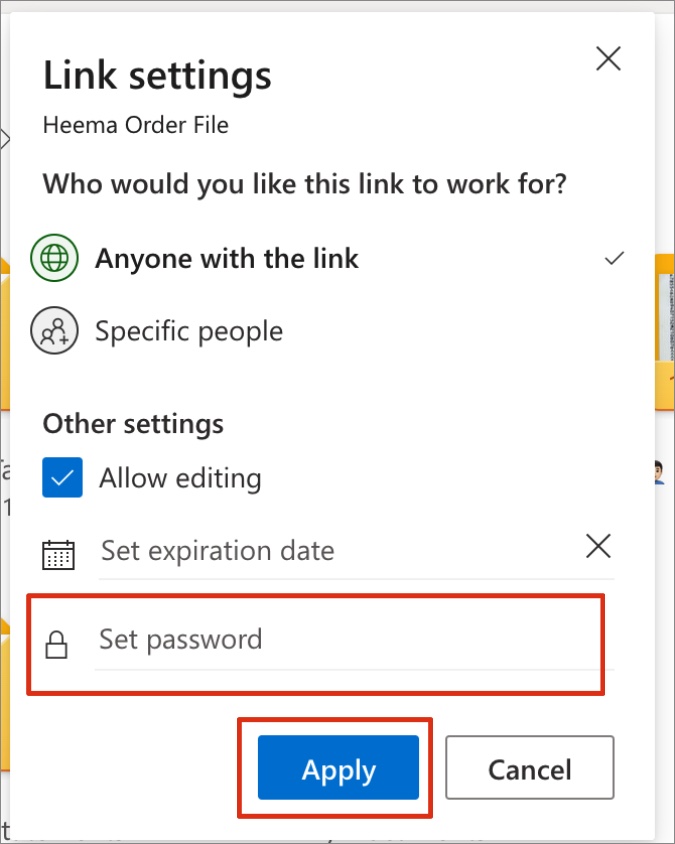
7. Add password and click on Apply button at the bottom. From the same menu, you can set the expiration date as well.
For example, you add an expiry date for a week and after the date/time has come to pass, the OneDrive link will become inactive.
Anyone with access to the OneDrive link will need a password to access the data. Using the same trick, you can add password protection to any file on OneDrive that you plan to share.
Wrapping Up: Password Protect an Excel File
Even though the spreadsheet market is filled with the likes of Google Sheets, Apple Numbers, and newbies like Airtable and Coda, Microsoft Excel remains unrivaled, especially in the business and enterprise sector.
In some cases, it makes absolute sense to protect confidential Excel files. Go ahead, use the trick above and apply brakes to unauthorized access to Excel files with a password.
Did you know you can create an app from an excel sheet that users can download and install on their smartphones?