Editing images is quite easy on Google Docs. However, things become difficult when one needs to manage multiple images, such as keeping two pictures side by side. Don’t worry though. You can put two pictures side by side in Google Docs in three ways – by resizing images, using tables, and from Google Drawings. Each method offers an advantage over the other. Let’s check the methods.
Table of Contents
1. By Resizing Images
One of the easiest ways to add two pictures side by side in Google Docs is by resizing them. The images will then automatically appear next to each other.
Follow these steps to keep images side by side:
1. Open the Google Docs document.
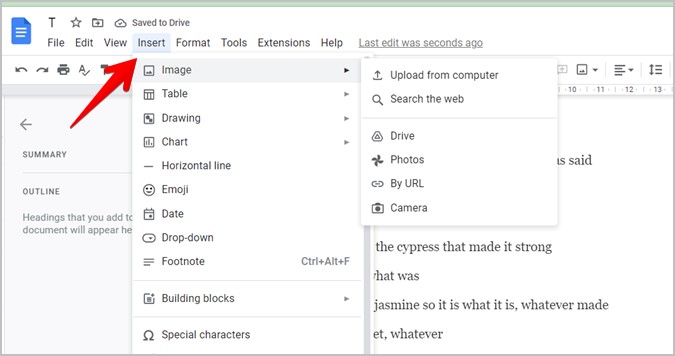
2. Place your cursor where you want to insert the first image. Then, go to Insert > Image. Select the source (computer, web, Google Drive, etc.) from which you want to add the image.
3. Select the image to add. It will show up in the document. Similarly, insert the second image.
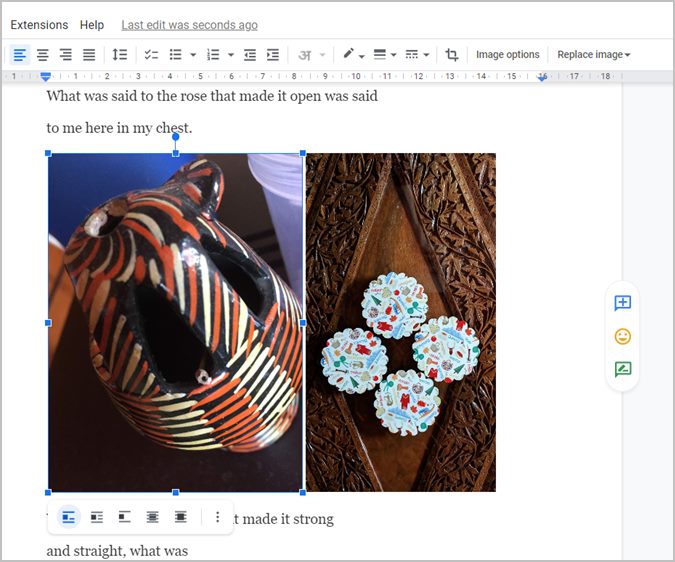
4. Now, click on the first image and using one of the corner edges drag it inside to decrease the size of the image. Similarly, decrease the size of the second image.

5. In most cases, the images will automatically appear side by side when you resize them to the appropriate size. If that doesn’t happen, move the second image next to the first image using your mouse. For best results, make sure the two images are of the same size and the first image isn’t bigger than the second image.
Pro Tip: Right-click on the image to crop and perform other image editing tasks, which can be accessed under Image options.
2. Using Table
The drawback of the above method is that it may not always work as you expect it to due to size issues. Thankfully, you can add two pictures side by side in Google Docs by using tables. This method offers more flexibility as you can resize one of the images without affecting the other image. Furthermore, you can add as many columns or rows as you want and then add an image in each of them.
In this method, you will need to insert a table with two columns and then add an image in each column. Lastly, you will have to remove the table border.
Here are the steps in detail:
1. In your Google Docs document, keep the cursor where you want to place the images.
2. Go to Insert > Table. Select 2×1 table.

3. Keep the cursor in the first column and go to Insert > Image. Select the image from the preferred source.

4. Next, keep the cursor in the second column and again go to Insert > Image to add the second image.

5. After adding both the images in the two columns of the table, you have to remove the table border. For that, hover your mouse over the table and right-click on it. Select Table properties from the menu.

6. Expand the Color section in the Table properties panel that opens on the side. Select Opt in the Table border size drop-down box.

That will remove the border from your table making your images appear side by side.

Pro Tip: Learn how to add a table of contents in Google Docs.
3. Using Google Drawing
If the above two methods don’t suit your requirements, you can use Google Drawing as well to keep two pictures side by side in Google Docs. The benefit of using this method is that the two images will be grouped in the document. Any change that you make to the final image will affect both images. You can resize the pictures and change their text wrapping style as one image instead of two separate images.
This method also allows you to specify how far or near the two images should be in your document. You can even reuse the two images in other Google Docs documents or other Google products that support Drawings. Furthermore, you can even download the two images that are side by side as a collage and use the picture outside of Google products.
Follow these steps to create a Google Drawing consisting of two pictures side by side and insert it into the Google Docs document:
1. In your Google Docs document, keep the cursor at the place where you have to add the images.
2. Go to Insert > Drawing > New.

3. The Drawing panel will open. Click on the Image icon and insert the picture from the desired source like a computer, Google Drive, URL, etc.

4. Again, click on the Image icon in the Drawing panel to add the second image.
Pro Tip: Perform image editing tasks for individual images in Google Drawing only.
5. If the second image appears on top of the first image, move it next to the first image using your mouser. Once the images are side by side, click on the Save and close button.

Pro Tip: Learn how to layer images in Google Docs.
6. The two images will appear side by side in your Google Docs document. As mentioned earlier the images will be grouped. So any editing task that you would perform will apply to both images.

Pro Tip: Create a collage on your computer with two pictures side by side and then add the collage to your Google Doc.
Edit Pictures in Google Docs
After putting two pictures side by side in Google Docs, learn how to add text to images. You can use the text to watermark the image or annotate it. And, if you like images in a document, know how to download images from Google Docs.