We all scan documents every now and again. Smartphones, thankfully, have eliminated the need for bulky scanners to digitize documents, making the process far simpler. In this article, we’ll go over the best possible ways to scan documents on your Samsung Galaxy phone. So, let’s start.
Table of Contents
1. Scan Documents With the Camera App
If your Samsung phone is running One UI 2.0 or later, you won’t have to look far to scan documents as the Camera app comes with a scanning feature. Although the feature comes pre-enabled on your Samsung phone, it never hurts to double-check in case you’ve disabled it.
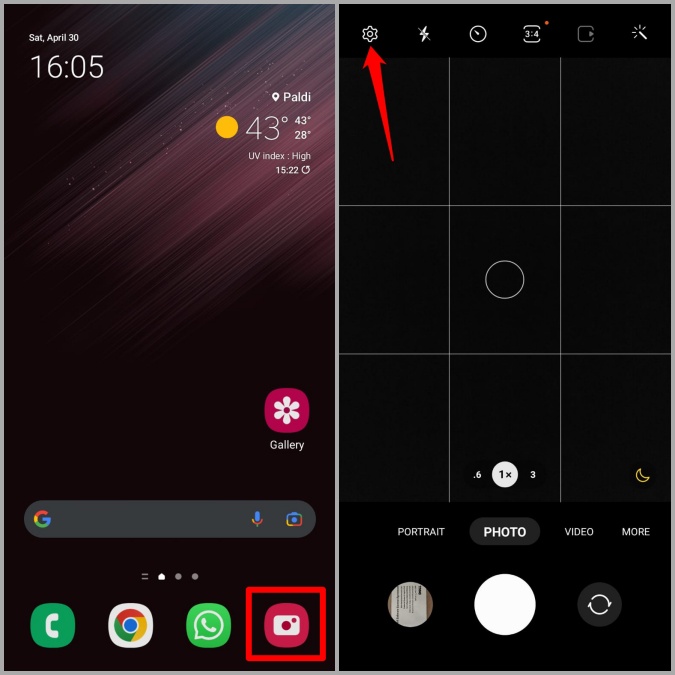
1. Launch the Camera app on your phone and tap the gear icon in the top left corner to open settings.
2. Go to Scene optimizer and enable the switch next to Scan documents.
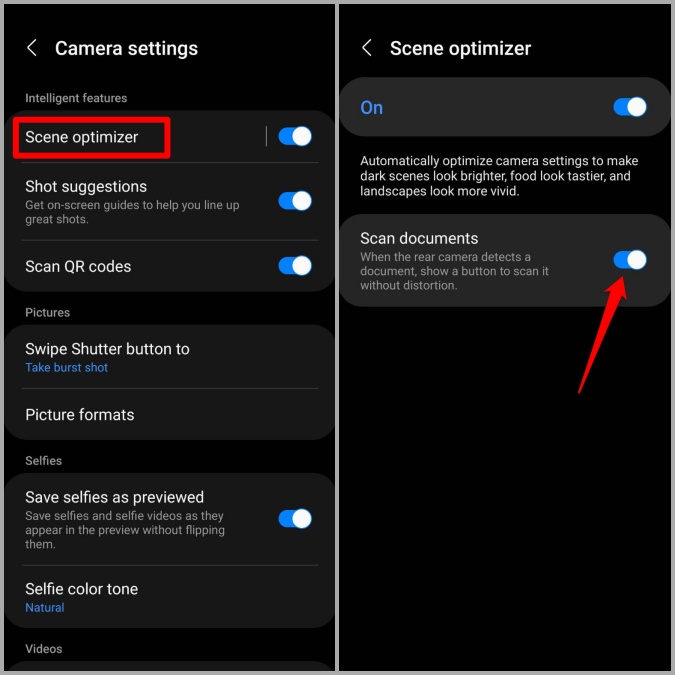
Once enabled, you’re all set to scan documents with the camera app on your Samsung Galaxy phone. Here’s how.
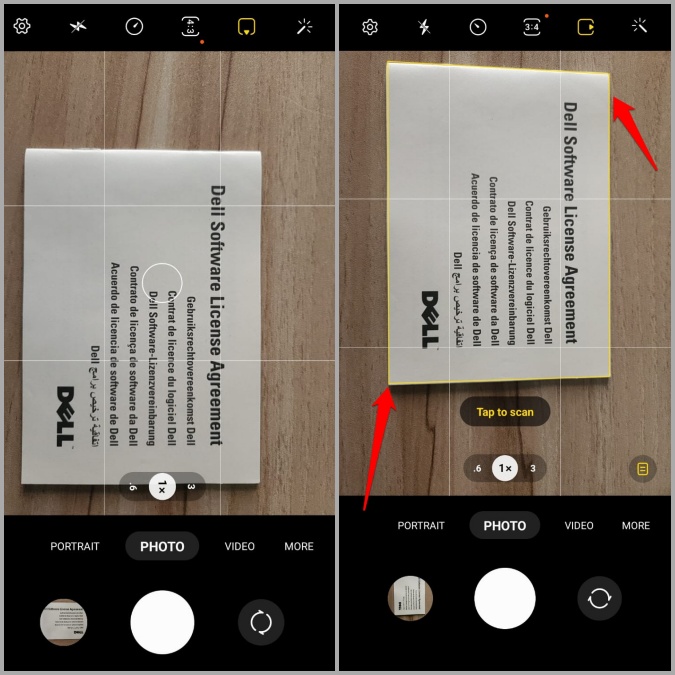
1. Open the Camera app and point it towards the document you wish to scan. As you do that, the Camera app will automatically highlight the document with a yellow border and give you an option to scan.
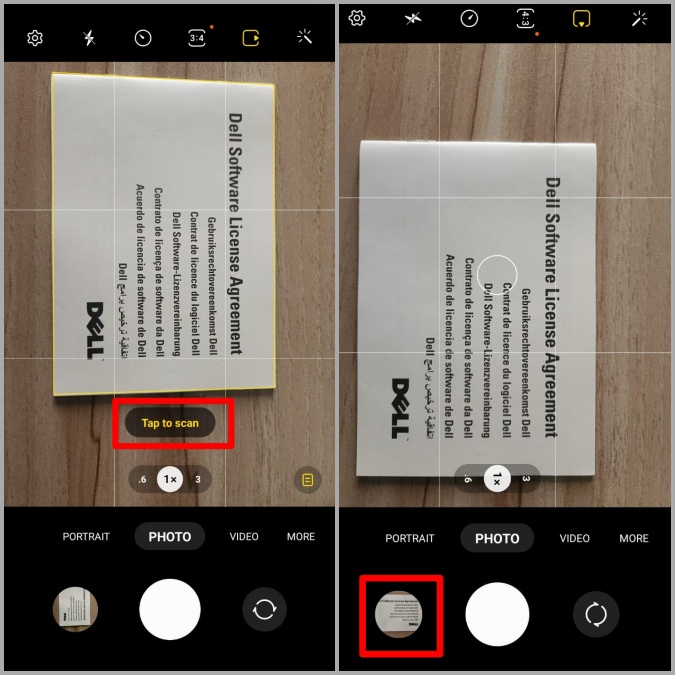
2. Choose Tap to scan to capture your document. After that, tap on the thumbnail image in the bottom left corner to review your scan.
3. Adjust the borders around the document to improve accuracy and hit Save.
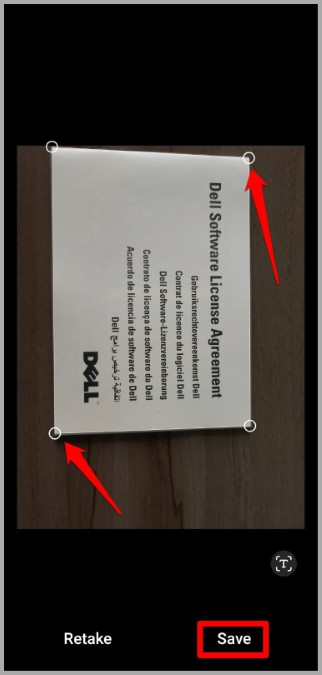
Alternatively, if you’re not satisfied with the result, tap on Retake to scan the document again.
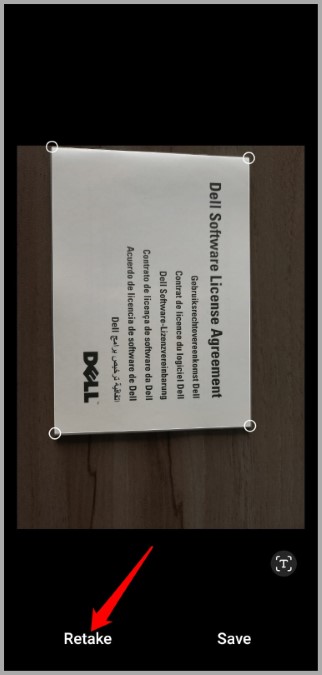
And that’s about it. Your scanned image will be saved in the Gallery.
2. Scan Documents With Microsoft Office App
While the Camera app on your Samsung Galaxy phone is quite efficient when you just want to scan one odd document, the app doesn’t offer an option to scan a multipage document. For that, you can turn to the Microsoft Office app, which by the way comes pre-installed on your Samsung Galaxy phone thanks to the long-standing partnership between Samsung and Microsoft.
Here’s how you can use the Microsoft Office app to scan a multipage document.
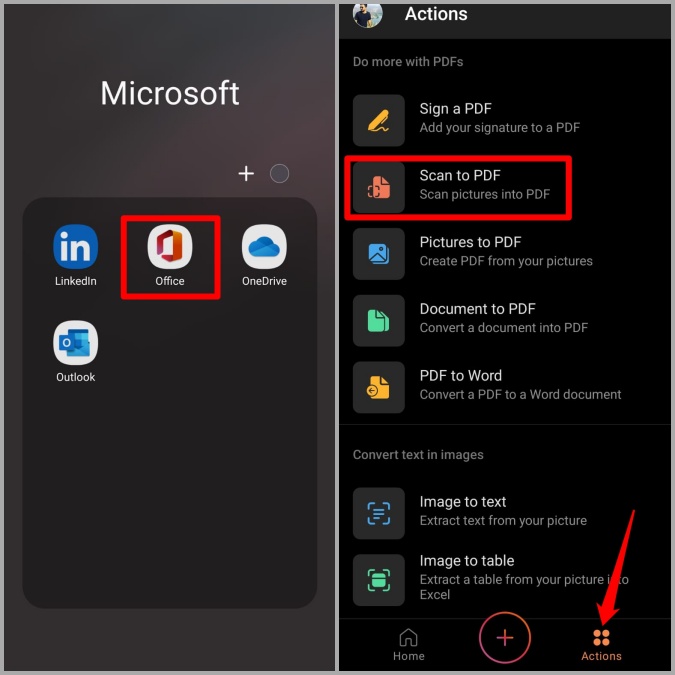
1. Launch the Microsoft Office app on your phone. Navigate to the Actions tab and tap on Scan to PDF.
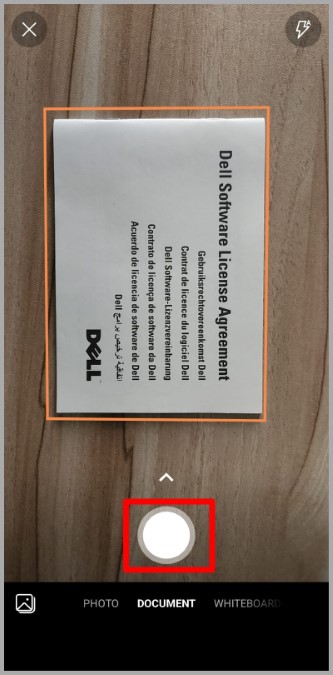
2. Point the camera towards your document and tap on the capture button once the app highlights your document.
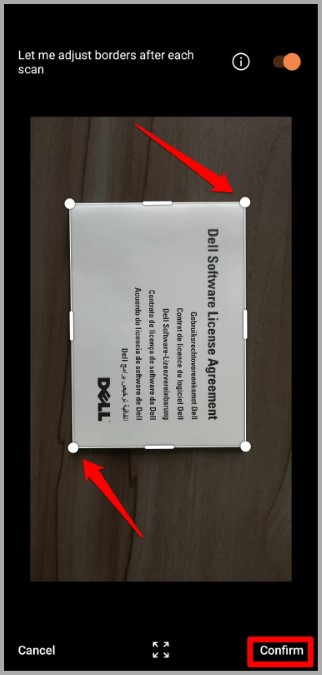
3. Make minor adjustments if required and then tap on Confirm.
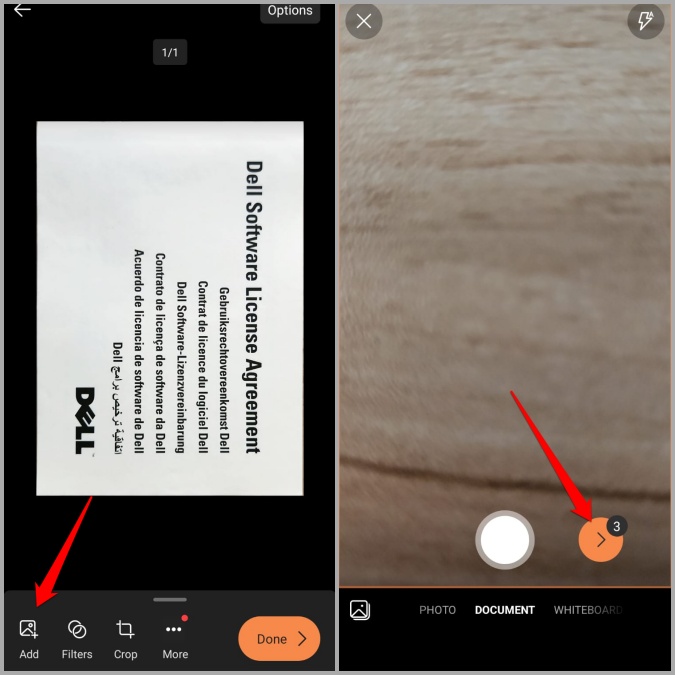
4. Now tap on Add button at the bottom to scan the rest of the pages. Once you’re done scanning all the pages, tap on the forward arrow to continue.
5. You can use the tools at the bottom to crop, rotate, or reorder pages if you like. After that, tap on Done to save your document.
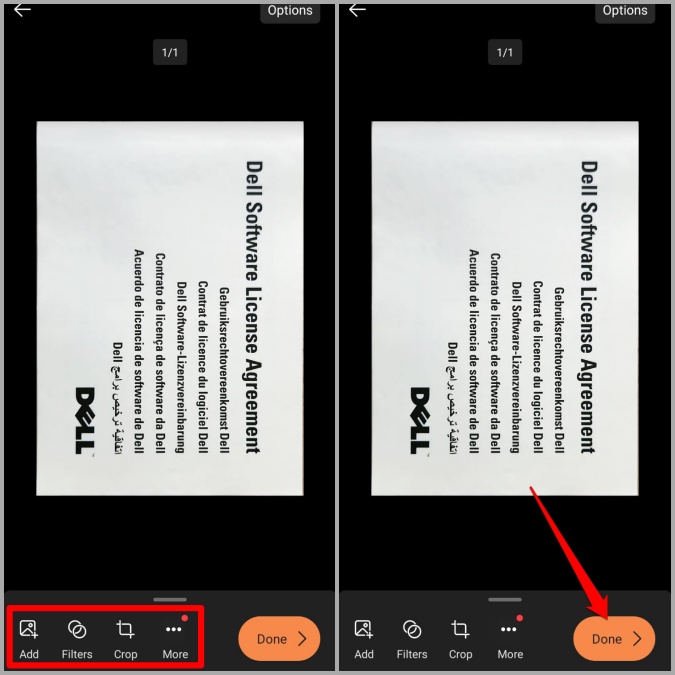
That’s it. Your document is ready for sharing.
3. Scan Documents With Google Drive App
Although Microsoft Office has several scanning features, it may not be the most practical choice for you if you’re hooked to Google’s products and services. In that case, you can use the Google Drive app on your phone to scan documents.
1. Download and install the Google Drive app if you haven’t already.
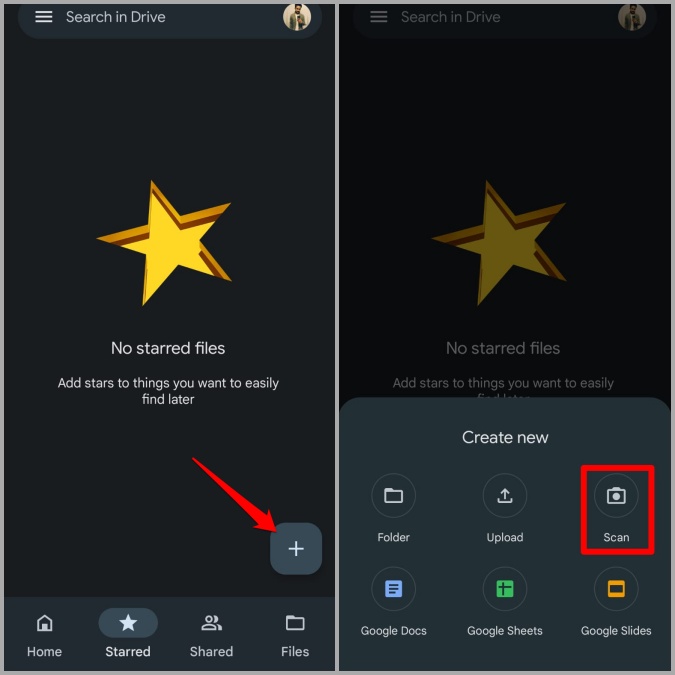
2. In the Google Drive app, tap on the Plus icon in the bottom right corner and select Scan from the menu that appears.
3. Capture a photo of the document with the camera. Next, tap on Retry if you wish to scan it again. Or else, tap on OK to continue.
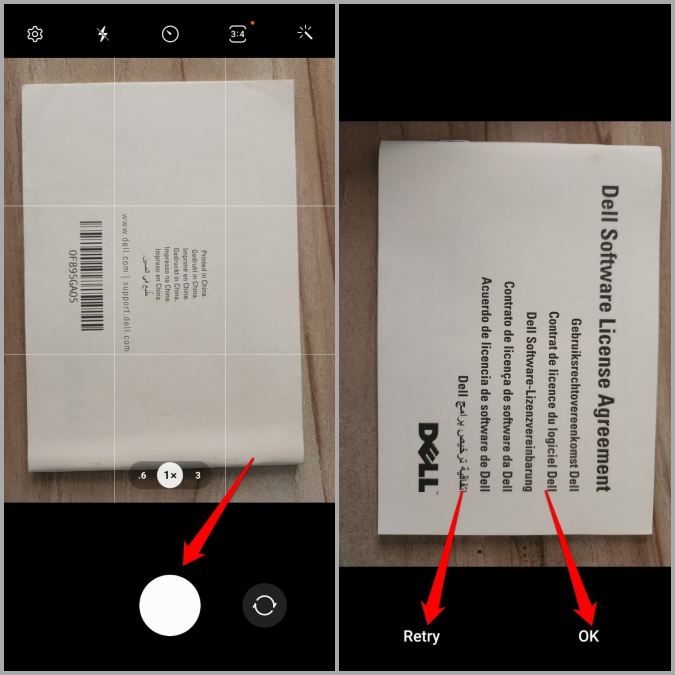
4. The app will automatically crop and scan the document. Tap on the Plus icon in the bottom left corner to scan more pages.
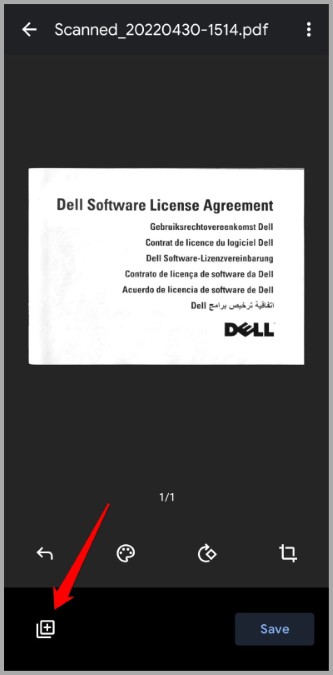
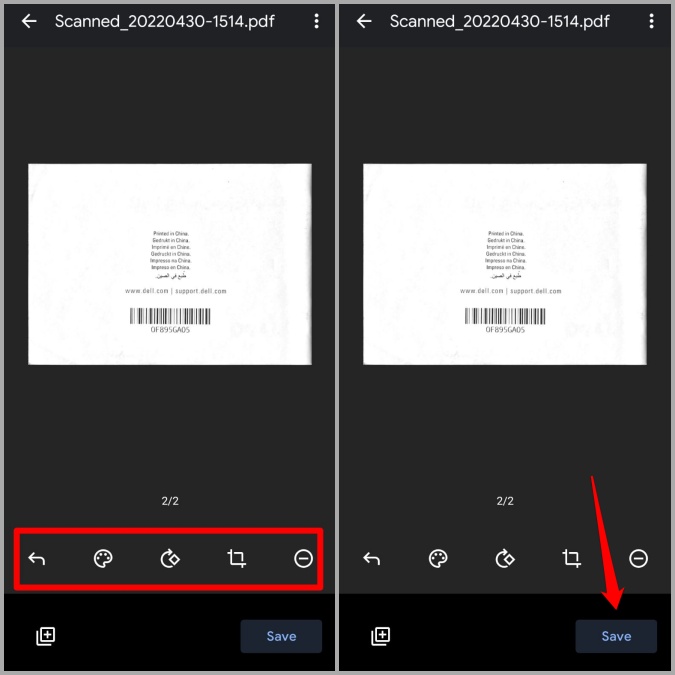
5. After scanning all the pages, use the tools at the bottom to make rotate, crop, or remove pages. Then hit Save.
6. Give your document a suitable name and hit Save again.
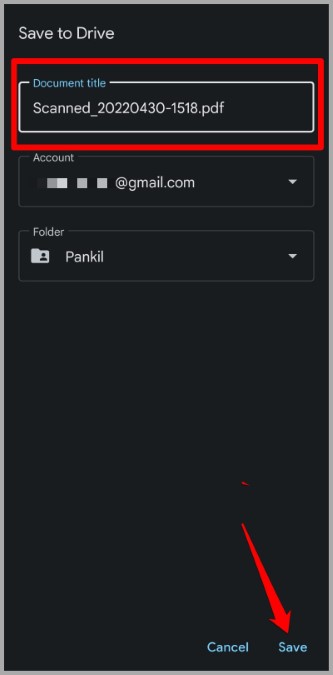
And voila! Your scanned document will be uploaded safely into the Google Cloud.
Tap to Scan
So, those were the best possible options for scanning documents on your Samsung Galaxy phone. Each method has its own benefits. If you’re just looking to scan a single page, the camera app is the quickest way to scan things. However, it only stores your scanned documents as an image. So, you’ll need to take extra steps in order to convert those images into a PDF. If you need to scan documents on a regular basis, you’re better off with Microsoft Office or Google Drive depending on which ecosystem you prefer.