Instagram’s constant feature updates have turned it into a stand-alone social media and marketing ecosystem. Users can set up shops, raise money for a cause and even launch products on Instagram. If you are a brand or an influencer finding it difficult to manage all accounts, you can use tools like Planoly to do it for you. What is Planoly? It’s a visual Instagram tool that we discovered recently. Let’s begin!
Beginners’ Guide to Use Planoly
What is Planoly?
Planoly is a tool that will put rest to most of your Instagram feed needs. It allows you to schedule posts, save multiple ideas as drafts and even schedule your Instagram stories. It has officially partnered with Instagram which gives it additional control over marketing tools and analytics.
Apart from that, there’s a hashtag group feature. It allows you to categorize hashtags according to types.
How to Sign-up to Planoly
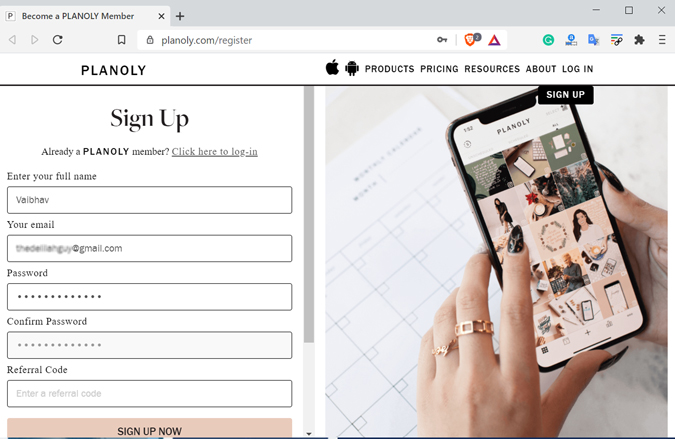
Signing-up for Planoly is easy. Simply head to the Planoly sign-up page and key in your basic details along with your e-mail ID. There is also a slot for a referral code if you have any. This gives you free credits that can be redeemed when you upgrade to a paid plan.
1. Once done, click on Sign Up Now at the bottom.

2. You will be required to link your Instagram account in this step. To do that, select Link Instagram and click on Link Via Instagram (bottom) on the next page. Doing this will redirect you to Instagram’s authentication page. Simply type your login info or use Facebook credentials.

3. In the next step, select the most suited description which will allow Planoly to create a better Instagram profile. You can choose from multiple options like Freelancer, Publisher, Service, etc. In addition, you will also be asked your level of social media experience to personalize the experience.
I am sure this won’t affect the feature list or experience in any way, but there is no option to skip the step before accessing your dashboard.

4. Planoly’s homepage is your dashboard. It is similar to the Instagram UI with your feed on the left. You can scroll to see all your posts or quickly toggle to see scheduled and unscheduled posts in the same tab.
Instagram stories have a different section on the top left corner. You can simply click on Stories to access the stories section.

How to Schedule Posts on Planoly
I believe if you are looking at an Instagram tool, you publish a lot of posts each day. With the scheduler feature, you can simply upload and set a time for multiple posts. Thus, this not only automates most of your work but also gives you time to be consistent with it. Scheduling a post is easy on Planoly. Let’s see how it is done.
Once you schedule a post, you will get a notification at the specified time on the app. You must approve it to publish the post. Another alternative is to get a business account to enjoy the auto-post feature.
1. Click on + Add to Grid on the top left corner of the feed.

2. From the source selection pop-up, choose an option of your choice. Then browse to the picture and hit Open to upload the picture.

3. You will see a preview of the picture you uploaded. Click on Upload as 1 Post if you only have one picture. Furthermore, you have the option to upload pictures as a swipeable carousel.

You will be able to view the picture in your profile grid. Remember the picture hasn’t been uploaded yet. We have simply uploaded a draft and still need to schedule the post.
This way, you can add multiple pictures to your feed without publishing them. It works great when you have to get an idea of how the feed will look once your picture is published.

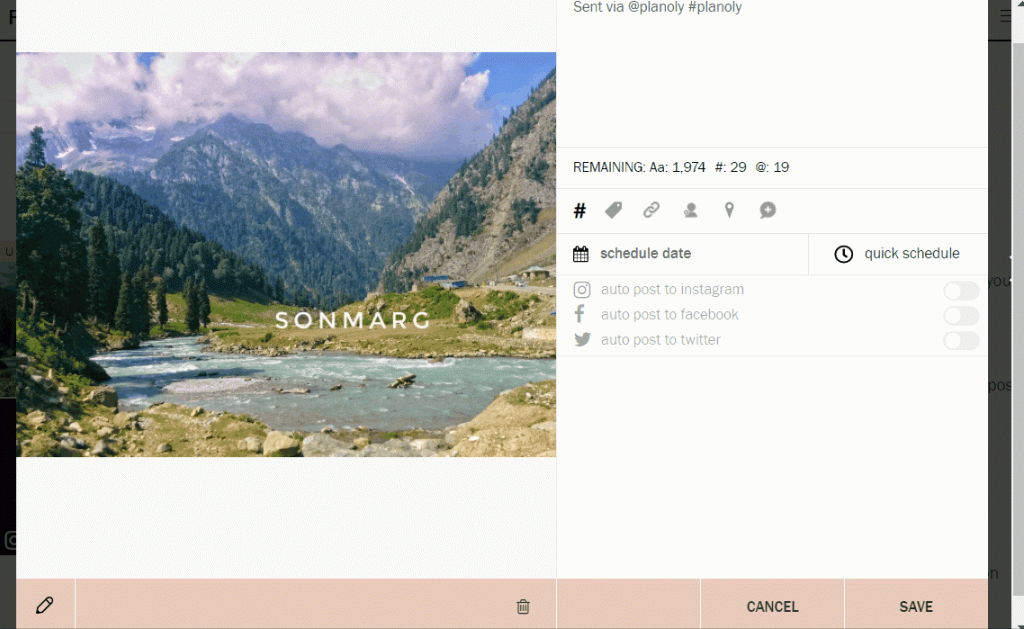
4. Next, click on the picture to see the preview again. In the preview window, you can write posts’ descriptions, add hashtags, location, etc. We are now going to schedule our post. To do that, simply click on Schedule date, then select a date and time. Once you’re finished, click on save at the bottom, and you are done.
Remember, you must have the Planoly app installed on your phone as well. At the set time, you will get a custom notification with a post now button.

5. You can also edit your photos before posting them. Although the photo filter section is locked for pro users, you can crop the photo with presets. This comes in handy when you are not sure about the aspect ratio. There is a download button as well if you wish to save the photo in the future.
The photo edit section can be accessed from the pencil icon at the bottom left corner of the preview window.

How to Create a Hashtag Group on Planoly
Another interesting feature that I think will add a lot of efficiency to your Instagram game is the Hashtag Group feature. If you use hashtags from various categories like travel, photography, and tech, this will solve most of your problems. You can easily create hashtag groups and use them without the need of typing them again and again. Here’s how it’s done.
1. Go to the Plan tab (homepage) and click on the hashtag icon on the top left corner of the screen.

2. Click on Create New Group to create a hashtag group.

3. You can give a category name in this window and add mentions and hashtags. Remember you are restricted to 30 hashtags and 20 mentions. Once you are done, click on Save at the bottom.

You can follow the same steps and add multiple hashtags categories. When you upload a photo, you have the option to add these hashtags with a single click. Apart from that you can edit these anytime and copy them to the clipboard as well.

Planoly’s Tabs Overview
These are several main tabs that you’re going to use. You can toggle them from the top right corner of the page. Since some of these features exclusively work for business accounts, I recommend switching to make full use of them.
Plan – This is the main canvas. It shows your scheduled posts in a calendar-like style. The same tab we used to upload our pictures, stories and schedule them.

Drafts – This is a dedicated tab where you can view all your drafts. Similar to the hashtag groups, you can create one for drafts too. It is a great way to categorize pictures. This helps you to schedule similar or varied types of posts over time.

Discover (Business) – This feature is only useful for accounts that are into reposting. For example, if you have a travel page, you can search for specific users, hashtags, stock photos and post them straight away on your feed. Planoly tags the original creator of the content. However, I suggest double-checking as these posts can be copyrighted too.

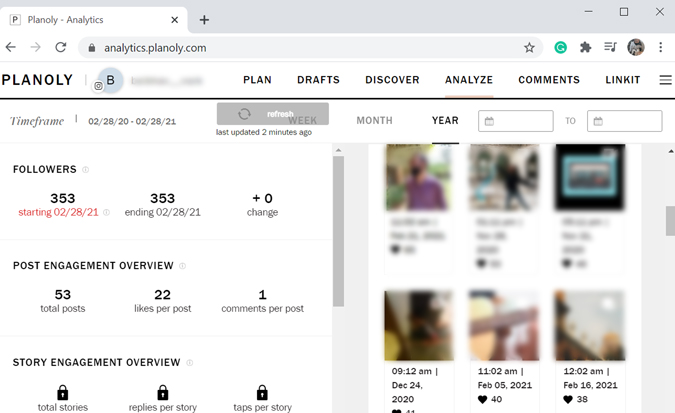
Analyze (Business) – Although limited with the free account, you can still view basic analytics about your profile. For example, you can view audience engagement, filter data by week, month year, export data to a CSV file, etc.

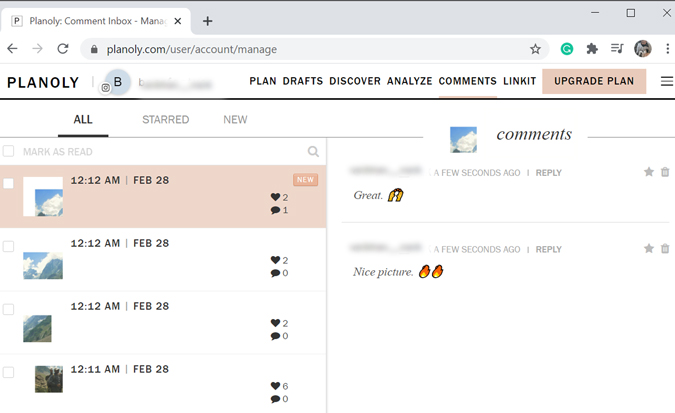
Comments (Business) – In the free plan, you can reply to and manage comments for up to 5 of your latest posts.

LinkIt (Business) – A great tool for brands to promote their products. This feature allows you to create a gallery of your Instagram posts. You can link products, links and redirect users to your virtual store. The best part? It’s a free feature.

Planoly’s Plan Comparison
If you are using Planoly for your personal Instagram account, the free version will most likely suffice. There are several restrictions that you must consider. You are restricted to 30 posts per month and are only restricted to photos. So if your profile is GIF or video-heavy, I suggest upgrading. Moreover, the free version does not allow you to share on Twitter or Facebook.
Apart from that if you like applying filters, consider using the Instagram app. As the picture filters are only supported for the paid versions.
| Multiple Insta Profiles | Image Support | Video/GIF | Quick Schedule | Share to Facebook | Cost/pm | |
| Free | 1 | Yes | No | No | No | Free |
| Solo | 1 | Yes | Yes | Yes | Yes | $9 |
| Duo | 2 | Yes | Yes | Yes | Yes | $19 |
| Custom | 2+ (Extra cost) | Yes | Yes | Yes | Yes | $29 |
Closing Remarks: Should You Use Planoly for Instagram
Planoly is a great tool to manage your Instagram accounts and is definitely worth a shot. Its visual approach allows any user to get used to the interface in no time. Over and above, the only issue I faced while using Planoly was with the stories tab. The app couldn’t connect to Instagram for some reason. However, I think it is just a temporary issue and there is nothing to worry about.
Also Read: INSSIST Chrome Extension: Upload Videos to Instagram From Chrome Browser