Twitch panels are a great way to promote your merchandise while streaming. Mostly, these panels include links to your social media accounts, donation options, merchandise, etc. But Twitch also supports extensions that helps bring the Twitter feed directly to the Twitch panel. That way, instead of just linking to Twitter profile, you can actually display your latest tweets right on Twitch. Here’s how to add Twitter profile and add Twitter panel to Twitch.
How to Create a Twitch Panel Linking To Twitter
To create a normal Twitch panel that links to social media sites like Twitter:
1. First, you need to create the panel that you want to link to Twitter. One easy way is to use a third-party Twitch panel maker like NerdorDie.
2. On NerdorDie home page, click on the Tools menu and then select Twitch Panel Maker in the drop-down.

3. Here you can find templates or options to create the panel from the scratch. Select the Free Templates option.
4. Now select a panel design from the list of templates provided.
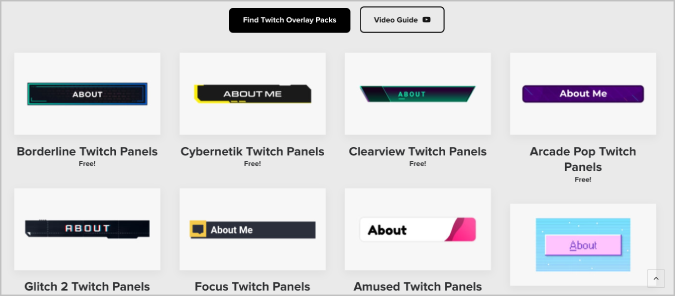
5. On the next page, click on Add to Cart.
6. Now open the Cart icon at the top right corner and Checkout.

7. You don’t have to provide any payment details. You just need details such as email id and address. As this is not a physical product, you can fill it with the wrong details if you prefer.
8. Once done, you will get an option to Download. Click on it.

9. Open the downloaded zip file and extract it.
10. Now open Twitch > Profile Pic > Channel > About Section and enable the Edit panels toggle. Then click on the Plus + box below it.

11. Now select Add a Text or Image Panel.

12. Click on Add image button and select the Twitter image from the extracted folder.
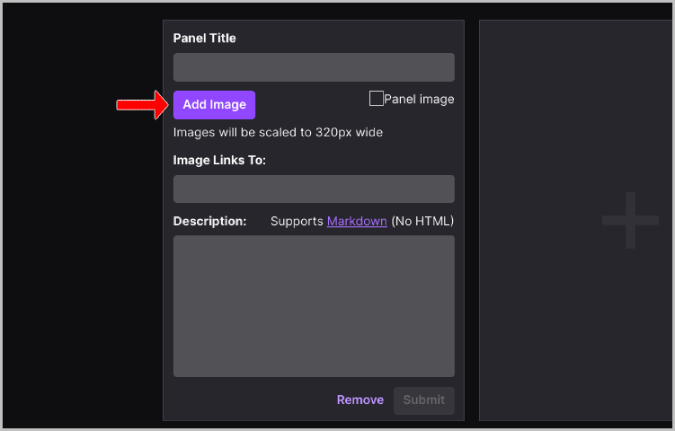
13. Then paste your Twitter account link in the Image Links To section. Once done, click on Submit.

That’s it, now everyone on your stream can scroll down and access the Twitter panel that you just added. Clicking on that panel will open your Twitter profile.
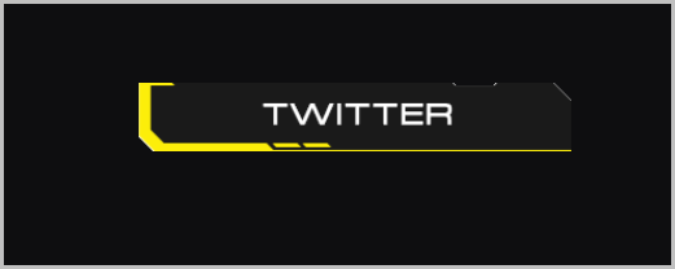
If you like to add other social media panels, make sure you are consistent with the template for an official look.
How to Create a Twitch panel with the Twitter Feed
To place the Twitter feed directly on the Twitch panel itself,
1. Open Twitch > Profile Pic > Channel > About Section and enable the Edit panel toggle.
2. Now click on the Plus + box below it.
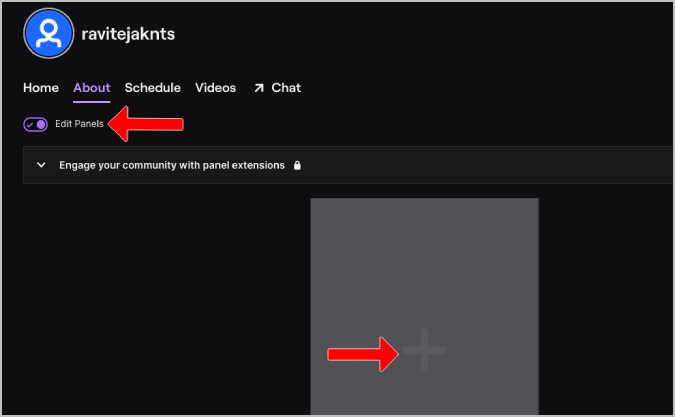
3. Here select the Extension panel option.
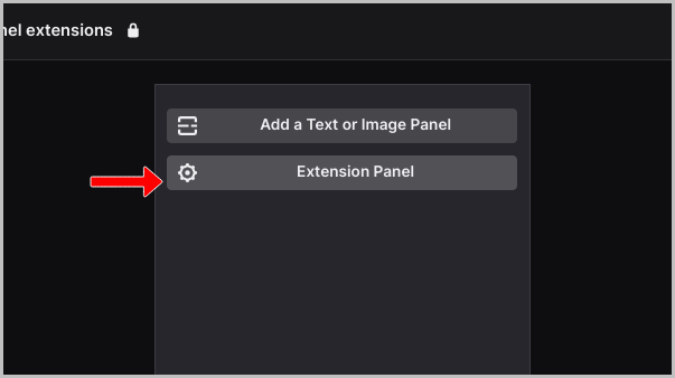
4. On the created panel, click on the Extension Manager button.
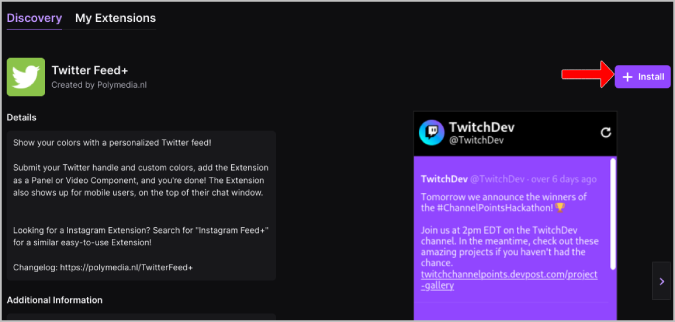
5. Now under the Discovery feed, search for the Twitter Feed + extension and click on it. Alternatively, you can also use this link to open the Twitter Feed + Twitch extension.
6. Here, click on the + Install button to install the extension.
7. In the pop-up, click on the Configure button.
8. Then enter your Twitter username and adjust the colors of the Twitch panel. Once done, click on Save.

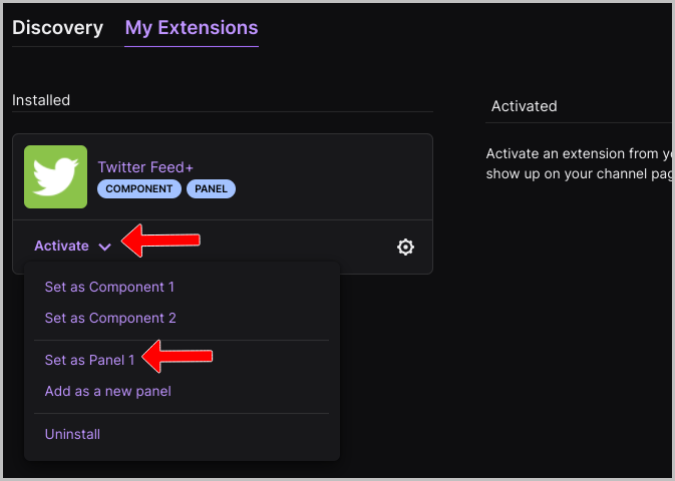
9. Twitter Feed + extension will be listed under the My extensions section. Just click on Activate and select Set as Panel 1 in the drop-down. If you already have more extension panels, select the panel number accordingly.
That’s it, now you can find the Twitter feed directly on your Twitch account. There is a scrollbar to view more tweets.
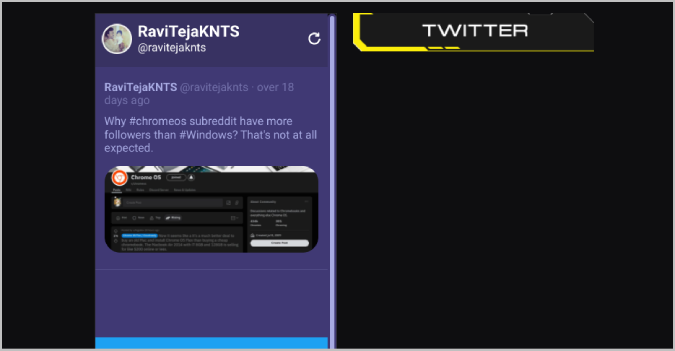
Subscribing to Twitter Feed + Premium subscription will provide you with more customization features like hover colors, custom headers, etc.
Twitter Panel on Twitch Channel
You can use either way to promote your Twitter handle while you are streaming. One way will provide a clean link that will help people to open your Twitter handle, and the other way will provide your latest tweets directly on Twitter. Anyhow, this will only show tweets and retweets on your profile, not your replies. Apart from NerdorDie, you can also try out other Twitch Panel Maker sites for more templates.