On the iPad, you can take handwritten notes, and it also supports the conversion of handwritten text to typed text. If you are looking to use handwriting to text mode on iPad, check the following tips for a better experience. The following tips work for both generations of Apple Pencils.
Table of Contents
1. Enable or Disable Scribble
The first thing that you must do in order to convert handwriting to text in real-time on the iPad is to enable Scribble. Your iPad must be running on iPadOS 14+ to use this feature.
Open Settings on your iPad and go to Apple Pencil. Enable the toggle next to Scribble. In case you don’t want to use this feature, turn off the same toggle.
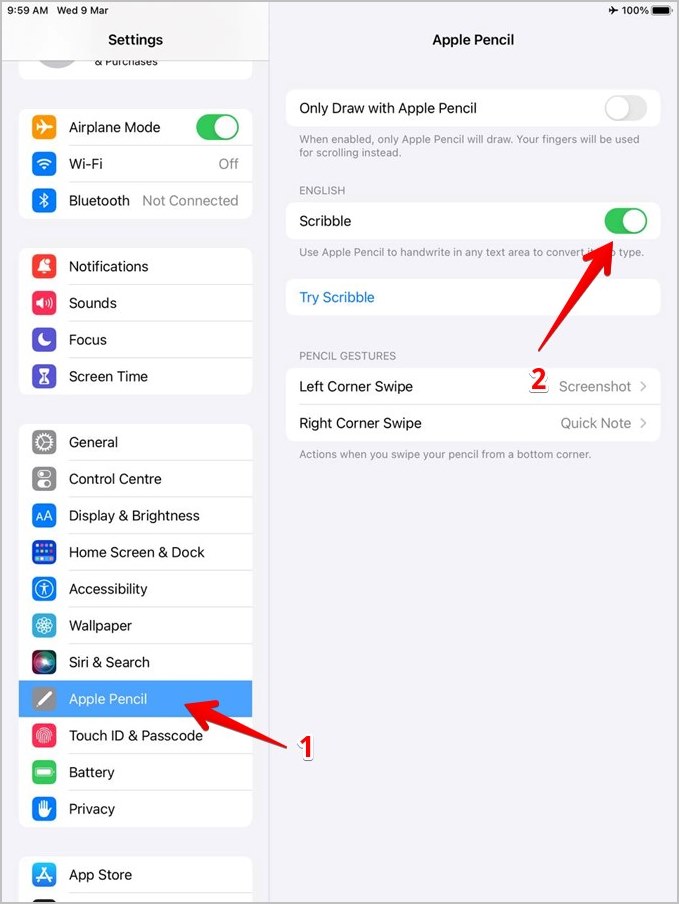
Note: In case of Scribble doesn’t work properly on your iPad, make sure your keyboard’s language is set to English or one of the supported languages.
2. Write in Any Text Field
There’s a general misconception that handwriting to text feature works in the Apple Notes app only. However, that’s not true. You can write in any text field in supported Apple apps such as Reminder, Email, Pages, Safari, etc. For that, simply, start writing in the text field using Apple Pencil. Once you start writing, you can write beyond the edges of the text box as well.
Sadly, Scribble doesn’t work in popular apps like OneNote, Google Docs, or Microsoft Word.
3. Use Action Toolbar
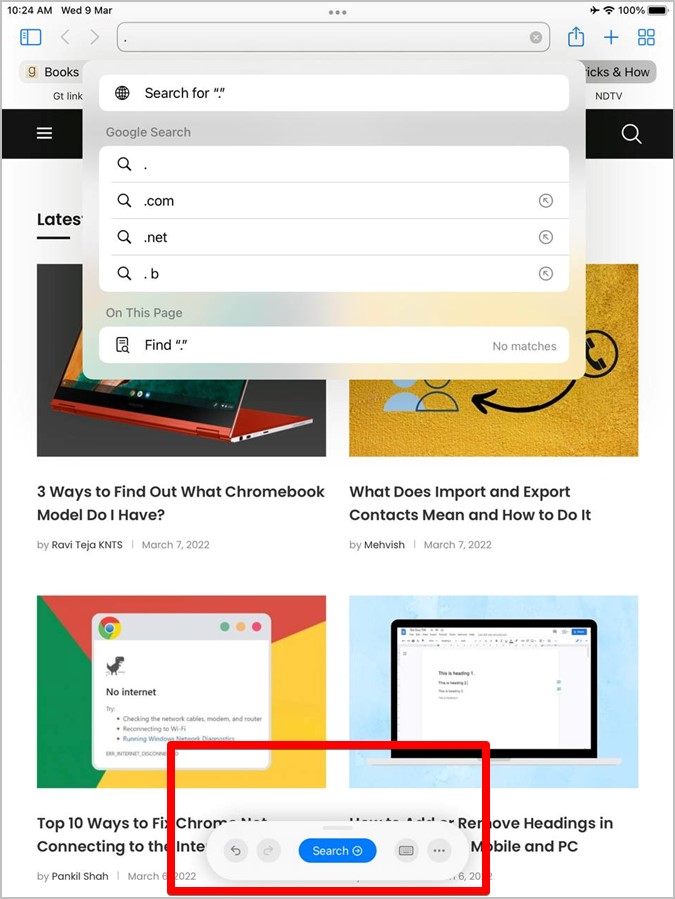
When you are writing using Apple Pencil, you will see an action toolbar at the bottom of the screen. The tools in this toolbar vary according to the app that you are using. For instance, you will see a big Search button in Safari and formatting icons in the Pages app. Some of the tools that remain constant are Undo, Show keyboard, and Apple Pencil settings.
4. Auto Minimize Toolbar
While the action toolbar is quite helpful, it can get a bit annoying if it continues to stay on the screen when you don’t need it. To avoid that, you can minimize the toolbar automatically. For that, tap on the three-dot icon in the action toolbar and enable the toggle next to Auto-minimize.

Pro Tip: To show the full version of the toolbar when you need it, tap on the minimized version.
5. Write Handwritten Notes in Apple Notes App
One of the widely-used apps for writing handwritten notes is the Apple Notes app. Follow these steps to take handwritten notes in it:
1. Open a new or existing note in the Apple Notes app.
2. Tap on the Markup toolbar icon at the top.
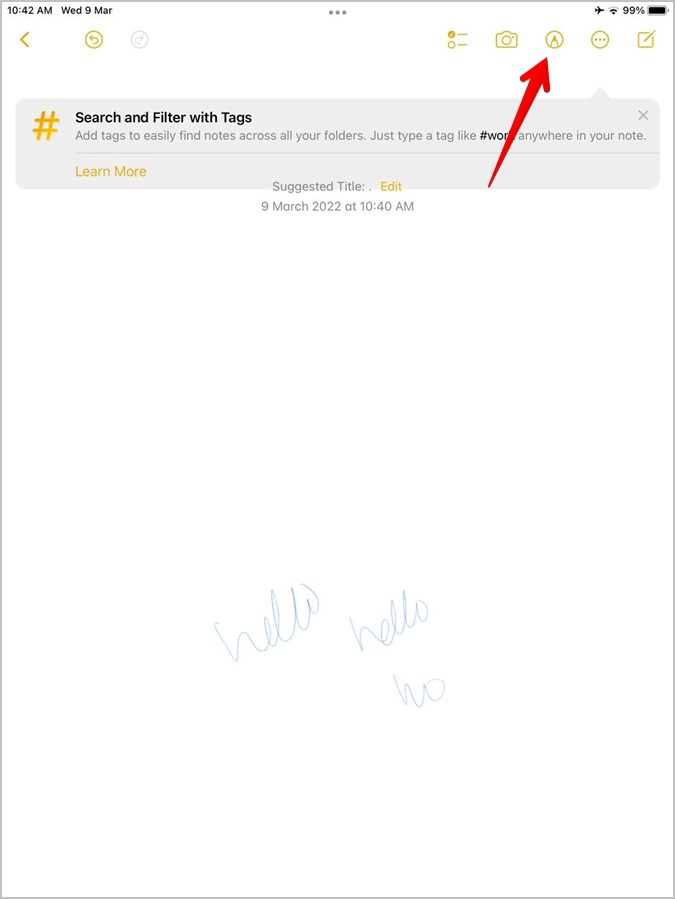
3. Tap on the floating Pen button at the bottom to expand it.
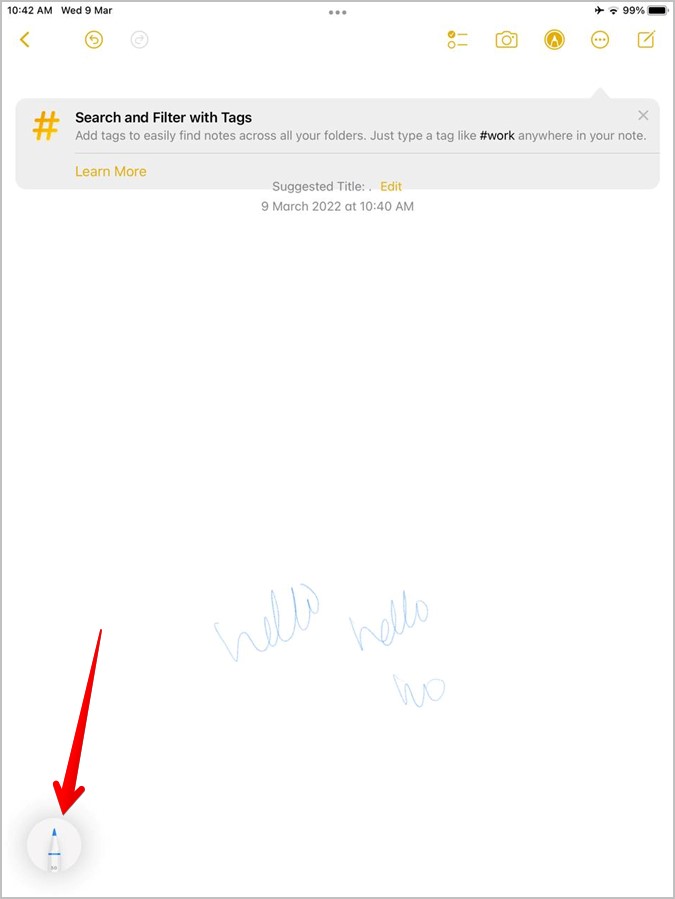
4. Tap on the Handwriting pen that says A to activate the Scribble mode.

Now, write anywhere on the screen and the iPad will automatically convert handwriting to typed text.
Tip: Check out how to use the Quick Notes feature on the iPad.
6. Edit Handwritten Text
Once the handwritten text is converted into typed text, you can edit it using the following techniques.
- To delete a typed word, scratch it out using the Apple Pencil.
- Draw a vertical line between the characters to join or separate word or characters
- Touch and hold the text area where you want to insert more text. Write in the space that shows up.
7. Select Text
There are multiple ways to select the typed text after it has been converted from handwriting.
- Double tap a word to select it
- Draw a circle around the text using Apple Pencil to select it.
- Underline the text with Apple Pencil.
- Triple-tap a word or at the start of the line/paragraph to select it.
- Drag Apple Pencil over the paragraph.
8. Convert Normal Handwriting to Text
You can also convert an existing normal handwritten note to a typed note. For that, select the handwritten text by double-tapping on it. A pop-up will show up. Choose Copy to text from the menu. You can then paste this copied text into the same note or a different app where it will be converted into a regular or transcribed text.

9. Translate Text
If you wish, you can translate handwritten text into another language quite easily. For that, select the desired text first and then tap on the Translate option in the pop-up menu.

A Translate window will open allowing you to select the new language, copy translation, or add it to favorites.

Tip: Know about the best translation apps for iOS and Android.
10. Move Handwritten Text
To move the text, you must select it first. You can do it by double-tapping the text or by using the Lasso tool.
To activate the Lasso tool, open the Markup toolbar in the Notes app and then tap on the Lasso tool (present between eraser and ruler). With the Lasso tool active, draw a circle over the desired text. Drag the selected text to the new position.

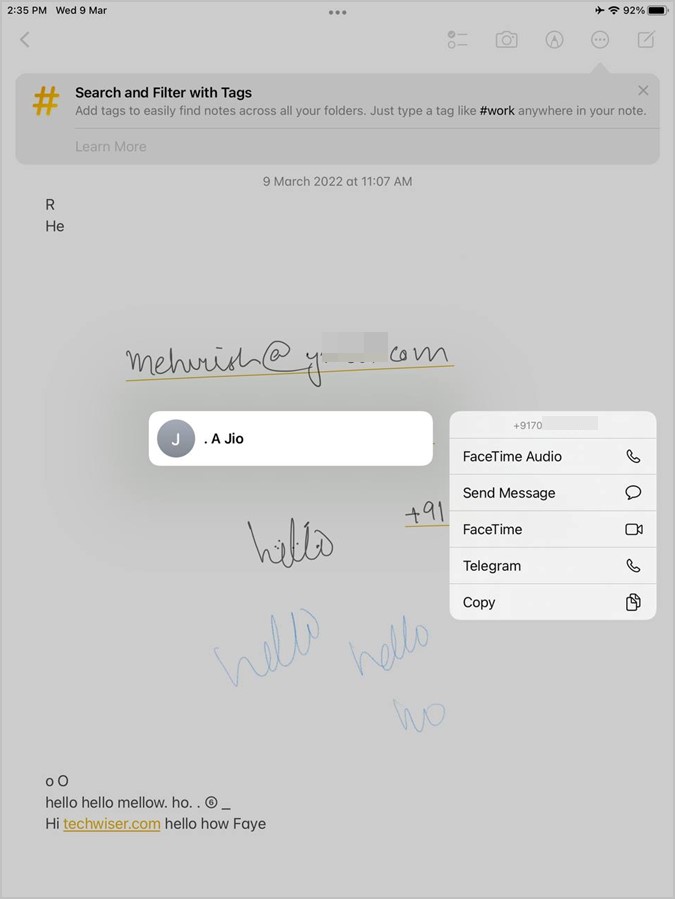
11. Take Action on Important Data
When you write informational data like phone number, dates, address, email, etc., your iPad will detect the information and show a yellow underline below the handwritten text.

Tap on the text to open the associated app or to show the relevant options.
Bonus Tip: Draw Perfect Shapes
When you are taking handwritten notes, you can draw perfect shapes using Apple Pencil. For that, draw a shape, and when you are about to finish, stop and hold the Apple Pencil at the finishing point for a few seconds. The irregular shape will automatically be converted to a perfect shape. You can draw straight lines, squares, circles, rectangles, arrows, stars, etc., using this trick.
Celebrate Your iPad
The handwriting-to-text features using Apple Pencil on iPad are quite helpful. Do check out the best handwriting apps and the cool note-taking apps for iPad. Also, learn how to use the iPad as a second monitor for PC. If you are into customization, check amazing tips to customize iPad’s home screen.