Over the years, I have found a good number of Chrome extensions that I love to use. But they cluttered my extension panel. Though I can uninstall and reinstall anytime, it’s not really an answer. One easy way to deal with such a situation is to just disable Chrome extensions so they don’t clutter the panel. The steps are the same for Mac, Windows, Linux, and ChromeOS. Let’s begin with Chrome’s native method to disable extensions and then some more novel solutions.
Table of Contents
How to Disable Chrome Extensions Natively
The native way to enable or disable extensions on Chrome is not intuitive, not quick, but gets the job done. Useful if you don’t enable/disable extensions frequently.
1. Click on the extension icon at the top right corner to open the extension panel.
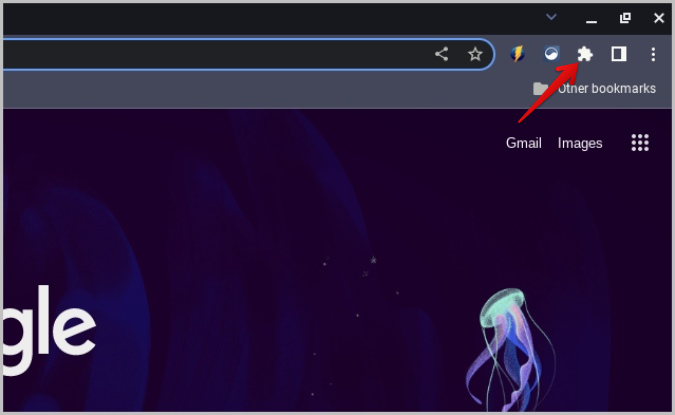
2. Here click on the kebab menu (three-dot menu) beside the extension that you want to disable.
3. In the menu that opened, select the Manage extension option from it.

4. It will open the extension page in a new tab. Here, click on the toggle to disable it.

If you want to disable multiple extensions in Chrome in one go, there is a faster way to do so.
1. Click on the kebab menu (three-dot menu) on the Chrome browser and go to More Tools > Extensions.
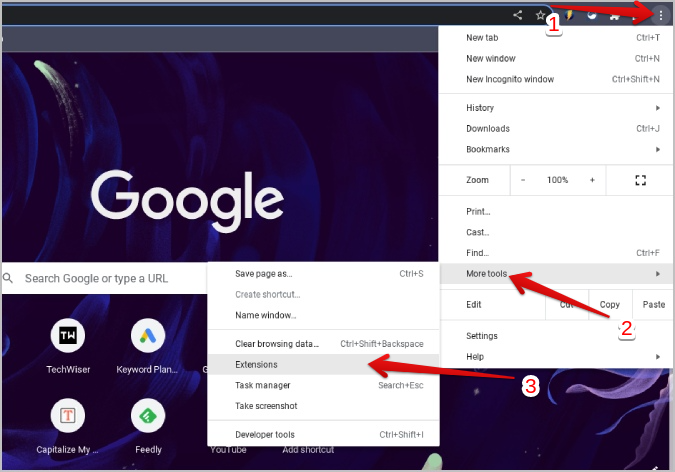
2. This should open the extensions page in a new tab. Here you can search or find the extensions that you want to disable and toggle them off.

It will disable the extension instantly. This method also comes in handy when you are facing issues with Chrome browser and want to troubleshoot to find which extension that’s causing it. If you want to enable any extensions and use them again, repeat the same steps and enable them from the Extensions menu.
Disabling/Enabling Extension on the Fly With Extensity
The native option works like a charm, but is cumbersome to use and involves multiple steps to enable and disable extensions. Extensity Chrome extension makes disabling and enabling extensions process seamless making it so that you can enable/disable any number of extensions with just two clicks.
1. Open Extensity Chrome extension page and install it on your Chrome browser.
2. Now click on the extension icon at the top right and select the Pin icon besides Extensity. This will make it easier to disable and enable other extensions.
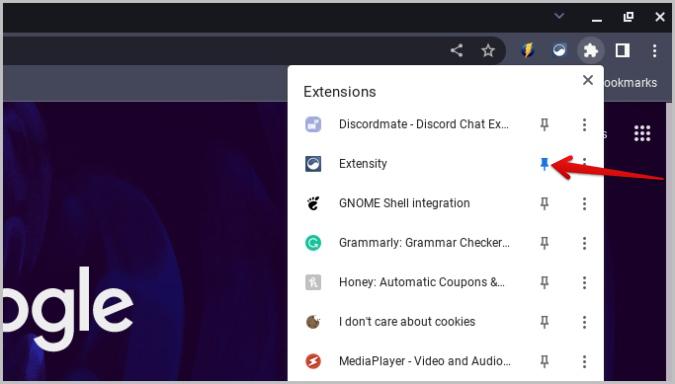
3. Now click on Extensity extension icon to see all installed extensions. Simply click on an extension icon to disable it on Chrome. It will instantly turn gray suggesting the extension is disabled. You can disable as many extensions as you like quickly.
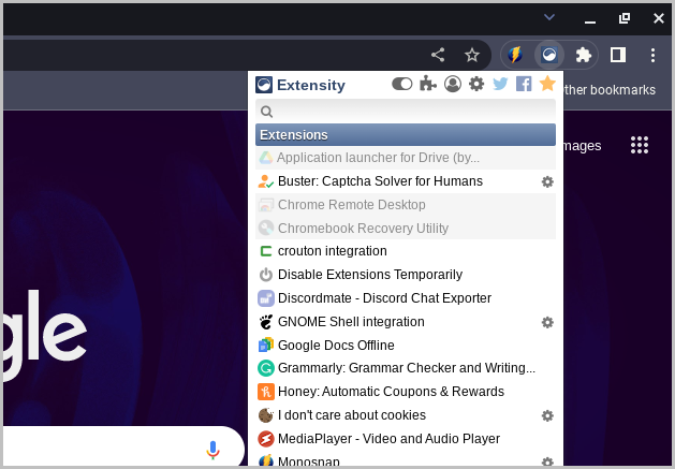
4. To enable an extension, open Extensity extension menu again and click on the extension that you want to enable.
Disabling All the Chrome Extensions
Chrome extensions often lead to browser issues. There is an extension for everything and there is one for quickly disabling all the extensions to troubleshoot browser errors.
1. Open this and install the Disable Extensions Temporarily Chrome extension.
2. Now open the extension icon and click on the Disable Extensions Temporarily extension.

3. It disables all the extensions except for disabled extensions temporarily extension.
4. You can click on the extension again to enable the extensions again.
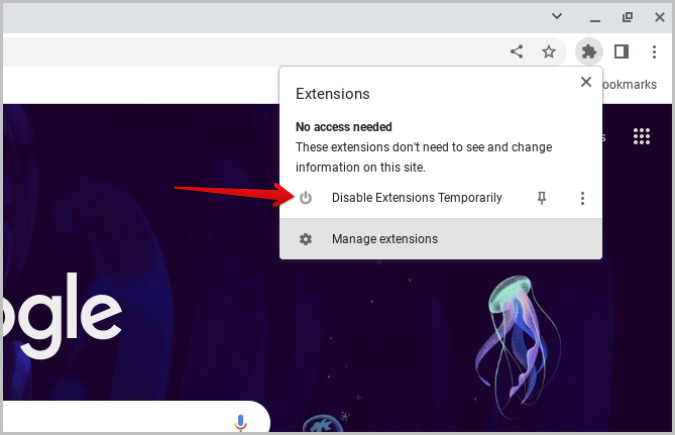
The app does a good job won’t just enable all the extensions, instead, it will only enable the extensions that it has disabled. So if you have any disabled extensions, you are sure that it will be not enabling it.
Disable Extensions on Chrome Browser
All the 3 methods work on the Chrome browser for all OS like Windows, macOS, Linux, and ChromeOS. You can also use these tricks on other Chromium browsers. As you can now manage extensions now, instead of having to uninstall them, you can install more extensions without having to worry about system resources. Here are some of the best Chrome extensions you need for productivity and Chrome extensions that improve Google apps’ functionality.