It has been a while since I’m using canon 70d to shoot YouTube videos. But, I recently found out about CineStyle by Technicolor. Without giving it much thought, I went ahead and installed it on DSLR. And I’ve to say, I’m impressed.
To those who don’t know, Cinestyle is a picture profile available for Canon EOS Cameras. Consider it like this; generally, when you press the record button of your DSLR, it shoots video in Auto mode. And any video shot in an auto mode has less room for color correction in the post. However, if you change the picture profile mode from Auto to Cinestyle, it’ll capture more details in the video, giving you more freedom to play with colors.

Is Cinestyle safe?
For the most part, yes it’s. Like I said, Cinestyle is a color profile, (and not a firmware). It only contains slight tweaks to the picture settings like curve, adjustments, saturation, and contrast etc. So, it won’t affect your camera firmware. In a nutshell, Cinestyle doesn’t void your warranty.
To get started with Cinestyle, just load the cinestyle file on your DSLR with the EOS utility, and start using it immediately, That said, if it’s your first time owning a DSLR, you might find the process a bit complicated, so here is a step by step guide on how to download and use Cinesytle on a Canon camera. The plugin works only for Canon cameras but you can find similar plugins (like Cineflat for Nikon) online. That said, let’s begin. Shall we?
Read: Use your old Android / iPad as an external monitor for DSLR.
Part 1: Download Cinestyle on your computer
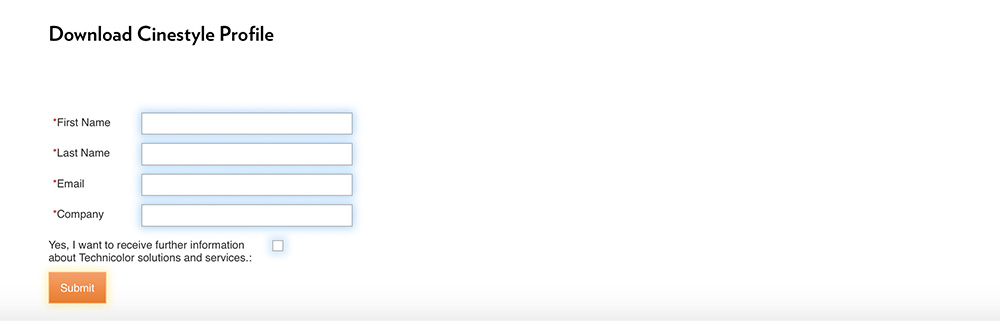
1. To get started, download the CineStyle plugin from the Technicolor website. You will have to enter your details like name, email address, etc. Once you press the submit button, you’ll get the download link in your email, so make sure you use a legit email address.
Once you click on the download link and it’ll automatically unzip a folder on your computer.
2. Now that you have cinestyle’s files on your computer, you need an app to transfer it to your DSLR, simply copy-pasting it in the SD card won’t work.
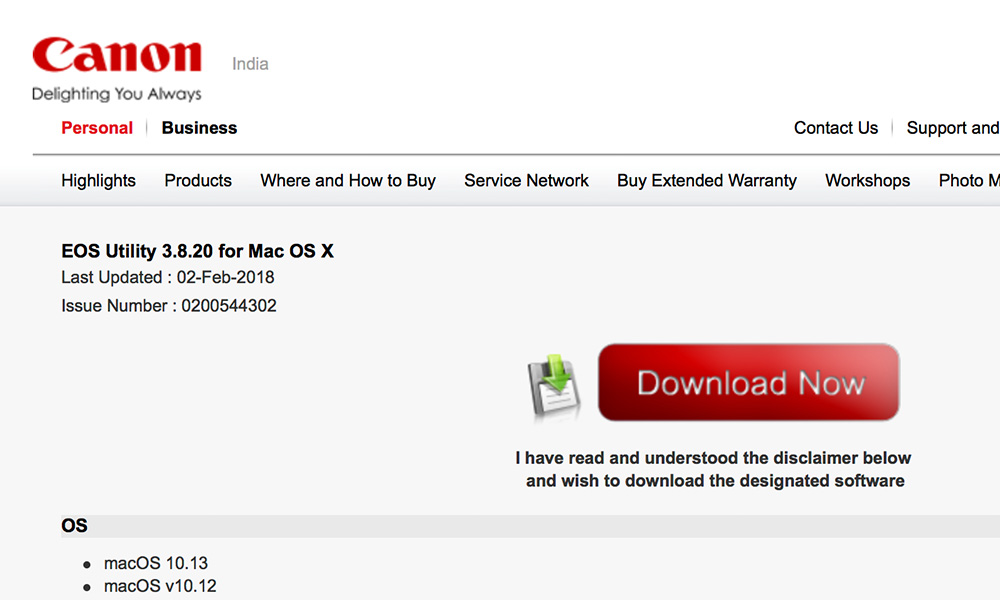
So, head over Canon official website, click on your Camera model number, and download the relevant EOS Utility app.
3. Connect your DSLR to your computer using the USB cable and switch on the camera. Once connected, the EOS Utility app will automatically launch on your computer screen.
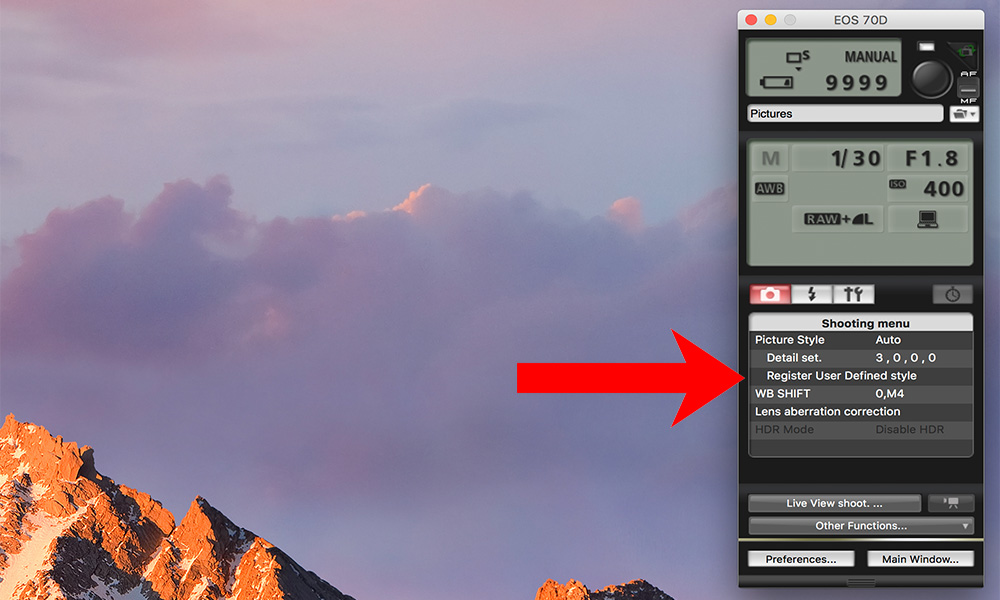
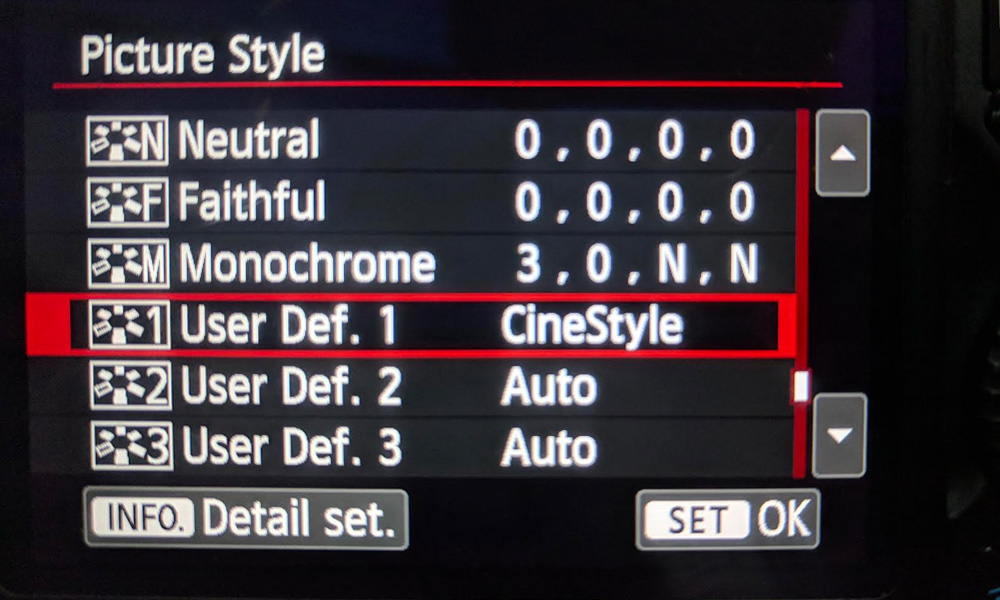
5. In the EOS utility app, click on camera settings. A new window will open with a bunch of camera options. Click on “Register User Defined style” in the shooting menu.
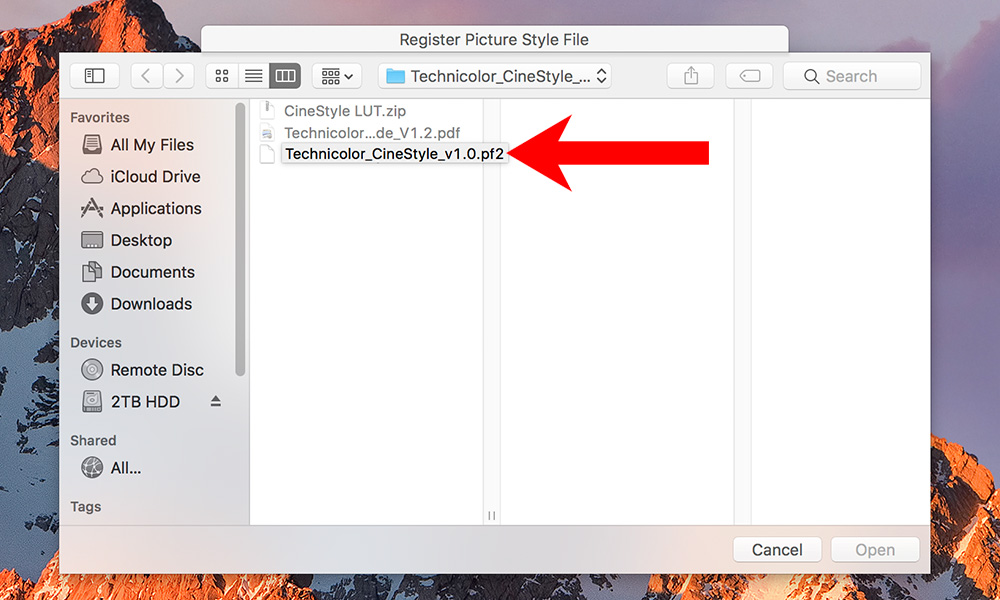
6. This will launch the finder window where you’ll have to locate the downloaded file in your computer. Click on the browse button and navigate to the folder containing the ‘technicolor_cinestyle_v1’ file.
Next, click OK, to save changes. That’s it, you have successfully loaded Cinestyle in your DSLR. It’s a small file so, won’t take much time. Exit the application and disconnect your DSLR.
Part 2: Set CineStyle mode on your DSLR
1. By default, your DSLRs records in Auto, so in order to record in Cinestyle mode, you need to set the picture profile to Cinestyle. To do this, open up your DSLR, go to Setting > Video Settings > Look for the option Picture Style and open it.
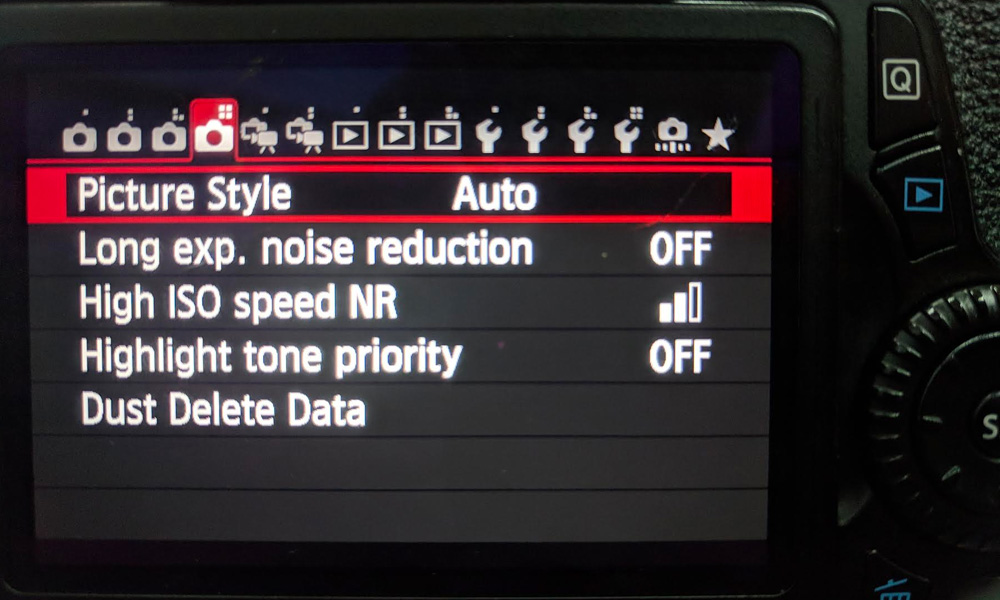
2. A new window will open with various predefined user modes, scroll down and you shall see Cinestyle mode. Enable it.
You will notice that your preview in viewfinder turns a bit faded. The videos will look washed out. This is because the saturation, contrast, etc are set to low. Don’t worry, this is normal and means, you are now recording in CineStyle mode.
To start recording in Cinetstyle, simply press the record button and there you go.
Part 3: Color Grade CineStyle in your Video editor
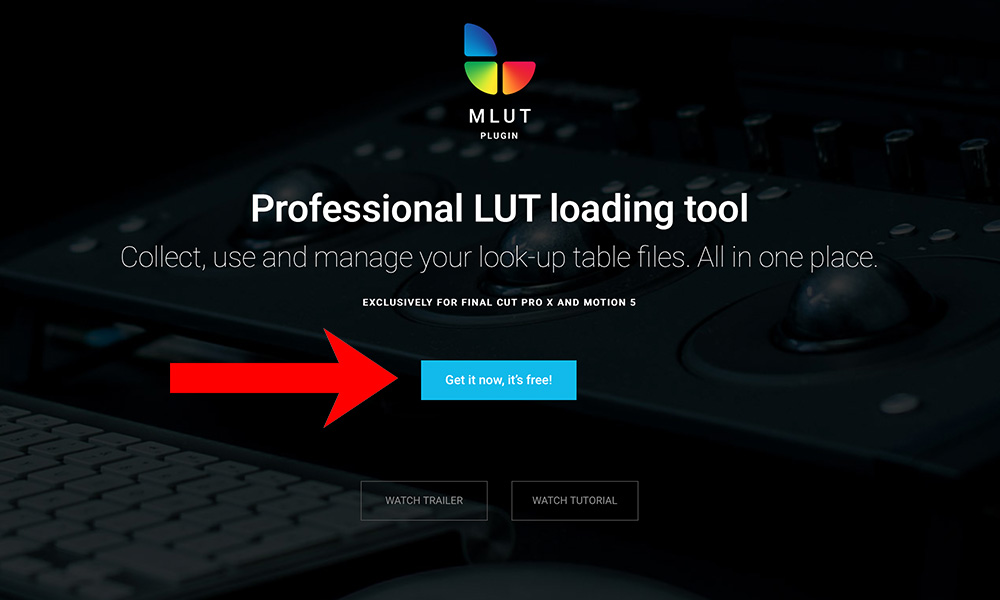
Now, that you have recorded the footage in Cinestyle, you’ll need to color correct them using your video editing software. Adobe Premiere Pro CC has the in-built Lumetri color panel to apply LUTs whereas if you are a Final Cut Pro X user, you’ll need third-party extensions to apply LUTs like the mLUT plugin.
So, let’s see how to color grade Cinesytle video in Final Cut Pro X
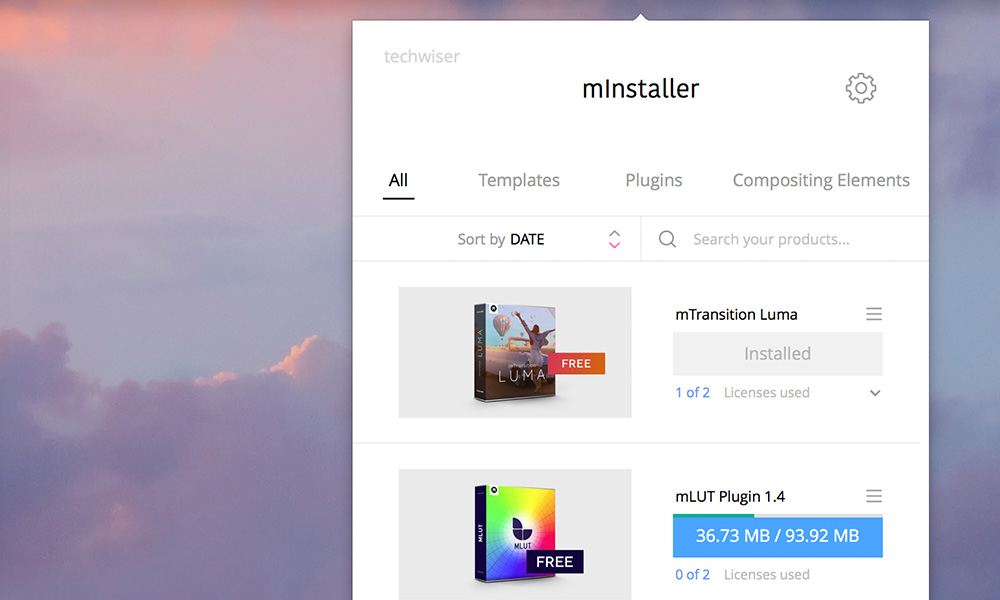
1. Start by downloading the mLUT plugin on your computer. To do this, create a free account at motionvfx and download mInstaller.
Once downloaded, open and install the mInstaller application on your computer. This application is required in order to install mLUT on your computer.
Next, download mLut (free) from the official website.
2. To proceed, you will have to add mLut in your cart, and once you click on checkout, you’ll be redirected to the minstaller app that we downloaded in the previous step. The installation will take place automatically
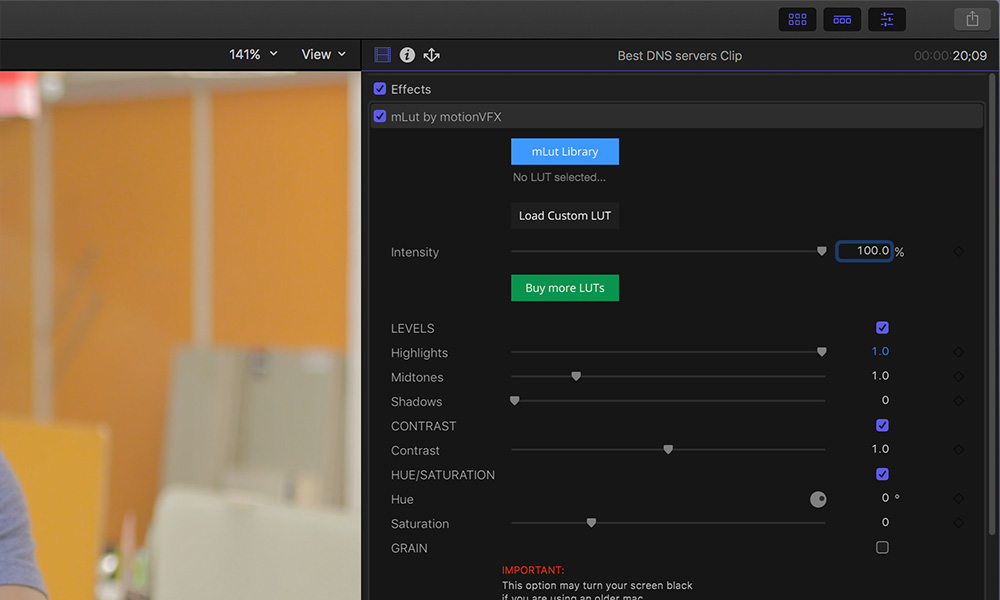
3. Next, open or restart FCP. Go to Effects, and there you’ll find mLut.
Simply select the video clips and apply the luts by clicking on the mLut library.
To adjust the intensity, click on the file, and then go to video effects and adjust the intensity from there. That’s it.
Wrapping Up: Use CineStyle to Shoot Cinematic Video
CineStyle is basically a picture profile which cuts some of the contrast; effectively capturing more details in your image. You can achieve the same effect, by turning down the contrast, saturation, and sharpness of your camera. But Cinestyle, helps you do all of that with just a click.
Do remember though, if you choose to go with cinestyle, you’ll definitely have to color grade your footage in post. So if you’re not into color correction or say you don’t really need cinelook in your videos, it’s perfectly fine to shoot in auto. But if you’re working on a project, where there are multiple cameras involved, then shooting in cinestyle does help in maintaining a consistent look.