Are you hunting for a symbol to complete that quotation? We understand your pain. Entering symbols is not that simple in Microsoft Word, and there are a multitude of ways you can enter them. But which method should you use and when? The guide will cover different ways to add symbols in Microsoft Word on Windows and when to use each.
Table of Contents
1. Emoji Keyboard (Quick and Easy)
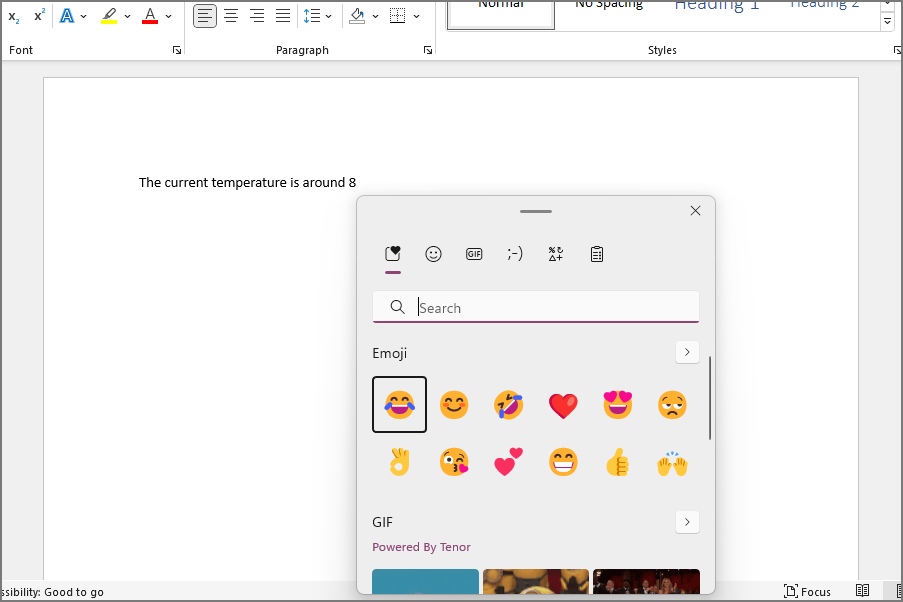
This is the easiest method here and what occasional users should consider the most: Emoji Keyboard. It is available in Windows universally, meaning you can add symbols, emojis, GIFs, and more anywhere in Windows 10 and 11.
1. To add symbols using this shortcut, open your Microsoft Word document and move to the section you want to add a symbol. Then press Windows + . (period) on your keyboard. With this, the emoji keyboard will appear on your screen.
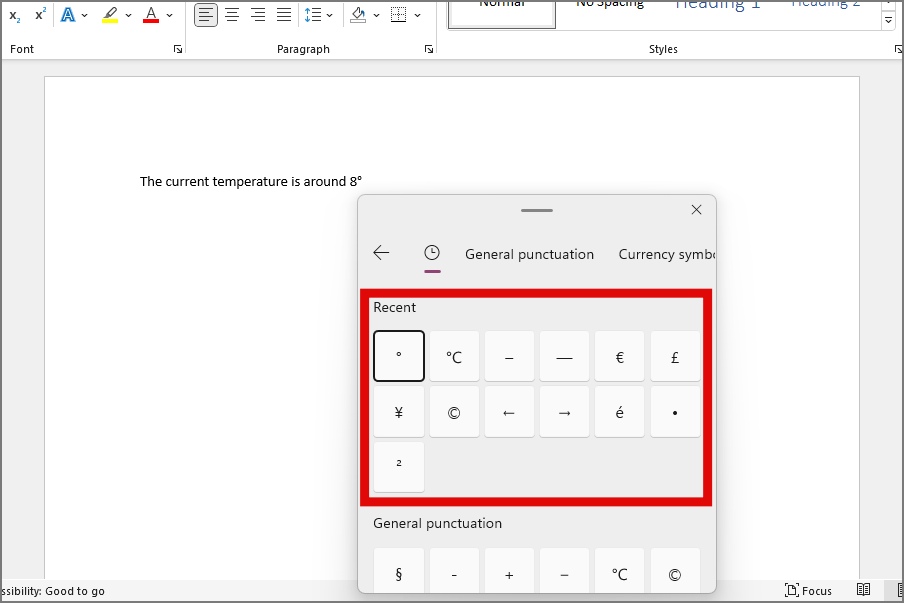
2. Move over to the symbols section. Here is a list of recently used and saved symbols in Windows.
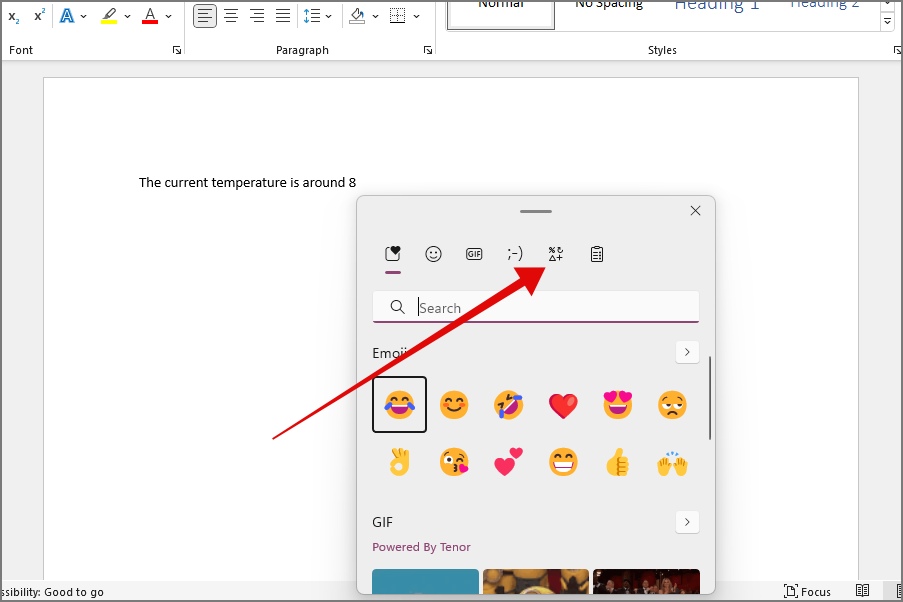
3. Look for your preferred symbol from the available list of General punctuations, Currency symbols, Latin symbols, etc, and click on it to enter it in your text. For example, we’ve entered the ℃ (degree) symbol in our text.
Did You Know: Confused between Blank Page and Page Break in Microsoft Word? Learn when to use and how.
2. Menu Bar (General Users)
The method as intended by Microsoft, uses the Insert menu bar to enter symbols in your Word files. This method is much preferred for people who rarely use symbols in their Word documents.
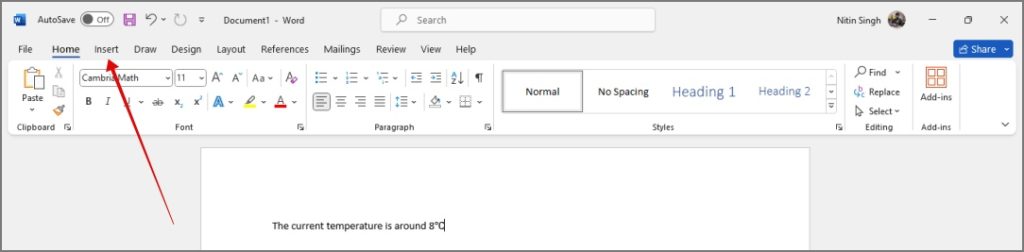
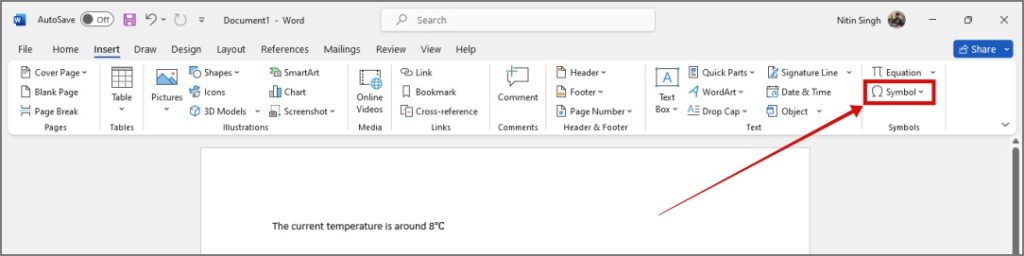
1. To insert symbols using the menu bar, open the Word document and navigate to the Insert menu bar.
2. Now navigate to the top-right side of the Insert bar and click on Symbols.
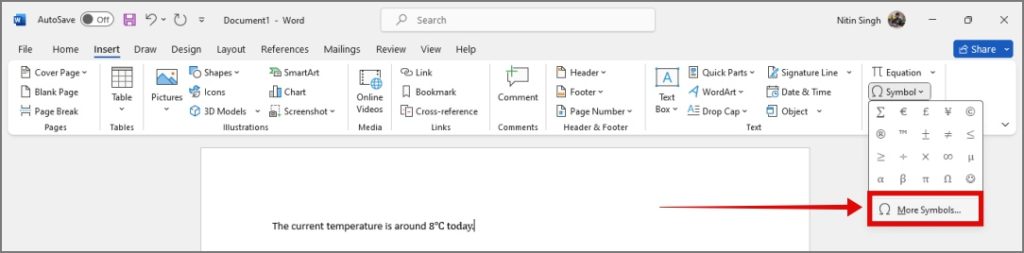
3. Click on More Symbols… to access the full Symbol dialogue box.
4. Find your preferred symbol from the dialogue box and click Insert. This will insert the said symbol in Microsoft Word.

Tip: You can find a lot of symbols and special characters from the expansive list of symbols.
Also, this is how you can remove passwords from an Excel file.
3. Shortcuts (Professionals)
If you want to get stuff done on quick presses and don’t want to be riddled with the number of steps to follow to add a symbol in the Microsoft Word document, then this method is for you.
1. To insert symbols using the menu bar, open the Word document and navigate to the Insert menu bar.
2. Navigate to the top-right side of the Insert bar and click on Symbols.
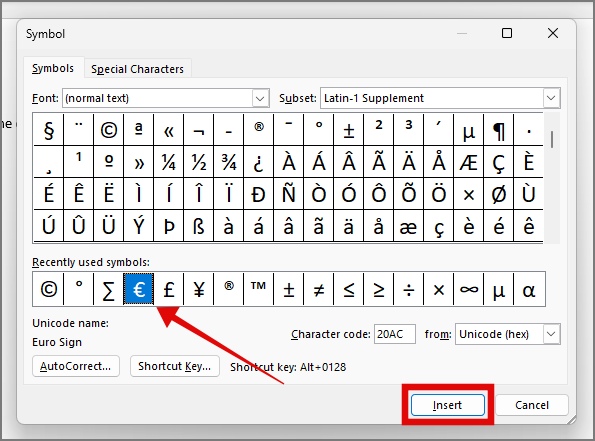
3. Click on More Symbols… to access the full Symbol dialogue box.
4. Tap on any symbols, and look for the shortcut key associated with this symbol at the bottom of this dialogue box.
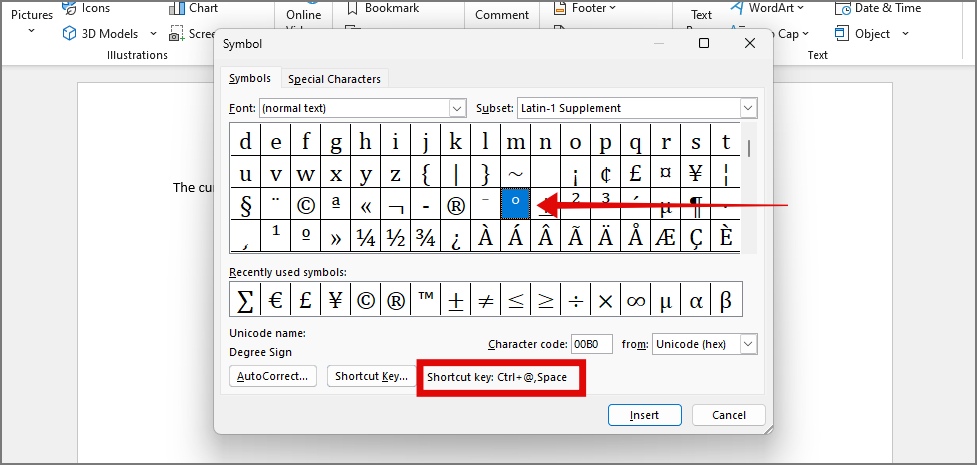
5. This is the default shortcut associated with these symbols, and you can enter any symbols by entering the right combination of keys. Remembering the shortcut keys is not everyone’s cup of tea, but you’ll find it very convenient to use once adapted.
Tip: You can customize these shortcuts by clicking on the Shortcut Key… and assigning a new shortcut.
4. Macros (One-Symbol Users)
You can create macros if you frequently use currency symbols or enter the same symbol repeatedly in Word documents. They are pre-recorded actions that are executed when you press the associated shortcut key.
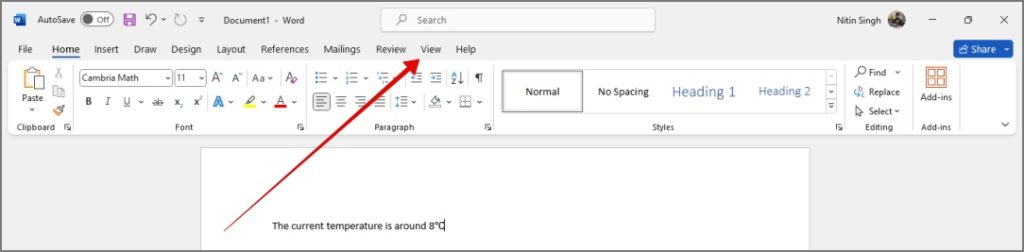
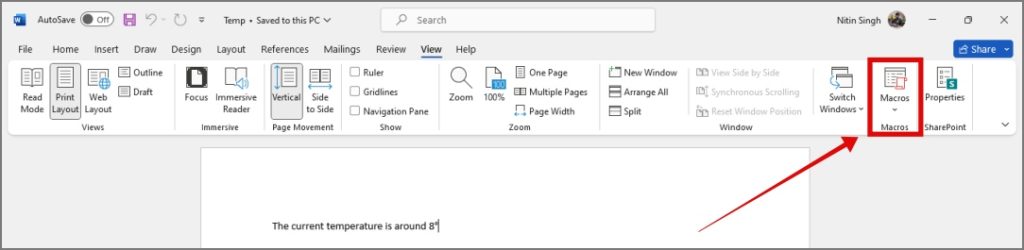
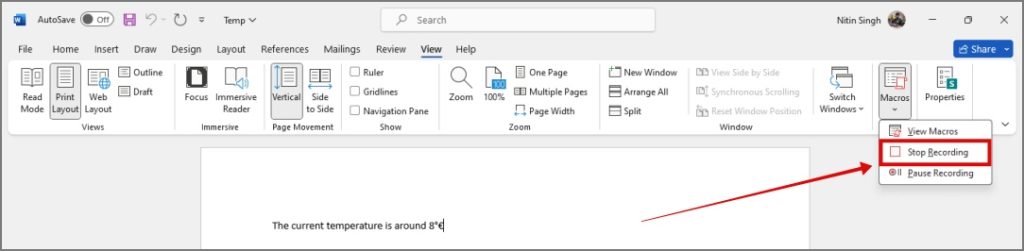
1. To set up a macro for symbols, open the Microsoft Word document and navigate to the View menu bar.
2. Now navigate to the top-right side of the View bar and click on the drop-down for Macros.
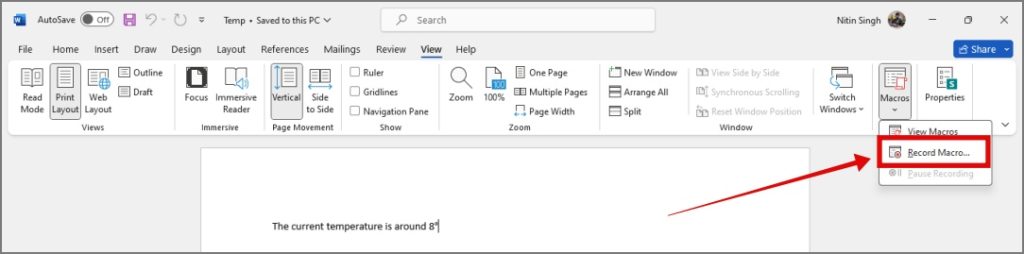
3. Click on Record Macro… in the drop-down menu.
4. A Record Macro dialogue box will open. Name your macro, for example, we’ve named it Euro, after the symbol we’ll add. Click on Keyboard.
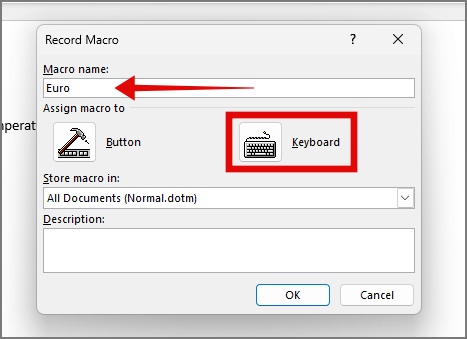
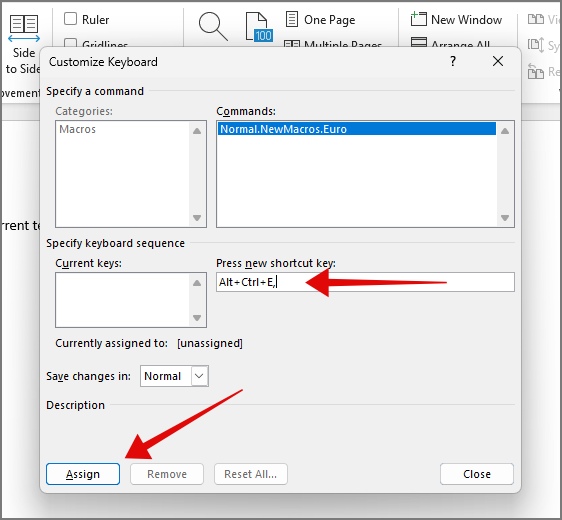
5. Enter a keyboard shortcut to associate it with the macro by pressing the respective keys. For example, we’ve added Alt + Ctrl + E keyboard shortcut. Click on Close. You tap on Close, Microsoft Word will start recording the macro.
6. Follow the previous method of opening the Symbols dialogue box. Click on the required symbol, in our case Euro, and click on Insert.
7. Finally, go to the Macro drop-down menu and click on Stop Recording.
With this, your macro for a symbol is recorded, and you only need to press the associated shortcut keys to enter the Euro symbol. You can also create multiple macros for your frequently used symbols and enter them in your style.
This is how to convert images to text in Microsoft Word on a PC.
Symbolize Easy
After reading through all the methods, you should be able to find a method that speaks to you the most. Using our guide, you should be able to add symbols in Microsoft Word on Windows, whether the simplest or the most complex.
Similarly, this is how you can create Fillable forms in Microsoft Word.