With your important meeting about to start on your phone, you’re only minutes away from landing the biggest development in your career. But then your Samsung Galaxy phone refuses to connect to the Wi-Fi. So how do you give that presentation or look at those notes saved in the cloud? Frustrating. Here is what to do if your Samsung Galaxy phone is not connecting to Wi-Fi.
Table of Contents
Before You Begin
- Restart Your Phone – Restarting can help you fix occasional bugs in the phone. Ensure you’ve restarted the phone at least once, then again try connecting to Wi-Fi.
- Update the Phone – The next thing you should do is update your phone to the latest version. These software updates can contain bug fixes for your phone and might already contain a fix to your Wi-Fi problem.
- Forget Wi-Fi Network – You can also try removing and reconnecting your Wi-Fi network if it has started causing you problems. This can be helpful in scenarios if your Wi-Fi provider has been changed recently.
- Restart Router – Just like your phone, sometimes the router can also have problems. Restart the router by turning the power off for about 30 seconds, then turn it on and try connecting your phone to the Wi-Fi.
1. Switch Between 2.4 or 5 GHz
Do you have multiple Wi-Fi networks with the same name, for example, Home-Wi-Fi and Home-Wi-Fi_5G. If so, try switching between them. Maybe the problem is with just one of the Wi-Fi networks and not all.
To change Wi-Fi networks on your Samsung Galaxy phone, tap on the Wi-Fi tile in the Quick settings. Then look for the Wi-Fi network with the same name as your current network, with 5G or 5GHz at the end. Tap on it.
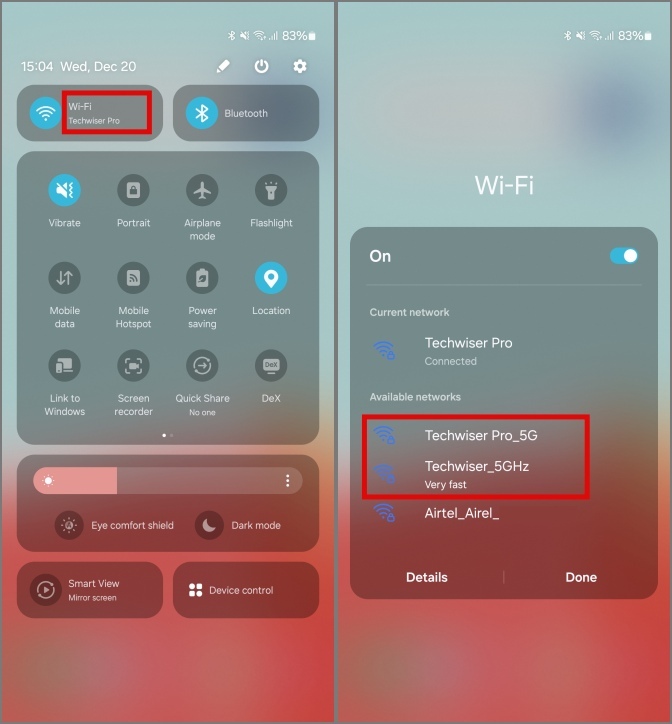
If asked, enter the Wi-Fi password and now your phone should be connected to the 5GHz Wi-Fi.
2. Check the Number of Devices Connected
As is the case with every router, there is a limit to the number of devices that can be connected to your router simultaneously. Maybe your router has exceeded the number of simultaneous connections, and need to remove a few to connect your phone to the Wi-Fi.
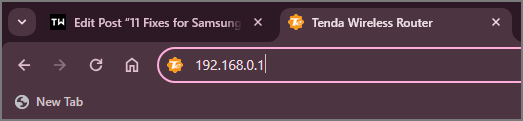
1. To check the number of devices connected to your router, access its gateway by going to your router’s IP address in a browser. In our case, it is 192.168.0.1.
2. Then log in by entering your credentials. Generally, the default username and password are either — admin and admin or admin and password. Or you can check this online database. However, if nothing works, contact the person who has set up your network.
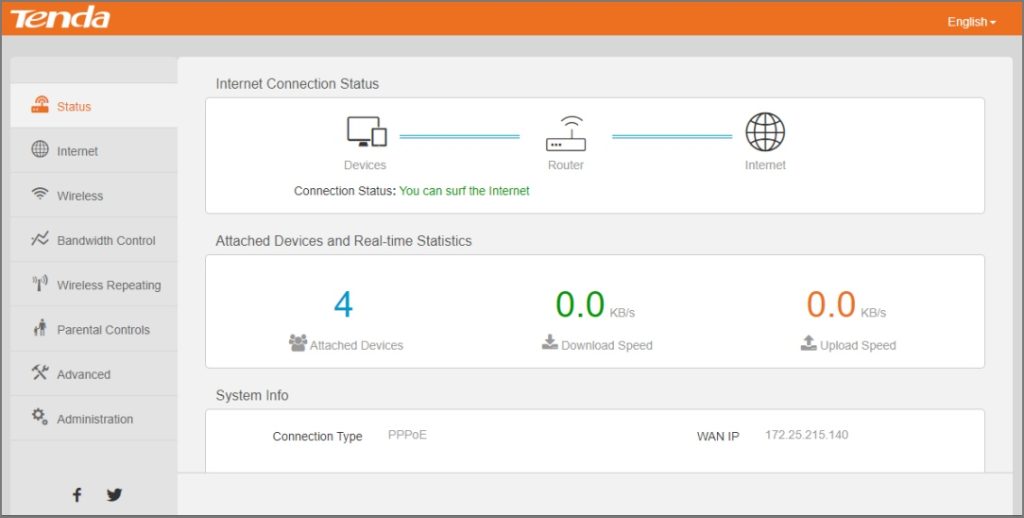
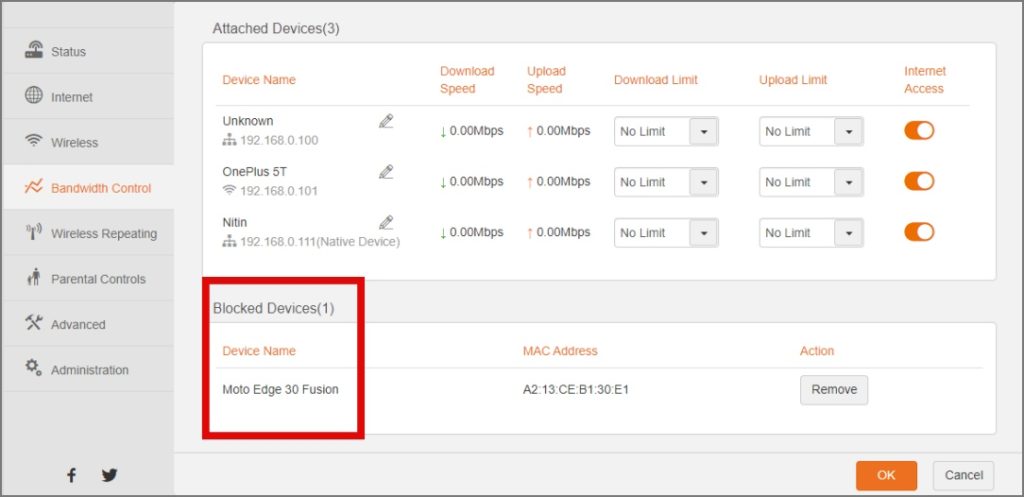
3. Then head over to the Bandwidth Control option. Bandwidth control may be present under a different name depending on the OEM of your router. You can also look it up among the number of connected devices.

4. Here you can see all the devices currently connected to your router. The number of devices that can be connected to your router simultaneously varies from OEM to OEM. Generally, this is at least 32 devices per band of the router, or at least 64 devices for a typical household router with Wi-Fi 5 having 2 bands, ie 2.4 GHz and 5 GHz. For more accurate information, you should check for your specific router on the OEM’s website.
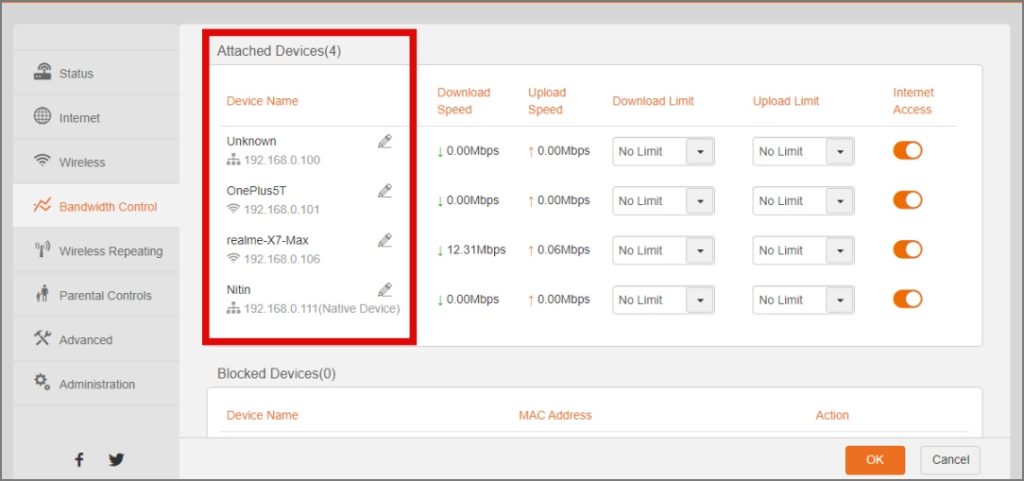
If you have more active devices than the recommended value, you’re bound to experience performance issues and even disconnections. Consider removing any barely used devices, or invest in a separate router to connect more devices simultaneously.
3. Remove the Phone From the Blocked Devices List
Every router has a security option built-in which blocks any device from connecting to the Wi-Fi network. You can check if your Samsung Galaxy phone is in the blocked list and remove it from there to continue connecting to the Wi-Fi.
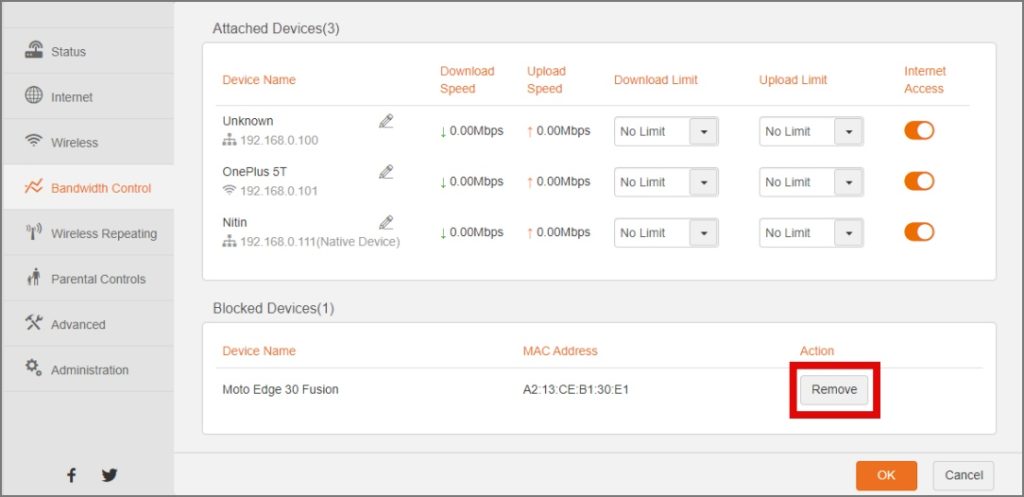
1. From the Bandwidth Control option in your router settings, find the Blocked Devices List.
2. If your phone is among the blocked devices, tap on Remove/Restore to remove it from the blocked devices and restore the Wi-Fi connection to your phone.
4. Turn Off VPN
Maybe you’re able to connect to the Wi-Fi but the internet is not working. If such is the case, a VPN could be affecting your internet speeds.
VPN offers privacy options but is also known to slow down your internet speeds, thereby hampering your experience. Another user facing the problem shared his ordeal on Reddit, and how disabling VPN worked for him.
5. Change DNS
While you’re checking the VPN status, also look if you’re using a private DNS. DNS servers are assigned to your device by your ISP, and if changed, it can affect your connection to the Internet, reducing speeds or just ending your connection. Many websites like Netflix can also stop working if your DNS is not a good one. Hence, if you’ve recently changed your DNS, then it’d be a good time to get back to the DNS assigned to your ISP.
6. Reset Network Settings
Was your Wi-Fi network recently re-configured or had some maintenance? If nothing has worked for you till now, try resetting the network settings to set all network-related settings to default.
Note: If you reset the network settings, it will erase all stored internet-related data from your phone, such as Wi-Fi names and passwords, network login information, and any paired Bluetooth devices like headphones or speakers.
1. To reset the network settings on your Samsung Galaxy, open settings and head over to General Management. Then tap on Reset.
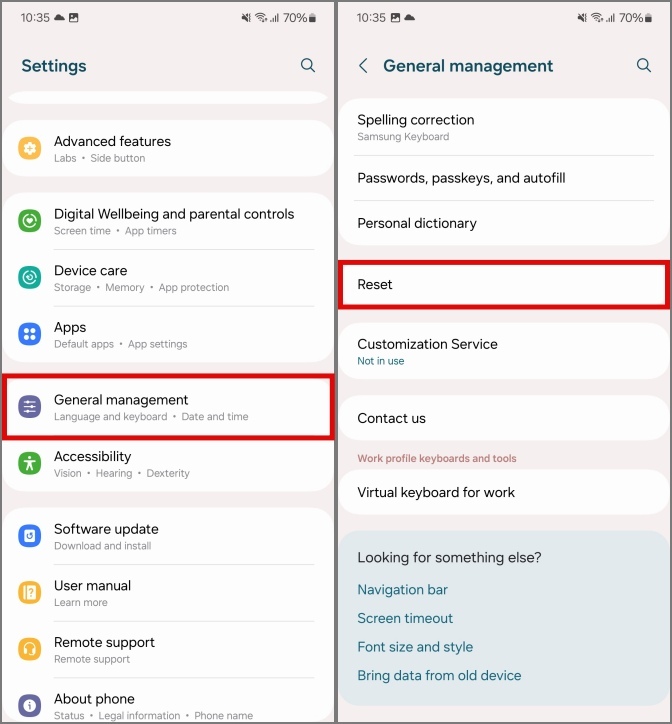
2. Tap on Reset Wi-Fi and Bluetooth settings. Then tap on Reset settings to confirm it.

7. Change IP Settings
Generally, IP addresses are assigned automatically and shouldn’t need user intervention. But if you’re having problems connecting to your Wi-Fi network, you should check this manually to see if it helps.
1. To change your IP settings, open settings on your phone, then tap on Connections. Then tap on Wi-Fi.
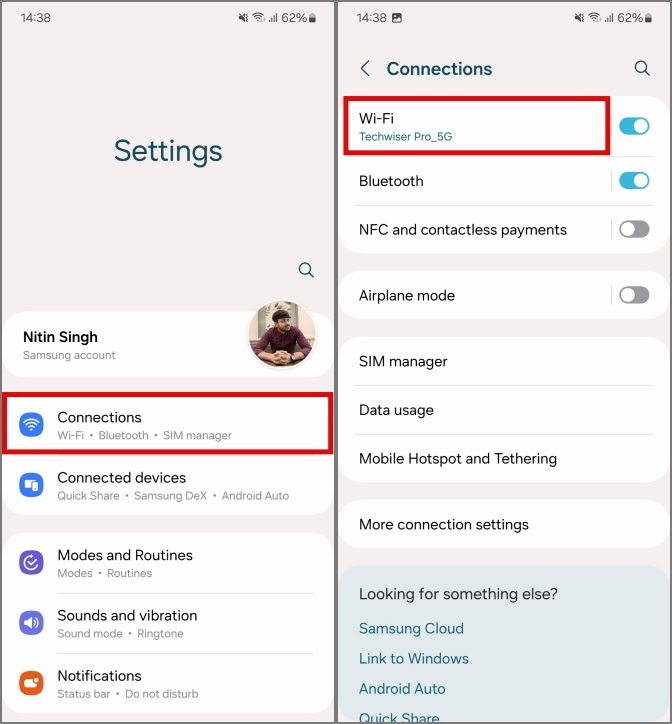
2. Look for your Wi-Fi network from the available networks list, and tap on it. Then tap on View more to open advanced Wi-Fi settings.
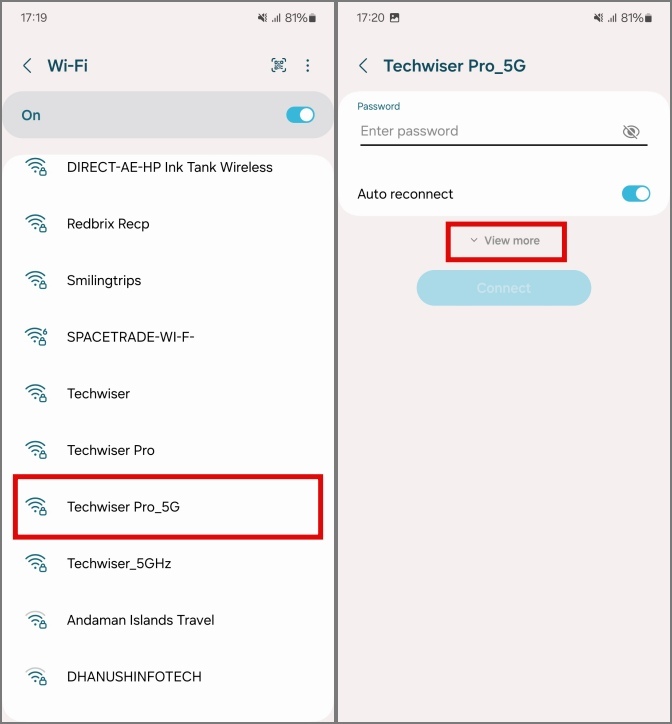
Pro Tip: You can also hold on network name if you’ve already tried connecting to it before, then head over to manage network settings.
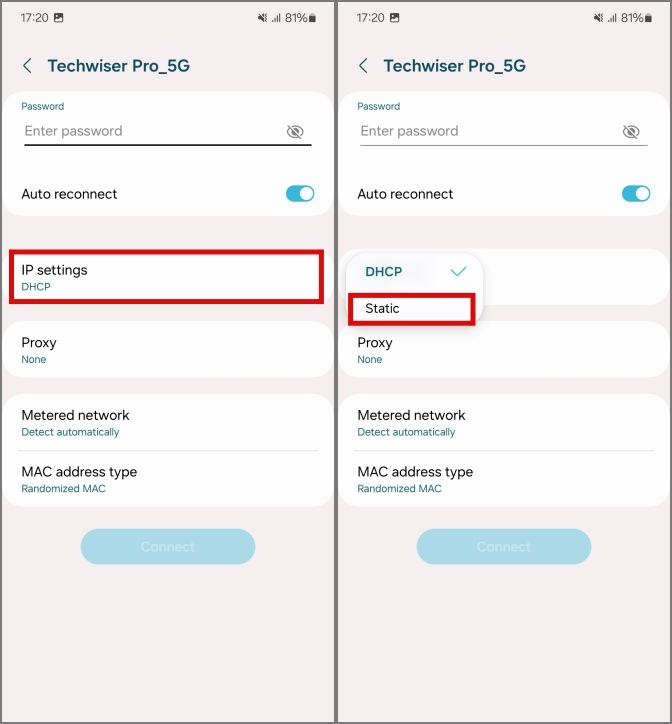
3. Tap on IP settings, and set it as Static. You’ll get access to more options like IP address, and gateway.
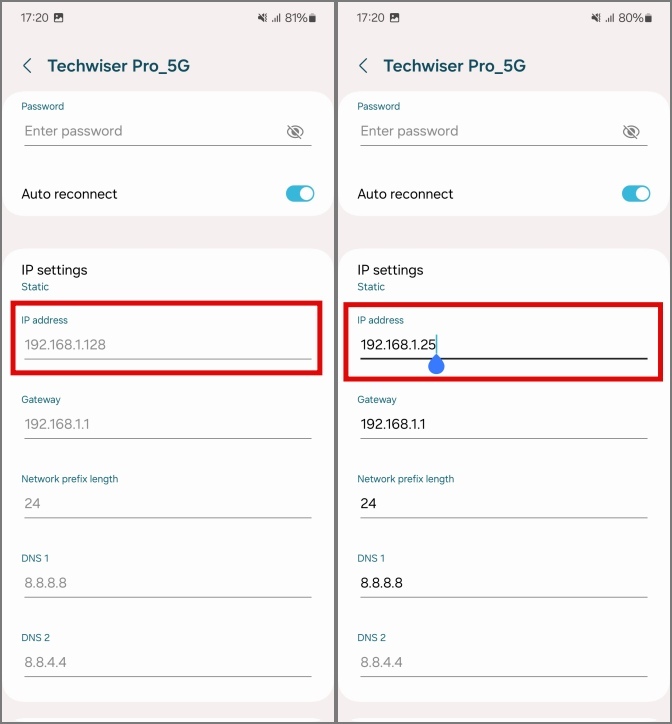
4. Enter your router’s IP address, but replace the last number with a higher value number between 20 and 30. For example, if my router’s IP address is 192.168.1.1, then I’ll enter the IP address as 192.168.1.25.
Tip: If your Wi-Fi network is already set to Static, try switching it to Dynamic.
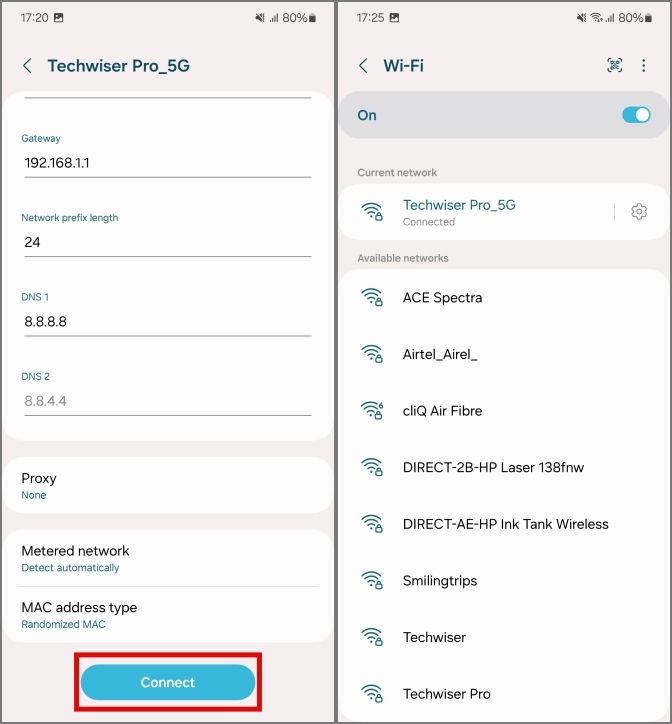
5. Now scroll down and tap on Connect. With this, your Samsung Galaxy phone should connect to the Wi-Fi.
8. Enable Wi-Fi Non-persistent MAC Randomization
Media Access Control address (or MAC for short) is the layer that controls your access to the Network via wireless or wired medium. A change in this option can lead to your phone not connecting to Wi-Fi, as was the case with another user. You should give it a try before heading on to more technical reasons.
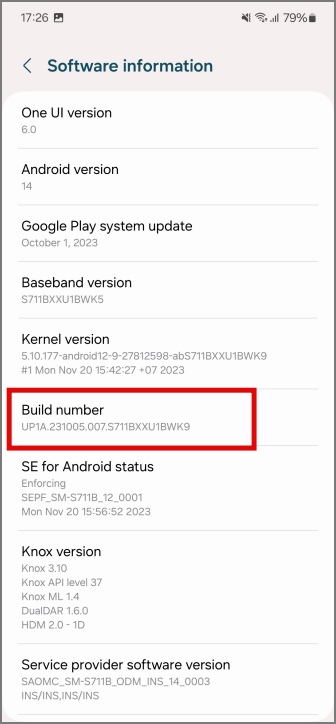
1. Open Settings on your phone, then head over to About phone. Look for Software Information and tap on it.

2. Then tap on Build number 7 times to unlock Developer options. Enter your phone password if asked about it, with this the developer mode will be enabled.
3. Go back to Settings, and tap on Developer options. Look for Wi-Fi non-persistent MAC randomization and enable it. With this, your Samsung Galaxy should connect to the Wi-Fi.
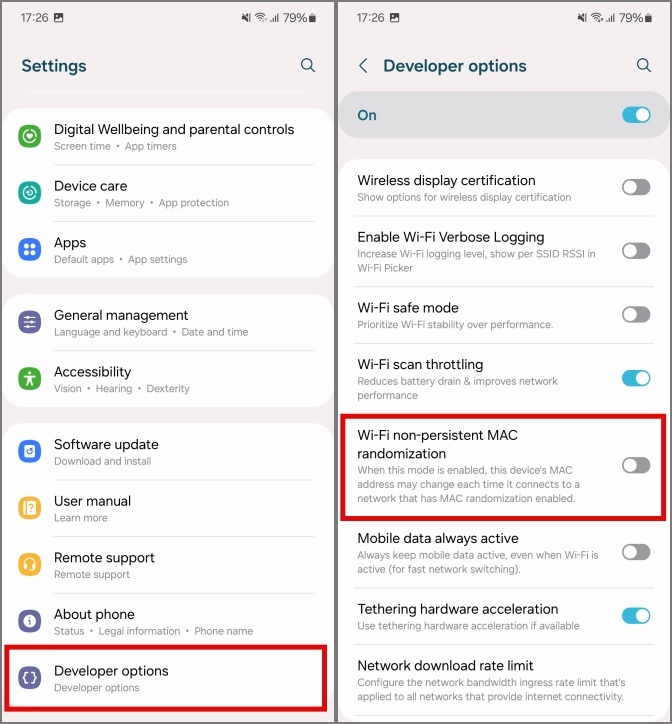
Note: If you face any problem while connecting to your network storage drives, it’d be a good idea to disable this setting the same way.
9. Restart Wi-Fi Subsystem
The Wi-Fi subsystem is the system API which directly controls the Wi-Fi antennas and any service associated with it. If you’re having trouble connecting to the Wi-Fi you could give it the jolt required by manually restarting the subsystem.
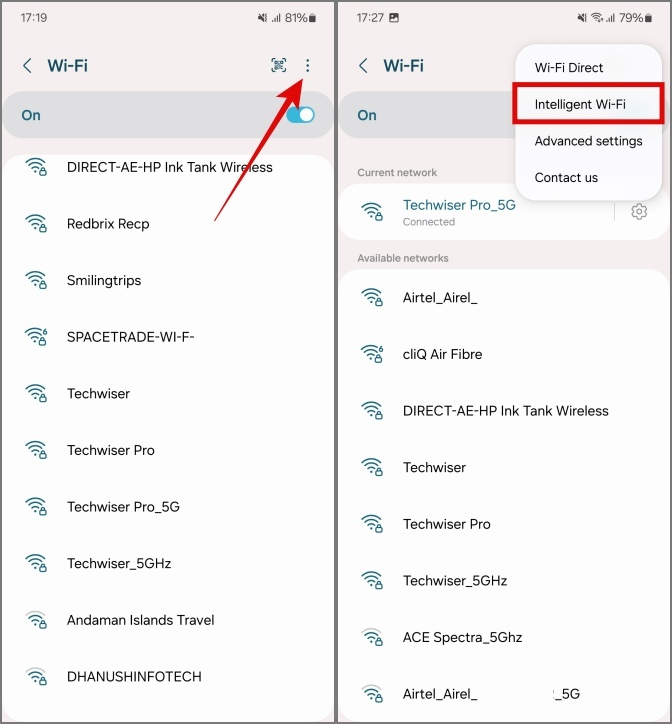
1. To restart the Wi-Fi subsystem in your Samsung Galaxy phone, tap on the three-dots menu in the Wi-Fi settings. Head over to Intelligent Wi-Fi.
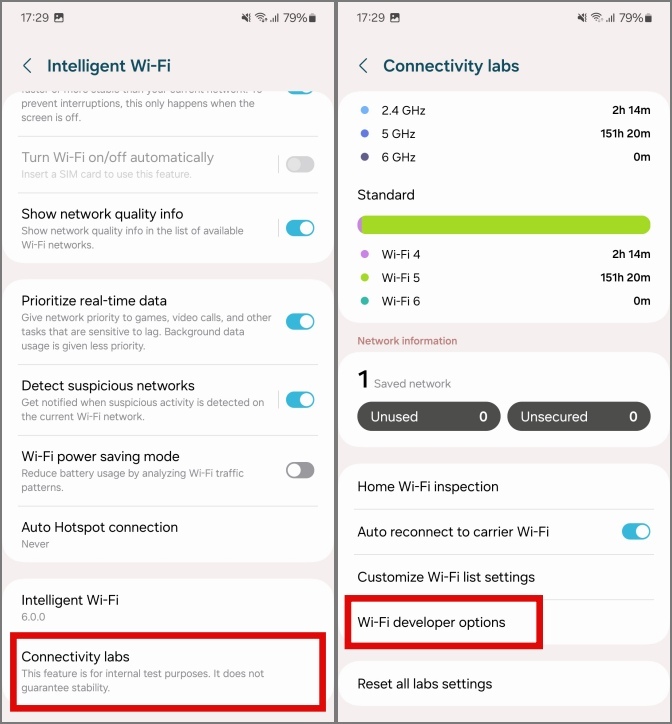
2. Scroll down and tap on Intelligent Wi-Fi 5 times to unlock Connectivity Labs.

3. Now, tap on Connectivity Labs and scroll down to access Wi-Fi developer settings.
4. Scroll down to find restarting the Wi-Fi subsystem and tap on it. Confirm restarting the Wi-Fi subsystem by again tapping on it.
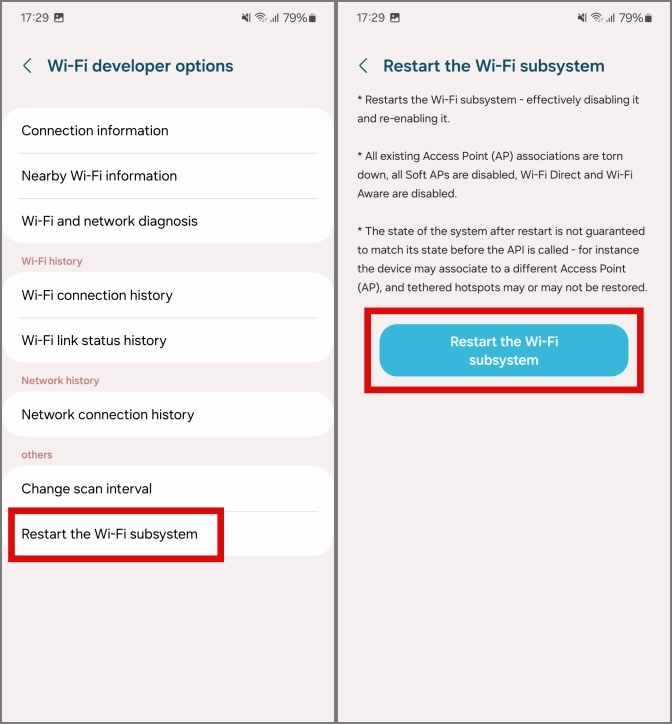
Disclaimer: Your phone’s Wi-Fi, Mobile Hotspot, and Wi-Fi Direct will not work in the process, but will resume working in about 5-10 seconds.
10. Boot in Safe Mode
In cases when you’ve recently installed some apps on your phone, you might encounter problems with the general function. You should boot the phone in safe mode to properly diagnose the problem.
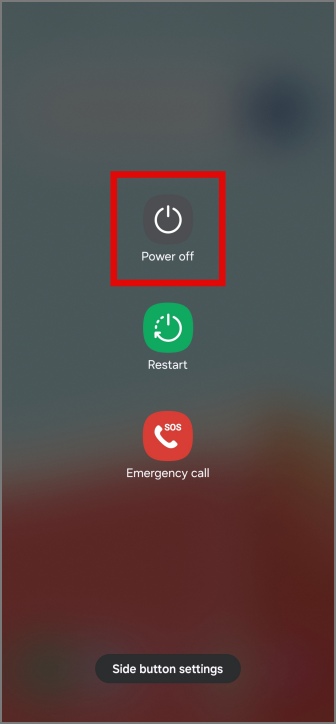
1. To boot into the Safe Mode, press and hold the power and volume down buttons for about 2 seconds to access the power menu. Then tap and hold the Power off option for 3 seconds.
2. Tap on Safe Mode to boot into safe mode.
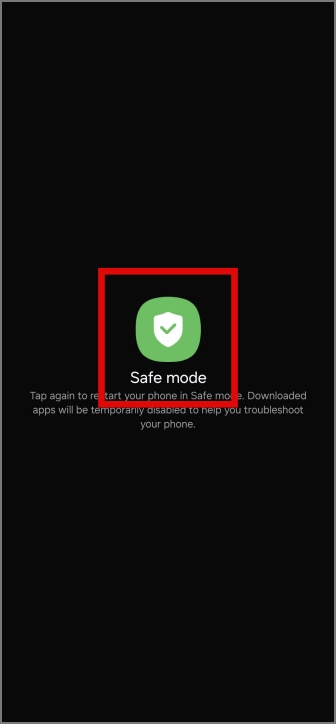
Now, try connecting to your Wi-Fi. It should connect to your Wi-Fi with no problems at all. This may indicate that a recently installed app is conflicting with the Wi-Fi, you should consider uninstalling it.
11. Visit the Store to Check for Hardware Issues
If you’ve tried to troubleshoot and still are facing problems in connecting to Wi-Fi, consider visiting the official Samsung store for a resolution because this seems to be a widespread issue. Some users have this issue in their phone since they bought it, while some had it originate after a major system update. The store staff may check your phone’s hardware for any anomalies, and provide you with the best resolution possible.
No More Wi-Fi Woes
Whether it’s the home Wi-Fi or your office network, your problems should be able to connect to the Wi-Fi after going through our guide. But in any case, if you are still facing the issue, contacting the Samsung store seems like a good idea.
On this note, this is how you can use Dynamic Island on Samsung Galaxy Phones.