Live Photos have been around for a while now. But other than looking cool, it doesn’t have many uses, at least not for me. While you can upload live photos to Facebook and Twitter, there is no such option for Instagram stories. You can’t even share the photos as a Live Photo to your friends if they don’t have an iPhone, it is converted to a standard JPEG file.
There are, however, always workarounds to get our way. I was looking for a way to post Live Photos on Instagram Story and I found three. Now, to make things simple, I have divided this article into 3 parts:
- Use Instagram to post Live Photos to Instagram
- Use WhatsApp to post Live Photos to Instagram
- Install an app to post Live Photos to Instagram
Read: How to Set Video or GIF as Wallpaper on Your Android
Post Live Photos on Instagram Story From iPhone
1. Use Instagram to post Live Photos to Instagram
Live Photos are stored as a collection of individual frames and when you tap a live Photo in the Camera Roll, it plays as a short 1.5s clip. The whole point of capturing Live Photos was to capture candid moments and with this app, you can now play this on a loop forever.
One way to post Live Photos on Instagram is hidden in plain sight. The Boomerang feature uses your Live Photos stored on the iPhone as is in Instagram Stories and can even convert those Live Photos to videos to post as stories. Let’s see how.
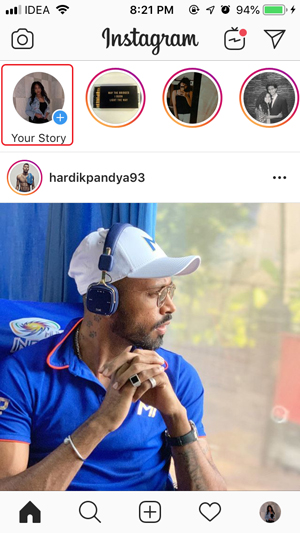
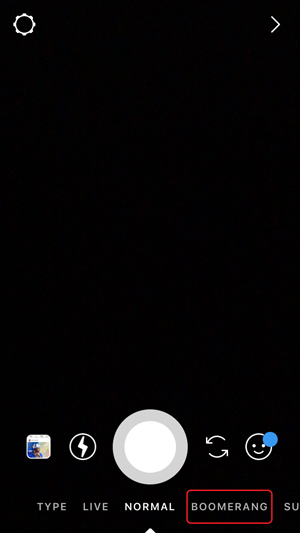
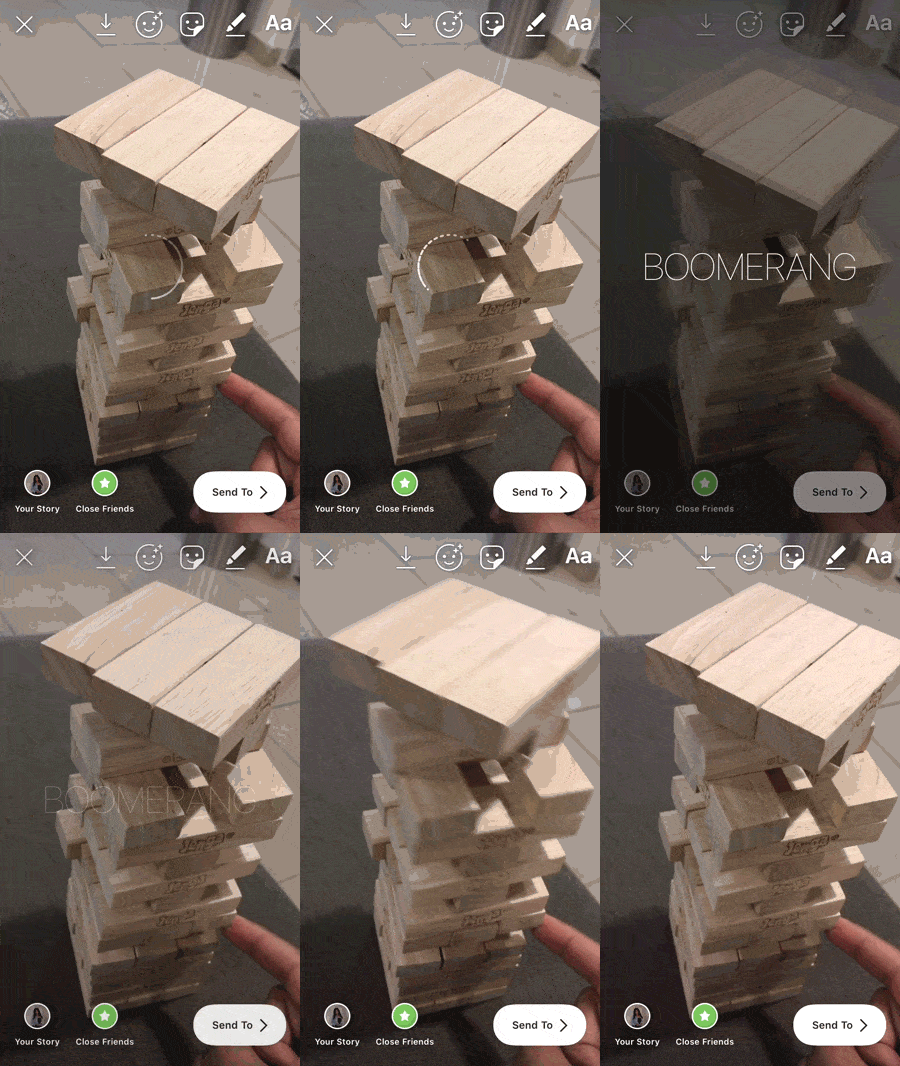
Open your Instagram app on your iPhone and log in with your Instagram account. After logging in, tap the Camera button or the Avatar on the top left. It would open the Camera and you can create stories here. You’ll see a few different options like Live, Normal, Boomerang, etc. Tap the ‘Boomerang’ option.
You can either create fresh clips using this feature or convert existing Live Photos into the Boomerang clips. To select a Live Photo from the Camera, simply, swipe up on the screen to open a popup menu. You can tap a Live Photo to select. There is no special marker for Live Photos to distinguish them from regular images so make sure you select the correct image.
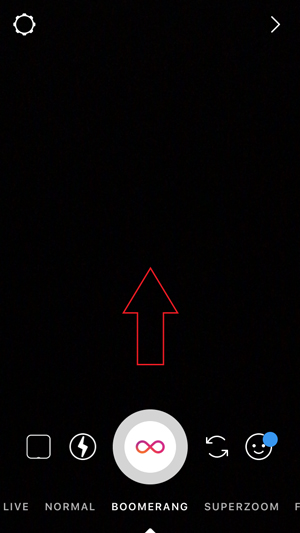
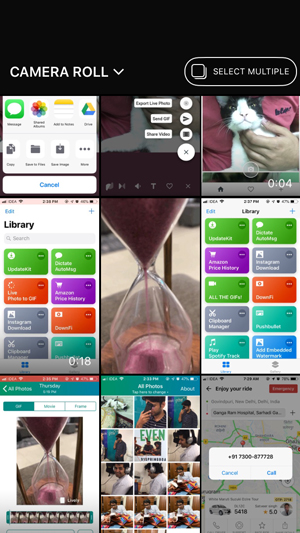
After selecting the Live Photo, it would still seem like a still image. Don’t Worry, just long press or 3D touch the screen to turn on the Boomerang Feature. If your image doesn’t convert to Boomerang then either it is a normal picture instead of a Live Photo or you just haven’t pressed the screen long or hard enough.
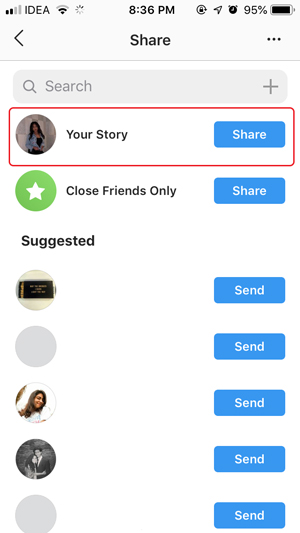
After your image is converted to a Boomerang, you can share it as your Story or share it with your friends on Instagram. Tap ‘Send To’ button on the bottom and select an option to post the Live Photo as your Instagram Story.
2. Use WhatsApp to post Live Photos to Instagram
WhatsApp even though is a popular Messaging app, it has a few features that make it exceptionally user-friendly. You can play videos within the app, send documents, links, videos, and images including Live Photos. It can either send the Live Photo as a simple image, video, or a GIF.
We would need a chat thread to convert a Live Photo to GIF and if you are a responsible friend and don’t want to bombard them with a bunch of test images, then you can create a personal group in which you are the only member.
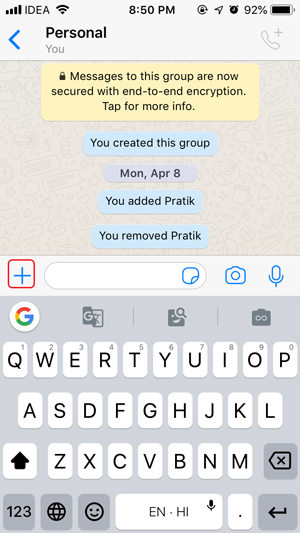
Open WhatsApp on your iPhone, tap on a chat thread and tap the + button. Select ‘Photo & Video Library’ to retrieve the images from your Camera Roll.
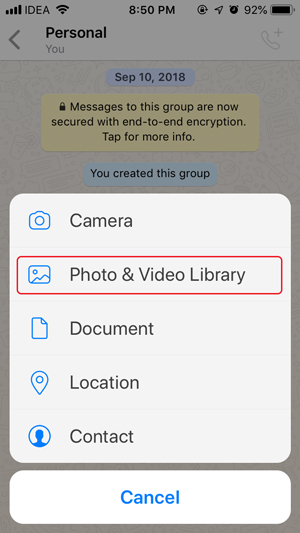
Unlike Instagram, WhatsApp makes a clear distinction between normal images and Live Photos. You can see a small dot on the bottom left corner of every Live Photo, 3D touch or long press a Live Photo to open a menu. It will let you select the Live Photo as a normal photo or as a GIF. Tap ‘Select as GIF’ to proceed.
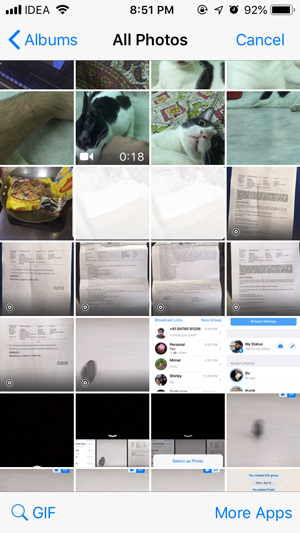
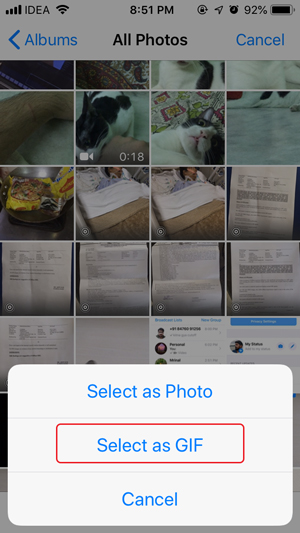
You can even edit the length of the Live Photo to suit your needs by adjusting the slider on top. The toggle on the top right can be used to convert the Live Photo to either GIF or a Video.
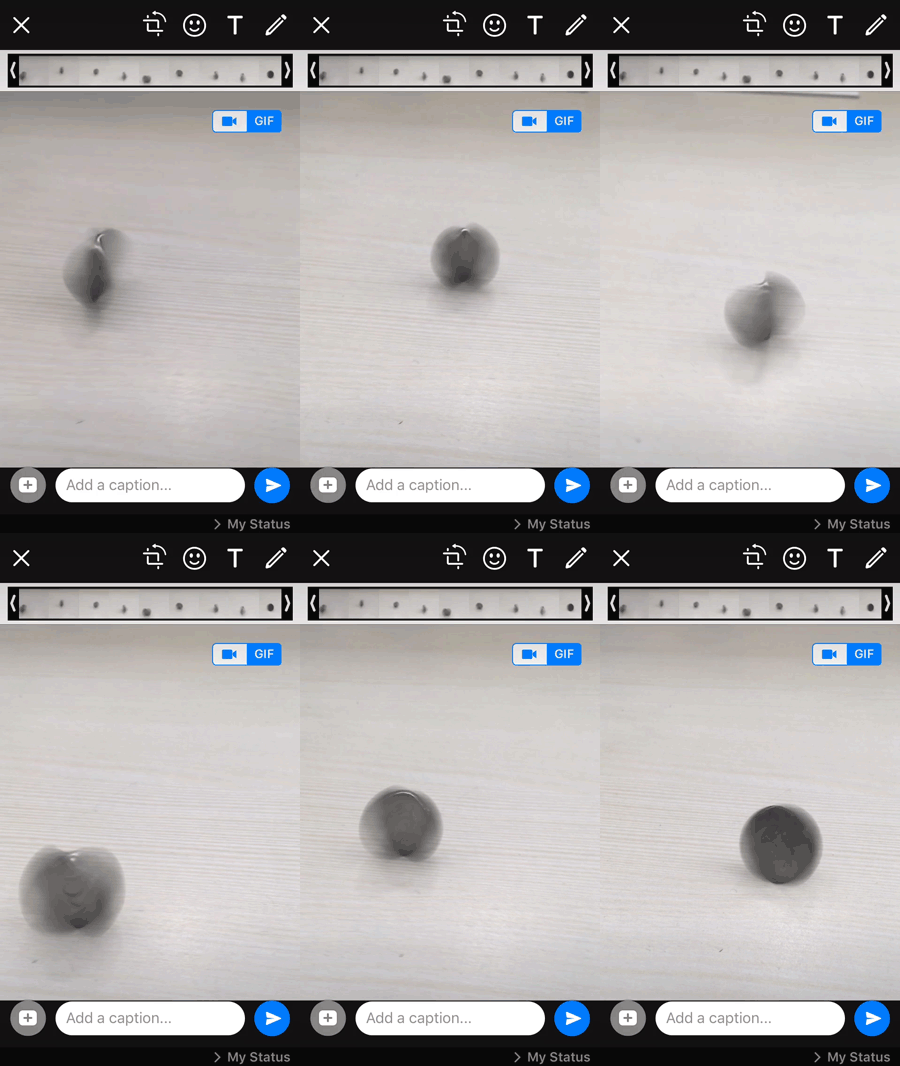
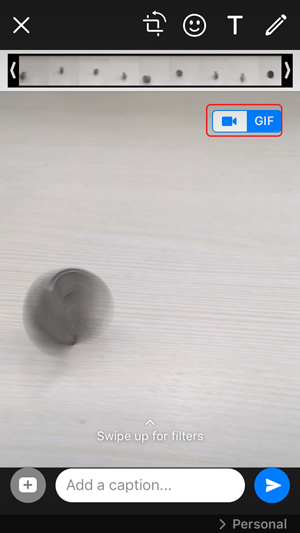
You can’t download GIFs on WhatsApp for iPhone that’s why we’ll send the Live Photo as a Video and download it to the Camera Roll. After Sending the Video, tap the video and then the ‘Share‘ button on the bottom left.
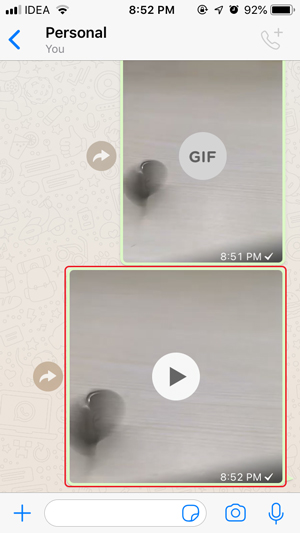
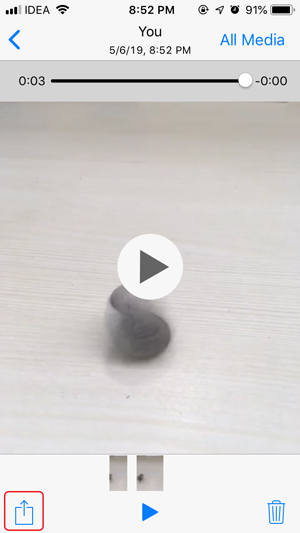
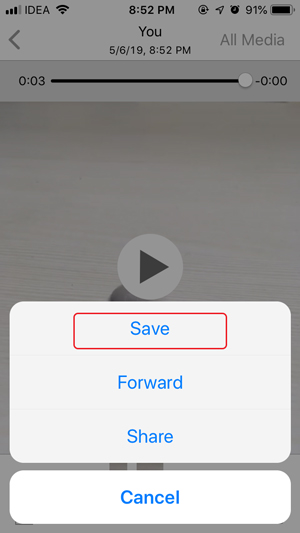
You’ll get the option to save the video to your Camera Roll. Now, you can find the video and upload it to Instagram the same way we did with the previous method.

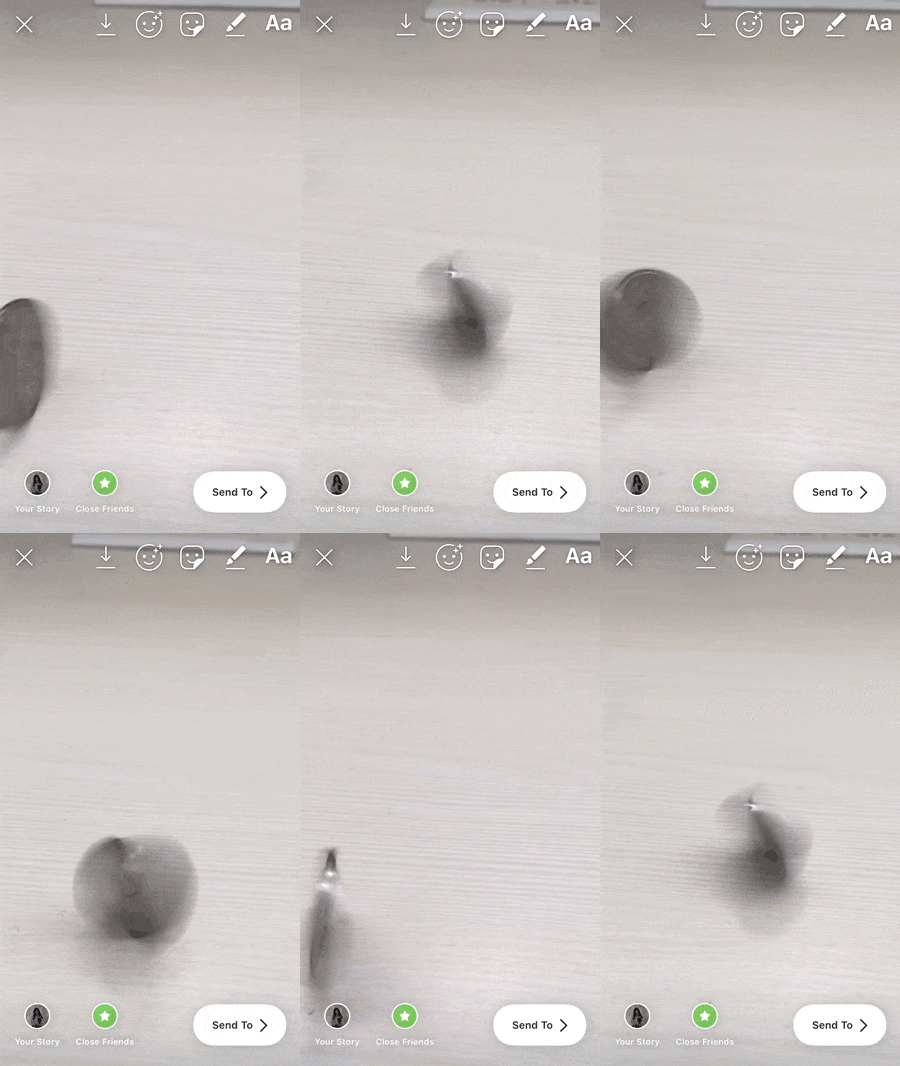
Tap the Camera button on the top left or swipe right from the left edge of the screen in the Instagram app and swipe up to load the options from the Camera Roll. Select the first video from the list of options. You can share it as your Story on your profile. Don’t forget the hashtags.

3. Install an app to post Live Photos to Instagram
While the above two methods work flawlessly, those methods don’t offer a lot of editing options other than Instagram. Motion Stills is another decent app for iOS that not only converts your Live Photos to GIFs but also lets you create new ones, among other decent features like a collage maker and a movie maker. You can export the captured footage as a Live Photo, share it as GIF or a Video.
Start by simply tapping the camera button to capture a new Live Photo. You can also select existing Live Photos by scrolling through the thumbnails.
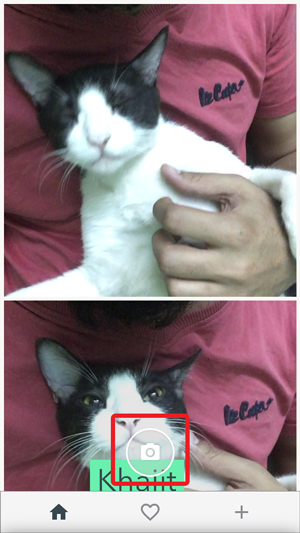
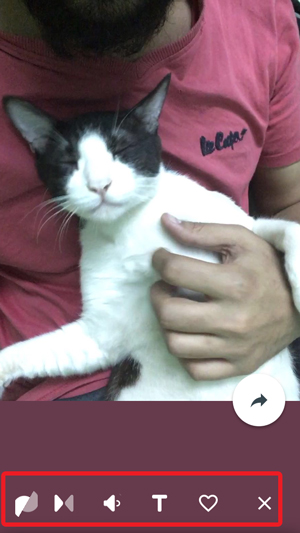
After selecting a Live Photo, you can do a bunch of things like cropping the Live Photo a bit, enable auto reverse, and add text.
The motion text feature is a little interesting, it tracks the subject much like other powerful video editor apps. You can simply input a text, select a color and place it on the moving subject. It automatically sticks to the subject and tracks the movement automatically. It’s pretty fun.

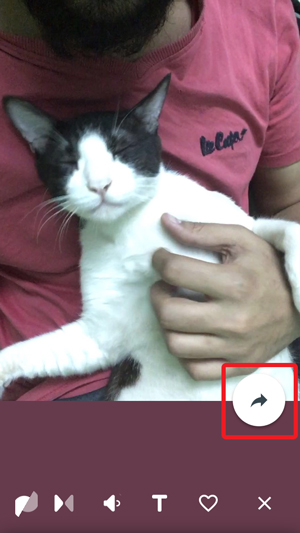
You get three options, either you can export it as a Live Photo, send it as a GIF, or share as a video. Tap the Share button to open the menu and select an option to export.
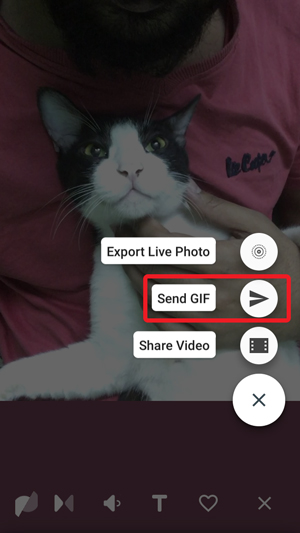
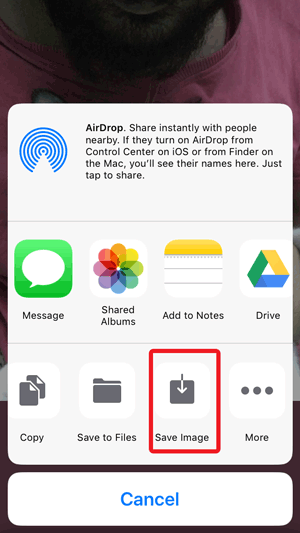
You can save the GIF using the Save Image button in the Share menu. Tap the Save Image button to save the GIF to your Camera Roll.
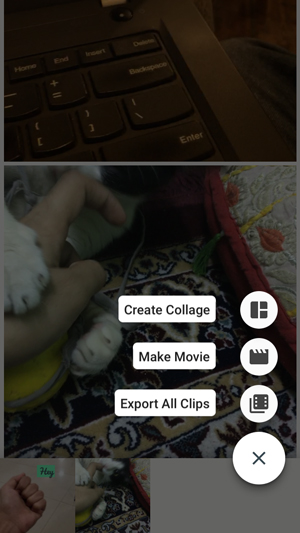
This app has a major advantage over Lively as it can process multiple Live Photos. You can use this app to create interesting collages, combine multiple Live Photos to create a Video, or batch export Live Photos as GIFs.
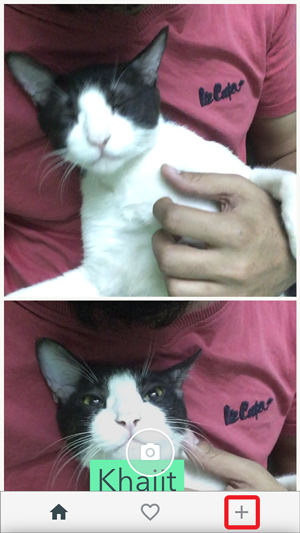
Tap the + button on the homepage to open the pop-up list. Select any one of the options to begin.
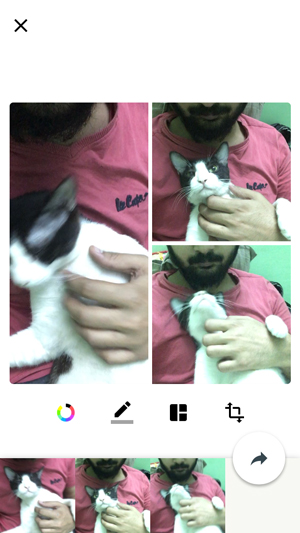
The Collage editor lets you adjust border size, width, and color. You can choose from a list of 20 different Collage styles with up to 4 Live Photos in one.
Instead of going for a Collage, you can create one single video with all the Live Photos combines and playing in a sequence.
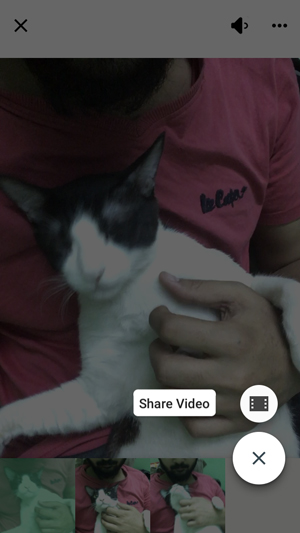
To share the videos and GIFs, you can simply find the videos in the Camera Roll and use the above methods to post Videos as Instagram Story.
I take a lot of pictures of my cat and he’s always on the run. So I have a huge number of Live Photos which I converted to make a long video of his shenanigans. You should try it, it’s great.
Post Live Photos on Instagram Story
These were three ways to post Live Photos to Instagram Story and I really like that every way is unique itself. Lively, simply put converts your Live Photos to GIFs but you can extract individual frames from the Live Photos which counts as the real candid shots. Motion Stills is a pretty intense app, performance wise and has a lot of cool features but the best part about this app is that it lets you merge all the Live Photos into one single video. The Siri Shortcuts are my personal favorites because I can see how the conversion actually happens and it certainly looks cool. How do you turn Live Photos to GIFs, tell me in the comments below?
Also Read: Best Ways to Reduce GIF Size Without Losing Quality