Wallpapers and screensavers help you personalize your Mac experience, so that you can easily identify your Mac. While macOS Sonoma brings exciting new video screensavers, you can also set videos, favorite movie clips, or even music videos show up when your Mac goes idle. Here’s how to set a video as a screen saver on your Mac.
Table of Contents
1. Use Built-in Video Screen Savers on macOS Sonoma
macOS Sonoma has new screen savers that show slow-motion videos of some of the most beautiful locations around the world. This includes the sweeping skyline of Hong Kong, the sandstone buttes of Monument Valley in Arizona, and the rolling hills of Sonoma in Northern California.
Here’s how to make your Mac play these beautiful aerial views when it goes idle:
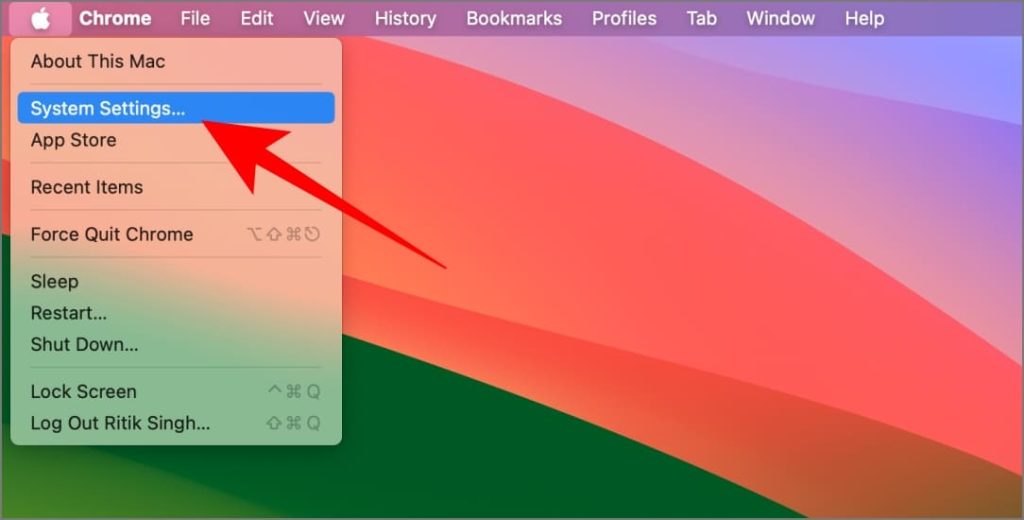
1. Tap the Apple logo in the top-left corner and select System Settings from the context menu.
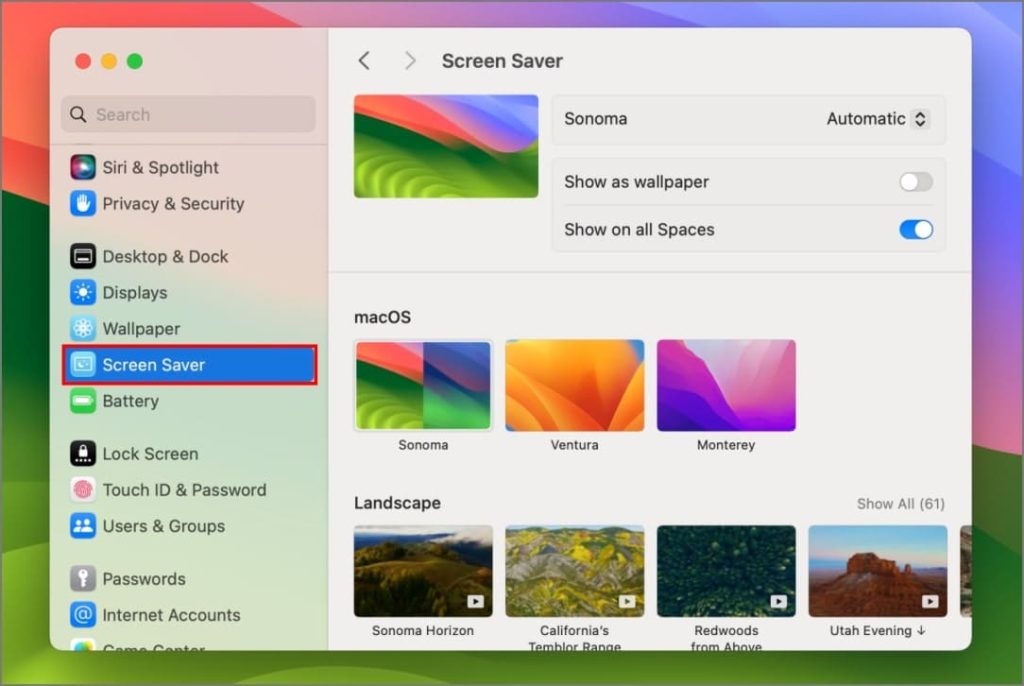
2. Choose Screen Saver in the left sidebar.
3. Scroll down, choose your video screensaver, and download it, if necessary. Choose whether you want the screen saver to show as wallpaper and on all spaces.
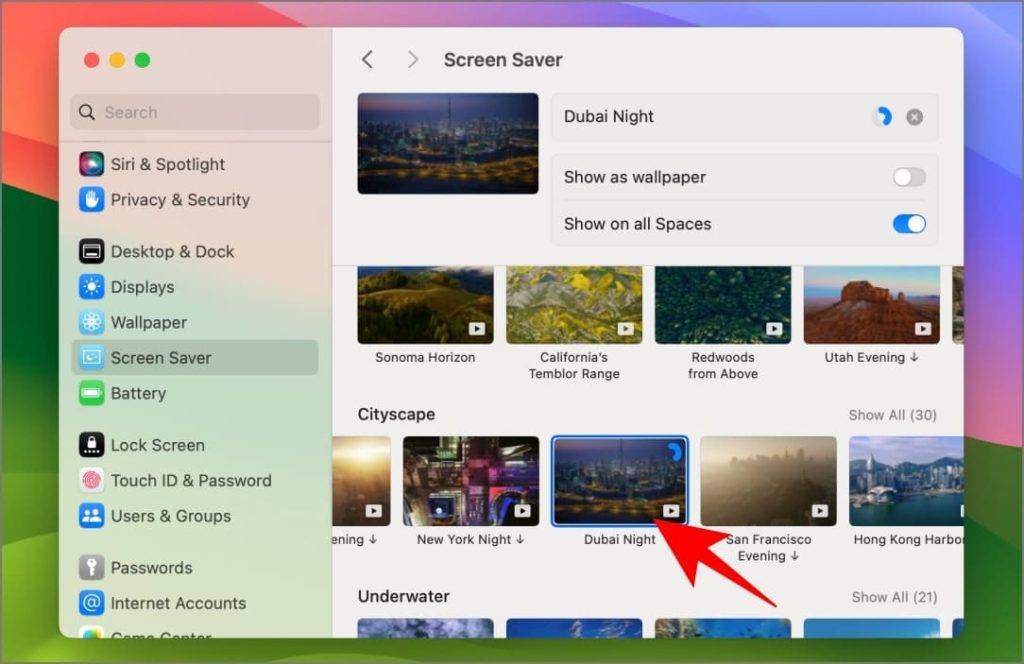
You can choose between Landscape, Cityscape, Underwater, and Earth categories as your video screen saver.
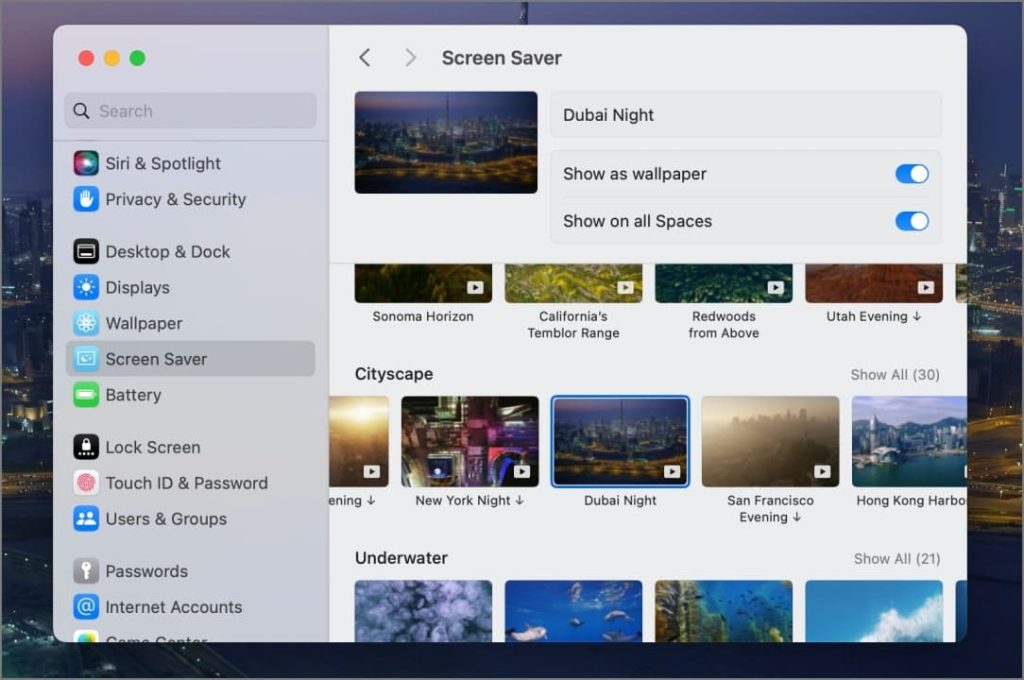
Once your Mac goes idle: the screen saver will begin to play in slow motion. Touching the trackpad or pressing a key will reveal the login experience, which has now been repositioned to the bottom to accommodate the new screen savers.
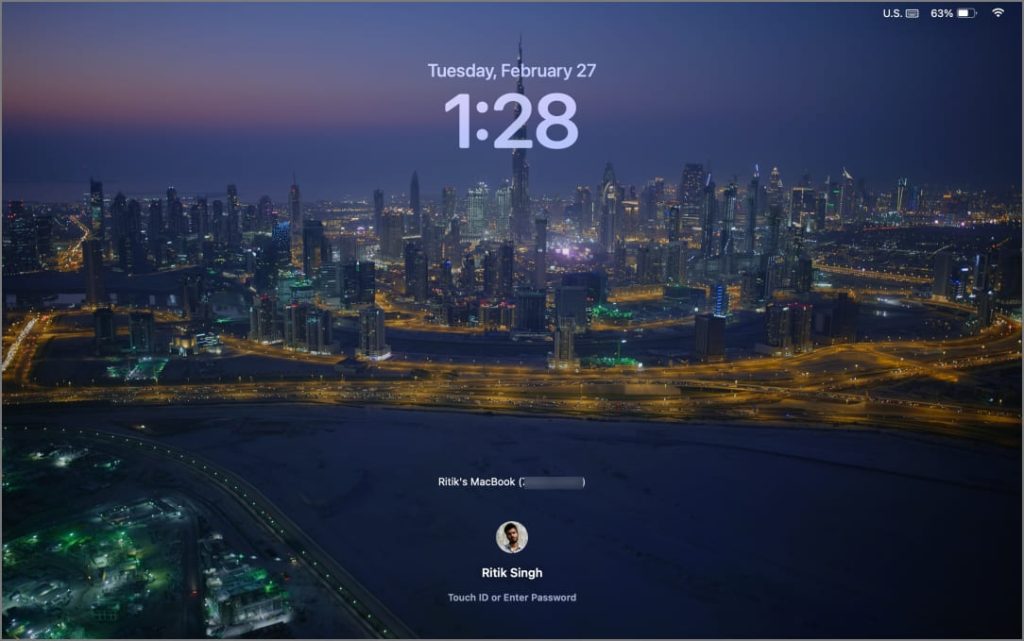
When you log in, it seamlessly transitions to the desktop.
Also Read: You can add and customize widgets in macOS on Mac.
2. Set Your Video as Mac Screen Saver Manually
At times, you may want to set your video screen saver despite the plenty of options in macOS Sonoma. Thankfully, you can manually place your videos in the appropriate folder, without any third-party app.
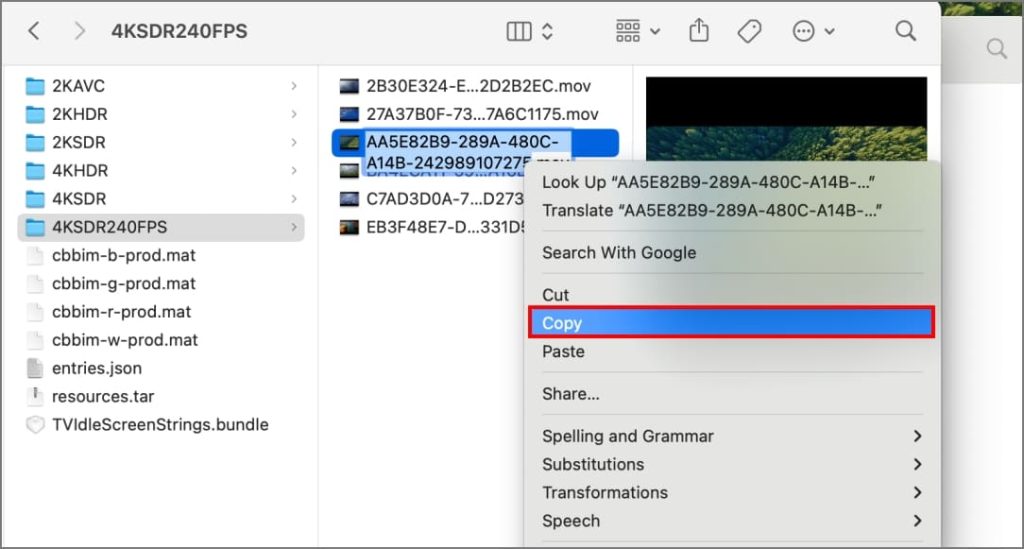
First, you’ll need to find the folder where macOS stores its built-in video screensavers. Once you’re there, copy the filename of one of Apple’s videos. Rename your video file to match that copied filename exactly. Finally, replace Apple’s original video file with your renamed one.
Check the detailed instructions below:
1. Open Finder on your Mac.
2. Press Shift + Command + G or tap Go (on the menu bar at top) and select Go to Folder.
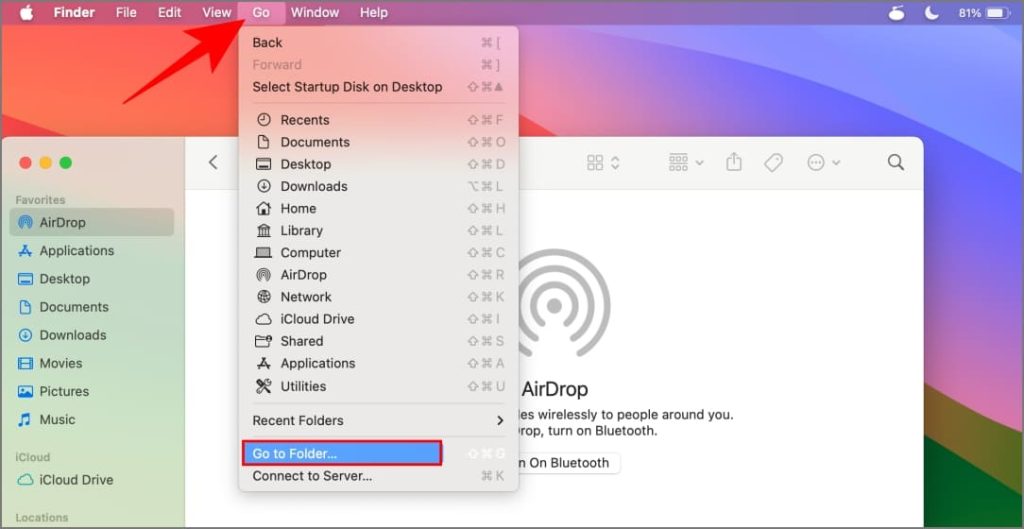
3. Paste the following path in the search box and press Return:
/Library/Application Support/com.apple.idleassetsd/Customer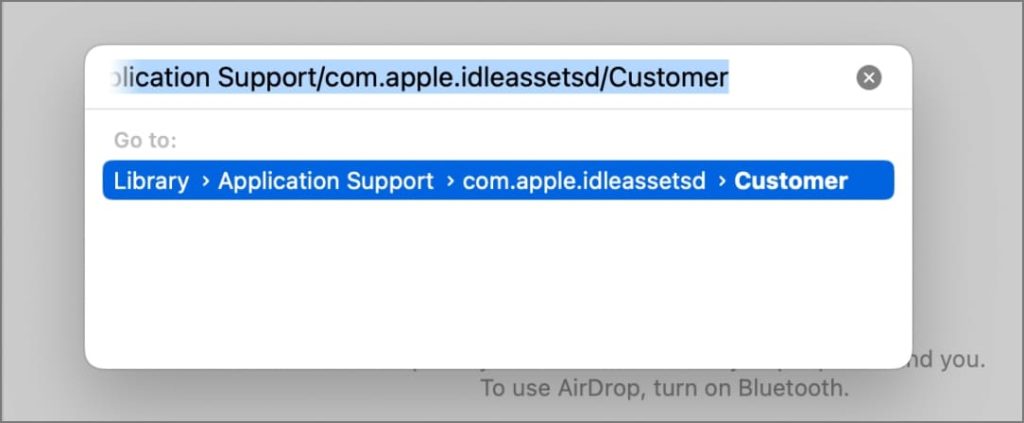
4. Check the sub-folders in this directory. You’ll find the downloaded video screen savers in that folder.
If you can’t find one, download some from System Settings > Screen Saver as shown in the first method.
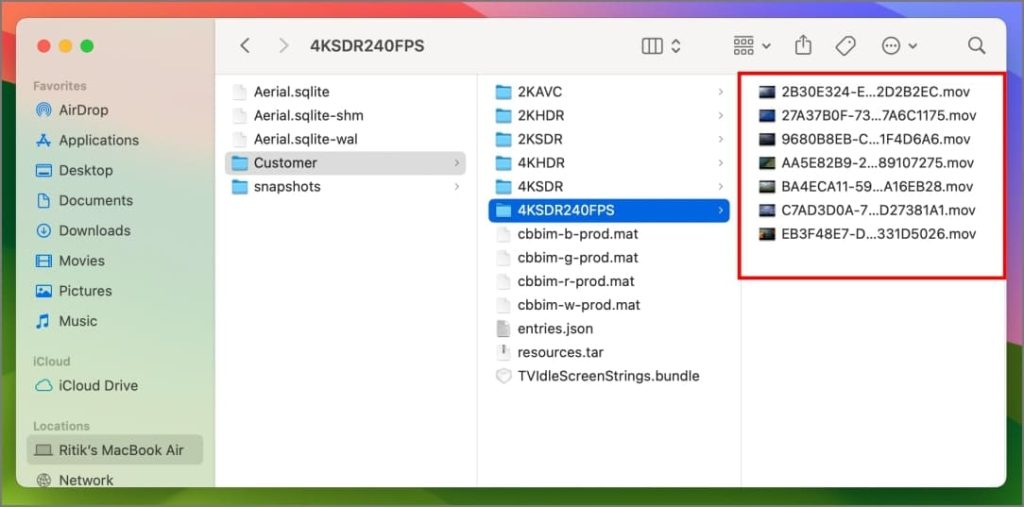
5. When you find a video, copy its file name.
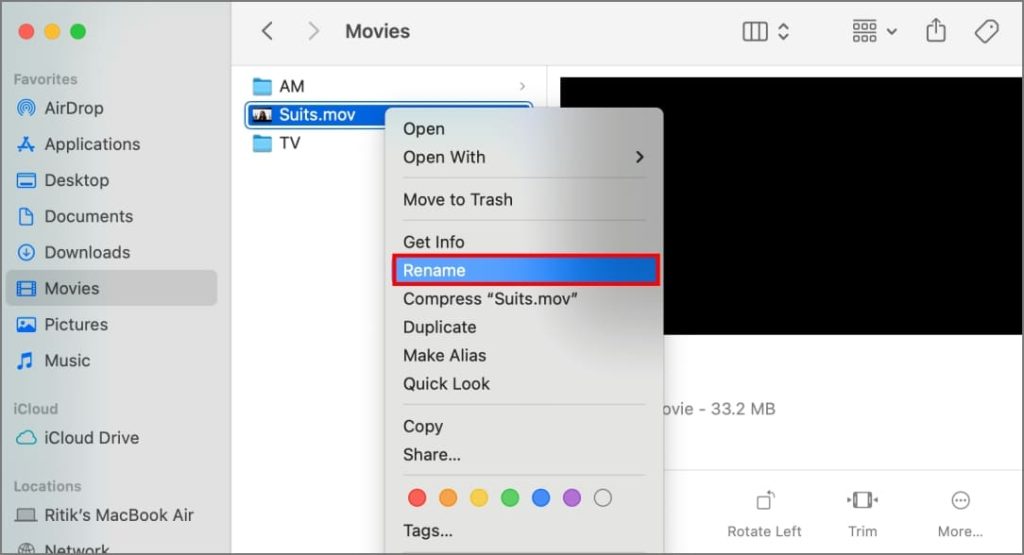
6. Go to the video you want to use as screen saver. Right-click on it and hit Rename.
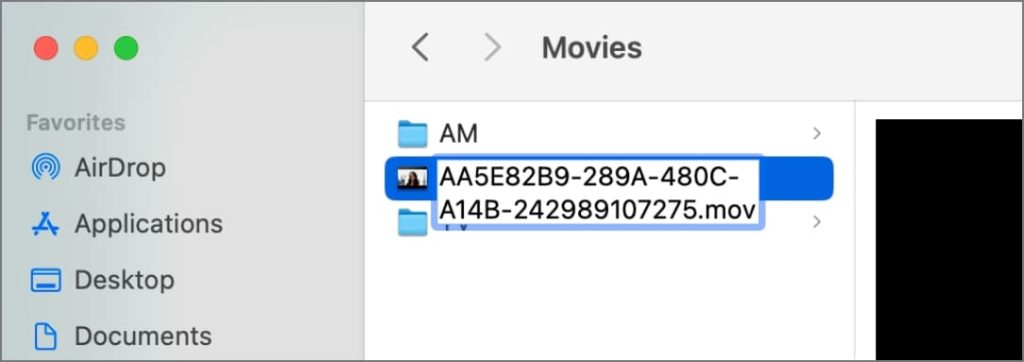
7. Rename it to the copied file name and change its format to .mov.
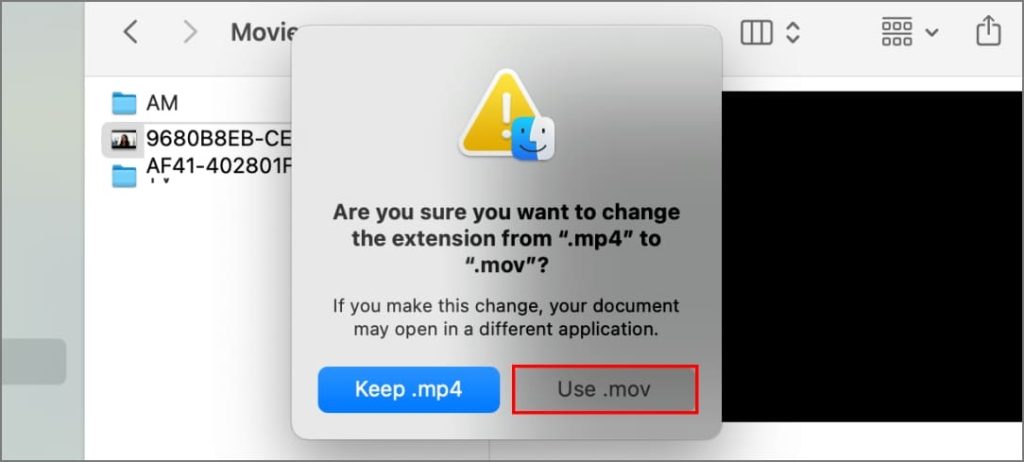
8. When changing the file extension, you’ll be prompted whether you really want to do it. Tap Use .mov to confirm.
9. Copy the renamed file and paste (or drag and drop) it in the corresponding sub-folder.
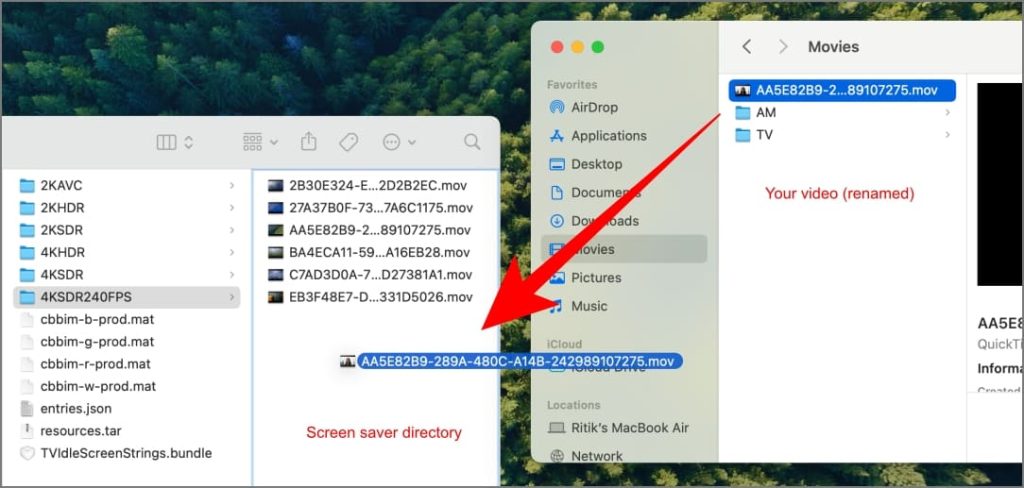
10. Tap Replace when you’re prompted to replace the original video with this file. You might be asked to use Touch ID or enter your password.

11. Head to System Settings > Screen Saver on your Mac. Choose the video screen saver for which you replaced the file.
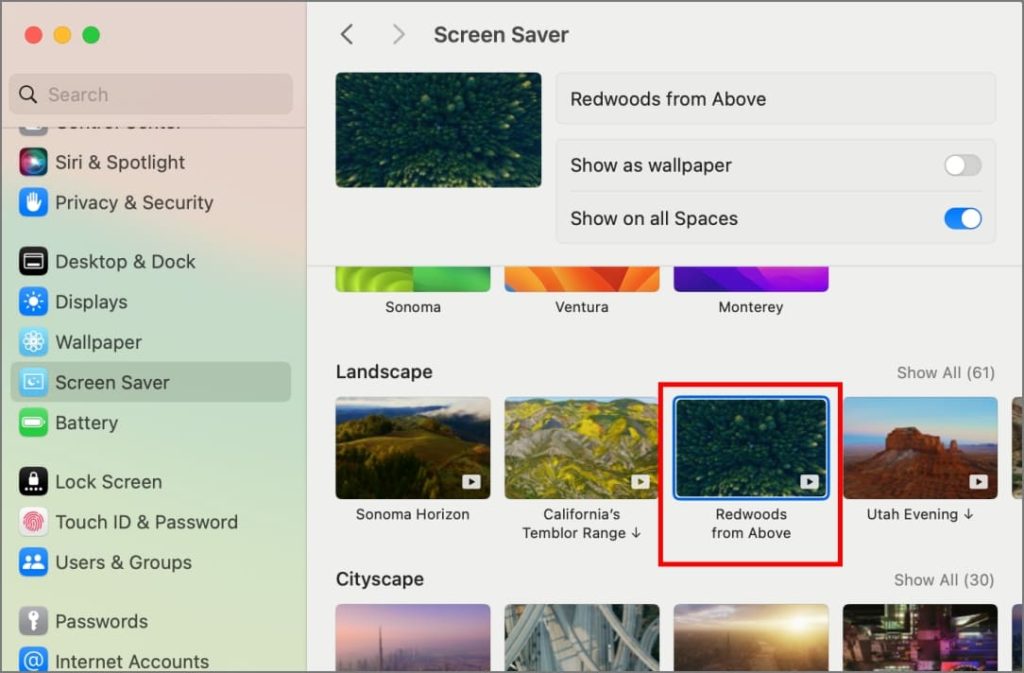
Leave your Mac idle for five minutes (or whatever inactivity time you’ve set). It will automatically play your custom video once the screensaver is triggered.
You might be wondering if this trick works for wallpapers as well. Unfortunately, the answer is no. Even if you select the replaced video in wallpaper settings, it will only display as a static image and not a video wallpaper.
3. Set a Custom Video Screen Saver Using SaveHollywood
If you want to personalize your screensaver with your own videos, like family memories, or snippets from your favorite music or movies to add a touch of entertainment while your Mac is idle, SaveHollywood can help too.
SaveHollywood is a free screen saver module for macOS X 10.8 and later. It allows you to play movies, videos, or multiple videos as screen saver on your Mac computer. Here’s how to use it:
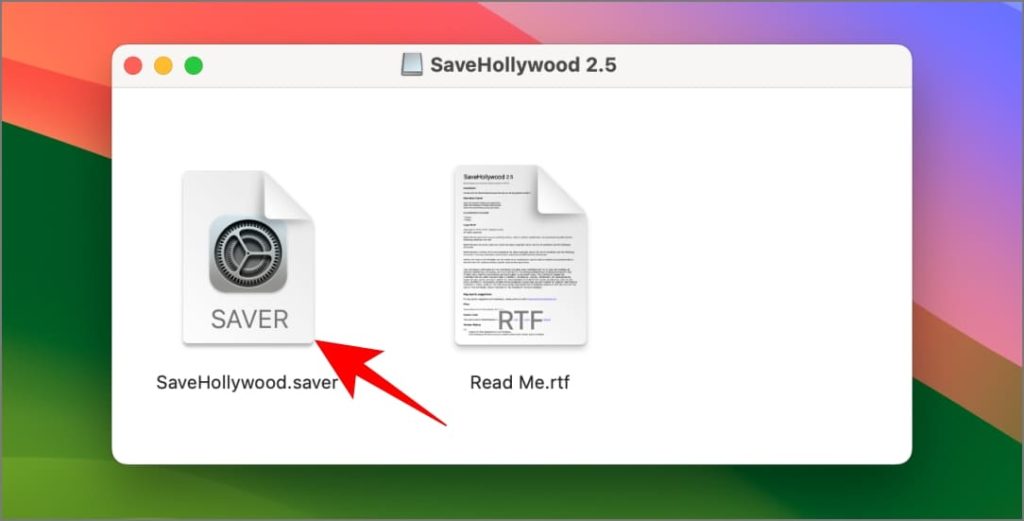
1. Download and open SaveHollywood.dmg on your Mac. Double-click on SaveHollywood.saver in the pop-up that opens next.
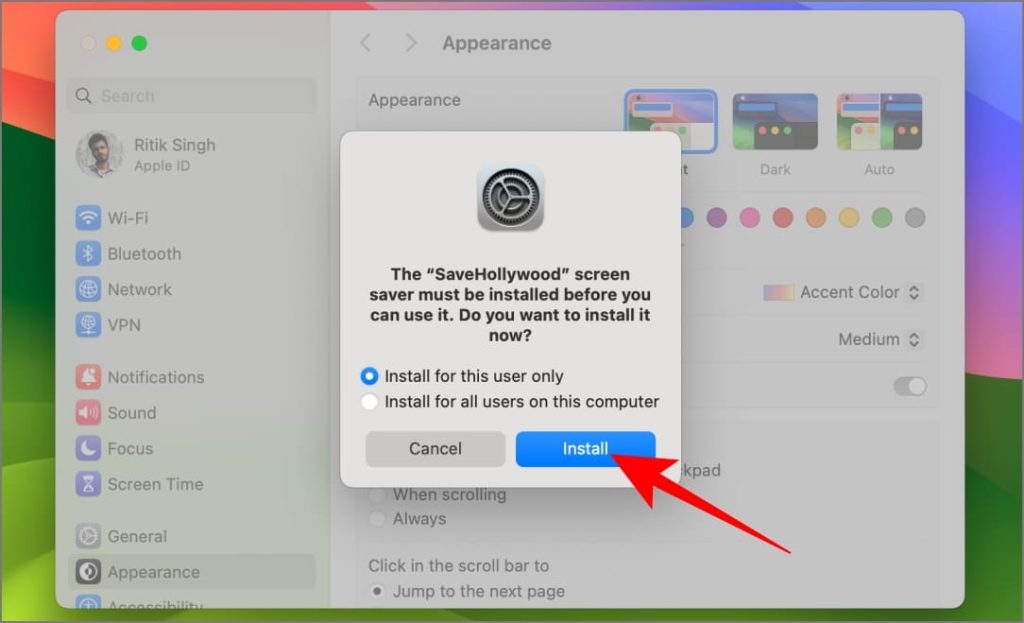
2. Choose whether you want to install it for only yourself or for all users on the device and tap on Install.
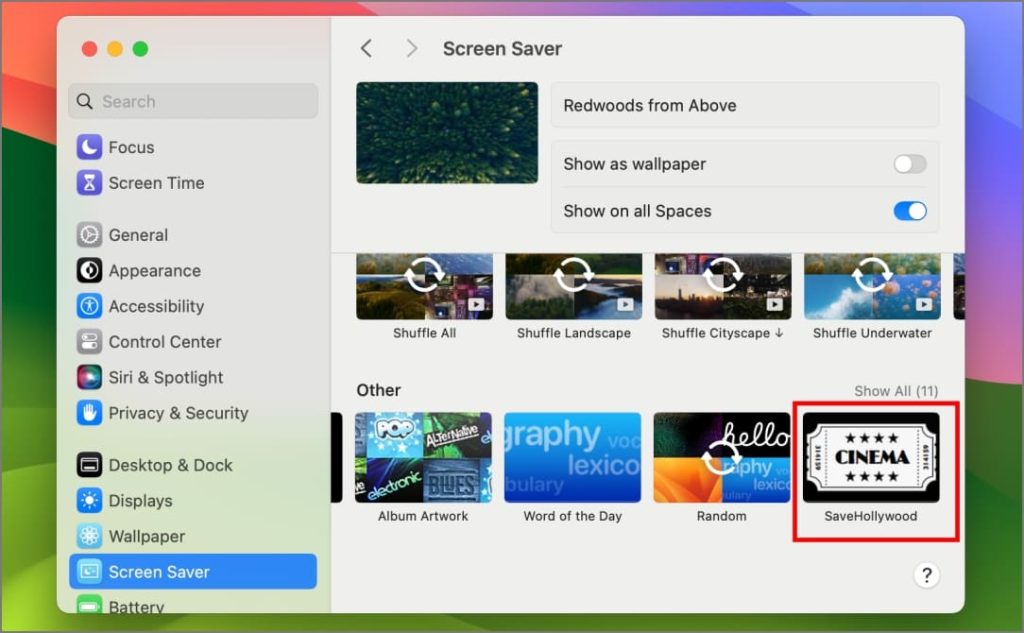
3. SaveHollywood will appear in System Settings > Screen Saver > Others. Select it.
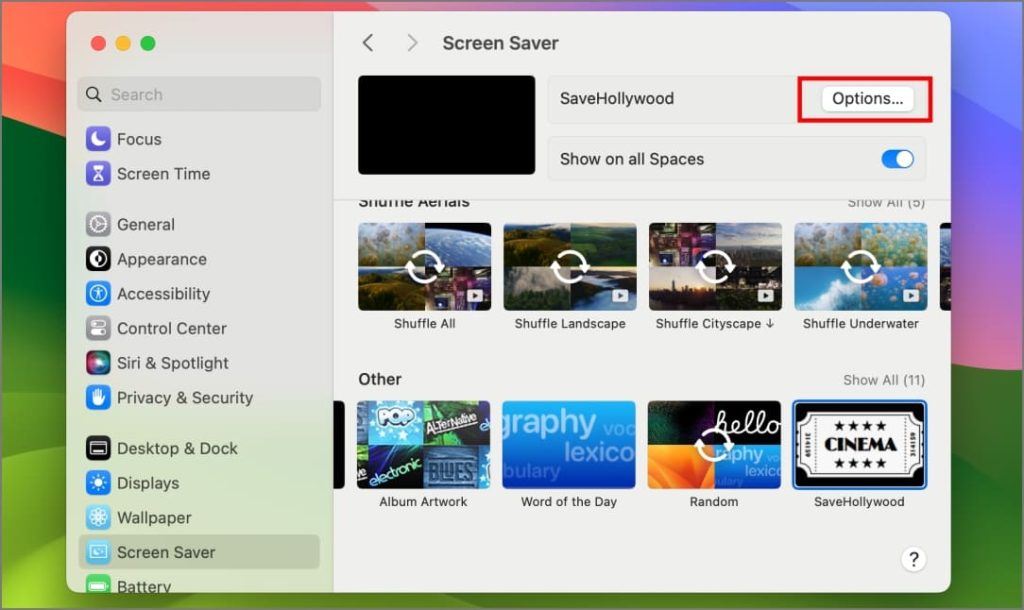
4. Click on Options on the top right of the screen saver window.
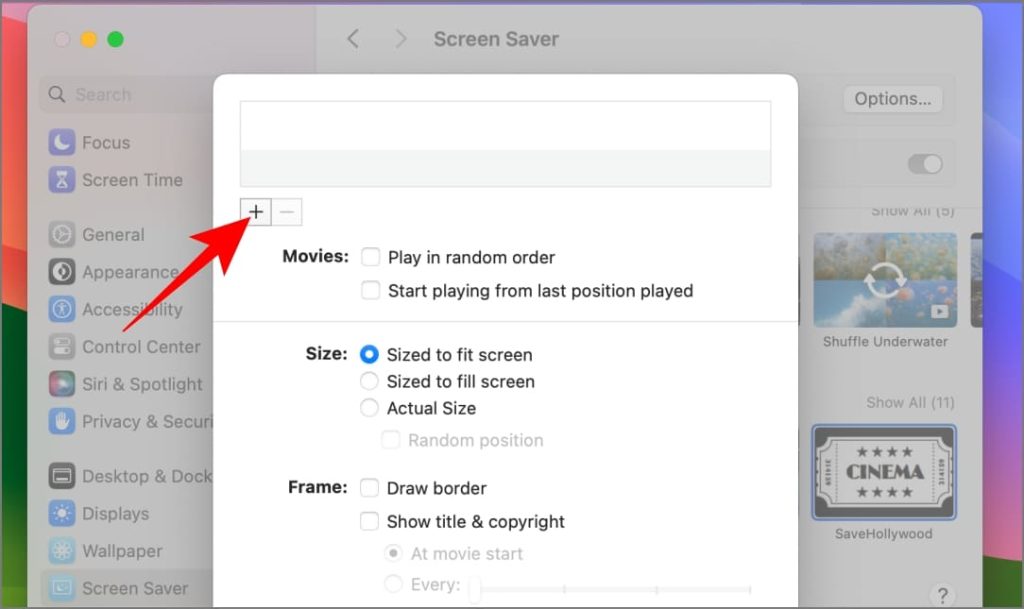
5. Click on the + sign and select a video (or multiple videos) you want to set as screen saver.
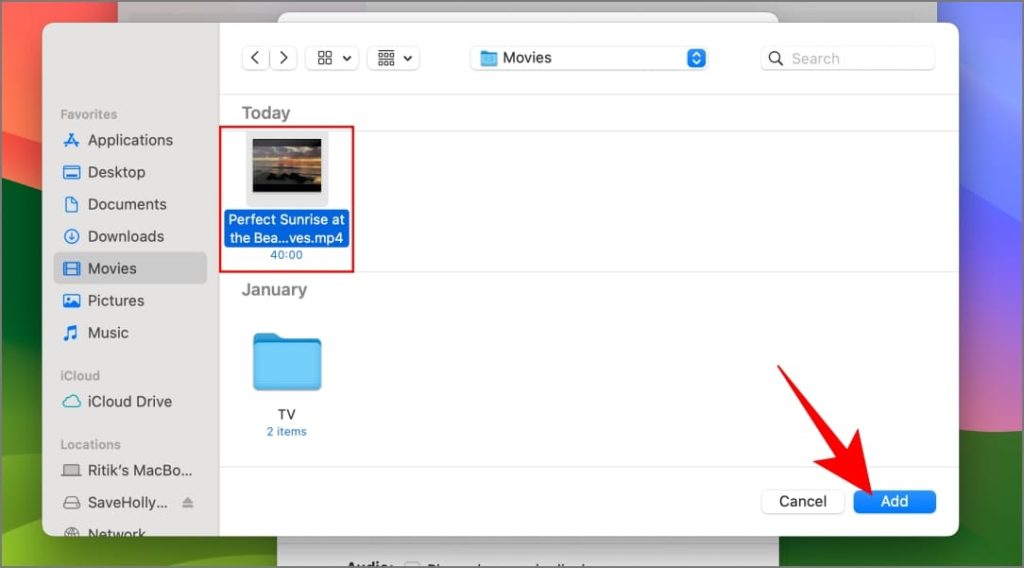
6. Once you’re done selecting videos, tap on Add to confirm.
7. Adjust the screen options based on your preferences, i.e., whether the video should fit the screen, fill the screen, or play in actual size and if you want any borders around the frame.
8. Finally, tap OK to save.

9. Keep your screen saver set to SaveHollywood in settings.
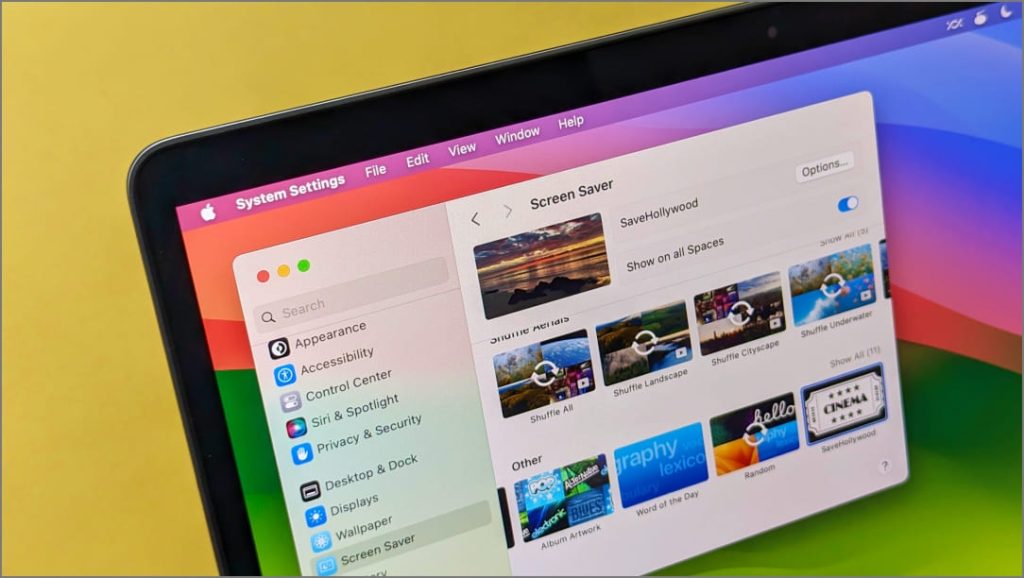
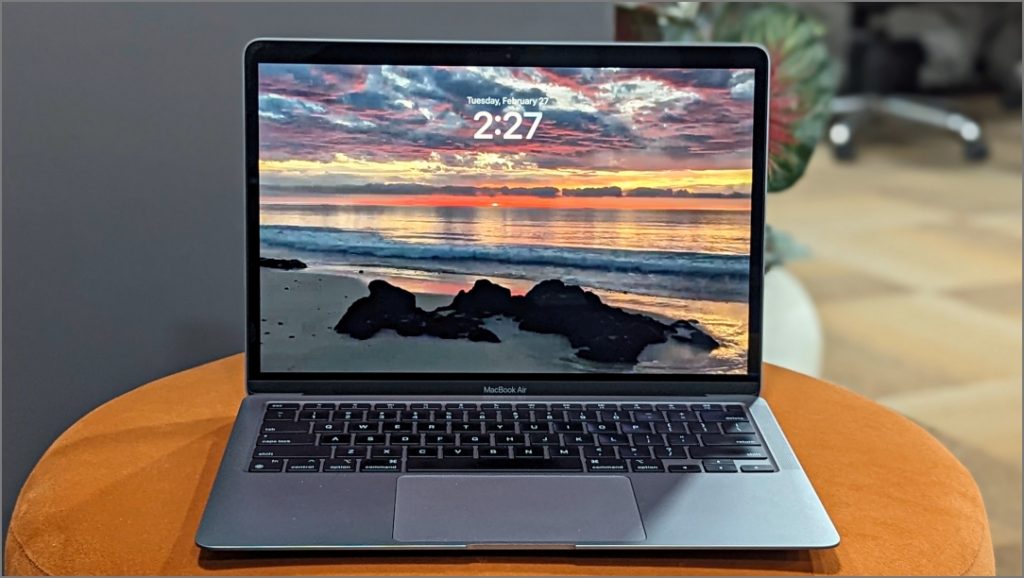
When your Mac goes idle, it will display the selected videos in your chosen order as your screensaver.
No Video Error in SaveHollywood
On recent macOS versions, you might see a ‘No Video’ message with a blank screen when using SaveHollywood, due to restrictions imposed by Apple. In that case, try these solutions:
- Head to users/shared and create a new folder (say, SaveHollywood).
- Copy the video files that you want the screensaver to play in this folder.
- Go back to System Settings > Screen Saver, choose SaveHollywood and tap on Options.
- Then, tap +, navigate to Users/Shared/SaveHollywood folder and select the videos from this folder.
Alternatively,
- Head to users/yourname/Library/Containers/legacyScreenSaver/Data/Library/ApplicationSupport/
- Here, create a folder named SaveHollywood.
- Drag and drop your video file to this folder.
- Go back to Hollywood Options menu. Tap on + and select the video from the above folder.
If it still doesn’t work, try Aerial– a SaveHollywood alternative that lets you play local videos as screen saver.
Change When the Screen Saver Appears on Your Mac
By default, a Mac’s screen saver automatically turns on after about five minutes of inactivity. You can change the time after which the screen saver begins using the steps below:
1. Head to System Settings > Lock Screen on your Mac.
2. Tap the drop-down menu for Start screen saver when inactive.
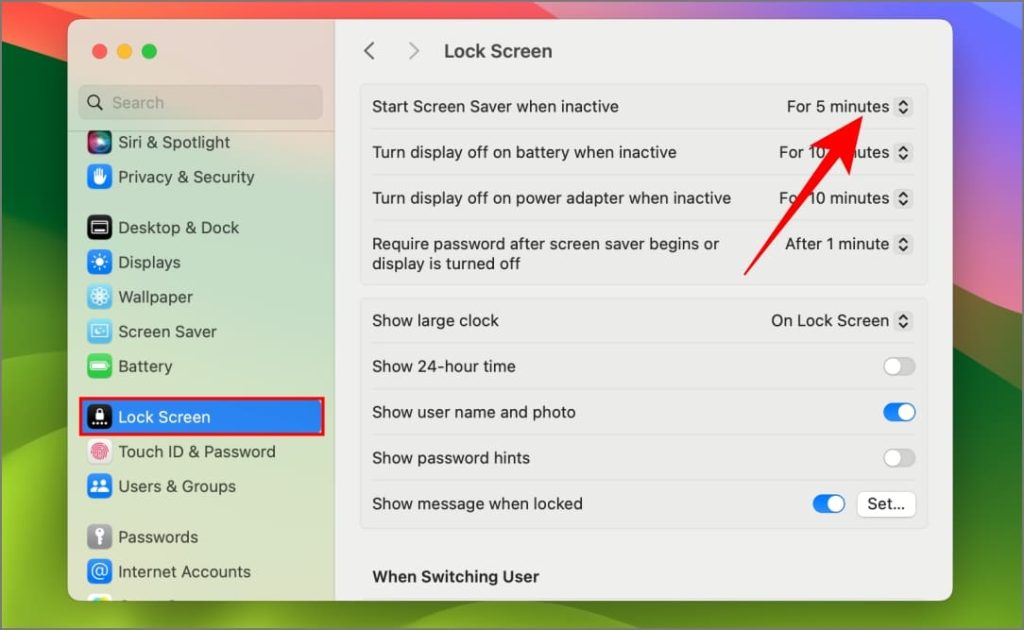
3. Choose your preferred time.
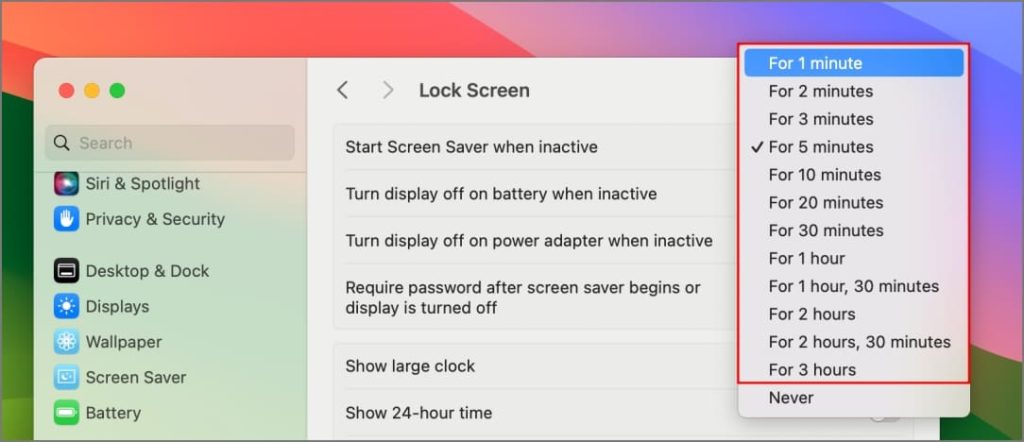
Make sure that Turn display off when inactive time is always more than the inactivity time required for triggering the screen saver. Else, your Mac screen will turn off before the screen saver starts.
Tip: You can also make the lock screen clock appear on the screen saver. To do so, tap drop-down menu for Show Large Clock and choose On Screen Saver and Lock Screen.
Password Protect Your Screen Saver
Locking the computer when the screensaver starts is a good security practice if you frequently step away from it for short periods. Here’s how to make your Mac require a password when it wakes from the screensaver:
1. Go to System Settings > Screen Saver.
2. Tap the drop-down menu next to Require password after screen saver begins or display is turned off.
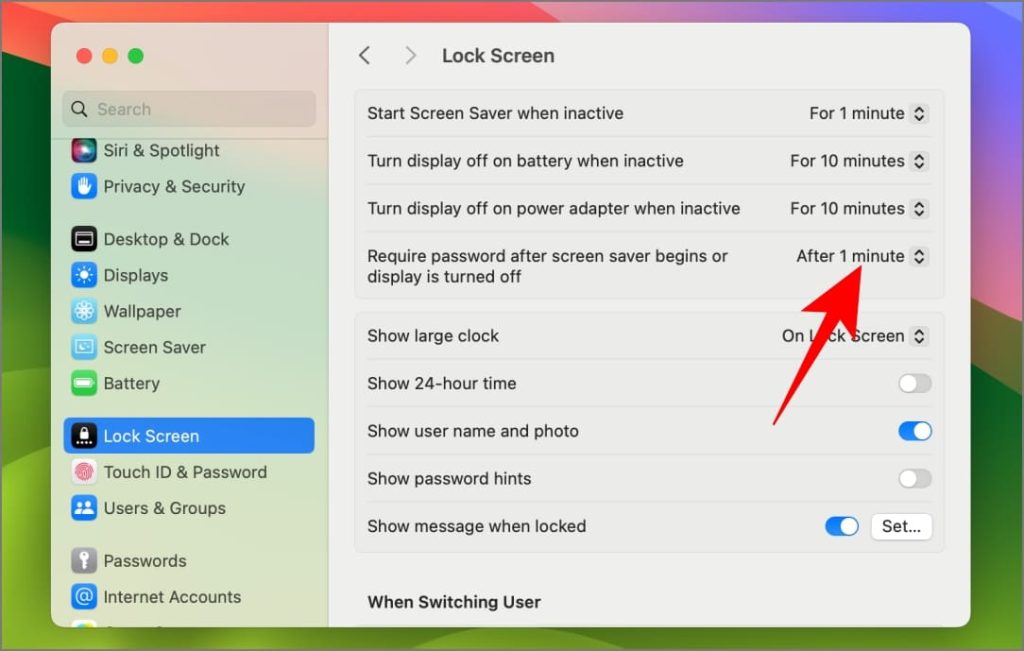
3. Change it to Immediately.
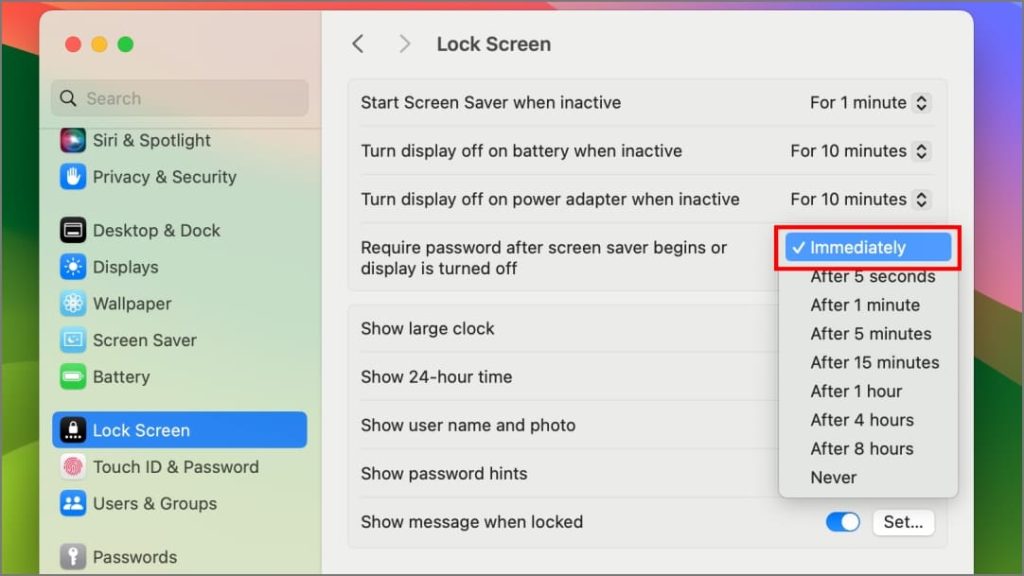
This will lock your Mac instantly when the screen saver appears and you’ll have to use Touch ID or password to unlock it.
Enjoy Video Screen Saver on Your Mac!
While Apple leaps to offer beautiful video screen savers with macOS Sonoma, it still doesn’t offer a built-in option to set your videos as a screensaver or live wallpaper. But don’t fret! If that’s your ultimate goal, there are workarounds: you can rename and replace video files or try the SaveHollywood app shown above. Go ahead and flaunt your pet playing in the garden or a movie that motivates you on your Mac’s screensaver.
If you’re a student looking to get the most out of your Mac, we have essential Mac tips and tricks to help you make the best of it. And for those switching from Windows, we’ve covered you with tips for new Mac users.