Bought the new shiny Apple Vision Pro? Besides enjoying it yourself, connect the Vision Pro to your Mac to enhance its experience. Also, when you connect your Mac to Vision Pro, you basically bring Mac’s interface to the visionOS to place it anywhere in the space. You can also make the display size bigger, take your Mac screen along with you around the house, get into a more focused environment with no distractions or you can simply use your Mac along with your other Vision Pro apps.
But before connecting, there are a few prerequisites.
Table of Contents
Things to Do Before Connecting Mac to Vision Pro
To use your Mac with Apple Vision Pro, there are a bunch of things you need to ensure are in sync. With that, you can seamlessly enjoy your Mac’s interface in Vision Pro and vice versa.
1. Use Same Apple ID
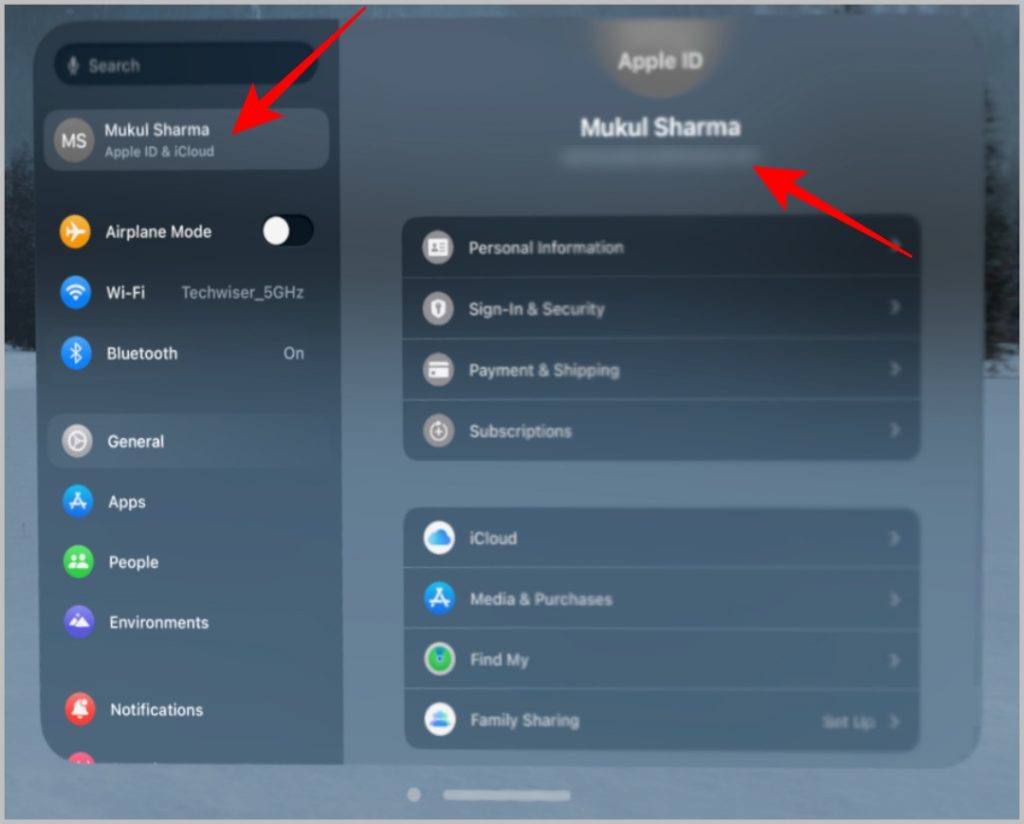
For starters, you’ll need to use the same Apple ID with the Vision Pro and your Mac. After that, you’ll need to use your Apple Vision Pro to check and confirm if you’re using the same Apple ID as your Mac. Here’s how to check that.
From the Home view of your Vision Pro, look at Settings app. Tap your fingers together to open the Settings app and tap on your name at the top-left corner of the Settings app. Next, check your Apple ID on Vision Pro and confirm if it’s the same one you use on your Mac.
2. Ensure Mac Runs macOS Sonoma or higher
Your Mac needs to run macOS Sonoma or later. Also, make sure your Vision Pro runs the latest version for a smooth experience.
3. Enable iCloud Keychain on Mac and Vision Pro
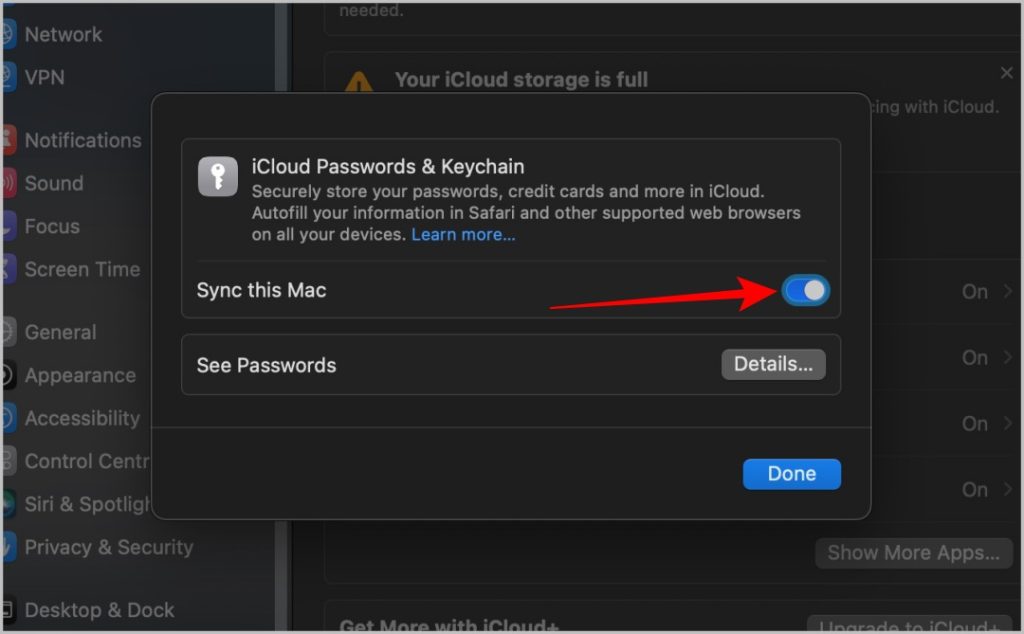
You’ll need to enable iCloud Keychain option on both devices. On your Mac, go to System Settings > tap your name at the top > iCloud > Passwords & Keychain, then enable the toggle beside Sync this Mac.
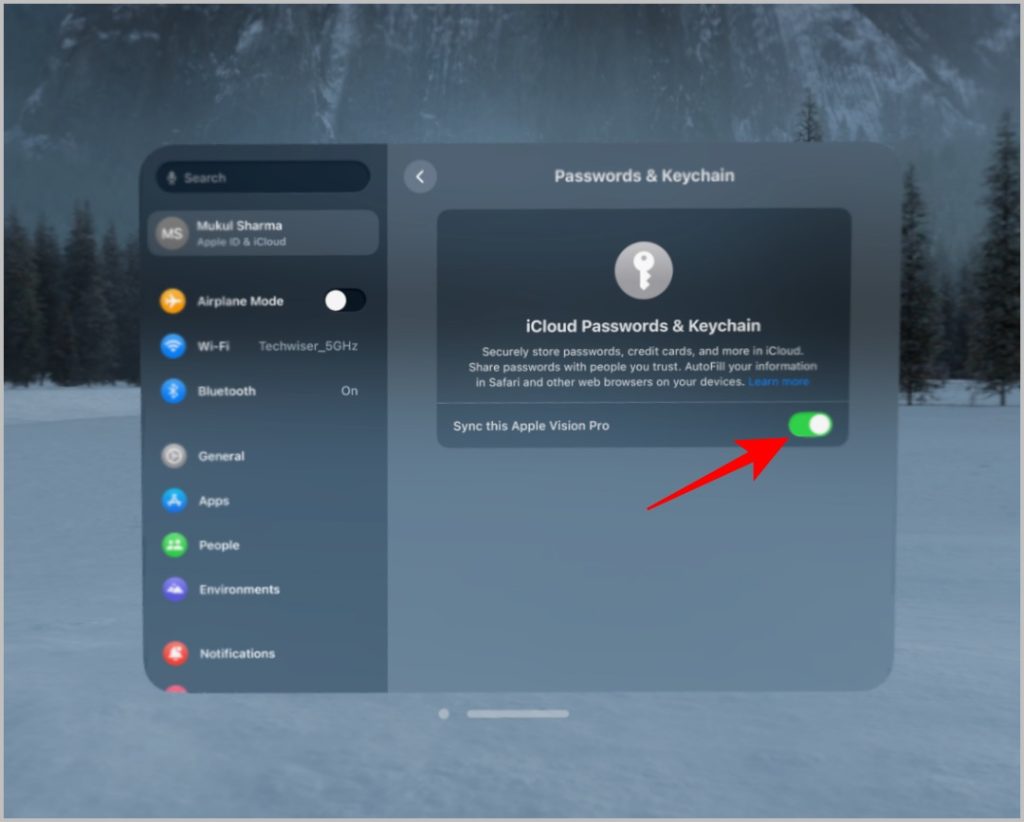
On your Apple Vision Pro, look at the Settings app and tap your fingers to select it. Look at your name at the top-left and tap your fingers to select it. Next, look at iCloud option and use the tap gesture to select it. Next, look at the Passwords and Keychain, then tap your fingers to enable the toggle beside Sync this Apple Vision Pro.
4. Turn on Wi-Fi and Bluetooth
You also need to enable Bluetooth and Wi-Fi on the Mac and Vision Pro while keeping them within 30 feet of each other. Also, you’ll need to ensure that both connect to the same Wi-Fi network, but you don’t share the internet connection of your Mac with Vision Pro and vice versa.
5. Enable Handoff
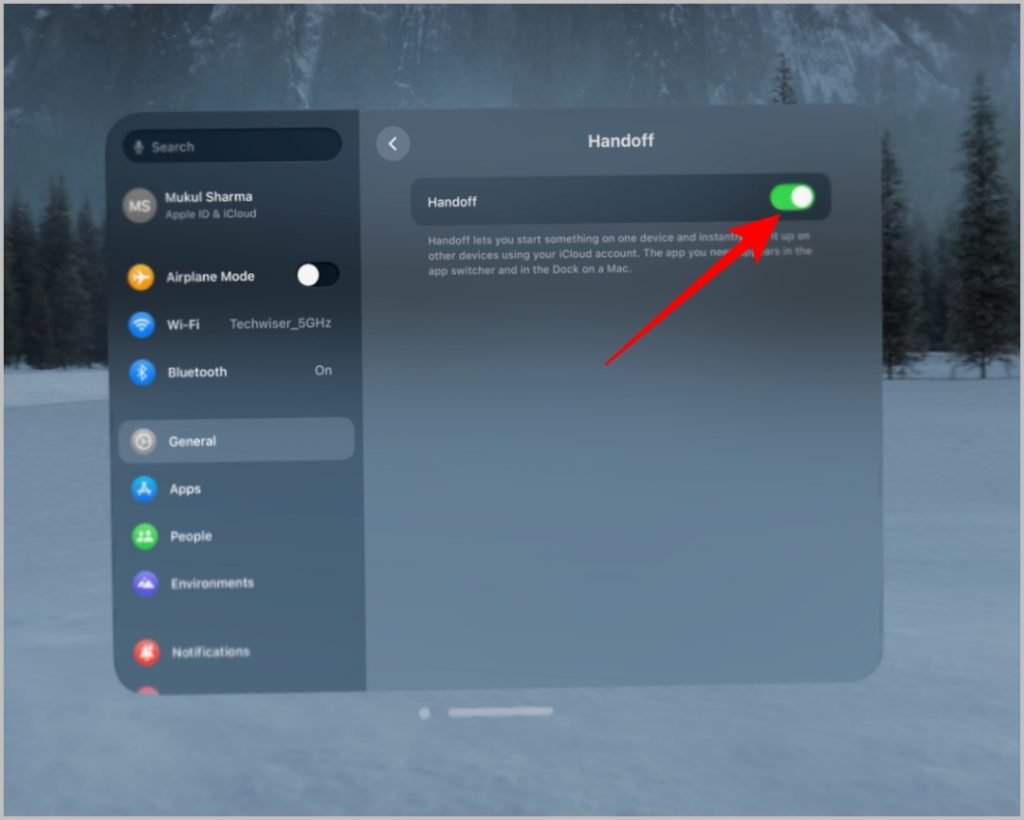
When connected, you can move your cursor across other Vision Pro apps too, but for that, you need to enable the Handoff feature. On Apple Vision Pro, go to Settings > General > Handoff.
On your Mac, go to System Settings > General > AirDrop & Handoff. You also need to go to System Settings > Displays > Advanced, then enable the toggle beside ‘Allow your pointer and keyboard to move between any nearby Mac or iPad.‘
How to Connect Mac to Apple Vision Pro
You can connect your Mac to Vision Pro with the help of the Mac Virtual Display feature on the Apple Vision Pro. While you have your Vision Pro on, here’s what you need to do:
1. Wear the Apple Vision Pro and take a look at your Mac. It will show you a Connect button above your Mac. Tap your fingers together to choose the connect button. If you have multiple monitors, look at the display that you have set as a main display.
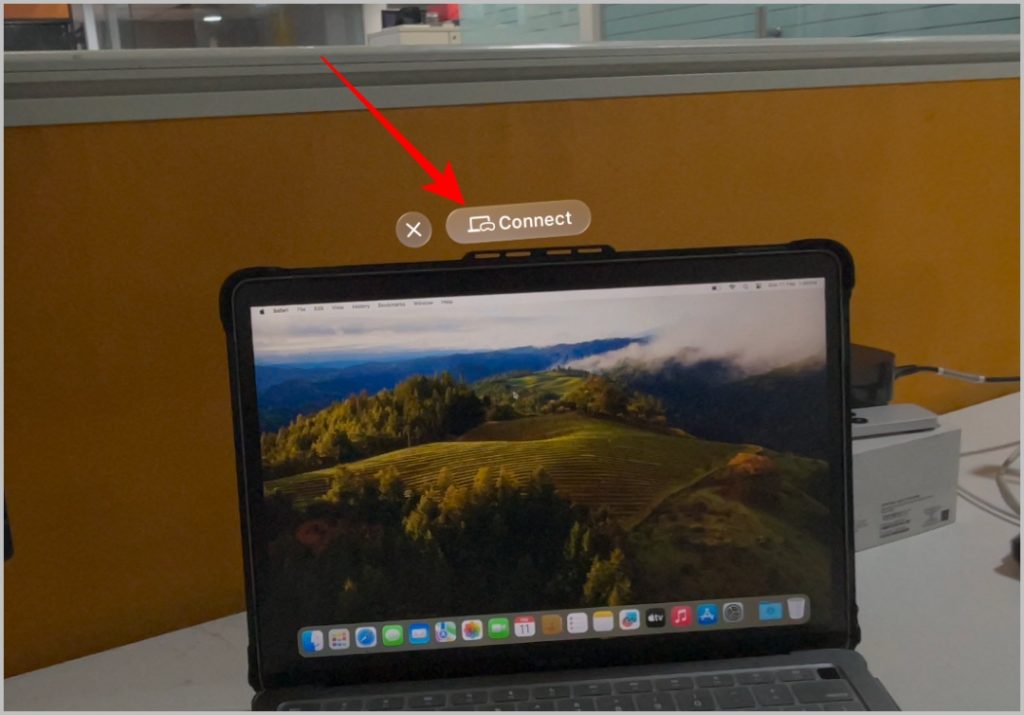
2. If the Connect button doesn’t appear, which can happen occasionally, then move closer to your Mac. Also, make sure to look directly at the Mac.
Alternatively, you can also connect to your Mac from Vision Pro manually.
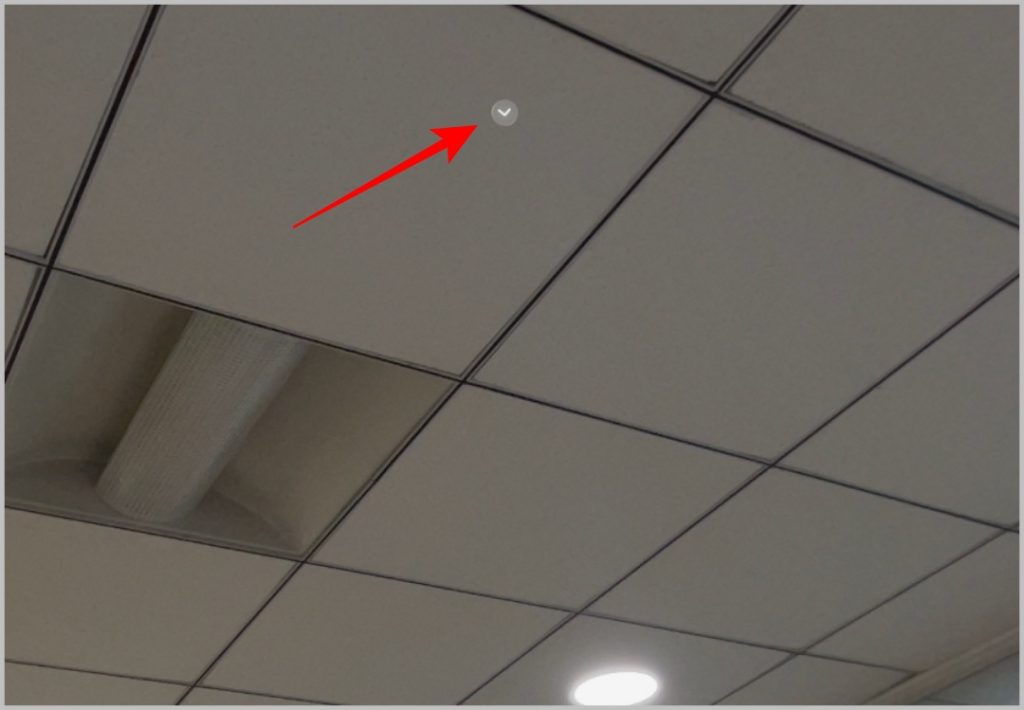
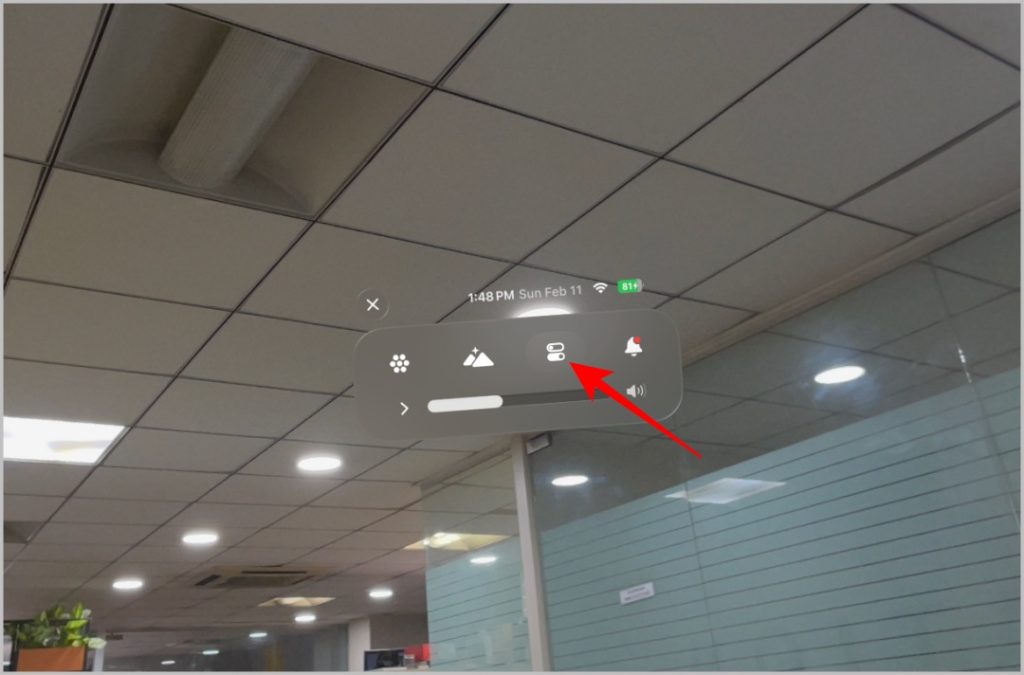
1. To connect manually, take a look above and tap your fingers together to select the drop-down icon to open the Control Center.
2. In the menu that opened, select the Control Center option.
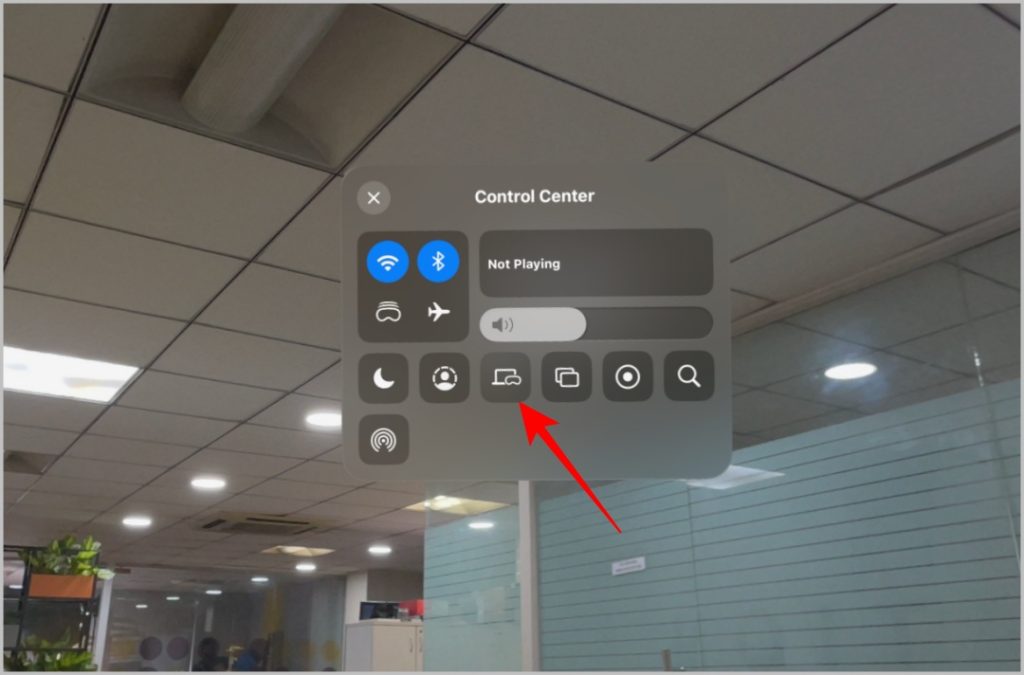
3. On the Control Center window, look at the Mac Virtual Display icon (Mac with Vision Pro icon) and tap your fingers to select it.
4. Finally, select your Mac from the list in the Mac Virtual Display window.
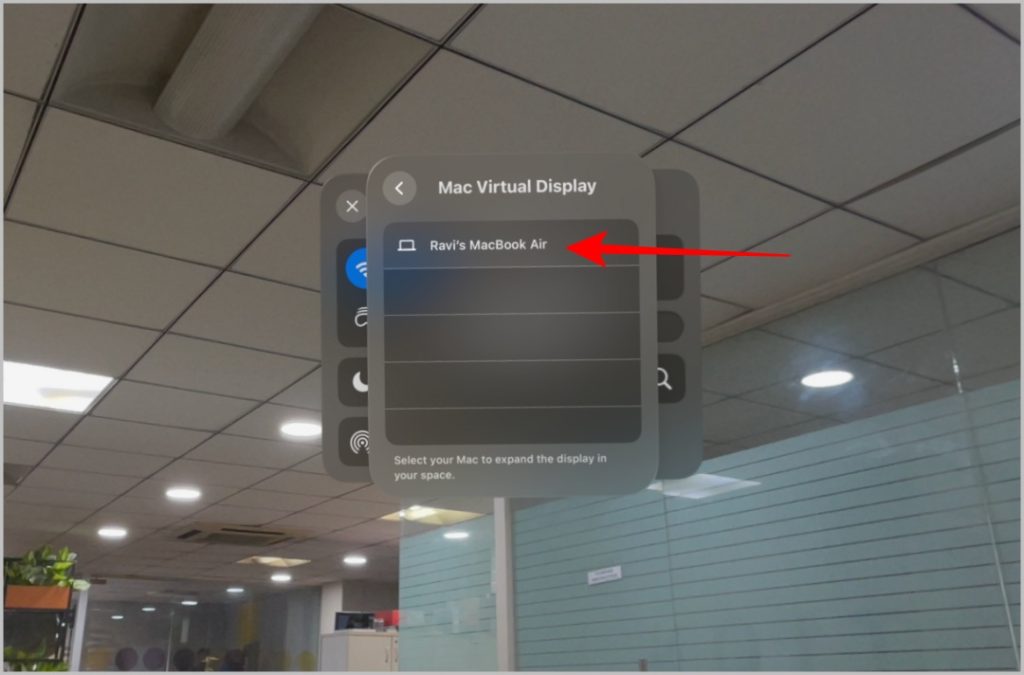
It will connect to your Mac and start a virtual display on your Apple Vision Pro. When the virtual display is enabled, your Mac screen will go black.
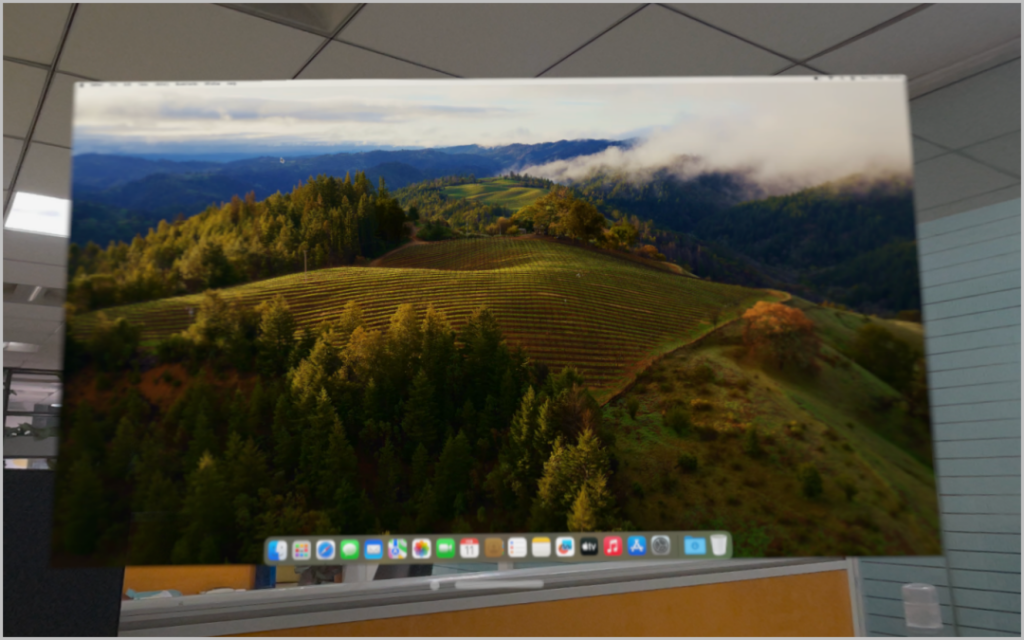
5. Look at the pill icon at the bottom of the window to move the window anywhere. Look for the icon at the corners to resize the window.
6. You can also start an environment to get into a focused space to get the work done.
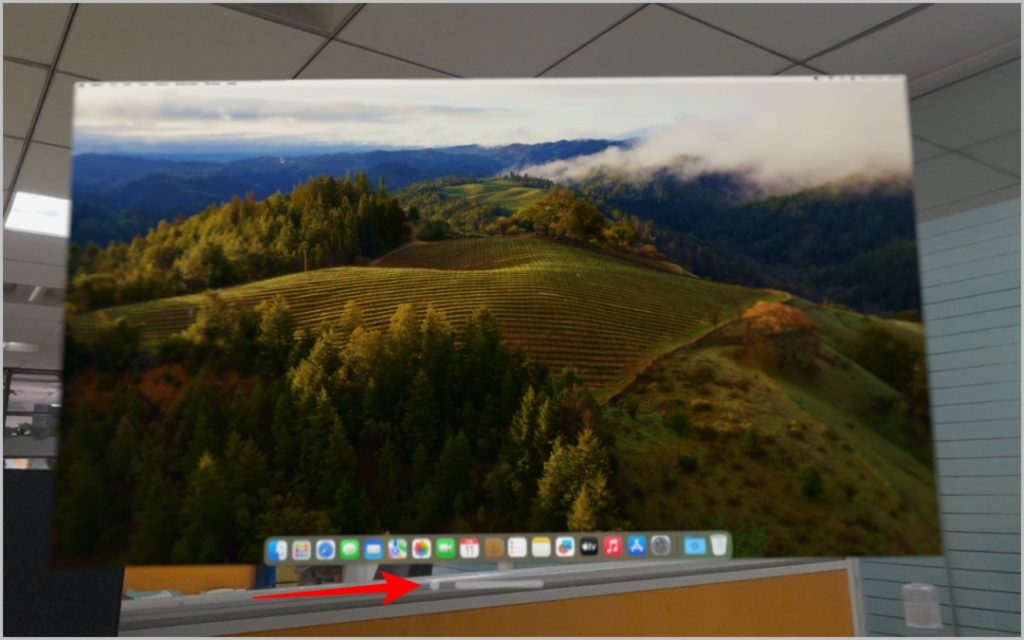
7 To stop the virtual display, just look at the dot at the bottom of the window and tap your fingers to close the window and stop the virtual display. After that, your Mac screen will turn on.
Things to Note
- This will only move your Mac display to Vision Pro without any sound. You can manually change the sound output to Vision Pro to use it as a speaker. Alternatively, you can also use AirPods or other earphones.
- To change the Mac resolution in the Vision Pro, open Settings on Mac > Displays and choose from the available resolutions. When you are using a Mac from Vision Pro, you can set Apple Silicon Macs to 4K resolution and Intel Silicon Macs to 3K resolution.
- If your Mac has multiple displays connected to it, the Mac Virtual Display shows only the one that you’ve set as the main display.
- When you’re in the Mac Virtual Display session on the Vision Pro, you can use your Mac computer’s keyboard, trackpad, or mouse to control your Mac inside the Vision Pro and also other Vision Pro apps.
- You can only operate the Mac with the look, tap fingers together, and pinch gesture on the Vision Pro. Unlike other native apps, you cannot touch it with a finger to operate it.
- Though it is just a virtual display, you are still limited to a single display. You cannot create a multi-monitor setup inside the Vision Pro for your Mac display.
Mac Virtual Display on Apple Vision Pro
Apple Vision Pro in February 2024 supports only handful of native apps and also the ability to install some iPhone and iPad apps. But, you cannot install Mac apps on the Vision Pro. With the help of the Mac Virtual Display feature, you can connect your Mac and also access all the Mac apps on the Vision Pro.
Also, check out, how to force quit apps on Vision Pro if they got frozen.