Many times, the images we add to our Word document have unwanted portions. Wouldn’t it be amazing if you could crop a picture right inside your Word document? Thankfully, it is possible and you can crop an image in Word in multiple ways. You can crop from one side, crop equally, crop according to shape, aspect ratio, etc. Let’s check different ways to crop a picture in Microsoft Word.
Table of Contents
1. Using Right-Click
One of the easiest ways to crop a picture in MS Word is using the right-click menu as shown in the following steps:
1. Right-click on the image that you want to crop.
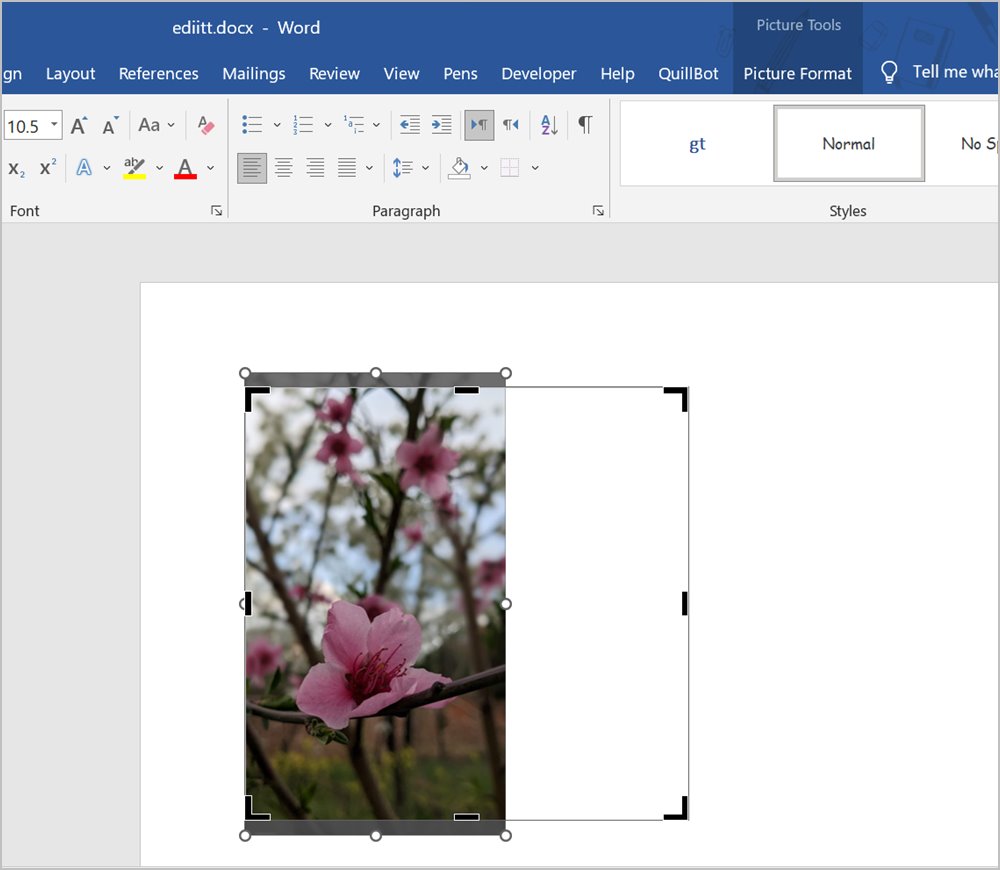
2. Click on the Crop option.
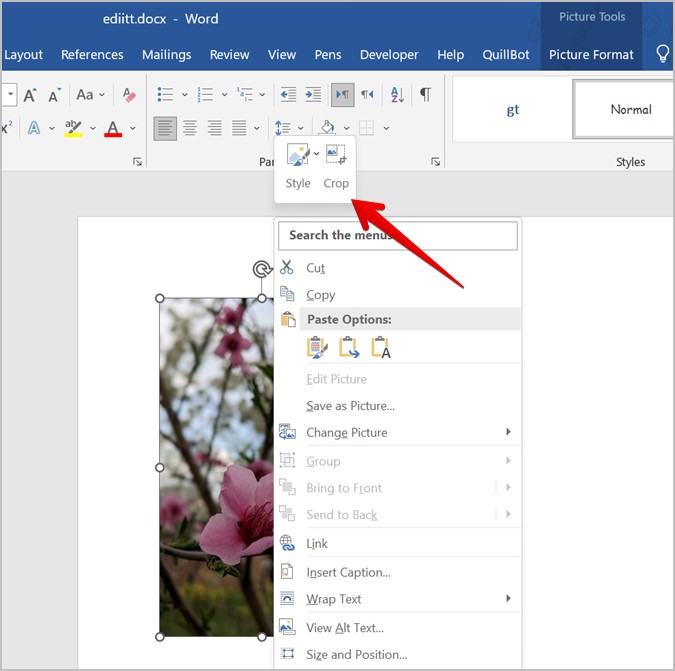
3. Black bars/handles will appear on your image. Now, you can crop the image from one side, two adjacent sides, crop equally on two parallel sides, or all sides as shown below:
- Drag the image inside using one of the side handles to crop one side.
- Drag the image inward using one of the corner handles to crop two adjacent sides at the same time.
- Press and hold the Ctrl key and drag the image inward using the side handle to crop it equally on two parallel sides.
- Press and hold the Ctrl key and drag the image inward using the corner handle to crop from all sides.
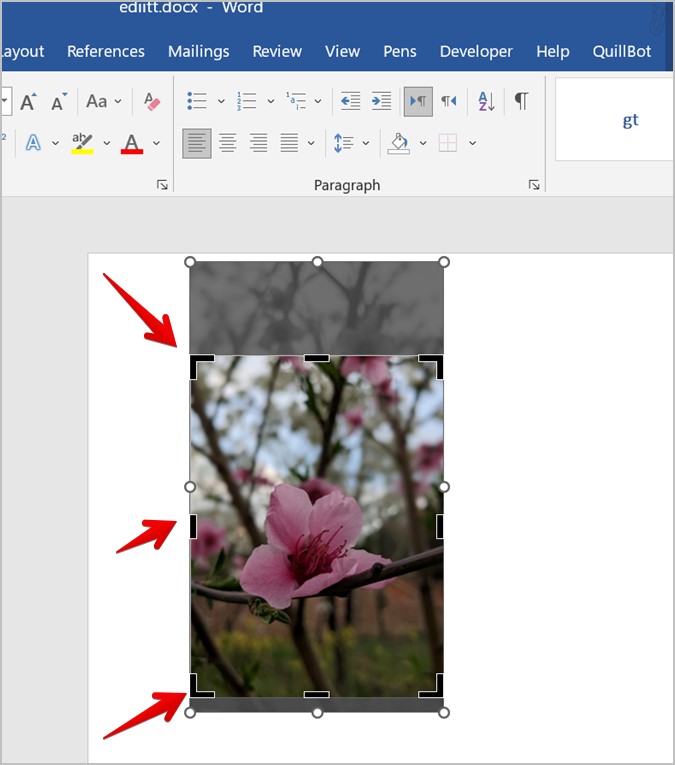
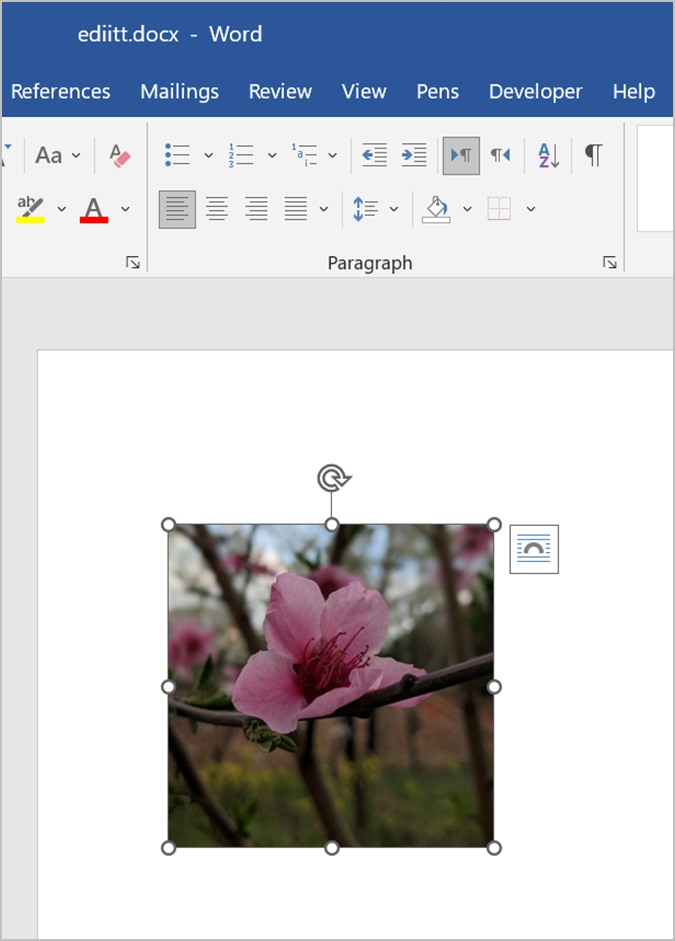
3. Then, press the Enter key or click anywhere outside the image to crop the picture.
Pro Tip: To reposition the crop area, move the picture inside the crop selection using your mouse before pressing the Enter key.
Tip: Know how to add a system-wide dictionary in right-click menu on a Windows computer.
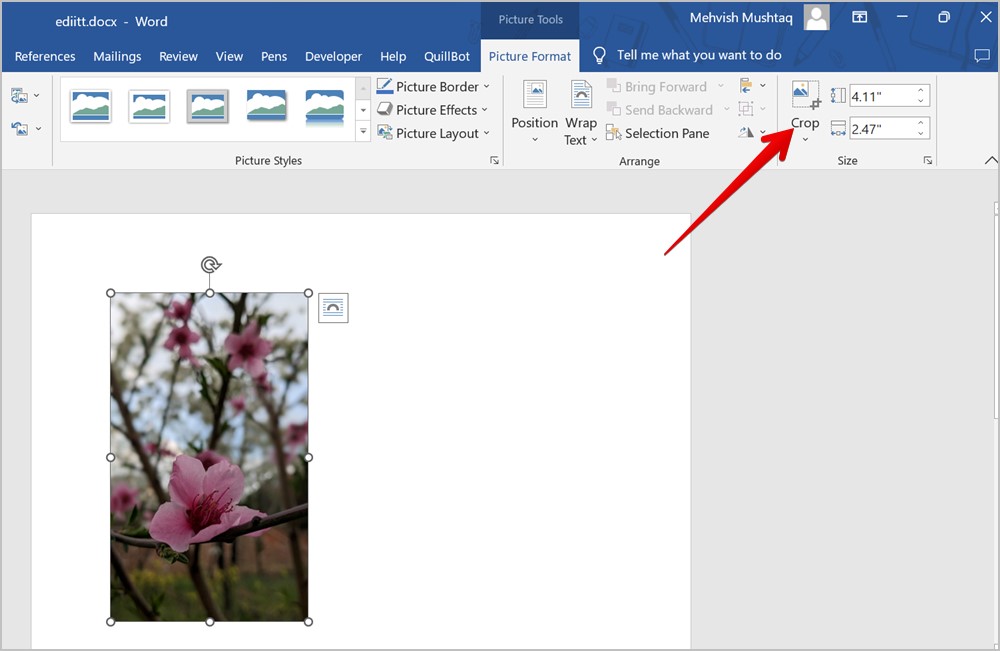
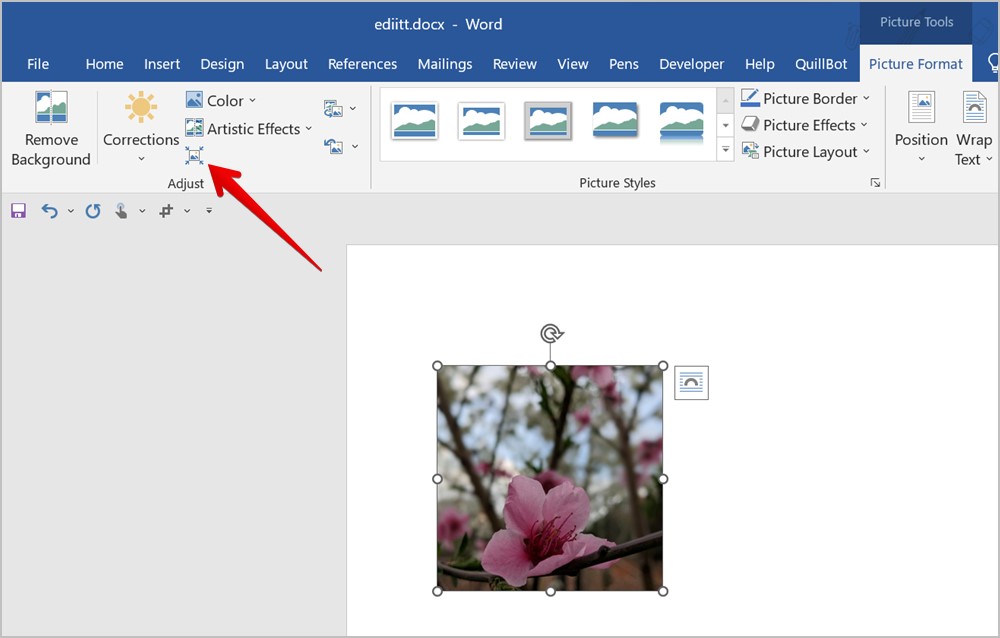
2. Using the Picture Format Toolbar
If you don’t see the Crop button after right-clicking the image, don’t worry. You can crop the picture from the Picture format toolbar as well.
1. Double-click on the image to open the Picture Format toolbar.
2. Click on the Crop button. You will get the black handles on the image. Then, crop the picture by dragging the handle inwards as shown in the above method.
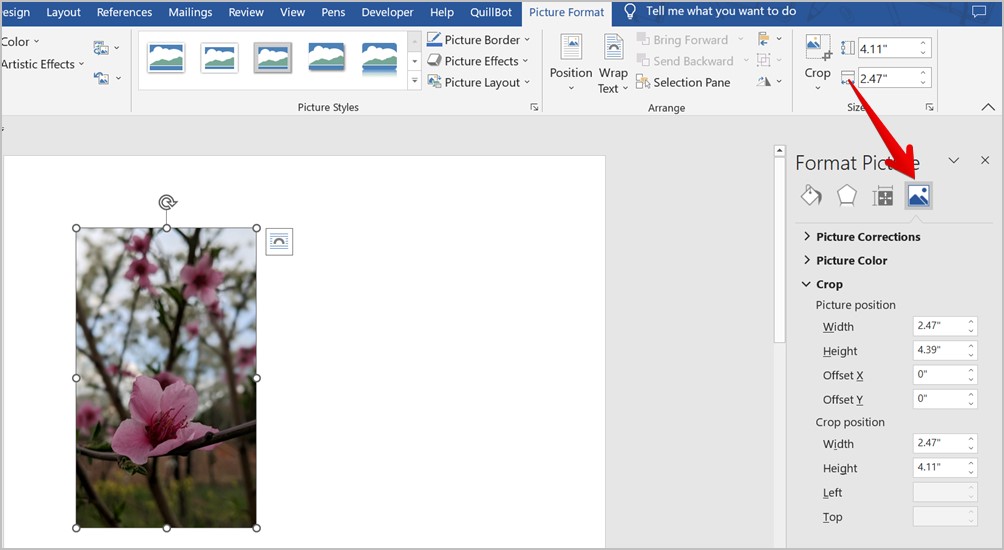
3. Crop the Picture by Manually Adding Width and Height
If you want to crop your image to a particular height and width, you can manually enter the parameters like width, height, offset, and crop position.
1. Right-click on the image and select Format Picture from the menu.

2. The Format Picture sidebar will show up. Click on the Image tab.
3. Enter the required parameters in the given field.
Tip: Learn how to edit photos on a Windows computer.
4. Crop According to Aspect Ratio
If you want to crop your picture according to a particular aspect ratio like 1:1, 3:4, etc., Word offers a native feature for that too.
1. Double-click on your picture to open the Picture format toolbar.
2. Click on the down arrow present under the Crop option.
3. Select Aspect Ratio and choose the preferred aspect ratio size to apply to your image.
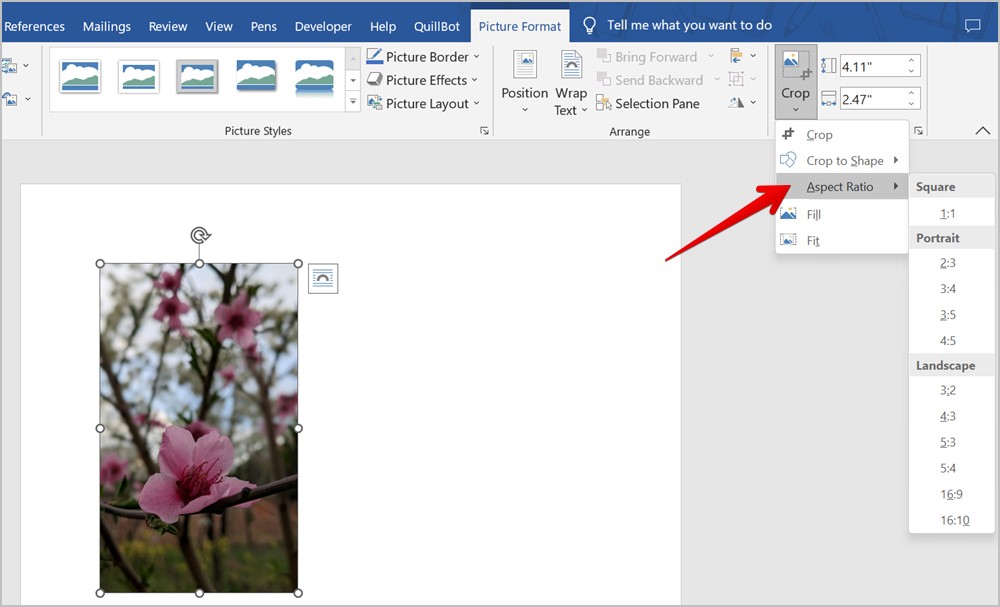
4. You will see the preview of the image with the selected aspect ratio. Press the Enter key to crop the image.
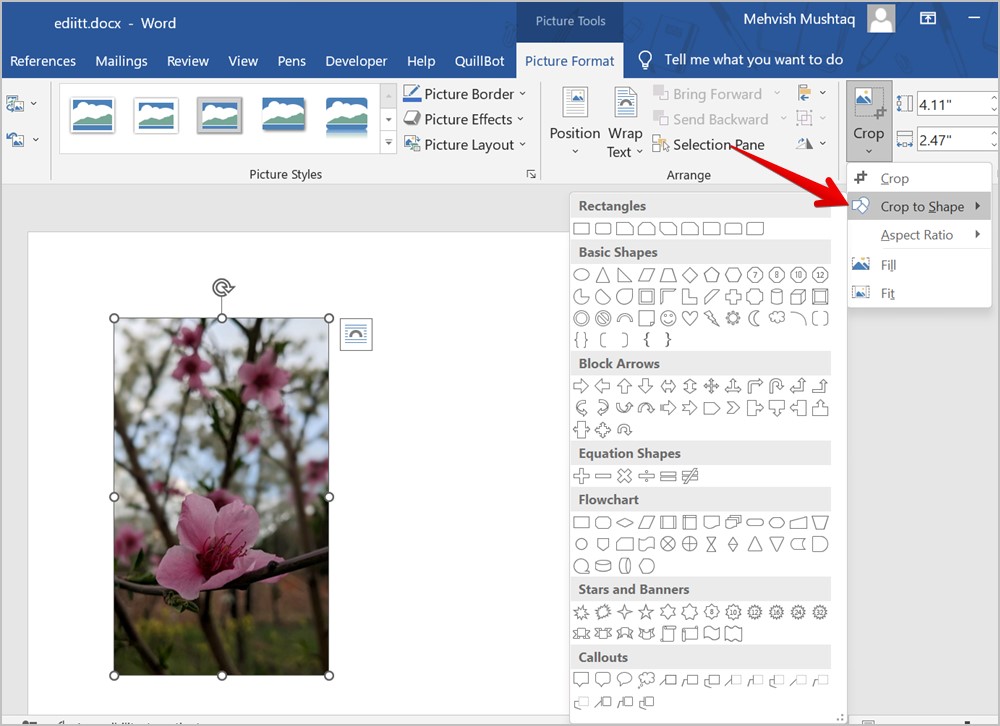
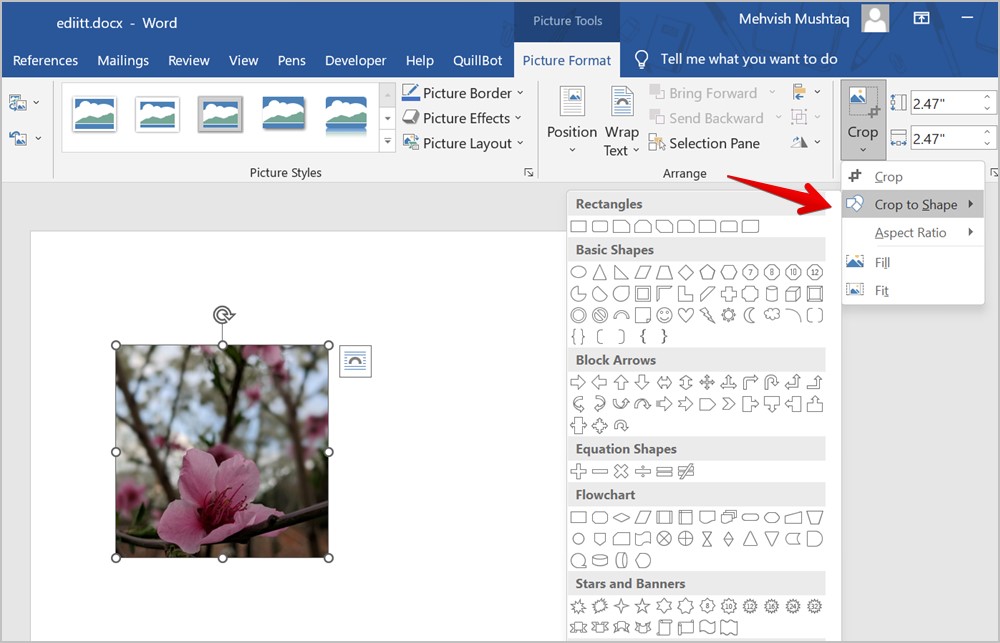
5. Crop a Picture According to the Shape
Whether you want to crop a picture in a circle, triangle, or any other shape, you can do that in two ways in a Word document.
Method 1: Using Crop to Shape
1. Double-click on the image in your document.
2. Click on the down arrow under the Crop button in the Picture Format toolbar.
3. Select Crop to shape and choose the preferred shape from the menu.
Pro Tip: Learn how to make a photo square shape without cropping.
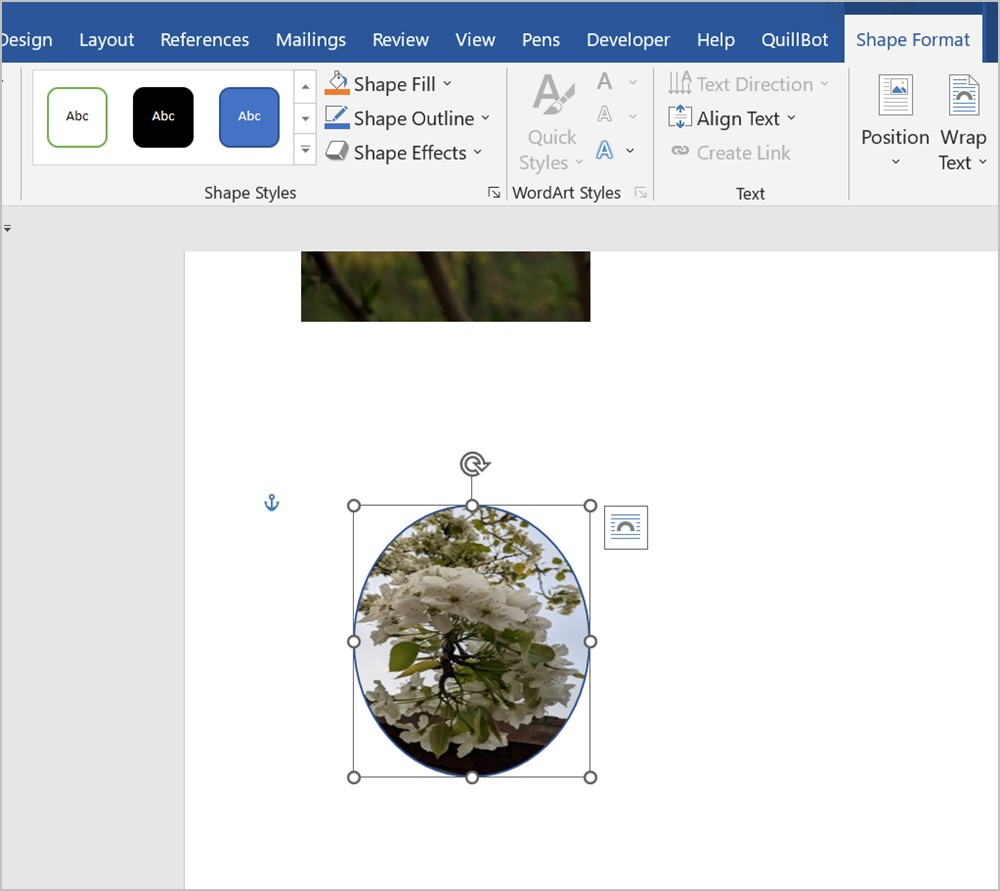
Method 2: Using Shapes
If you don’t like how the final image appears after cropping according to shape, you can draw the shape first and then insert an image in it. The image will be cropped according to the shape.
1. In your Word document, click on Insert followed by Shapes.
2. Select the shape that you want to use.
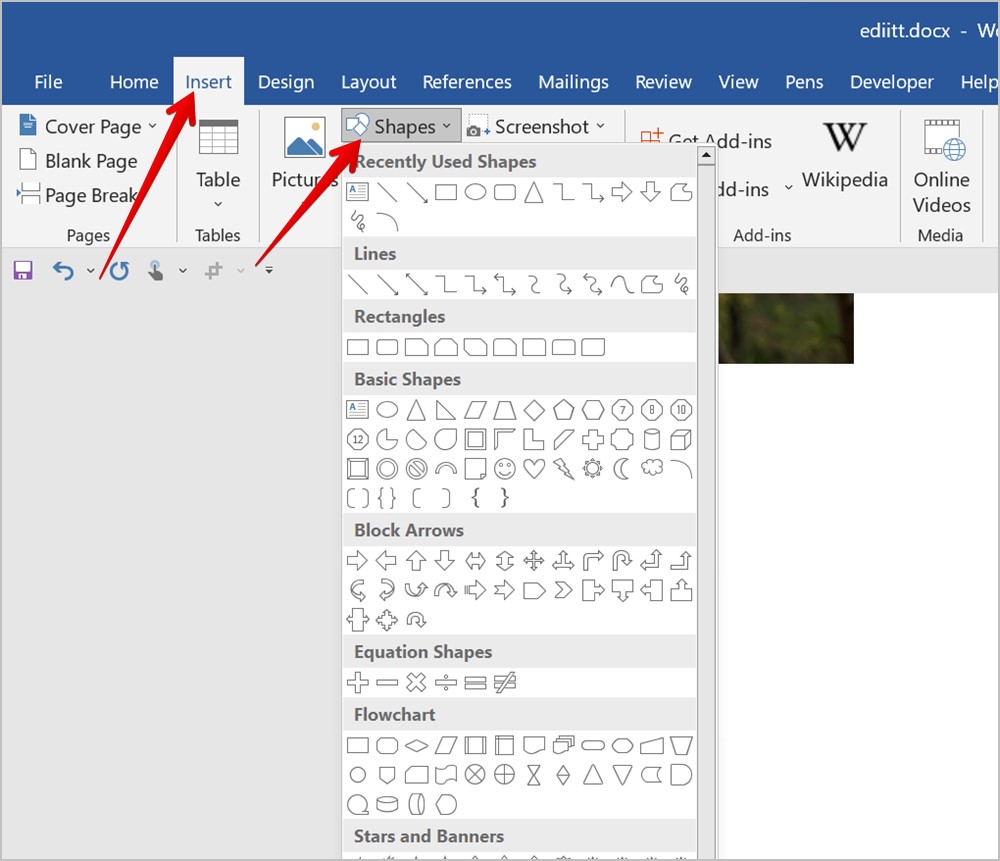
3. Hold the mouse button and draw the shape on the document.
4. Right-click on the shape and select the Fill option followed by Picture.
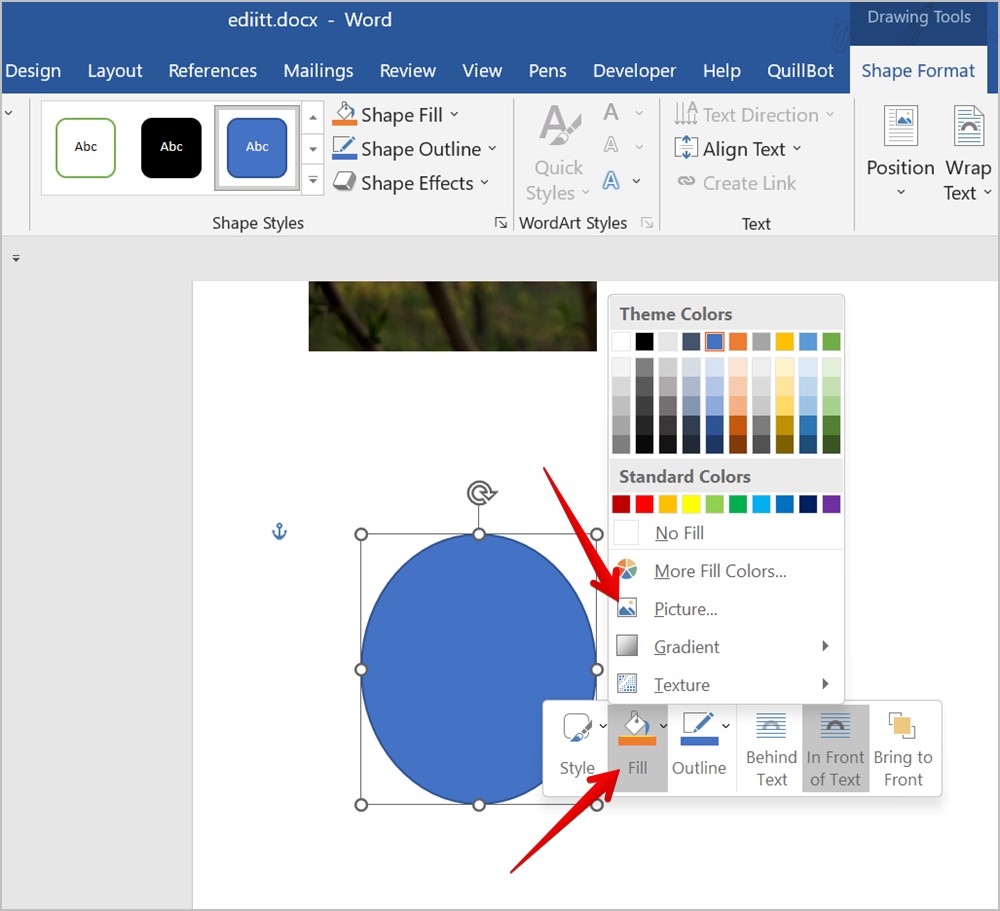
5. Choose the picture that you wanted to crop according to the selected shape. The picture will be inserted in the shape and cropped accordingly.
6. How to Crop a Picture in Word Into a Circle
Often, you might not be able to crop a picture into a perfect circle using the above steps. That’s because you need to crop the image in a 1:1 aspect ratio first before converting it into a circle.
1. Add the image to your Word document.
2. Double-click on the image and click on the down arrow under the Crop button.
3. Go to Aspect Ratio and select 1:1.
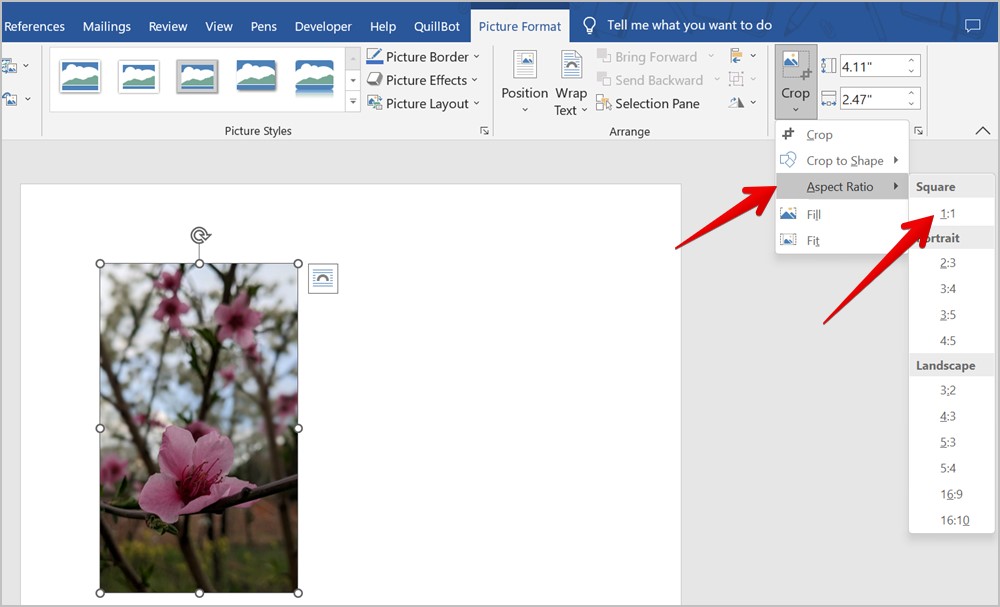
4. Move the picture and keep the portion that you want to keep in your final image. Then, press the Enter key.
5. Double-click again on the image. Click on the down arrow present under Crop. Select Crop to shape followed by the Circle shape.
Congratulations! You have successfully cropped a picture into a circle in Microsoft Word.
Tip: Learn how to add a circle or arrow to a WhatsApp photo.
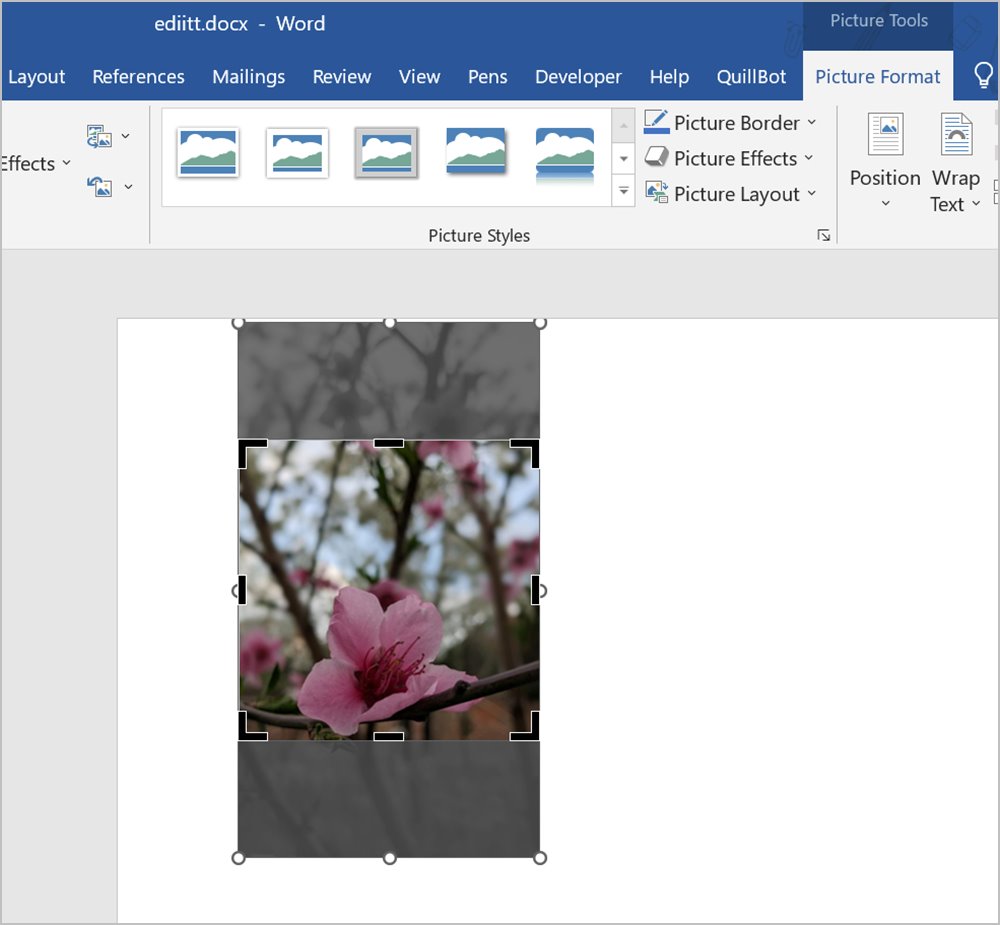
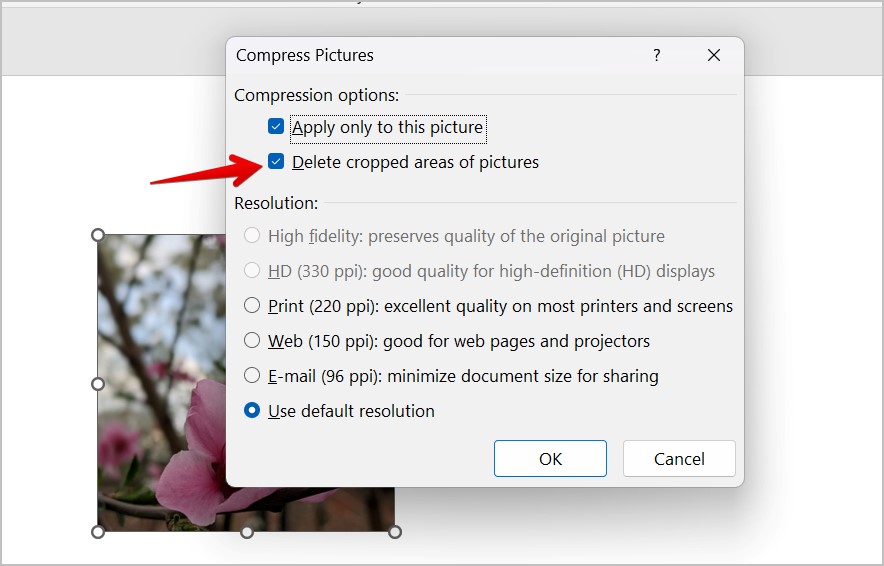
7. Crop a Picture in Word and Save it to Your PC
Microsoft lets you save pictures that you edit in the Word document to your computer. However, typically, if you right-click on the image and select Save as a picture after cropping the image in Word, it will save the original image instead of the cropped picture.
This happens because Microsoft Word doesn’t delete the cropped area of the picture. It is only hidden from your view and continues taking up the file size. You have to manually delete the cropped parts to save the cropped image to your computer. This also helps in reducing the file size of your Word document.
To save the picture cropped in Word to your computer, follow these steps:
1. Crop the picture using any of the above methods.
2. Double-click on the cropped picture and click on the Compress picture present in the Picture format toolbar.
3. The Compress pictures pop-up window will show up. Make sure Delete cropped areas of picture is selected. And if you want to delete the cropped area from only the selected image, check the box next to Apply only to this picture. Use the default resolution. Finally, click on OK.
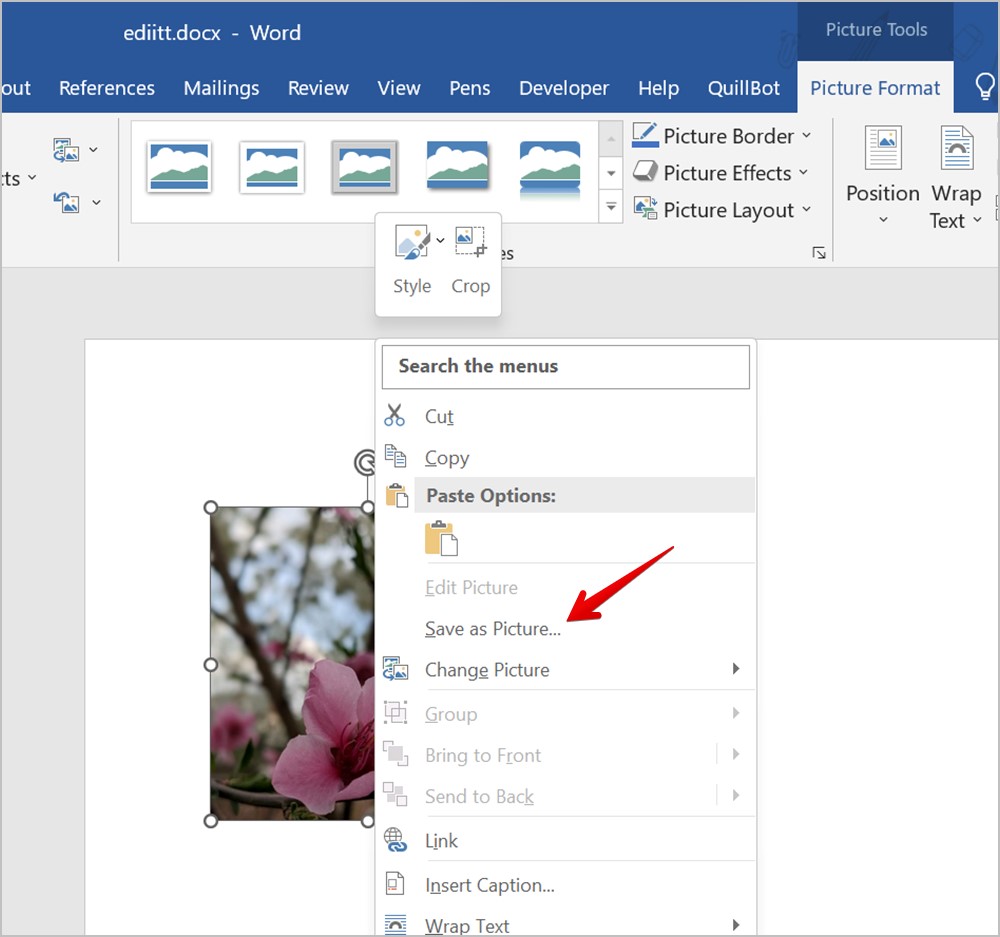
4. Right-click on the image and select Save as picture to download the cropped picture to your PC.
Bonus: Add Margin to a Picture Using Crop Tool in Word
You can easily add a margin around a picture in a Microsoft Word document by outcropping it i.e., by dragging the black crop handle outwards instead of inward.
1. Right-click on the image and select Crop.
2. Using any of the black handles, drag the image outwards to add a margin from the selected side.
Frequently Asked Questions
1. How to save pictures cropped in a shape to your PC?
Method 7 will not save pictures cropped in shapes to your PC. For that, copy the cropped picture from Word and paste it into Paint. Resize the canvas to fit the picture. Then, finally, save the image.
2. How to add the Crop tool to Quick access toolbar?
Double-click on any image added to your Word document to open the Picture format toolbar. Right-click on the Crop button and select Add to quick access toolbar.
Put Pictures Side by Side
Hope you were able to crop pictures in your Word document. Check out other ways to crop a picture on Windows computers. And once you have cropped the picture, know how to put two pictures side by side in Word.