Your iPhone is supposed to alert you to any new emails, messages, calls, and other events by sending notifications. However, if you are not receiving those alerts on time, they may not be of much help. Fortunately, it’s possible to fix the delayed notification issue on your iPhone with the solutions mentioned below. So, let’s take a look.
Table of Contents
1. Turn Off Scheduled Summary
With iOS 15, Apple introduced the Scheduled Summary feature. When enabled, this feature prevents apps on your iPhone from sending notifications right away. Instead, it schedules them to appear at a specific time during the day.
You need to ensure that Scheduled Summary is disabled on your iPhone so that you receive notifications as they come.
1. Open the Settings app and go to Notifications > Scheduled Summary.

2. Disable the toggle next to Scheduled Summary.

Alternatively, if you don’t want to turn off the Scheduled Summary feature entirely, scroll down to the Apps In Summary section, and then disable the toggles next to the apps for which you want to receive notifications without any delay.

2. Turn Off Do Not Disturb Mode
Another reason why notifications may not appear right away on your iPhone is if you’ve enabled Do Not Disturb. During this time, your iPhone silences any calls or alerts you receive.
To turn off Do Not Disturb mode, swipe down from the top right corner of the screen (or swipe up from the bottom of the screen on older iPhones) and tap the Do Not Disturb option.

3. Enable Notification for Apps
If the issue of delayed notifications on the iPhone is limited to a particular app, you should check the notification settings for that app using these steps:
1. Open the Settings app and select the troublesome app from the list.
2. Go to Notifications and enable the switch next to Allow Notifications.

3. From the same screen, make sure the Lock Screen, Notification Center, and Banners options are enabled.
4. Disable Low Data Mode
Enabling Low Data Mode on your iPhone can prevent apps from using the internet in the background, causing notifications to arrive late. To avoid this, it’s best to turn off Low Data Mode.
To disable Low Data Mode on Wi-Fi, navigate to Settings > Wi-Fi. Tap the info icon next to your Wi-Fi network and turn off the Low Data Mode toggle.

Similarly, if you’re using mobile data, go to Settings > Mobile Data > Mobile Data Options. Tap on Data Mode and select Standard from the following menu.

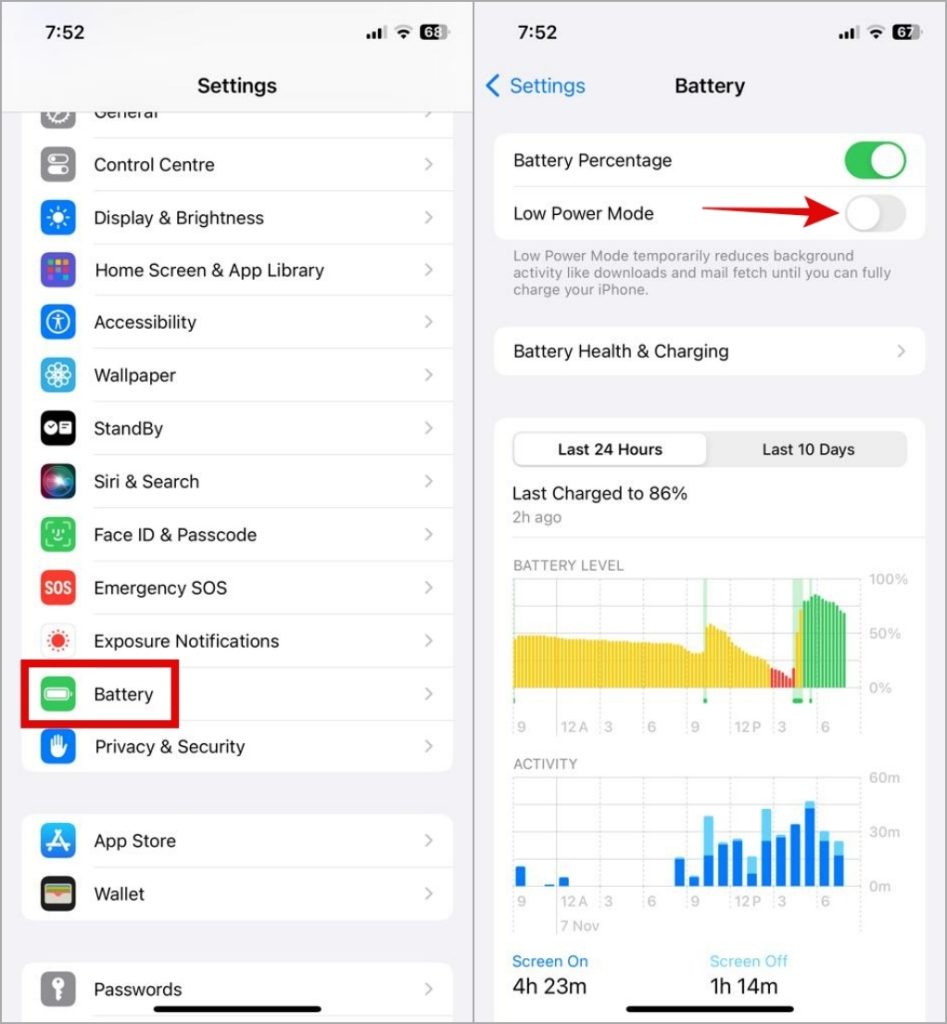
5. Disable Low Power Mode
Enabling Low Powe Mode can also restrict an app’s ability to fetch new notifications on time. To disable Low Power Mode on your iPhone, open Settings and go to Battery. Then, toggle off the Low Power Mode option.
6. Enable Background App Refresh for Apps
Enabling Background App Refresh allows apps to fetch new data even when you’re not using them. If you have disabled this feature for your apps, they won’t display notifications unless you open them on your iPhone.
To enable Background App Refresh for your apps, use these steps:
1. Open the Settings app and head to General > Background App Refresh.

2. Tap on Background App Refresh and select Wi-Fi & Cellular Data from the following menu.

3. Return to the Background App Refresh menu and use the toggles to enable the feature for all your favorite apps.

7. Avoid Removing Apps From Recent Apps Menu
When you remove an app from the Recent Apps menu, your iPhone suspends all activities and processes related to it. While this does free up RAM, it can also result in notifications being delayed on your iPhone. Hence, it’s best not to remove apps from the Recent Apps screen.

8. Update Apps
Using outdated versions of apps can also result in performance issues and delayed notifications on your iPhone. Hence, it’s best to keep your apps up to date.
To update apps on your iPhone, long-press the App Store icon and select Updates from the resulting menu. Then, tap the Update All option.

9. Update Your iPhone
Keeping your iPhone updated to the latest iOS version is equally important, as these updates usually bring all kinds of bug fixes and performance improvements.
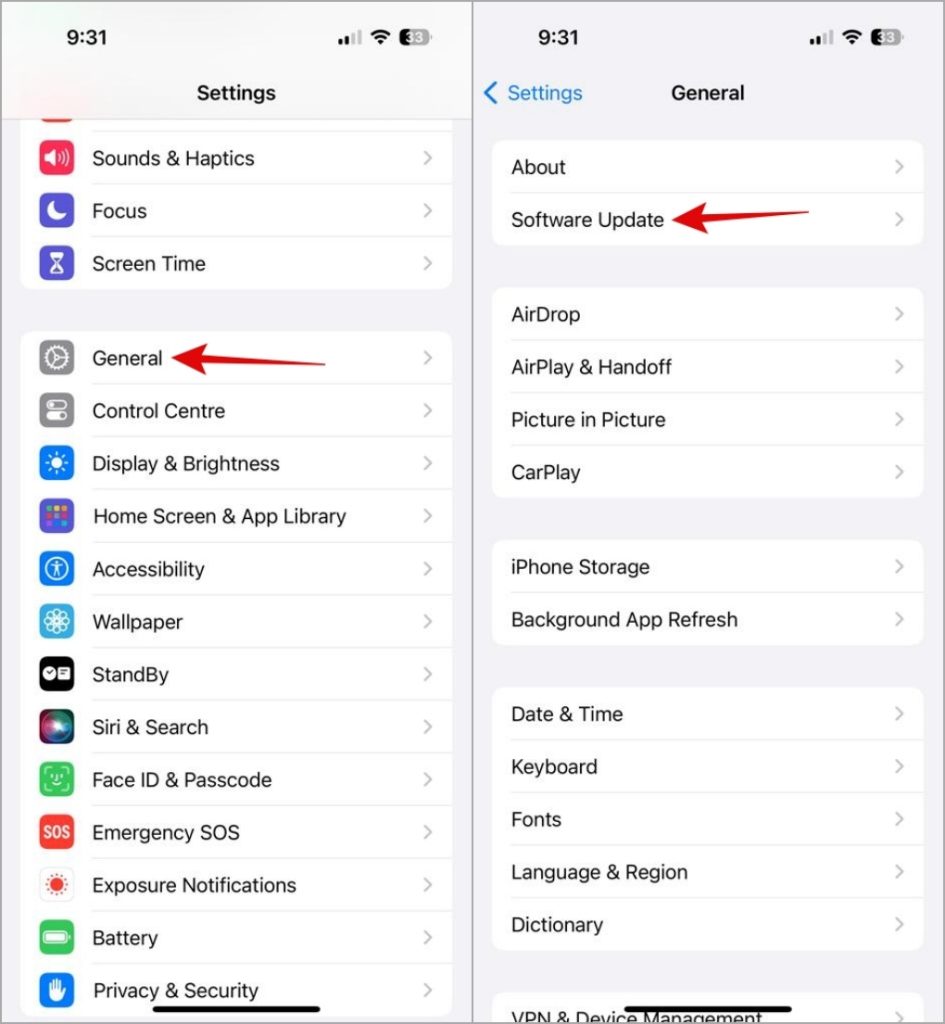
To check for available updates, open Settings and head to General > Software Update. Download and install any pending updates, and see if that helps.
10. Reset Network Settings
Issues with the network can also cause notifications to arrive late on your iPhone. You can run an internet speed test or switch to a different network connection and see if that works.
If the issue remains even after that, you can consider resetting all the network settings on your iPhone to fix the problem.
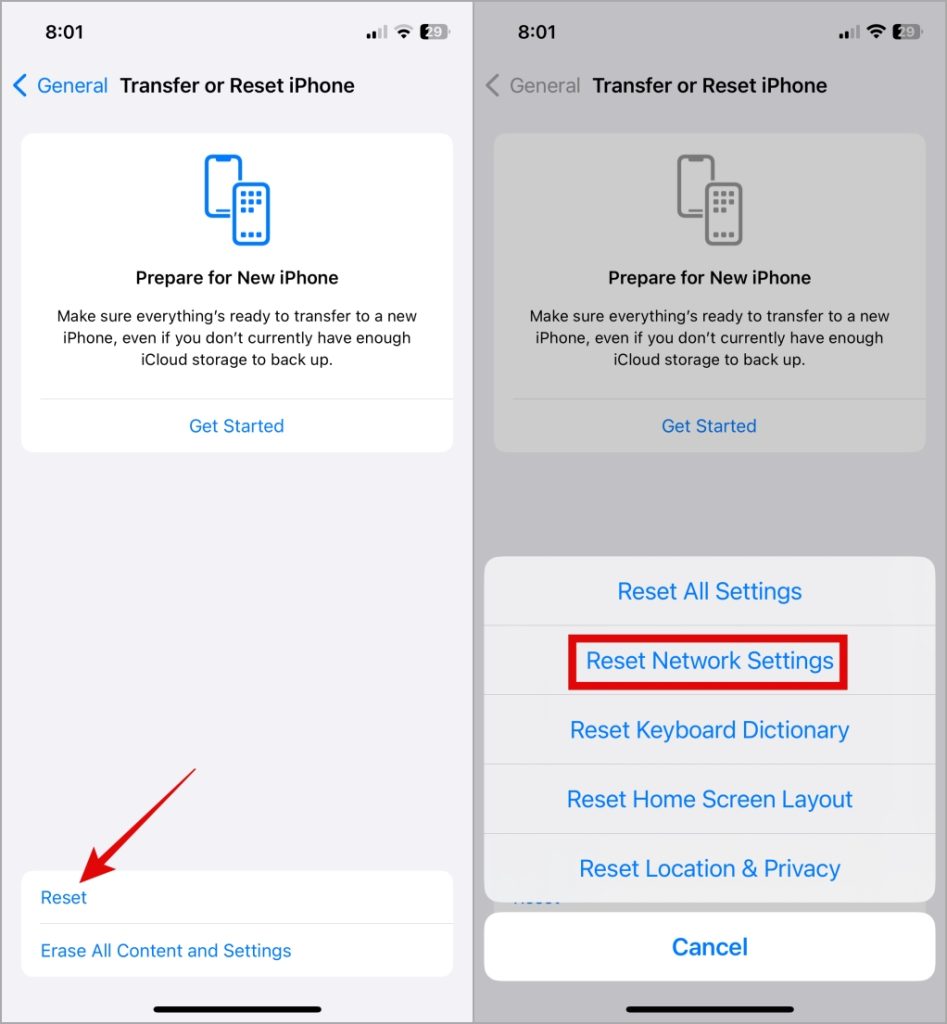
1. Open the Settings app, navigate to General, and tap on Transfer or Reset iPhone.
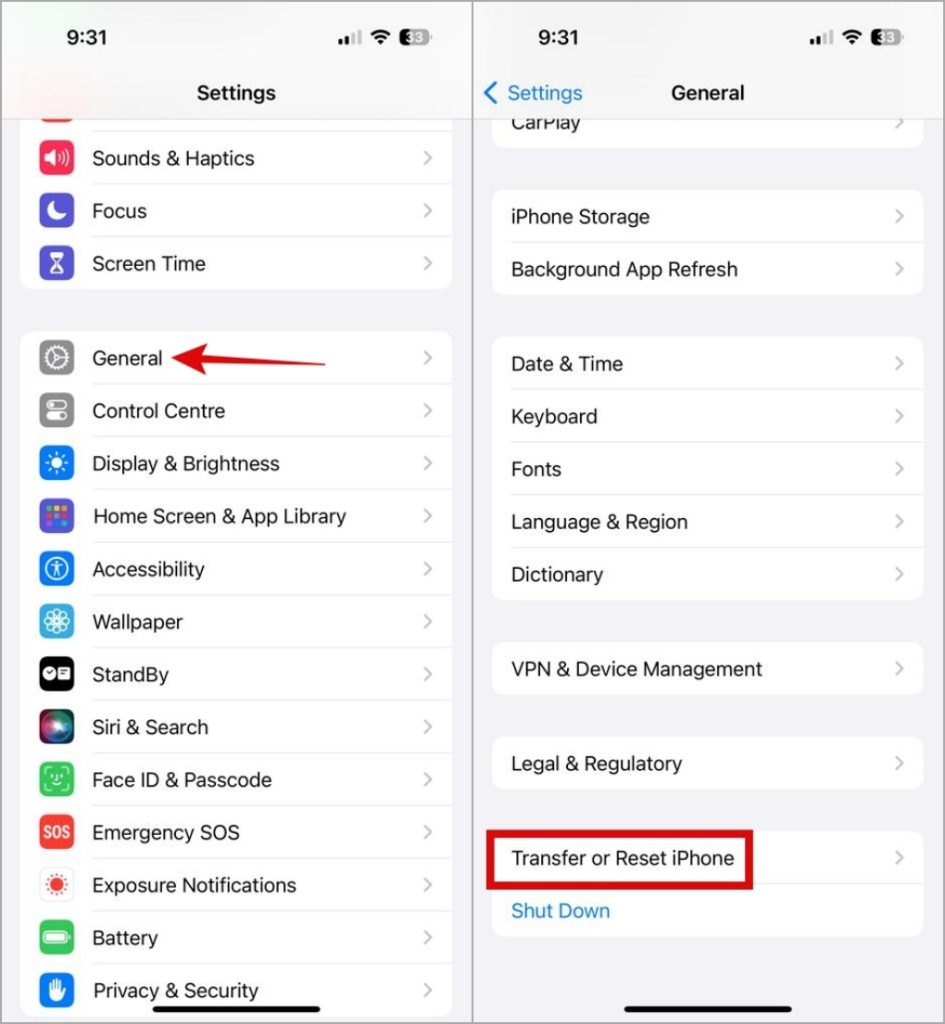
2. Tap the Reset option at the bottom and choose Reset Network Settings from the resulting menu.
11. Reset All Settings
If you can’t seem to fix the delayed notification issue, you’ll have to reset your iPhone as the last option. The process will reinstate all the settings to their default value. Don’t worry, your files won’t be affected by the process.
1. Open the Settings app on your iPhone and navigate to General > Transfer or Reset iPhone.
2. Tap on Reset and choose Reset All Settings from the resulting menu.

No More Delays
Notifications on your iPhone eliminate the need to check your apps manually for updates. However, delays in receiving notifications can render them useless. Hopefully, the above solutions have helped you put an end to the delayed notification issue on your iPhone, and things are back to normal.