It’s not unusual to experience 100% CPU usage on your Windows computer. This is often just temporary, and there’s no need to panic. For instance, if you’re playing a 4K or 8K video, installing software, or rendering a video, you might notice a sudden spike in CPU usage. However, if you’re observing high CPU usage even when your CPU is idle or during casual web browsing, there might be an underlying issue with your Windows PC. Here are multiple methods to fix 100% CPU usage in your Windows 10 or 11 PC.
Table of Contents
1. Before You Begin
Before we delve into the solutions, please ensure that background processes like file downloads, Windows updates, or antivirus scans are not running. These processes can increase CPU usage temporarily, so there’s no need for concern. Once the task is completed, your CPU will return to its normal state.
Also, if you’re using antivirus software, we recommend temporarily disabling or removing it from your computer to determine if it’s causing high CPU usage. Sometimes, antivirus software can consume a significant amount of CPU resources, especially during scans or updates.
2. End High-Consuming Programs or Applications
The simplest and most effective way to reduce CPU usage is by identifying and terminating the program or app, causing your CPU to go berserk. To do that, open the Task Manager on your PC (Ctrl + Shift + Esc) and head to the Processes tab.
Next, identify the application responsible for the high CPU usage, then right-click on that app and select the End task.

3. Restore Power Plan Setting
Many users had fixed a high CPU issue on their Windows by simply changing their power plan to the default state. So maybe you can try testing this on your computer and check whether this resolves the problem.
1. Open the Windows Search (Windows Key + S) and look for Choose a power plan setting.

2. After opening it, click on the Change plan settings next to the selected power plan.

3. On the following screen, click Change advanced power settings.

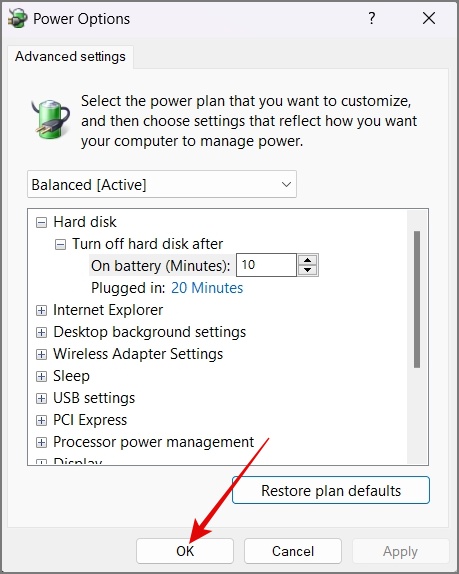
4. Now hit the Restore plan defaults button.

5. Click Yes to confirm your decision.

6. Lastly, click on the OK button and this should stop showing 100% CPU usage in your Task Manager.
If the above solution didn’t work out for you, try the following method, which also happens to work for many users:
1. Open the Windows Search and look for Powershell or Terminal.
2. Once found, right-click on it and select Run as administrator.

3. Click Yes, if the User Control Account prompt appears.
4. Copy and paste the following command into PowerShell, then press Enter.
PowerCfg /SETACVALUEINDEX SCHEME_CURRENT SUB_PROCESSOR IDLEDISABLE 0005. After that, copy and paste the following command and hit Enter.
PowerCfg /SETACTIVE SCHEME_CURRENT
Now open the Task Manager to verify your CPU usage. If the issue persists, move on to the next solution.
4. Disable Background Running Apps
When you go to the Startup Apps section, you’ll observe numerous Microsoft and third-party apps set to run when Windows starts. Some of these apps may significantly affect your CPU usage. Therefore, we strongly recommend disabling any non-essential apps from running during startup.
Here’s how to disable background running apps:
1. Open the Task Manager and switch to the Startup apps tab.
2. Next, right-click on the app that you want to disable and then select the Disable option.
This should probably fix the high CPU usage on startup.

Alternatively, you can also navigate to Windows Settings (Windows Key + I) > Apps > Startup. From the following screen, you can disable any unnecessary app.

5. Ensure Your PC Is Not Infected
Another reason why your Windows PC is running at 100% CPU usage could be due to a virus or malware. These malicious programs often run hidden background processes that silently consume your CPU resources. To check for this, perform a full system scan using your antivirus software.
If you don’t have an anti-virus software installed, you can use the Windows built-in malware scanner.
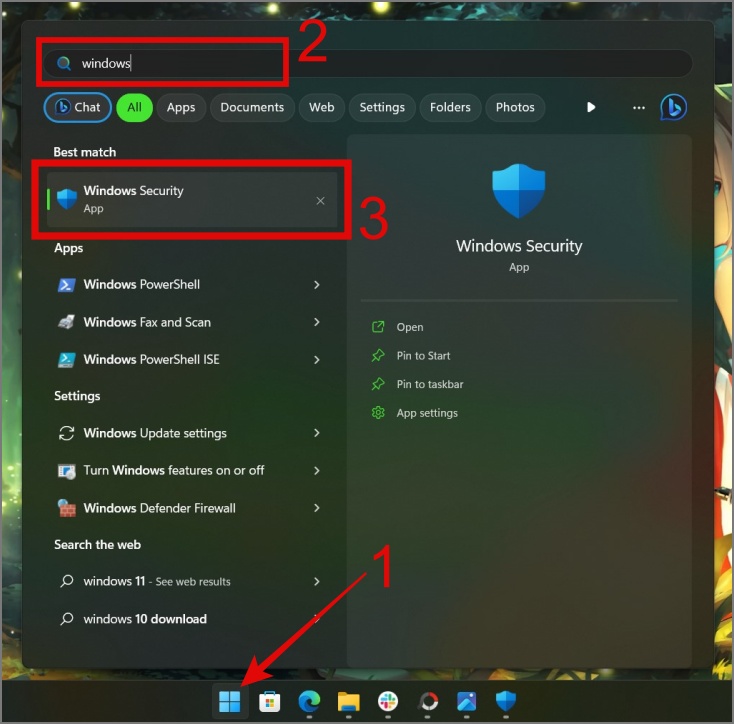
1. Open Windows Search (Windows Key + S) and look for the Windows Security app.
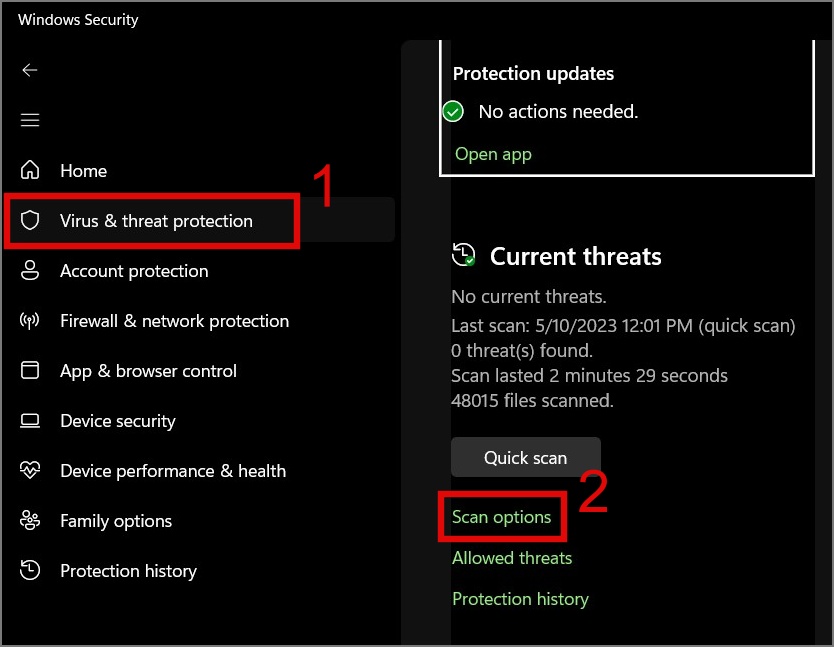
2. Next, open the app, move to the Virus & threat protection tab, and then click on the Scan options.
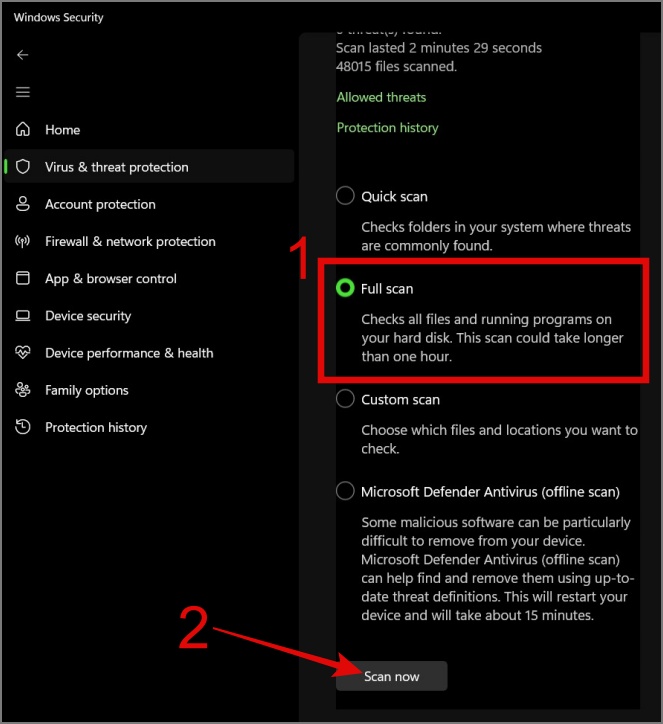
3. Now choose the Full scan option and then hit the Scan now button to start searching for malware on your PC.
6. Restart Your PC
We’ve been discussing technical aspects for a while now, but have you tried restarting your computer? Believe it or not, sometimes a simple restart can help fix minor performance issues by clearing temporary files and resetting system processes. If you’ve already tried it and it didn’t work, you can move on to the next solution.
Tip: Learn 10 ways to restart Windows PC in different situations
7. Update Drivers
Your computer is composed of several hardware components, each requiring a driver to function correctly. If any driver is not properly installed or is incompatible with your latest Windows update, it might behave unexpectedly and result in an increase in CPU usage. Therefore, we recommend updating all your drivers to see if this resolves the high CPU issue on your PC.
Here’s how to update Windows drivers:
1. Right-click the Start button or press Window Key + X to open the WinX menu and select Device Manager.

2. Right-click on the device and select Update driver.
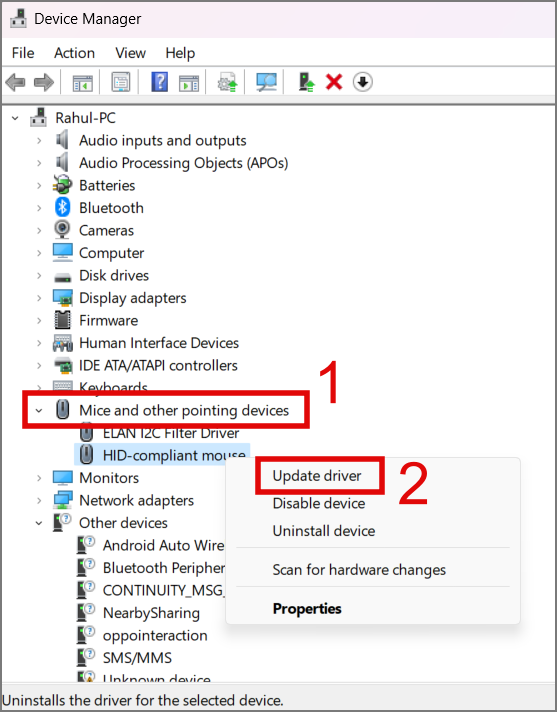
3. You have two options here – you can let Windows search for the driver, or you can manually search your computer for the driver.

Repeat the same steps for each device. Once done, restart the computer and see if this reduces the CPU usage.
8. Remove Unwanted Web Extensions
If you’re using popular browsers like Chrome or Edge on your PC, you may have installed some extensions. Though these add-ons can enhance your productivity and browsing experience, they do sometimes contribute to higher CPU usage.
Here’s how to remove extensions from your web browsers:
Note: This example uses the Chrome browser. For other browsers, refer to our guide on removing extensions from all popular browsers.
1. Click Kebab Menu (3-dots icon) > Select More Tools and choose Extensions.
2. On the next screen, you will see a list of all the installed extensions. Click the Remove button to uninstall any unused or resource-intensive extensions from your browser.

Tip: Is Chrome also causing high CPU usage on your PC? Here’s how to fix it.
9. Update or Roll Back Windows Updates
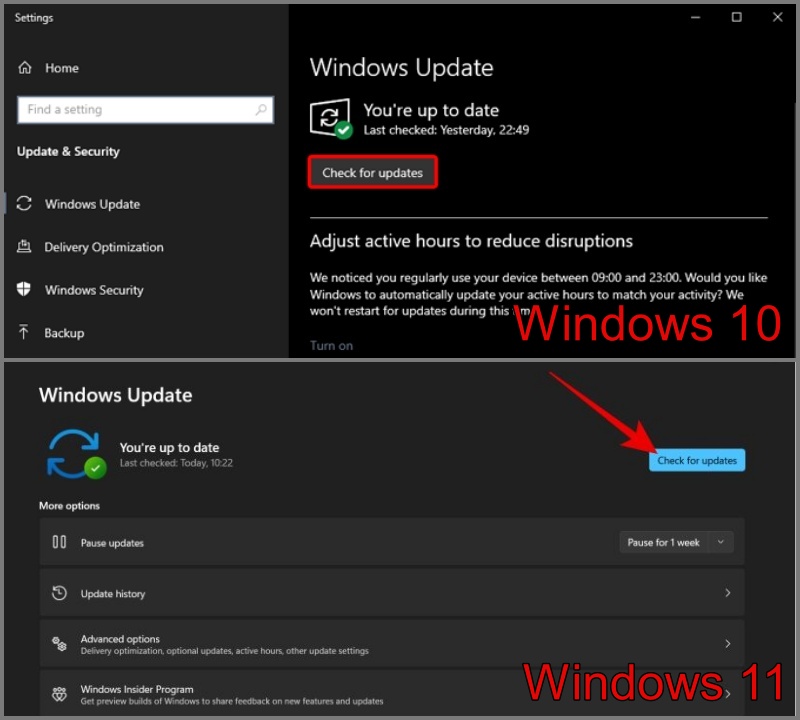
It’s possible that your Windows version has some bugs causing your CPU usage to stay at 100%. To fix this, check for Windows updates on your PC and install them as soon as possible. To update Windows, head over to Windows Settings > Windows Update and then click on the Check for updates button.
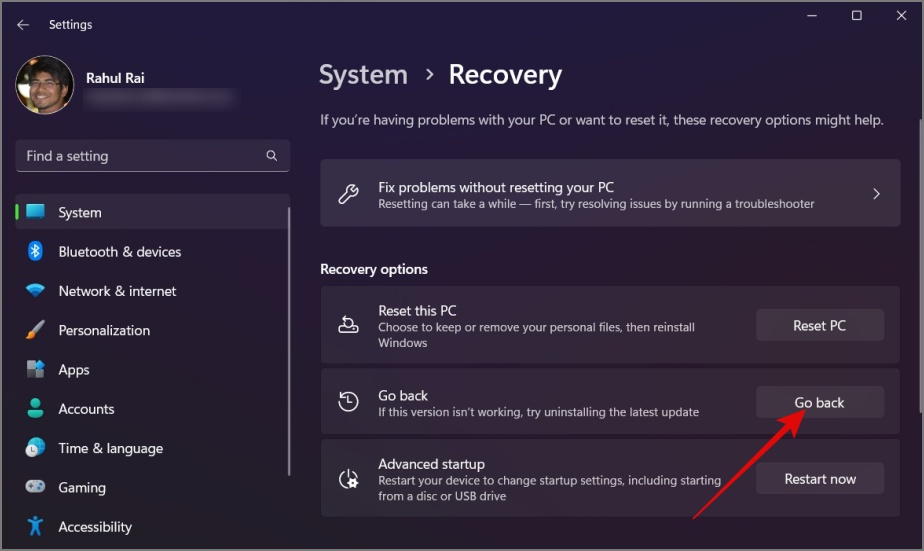
On the other hand, if the problem started after a recent Windows Update, you can roll back to the previous update. Here’s how:
1. Navigate to Settings (Windows Key + I) > System > Recovery > Go back.
2. Select the reasons and click Next.
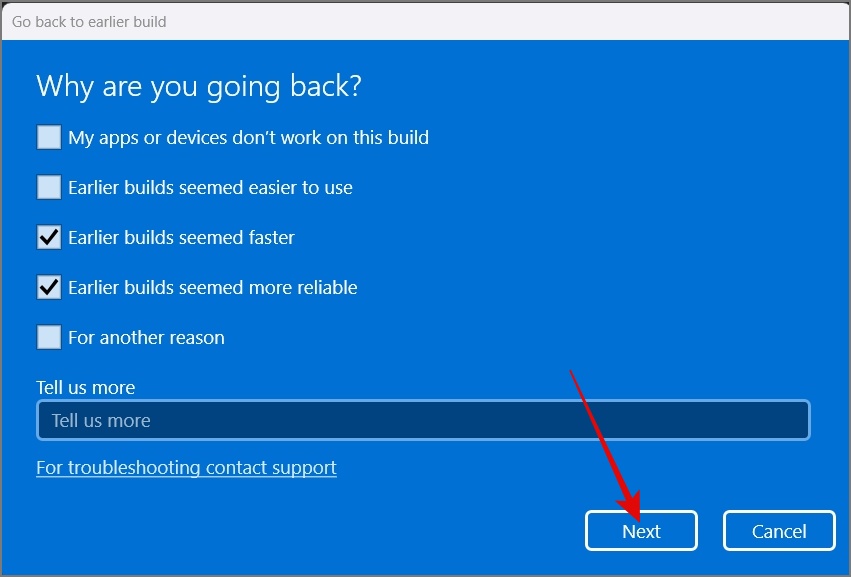
3. Click the No, thanks button.

4. Click the Next button.

5. Click the Next button again.

6. Lastly, click the Go back to earlier build button and it should start downloading and installing the previous build.

10. Reset Windows
If none of the solutions have worked so far, your last option is to reset your Windows PC. A fresh Windows installation should likely resolve the high CPU usage.
Stop CPU From Having Midlife Crisis in Windows
It can be annoying when your computer slows down, even when you’re not doing anything demanding. We hope the tips we’ve provided have fixed the high CPU usage issue and you’re no longer seeing 100% CPU usage in the Task Manager.
Before you leave, you can also check out how to disable ads from everywhere on Windows. Also, learn how to reduce booting time on Windows.