While browsing the internet, you may have come across suggestions such as switching to an SSD, updating the graphics card driver, increasing RAM, and updating Windows. However, even after following these recommendations, if your Windows PC is still taking too long to boot, what choices do you have? That’s exactly what we will discuss today.
Table of Contents
1. Is Your Fast Startup Enabled
Fast Startup is a feature that enables your Windows computer to boot up quickly, but sometimes it can also be the main culprit for slow PC startup. In such cases, disabling it could be a wise decision. With that said, here’s how to disable Fast Startup on your Windows:
1. Open the Windows Search Box and look for the Choose a power plan setting. Once found, click on it.
2. Now on the left sidebar, click the Choose what the power buttons do option.
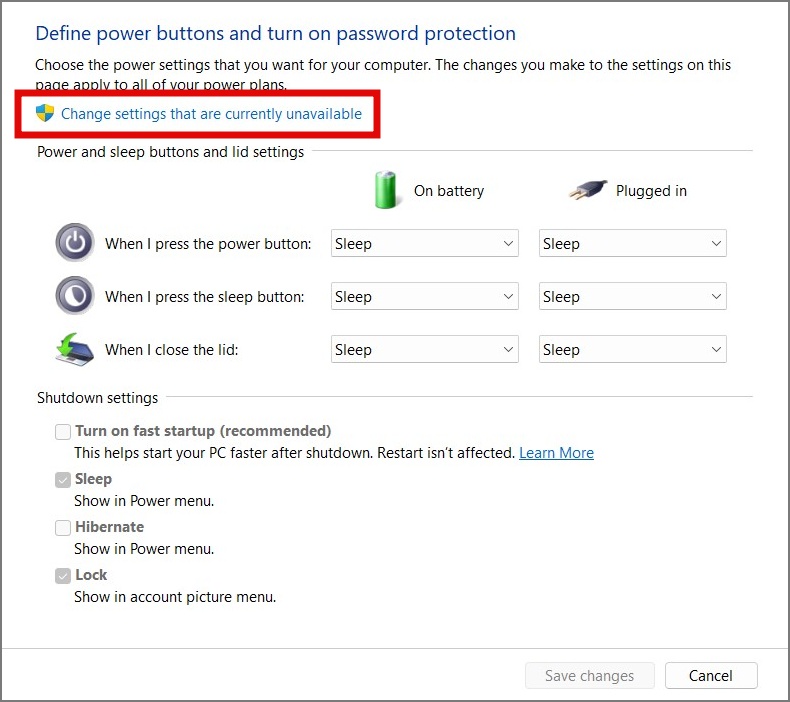
3. To edit Shutdown settings, click on Change settings that are currently unavailable.
4. Lastly, enable the Turn on fast startup setting and hit the Save changes button.
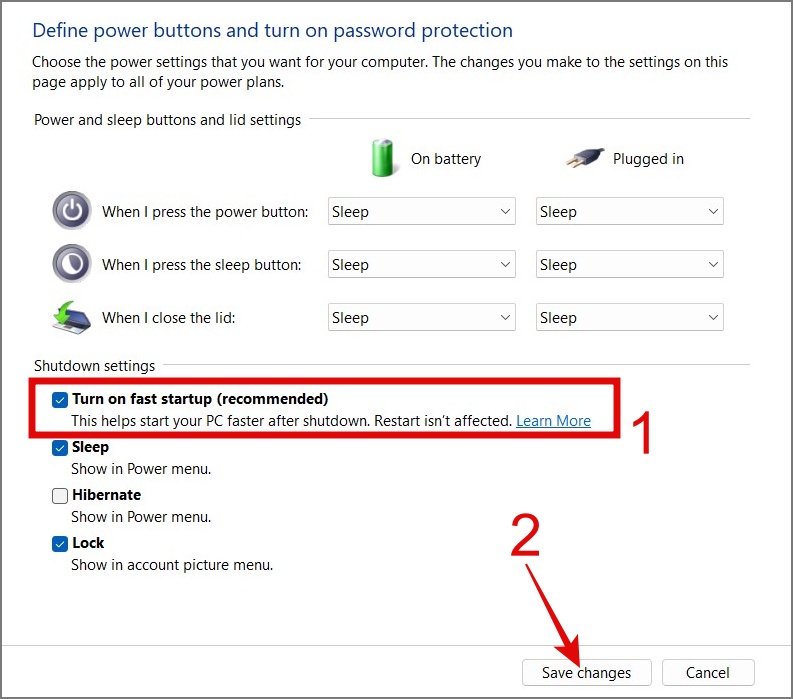
Note: Fast Startup doesn’t work on restart.
If you’re not seeing the Fast Startup option on your computer, it could be because hibernation is not enabled. To enable it, just open the Command Prompt (Admin) or Windows PowerShell (Admin) from the Windows Search Box and enter the following command:
powercfg /hibernate on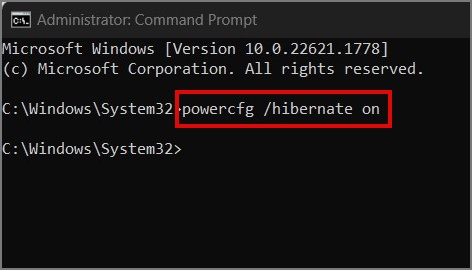
2. Do You Have Too Many Startup Apps
Many apps on your Windows computer run in the background, and some automatically configure themselves to start at boot, leading to strain on your system and slowing down startup speed.
Here’s how to disable startup apps:
1. Press Ctrl + Shift + Esc from your keyboard to open the Task Manager.
2. Next, click the hamburger menu (3-bar) and select Startup Apps.
3. Now right-click on the app and choose the Disable option.
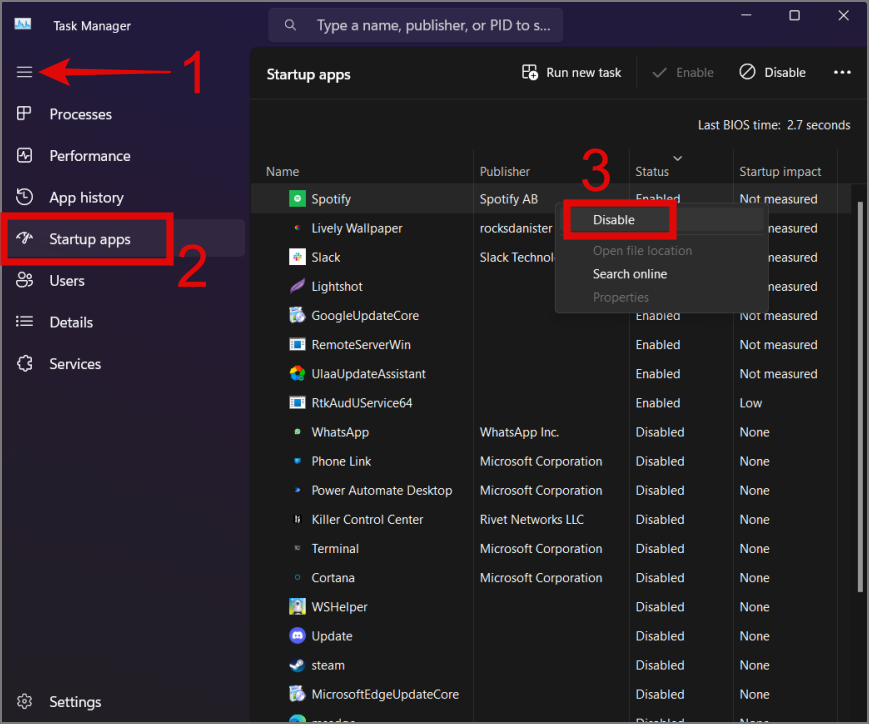
Quick Note: Don’t blindly disable any app you see. If the app is essential, keep it enabled or manually start it.
3. Disable Web Apps From Running in the Background
Many browsers allow web apps or extensions to run in the background, even after you close the browser. This can slow down boot times on Windows 10 or 11 computers. Since Chrome is popular, we’ll show you how to disable background apps in Chrome. For other browsers, simply Google search “disable background apps” followed by your browser name.
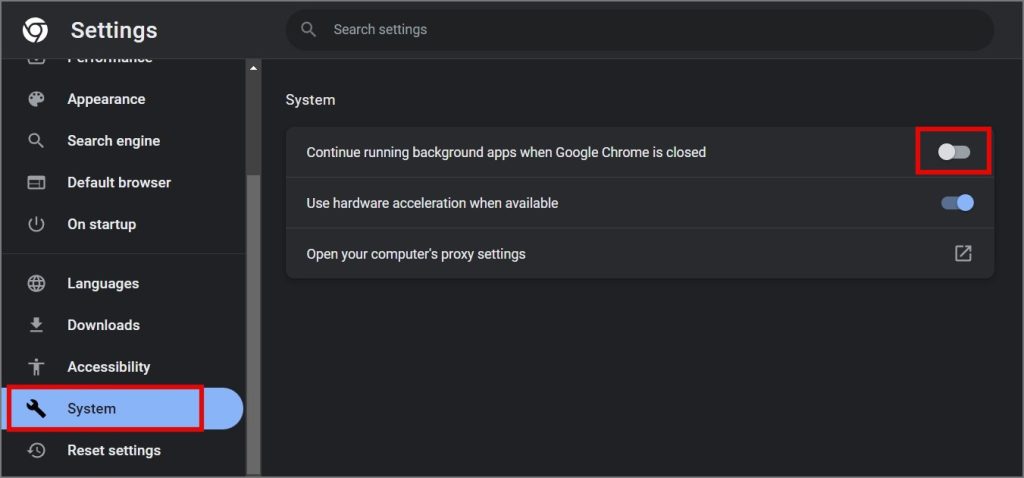
For Chrome, navigate to Chrome Settings > System and disable Continue running background apps when Google Chrome is closed.
Tip: Learn how to make your Google Chrome faster on your Windows.
4. Run CHKDSK Scan
CHKDSK is a command that scans and repairs file system errors on your drives. It can fix corrupt or missing files, potentially resolving slow startup issues on your laptop or PC.
Here’s how to use CHKDSK (Check Disk) to repair or fix the hard drive/SSD:
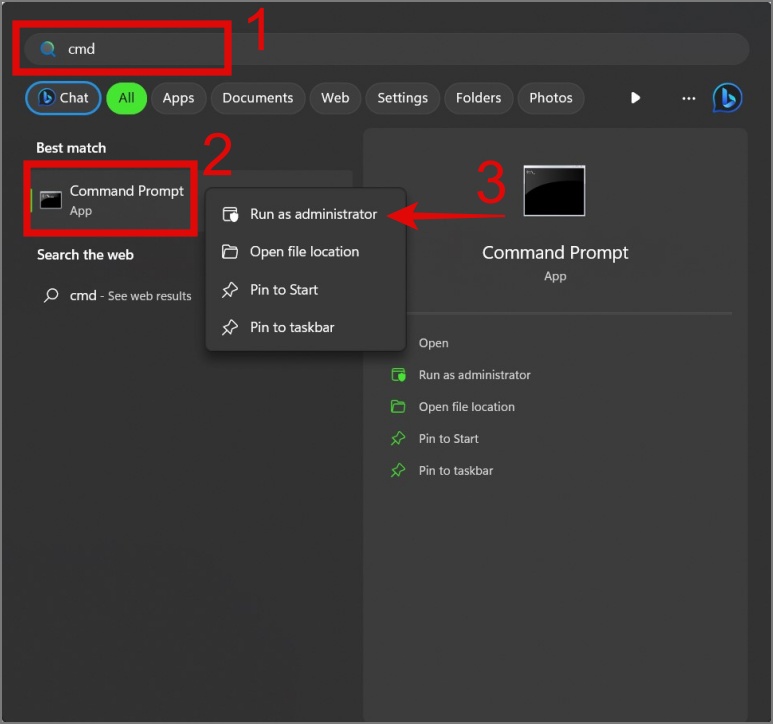
1. Type CMD in your Windows Search box and right-click on the Command Prompt.
2. After that, select Run as administrator.
3. Now type the following command based on your need:
- chkdsk [drive letter]: – It only identifies errors in the file system of your hard disk and does not fix any of them.
- chkdsk [drive letter]: /f – It scans your drive and fixes any error it finds in the system file.
- chkdsk [drive letter]: /r – It tries to fix errors on both the software and hardware part of the drives. For example, if any sector of the drive is damaged, it will try to recover the data and relocate it to a good sector.
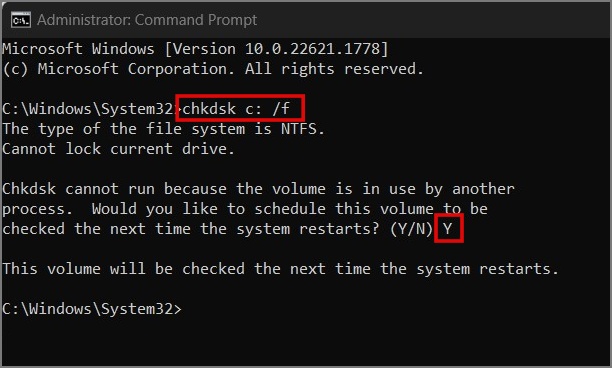
4. If it shows the “chkdsk cannot run” message, type “Y” and press Enter key to schedule the scan after the computer restarts.
5. Perform SFC Scan
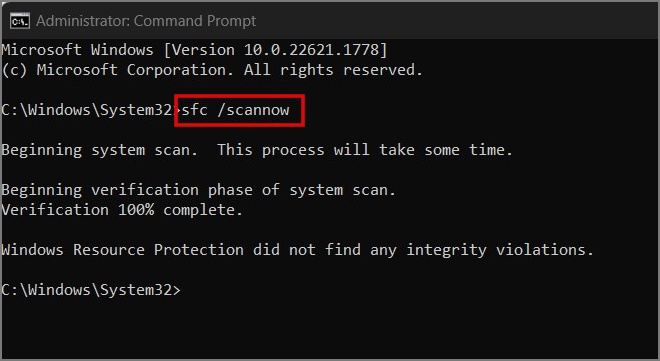
If your Windows PC is starting up slowly because of an error in the Windows system file, you can use the SFC command. This command is specifically designed to locate and fix errors in the Windows file system. To do that, open the Command Prompt (Admin), enter the command sfc /scannow, and press Enter.
That’s all. It will begin scanning your computer for errors and fix them if any are found.
6. Is Your BIOS Outdated or Corrupted
The BIOS is responsible for initializing hardware components and providing the basic instructions for the computer to start up. So we believe updating the BIOS may resolve the issue.
However, this method carries some risks and if the update is not performed correctly or interrupted, it can make your computer unusable. Therefore, take proper precautions before proceeding with this method.
7. Have You Checked for Virus
Malware infections can significantly slow your computer’s startup. Fortunately, a good 3rd-party antivirus software or the built-in Windows Security app can protect you from many viruses.
Here’s how to use Windows Security on your PC:
1. Go to Windows Search and look for Windows Security app.
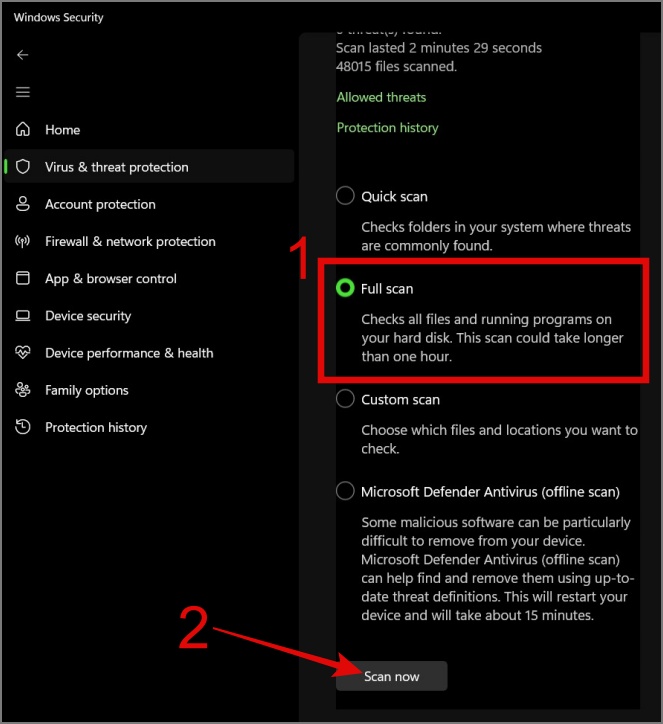
2. Open the app and navigate to Virus & threat protection section. On the right side, click on the Scan options.
3. Finally, select the Full scan option and click Scan now.
We also advise you to remove any pirated software or games from the PC, as they are one of the biggest sources of malware and can easily degrade your computer’s performance, including boot speed.
8. Remove 3rd-Party Anti-virus Software
As mentioned earlier, Windows has built-in anti-virus software, so there’s no need for additional anti-virus software. Moreover, it also impacts both your PC’s performance and startup speed. Therefore, unless you require a specific feature not provided by the built-in software, it’s best to avoid installing additional anti-virus apps.
To check if your current antivirus is slowing down your boot time, uninstall it and see if startup speed improves.
9. Is Your PC Running on Virtual Memory
When your Windows PC runs out of memory, it uses your storage as virtual memory (to prevent crashing). However, Windows automatically adjusts this allocation, which can slow down startup. To avoid this, you can manually set the virtual memory size. Here’s how:
Note: For faster boot times, prioritize increasing RAM over relying heavily on virtual memory.
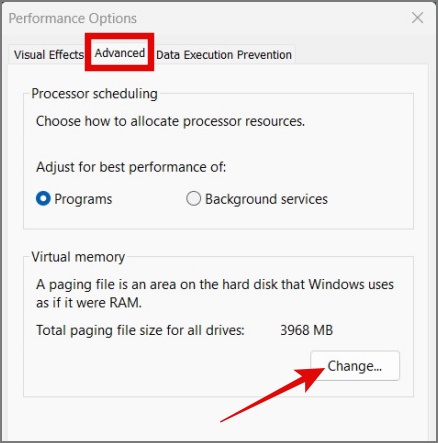
1. Type performance in the Windows Search Box and click “Adjust the appearance and performance of Windows”.
2. Now switch to the Advanced tab and hit the Change button (under virtual memory).
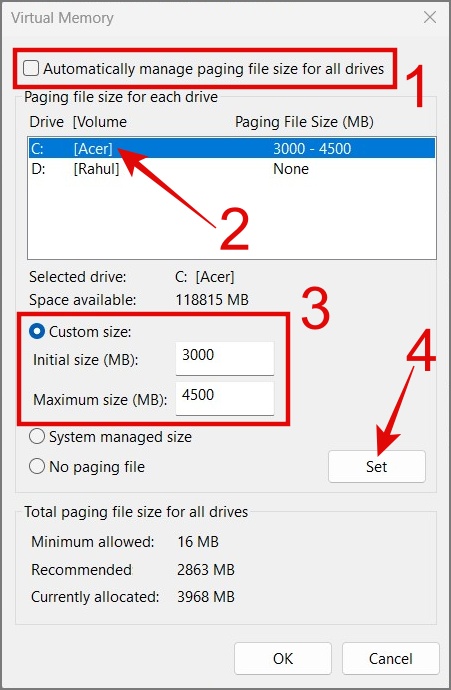
3. After that, uncheck “Automatically manage paging file size for all drives”.
4. Select the drive, choose Custom size, and set the initial and maximum size.
5. Once done, click Set and OK to confirm.
6. After a pop-up message, hit the OK button and restart your computer to see the effect
10. If Possible, Switch to SSD
We have seen how fast the computer boots up when switched from HDD to SSD and the difference is massive. So if you have an old computer or laptop that is running on a hard disk, try switching to SSD. You will see a noticeable difference in your boot times.
Pro Tip: Check for loose internal cable connection in your PC.
If none of the above methods work, the only option left is to either reset your Windows computer or do a fresh installation. We have already published an article on how to reset Windows without losing files. Make sure to check it out.