A few days ago I realized that most computers come with a US keyboard layout that doesn’t have currency symbols for other countries, at least it’s not that obvious. I frequently use currency symbols of different countries and I wanted an easier way to type the symbols than copying and pasting from Google. Let’s look at a few better ways to add a currency symbol to Mac.
Add Currency Symbol to Mac
Method 1 – Use Apple’s built-in Emoji and Symbols
Apple has an updated list of emojis and symbols on every device and you can access most currency symbols on your Mac with a shortcut. While you on any text editor, press CMD+CTRL+SPACE to bring up the Character window.
Must Read: 10 Best Menu Bar Apps for macOS That You Should be Using (2020)

Click the Search bar and start typing the currency symbol name.
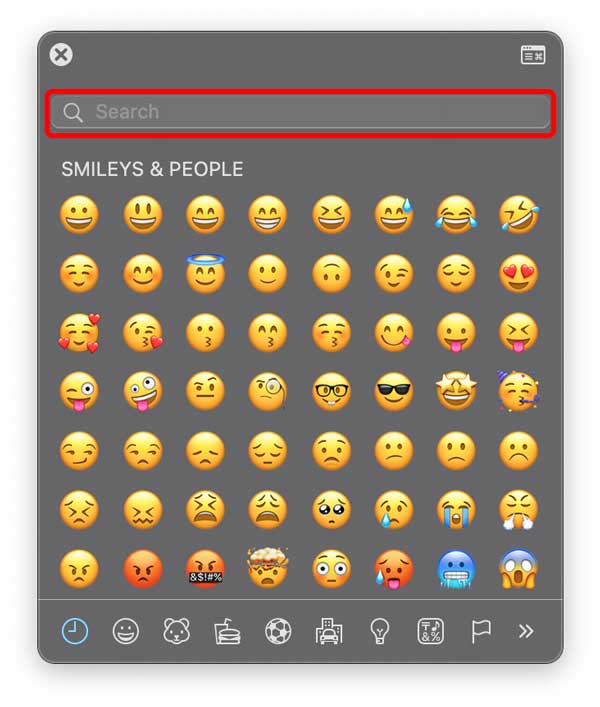
For instance, I wanted to use the rupee symbol therefore I chose that, you can find most currency symbols here. Click the appropriate symbol to add it to the text.

See? Nice and easy. You can do this to add an emoji or symbol anywhere on the Mac. It works everywhere across the Operating System.

You can also favorite the symbol so that it appears on the top of the emoji window, eliminating the need to search for the symbol every time. Open the Emoji Window by pressing CMD+CTRL+SPACE and click the Character Viewer Window icon on the top right.

In the Character Viewer search for the currency symbol and click Add to Favorites.

That’s it. The currency symbol would appear on top of all the other emojis and symbols and you can quickly select it to add to your work.

As much as this method is convenient, it does have some drawbacks as it is not as seamless as typing, say, the dollar sign where you can just press SHIFT+4 to enter the dollar sign. However, the next method further simplifies the solution.
Method 2 – Create a Text Shortcut
This next method is technically a workaround but it’s intended for situations like these. If you type a currency symbol a lot then you can create a text shortcut that would expand the trigger word with the currency symbol. For instance, I created a text shortcut for the rupee symbol, and the trigger word is set to ‘rupee/’. So whenever I type the word ‘rupee/’, it instantly changes into the rupee symbol and that is much more convenient than using the emoji and symbols method.
Pro Tip: To ensure that there are no false triggers, choose a word that you won’t accidentally type. For instance, add a prefix or a suffix such as ‘/’, ‘;’, etc to make your trigger word unique.
To create a text shortcut, open System Preferences, and click the Keyboard icon.

Read: 7 Best QuickLook Plugins for macOS
Under Text, click the + button on the bottom of the left pane to add a new shortcut.

Type the trigger word on the left side and the currency symbol on the right and that’s it. Now, whenever you type the trigger word, it would be replaced by the currency symbol you’ve assigned to it.

The text expander automatically changes the trigger word to the symbol as soon as you hit the space bar or period.

Method 3- Use a Different Input Source
The macOS has a series of different keyboard layouts stored that allows you to customize your keyboard according to your needs. For instance, the most common keyboard layout is the US version and naturally, it has the dollar sign next to the ‘4’ button on the keyboard and can be typed by pressing SHIFT+4. However, if you choose to use the Indian keyboard layout, it gives you access to the ₹ symbol by pressing OPTION+4. Also, the rest of the symbols and keeps are the same as the US keyboard layout so there isn’t a significant difference. You can simply find the keyboard layout that has the currency symbol of your choice and start using your currency.
To change the keyboard open the Settings app and navigate to the Keyboard settings.
It would open the Keyboard Settings and find the Input Sources tab on the top and click to open it.

Here you would see all the keyboards layouts that are currently active. Click the + button on the bottom left corner of the left pane.

Type in your country in the search box and select a layout of that country. Click Add.

You would now see a preview and you can test the keys to find out which key combination would give you the currency symbol. Try pressing OPTION, SHIFT, CTRL, and CMD to see the keys change on the window. In my case, the rupee symbol appears on the key ‘4’ when I press OPTION.

That’s it, you can continue to use this keyboard and whenever you need to enter the currency symbol, simply press OPTION+4. This may not be true for every keyboard layout so test your country’s keyboard layout to find out which key has the currency symbol and which modifier key activates it.
Closing Words
These were a few different ways to add a currency symbol to your Mac. Even though macOS recognizes all the symbols, you still need to feed the symbols and that’s why these methods help you fix the problem. What do you think? Let me know in the comments below.
Also read: How To Rotate Your Macbook Screen to 90 Degrees