One of the biggest issues with free background remover tools is that they often add watermarks, reduce the image resolution, or request your email ID to download the image. Thankfully, you won’t have to deal with this issue anymore. During a recent Surface event, Microsoft announced several features coming to Windows 11, including the background removal tool in the Paint app. So, let’s check how to remove background from images using the Paint and Paint 3D app.
Table of Contents
Make the Image Background Transparent in Paint
Removing the background from the photo in the Paint app is as simple as right-swiping someone on Tinder. Follow the steps below to learn how to do it:
Note: The background remover tool in the Paint app is currently only available for Windows 11 users.
1. Launch the Paint app on your Windows computer. If you don’t have it on your PC, you can download it from the Microsoft Store.

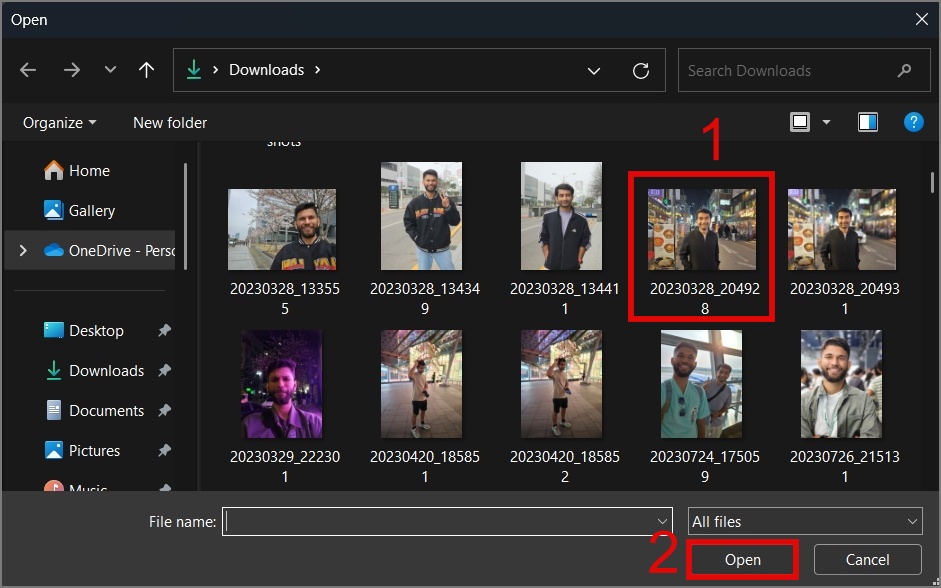
2. After that, click on the File tab and select the Open option.

3. Select the image that you want to make transparent and then click the Open button.

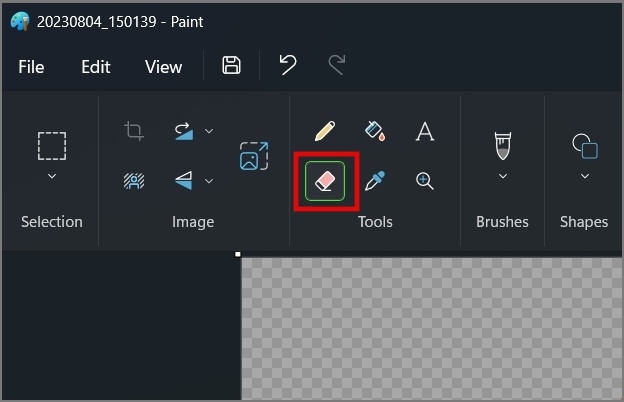
4. Now all you need to do is hit the Remove Background button (Person icon with shaded line) placed inside the Image section and it will begin analyzing the image.

After a few seconds of processing, your image will turn transparent.

You can check the before and after samples to check the results.

5. If the tool misses any part, you can use the Eraser tool to make a specific part of the image background transparent.
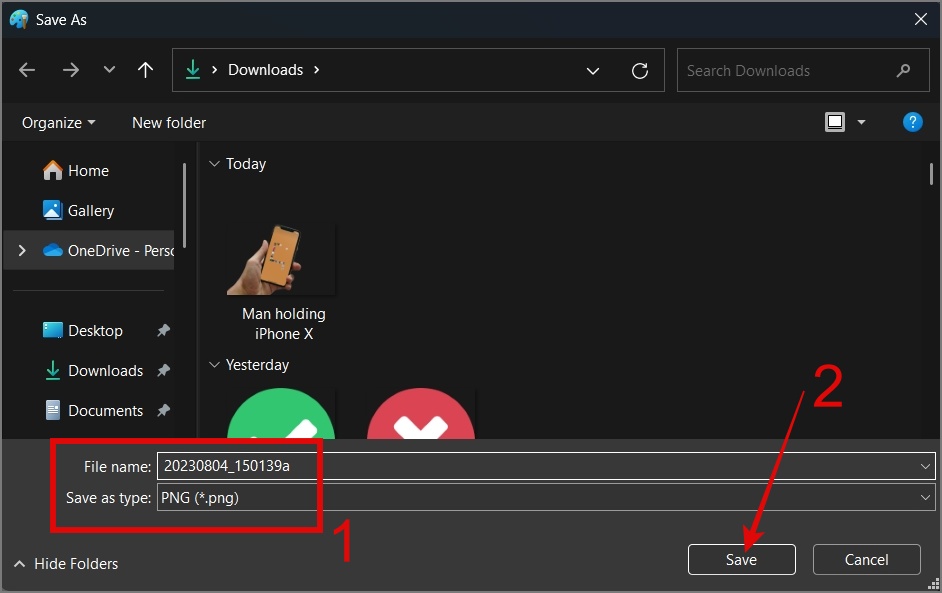
6. Once you’re satisfied with the result, you can then save the image. To do that, click on the File tab > Save as and then select the PNG picture option to save the image with a transparent background.

7. Now pick the location where you want to save the image and then hit the Save button.
We also tried removing the background from the outdoor night shots, and here as well, it was able to erase the background with ease. The edges were properly detected, and we didn’t notice any major defects in the final output.
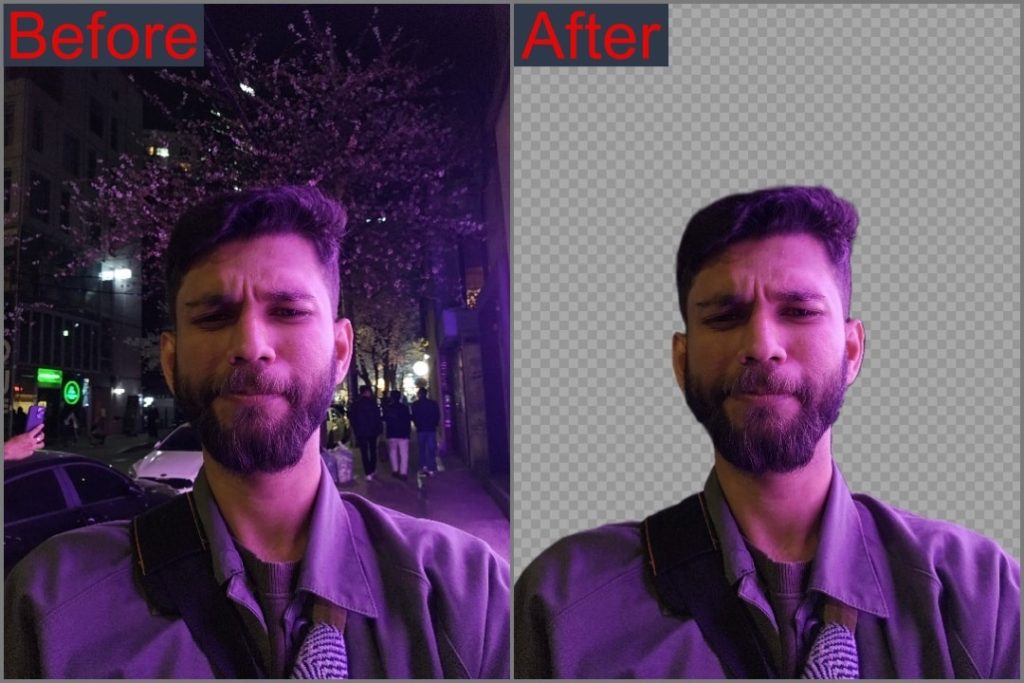
We also want to point out that your image resolution will remain unchanged, so you don’t have to worry about the image resolution or quality being degraded while using the Paint app.
Make the Image Background Transparent in Paint 3D
In 2017, Windows 10 introduced the Paint 3D app, an updated version of the classic Paint app, which also included a background remover feature. To learn how to use this tool, follow the instructions below:
1. Launch the Paint 3D app or download it if you haven’t already.

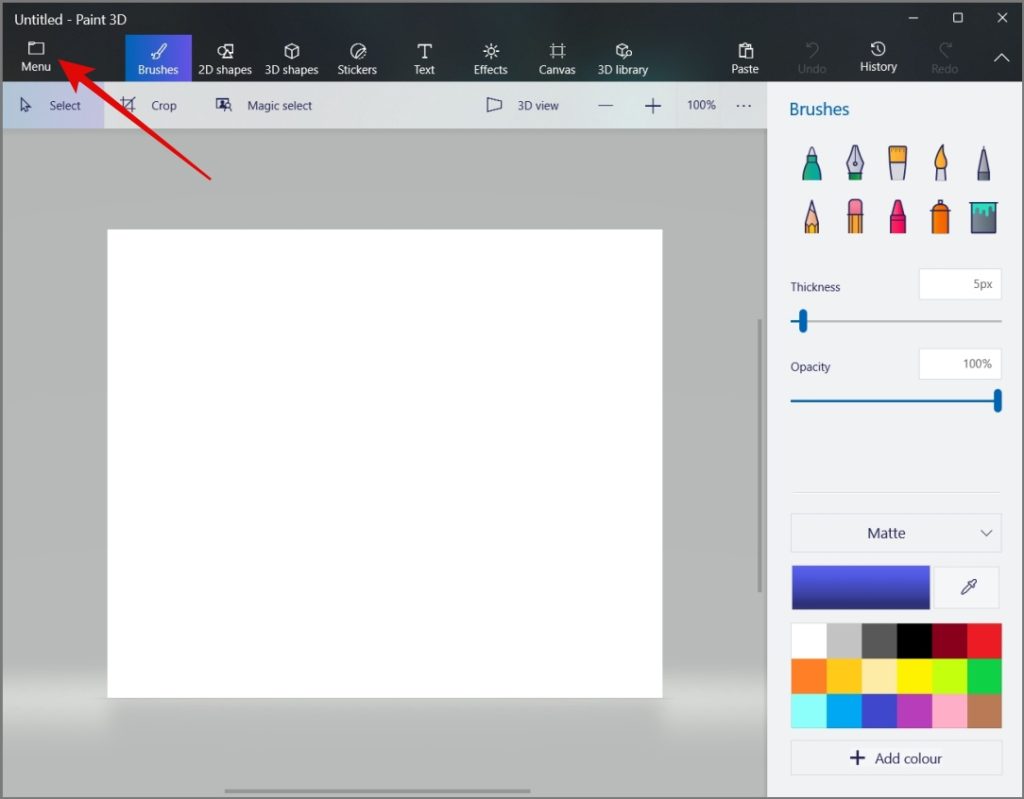
2. Once the app is open, click on the Menu tab.
3. Then, click on the Open menu and hit the Browse files button.

4. Now select the image that you want to edit and hit the Open button.
5. Once your image is loaded, click on the Magic Select tool, located in the top bar.

6. Then move the outline closer to the subject for better edge detection.
Once done, hit the Next button, then the app will automatically detect the subject based on your outline.

7. If it misses any part, you can use the Add or Remove buttons to fine-tune the selection.
Once you’re satisfied with your selection, you can click Done.

8. After that, you need to switch to the Canvas tab and disable the Show canvas toggle.

9. Once done, go to the Menu and select the ‘Save as’ option. From there, select the Image file format.

10. Now, all you need to do is select the PNG file format from the drop-down menu (under “Save as type”), customize the image resolution, enable Transparency, and then click the Save button.

11. Choose the location where you want to save your transparent image and then click the Save button.

Here’s what the final output looks like:

We also used the same outdoor night shot to test Paint 3D’s background removal capabilities, and this is what the results look like:

Pretty bad, isn’t it? Compared to the classic Paint app, Paint 3D lags behind in many ways. First and foremost is its ability to detect edges. Most of the time, you have to manually adjust the edges to make the image transparent. Additionally, Paint 3D involves multiple complex steps to make a photo transparent compared to the Paint app, which only requires one click to remove the background.
FAQs
1. Which one is the best background remover app, Paint or Paint 3D?
We ran several tests, and it turns out the regular Paint app is better than Paint 3D. It’s also easier to erase backgrounds from the classic Paint app compared to Paint 3D, which involves a more complicated process. Plus, Paint 3D doesn’t do a great job detecting edges. So, we suggest sticking with the good old Paint app – it’s more reliable.
Make Your Background Disappear Like a Ninja
With a background remover tool right in our hands, we no longer have to settle with low-quality image resolution or the watermarks that come with free background removal apps or online tools. If you’re interested, you can also learn how to remove background from images on Android and iPhone.