You might find it necessary to use or send a smaller image size in various situations, such as when sending an email attachment, uploading an image to a website, or saving phone space. However, the key question is how can you decrease the file size of a JPEG/JPG without compromising its quality. In this article, we will guide you on precisely how to shrink the file size of JPG/JPEG without losing much quality.
When you compress any image, you’ll lose detail and clarity. However, the results are often so amazing that it takes a trained eye to notice the differences.
Table of Contents
Reduce JPG File Size Online
One of the greatest advantages of online tools has always been their accessibility from any device, whether a phone, tablet, or computer. Now, to reduce the size of the JPEG file, we will use this amazing tool called ImageResizer. To use it, you need to upload the image by clicking on the Select Image button.

Next, enter the image dimensions and select the image format. If you prefer to skip these steps and directly reduce the JPG file size to, let’s say, 100 KB, enter the desired size in the Target File Size box (Keep in mind that this may significantly impact your image quality because it doesn’t change the image resolution accordingly).

After that, hit the Export button, and it will begin processing the picture. To download the image, click the tiny download button under the New Size column.

As you can see in the comparison picture below, the JPG image size has been significantly reduced from 9.44 MB to 261 KB, and there’s hardly any noticeable difference between the original photo and the compressed one.

Decrease JPG File Size on iPhone
If you prefer an app over an online image size reduction tool, you can use the Compress Photos & Pictures app for your iPhone. It’s easy to use, doesn’t take up much space on your phone, and usually gives good results. Here’s how it works:
1. Launch the app, then tap the Select Photos to Compress button and choose the image.

2. Adjust the photo quality and dimensions using the slider and hit the Compress button.

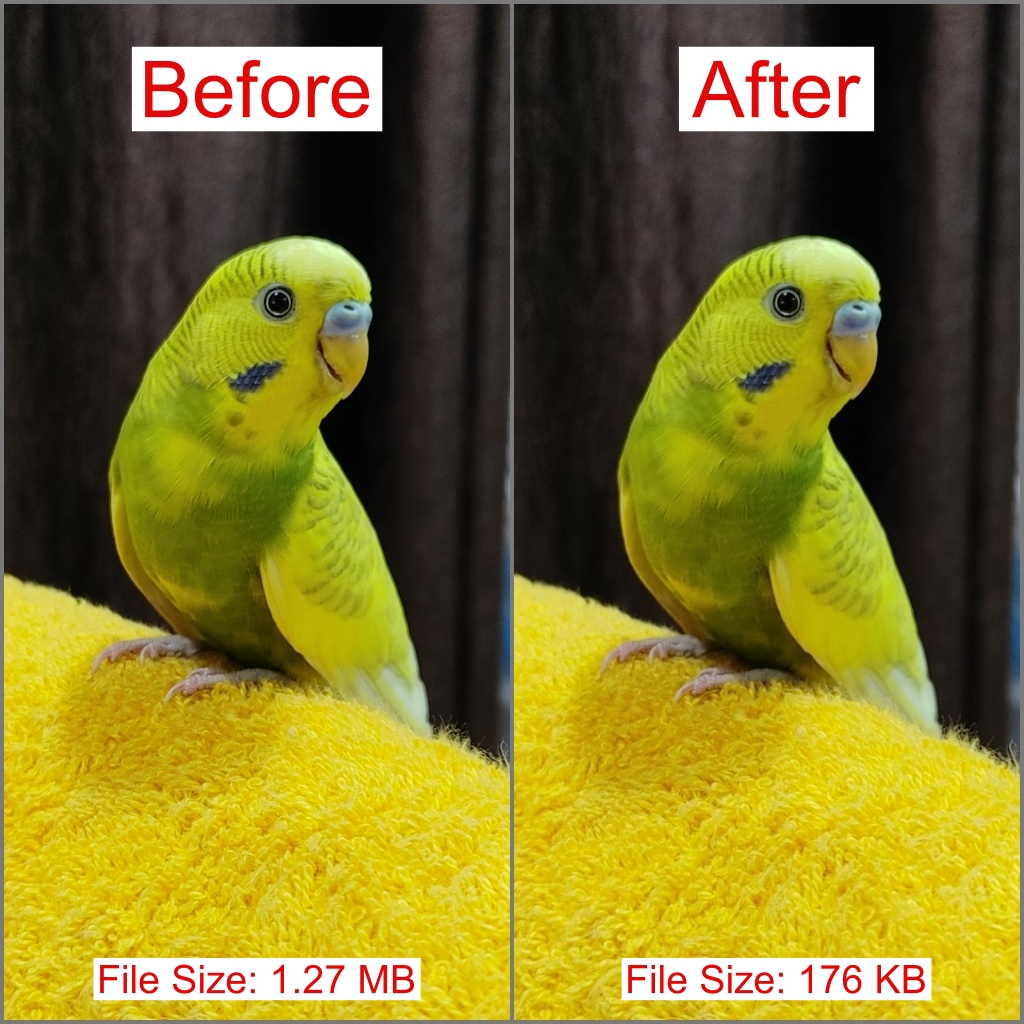
As you can see, it reduced the JPEG file size from 1.4 MB to 144 KB.

Here’s the side-by-side comparison for you:

Tip: Here’s how you can organize photos on iPhone.
Minimize JPEG File Size on Android
We suggest using the Compress Image – MB to KB app for Android. It’s easy to use, has a clean user interface, and did a great job compressing our images – beyond our expectations.
To use it, tap the Select Images button to choose your image. You can also reduce the file size of multiple images at once.

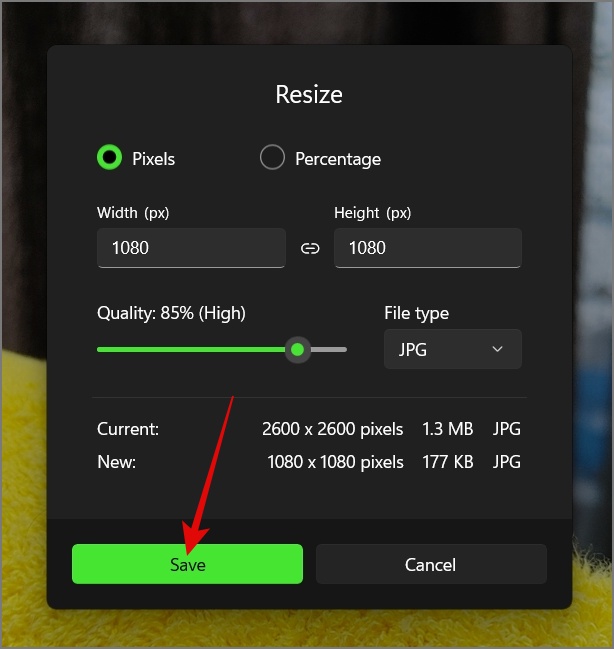
After selecting, choose your compression level, and the desired file size, and click the Save button.

As shown in the screenshot below, the differences are hard to notice.

Shrink File Size of JPG on Windows 10/11
Unlike Android or iPhone, you don’t need to install additional apps on your Windows PC to reduce the JPEG file size. You can do it directly using the built-in Microsoft Photos app. Here’s how it works:
1. Open the image you want to resize, then click on the three-dotted icon (Meatball icon) and select the Resize image option. If you’ve uninstalled the Microsoft Photos app from your Windows computer, you can install it from the Microsoft Store again.

2. Enter the preferred resolution and select the image quality and format. After that, tap Save.
Tip: As you make adjustments to the image, you’ll see a preview of the new file size.
3. Choose the destination where you want to save the new image on your computer. After that, click on the Save button.

Here’s the side-by-side comparison. Notice the difference in image quality.
Tip: Here’s how to edit photos on Windows using Microsoft Photos.
Reduce the File Size of JPEG on Mac
Similar to Windows, Mac also has built-in functionality to reduce the file size of the image, including JPG, PNG, HEIF, etc. Here’s a step-by-step process:
1. Double-click to open the image, click on the Tools tab, and select the Adjust Size option.

2. Choose the desired pixels/resolution for your image. After you select it, click the OK button.
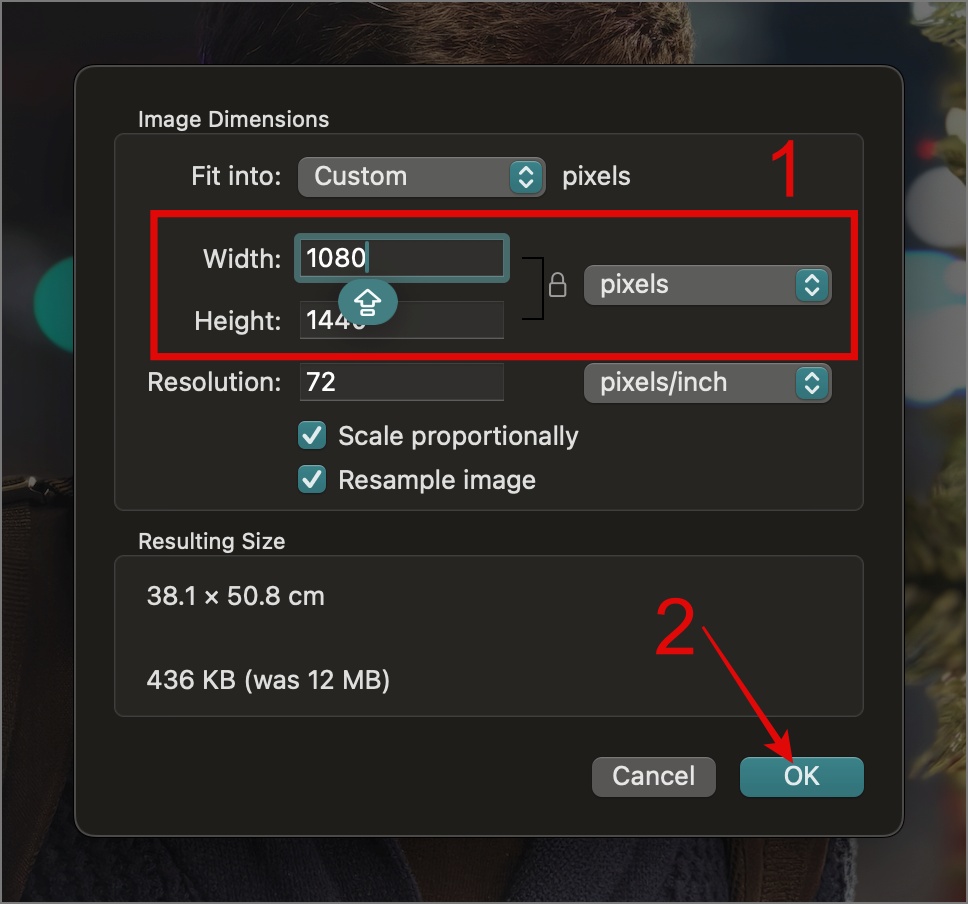
Your original JPEG image will be saved to the new resolution and file size.

FAQs
1. Can I reduce the size of JPEG files in bulk?
You can easily compress many image files at once on iPhone and Android using the method mentioned above. However, if you’re using Windows or Mac, use the online tool we discussed.
2. Does the method mentioned above also support other image formats?
In our tests, we found that the tools mentioned above can handle popular image formats like PNG, WebP, and HEIF. If they can’t handle a specific format, just use image converter tools to change it to a supported format.
Shedding Pixels Without the Tears
Reducing the image file size has a lot of benefits, including faster loading times on websites, decreased bandwidth usage, easier storage and sharing of images, and more. We hope the above guide has helped you in reducing the file size of JPEG images on any operating system you are working with.