Mobile numbers or email ID is required to log in to Instagram account, reset passwords, and receive notifications. In case your mobile number or email ID has changed or you are traveling to another country and switching to a new number, you must update these details on Instagram to ensure secure login and account recovery. Instagram has changed the UI settings for updating personal details. Here’s how to update your phone number and email ID on your Instagram account.
Table of Contents
Why Update the Phone Number and Email
Updating your phone number on Instagram is crucial, and here’s why you shouldn’t overlook this vital step.
- Account Recovery: If you ever lose access to your Instagram account, you will need your email id and phone number to recover it and reset your password.
- Security: Instagram sends an email notification or message in case it detects unusual activity or sign in to your Instagram account.
- Account Verification: The blue tick that means your profile is verified is only given to those whose Instagram account is up to date with their personal details so they can verify them.
- Notifications: Instagram might reach out to you via email or phone to keep you in the loop about important updates like login to your account or policy changes.
- Two-Factor Authentication: 2FA is a security feature that adds an extra layer of protection to your Instagram account. When you enable 2FA, Instagram will send you a code to your phone number or email address for verification.
Update Contact Information on Mobile
The process for updating email addresses and mobile numbers is the same on both Android and iOS. Let’s take a look at the steps.
1. Open your Instagram app and tap on the profile icon.

2. In your profile, tap on Edit profile button and then on Personal information settings.

3. Now, you will get directed to personal details. Here, tap on Contact info.

4. On the Contact information page, you can check the existing contact number and email address linked to your account. To update the contact info, tap on Add new contact.

5. Here, if you want to update your mobile number tap on Add Mobile Number or tap on Add Email Address to update your email address.

Update Mobile Number
If you selected Update mobile number, follow the steps below:
1. Enter the new mobile number in the blank space. Also, look out for the country code and if the country code is incorrect, tap on Change, and select your country code from the list.

2. All the accounts linked to the contact number will be listed. Tap on the account you want to link with the updated number and then tap on Next.

3. Instagram will send a confirmation code to the new mobile number. Enter the confirmation code and tap on Next.

4. A confirmation message will be displayed on the successful update of the contact number mentioning the linked Instagram account. Unfortunately, we were unable to receive the confirmation code on our contact number during the test due to issues with the Meta servers.
Note: Updating to a new number will disable two-factor authentication. You can set up two-factor authentication again in settings.
Update Email ID
To update the new email address, follow the steps mentioned below.
1. Enter the new email address in the blank space.

2. All the accounts linked to the email address are listed here. Now, tap on the account for which the email needs to be updated and then tap on Next.

3. Instagram will send a confirmation code to the new email address. Enter the confirmation code and tap on Next.

4. Now, a confirmation will be displayed on the successful update of the email ID mentioning the linked Instagram account.

Note: Updating to a new email address will disable two-factor authentication. You can set up two-factor authentication again in settings.
Update Contact Information on Desktop
Now let’s go through the process of updating the contact information on a desktop.
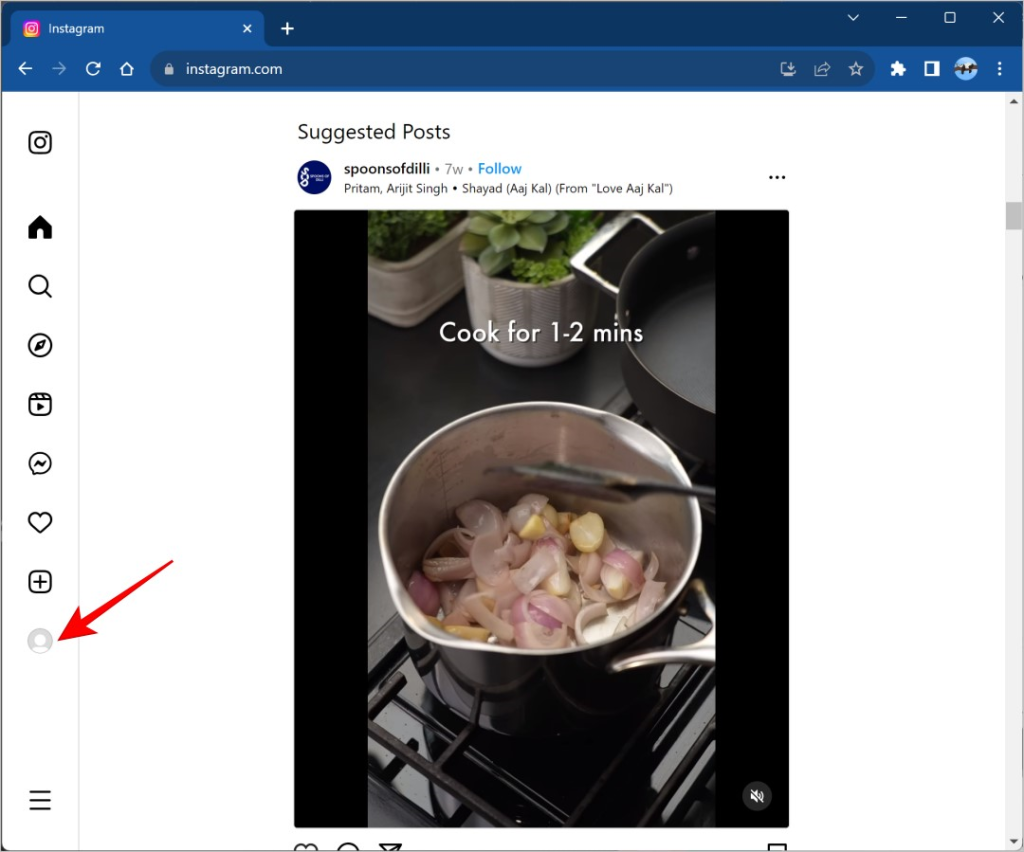
1. Log into your Instagram account on any browser and click on the Profile icon.
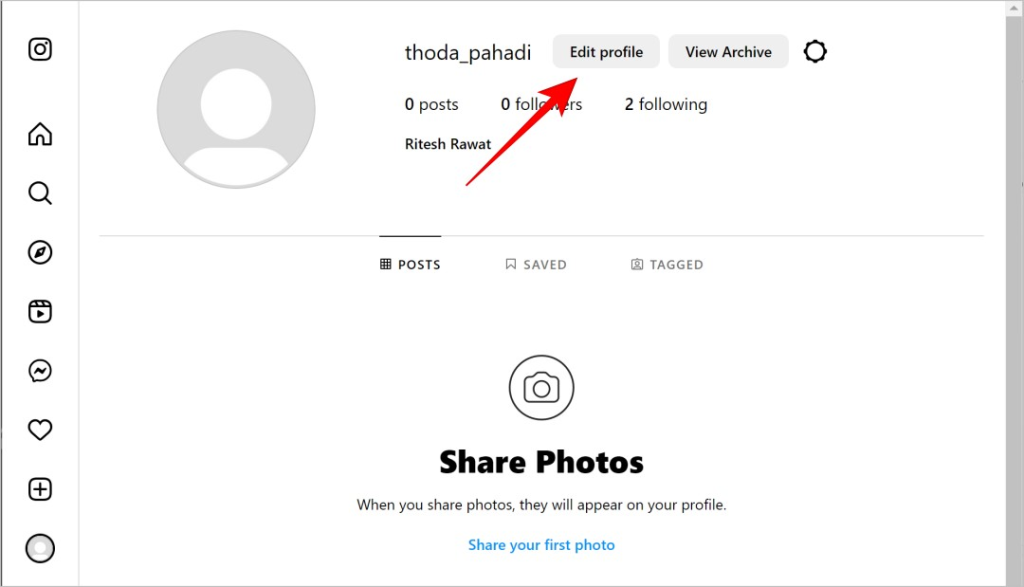
2. In your profile section, click on Edit profile button.
3. Under the Accounts Center, click on See more in Accounts Center highlighted in blue color.

4. From the list of account settings, click on Personal details.

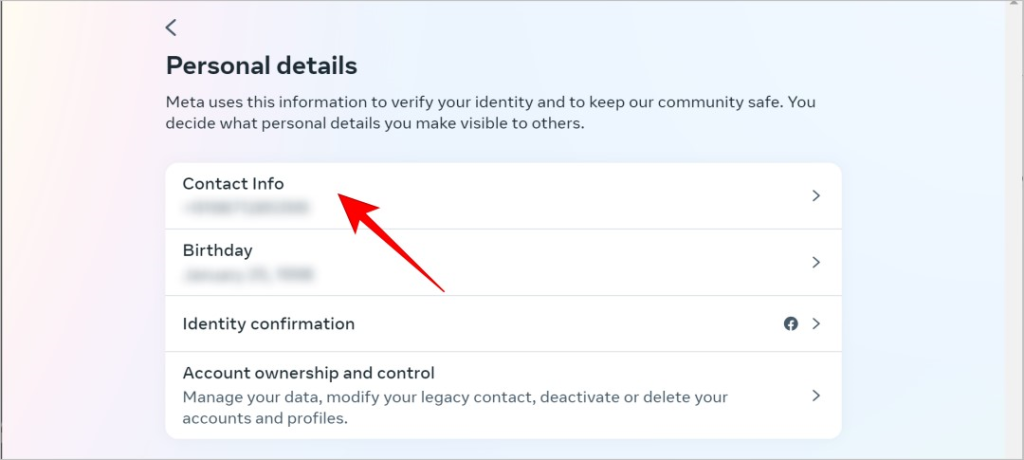
5. Now, click on Contact Info.
6. Here you can check the email address and contact number already linked to the account. To update, click on Add new contact.
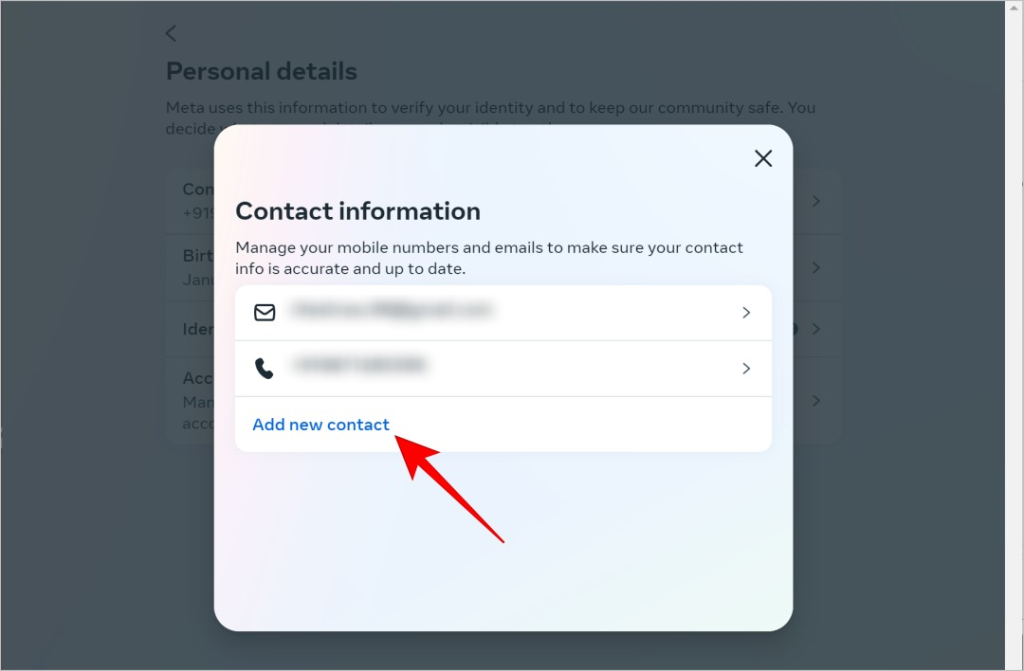
7. Select Add mobile number or Add email to update them.

Update Mobile Number
Here is how to update your mobile number on your Instagram account on your desktop.
1. Enter the new mobile number in the blank space and check for the country code. In case of an incorrect country code, tap on Change and select your country code from the list.
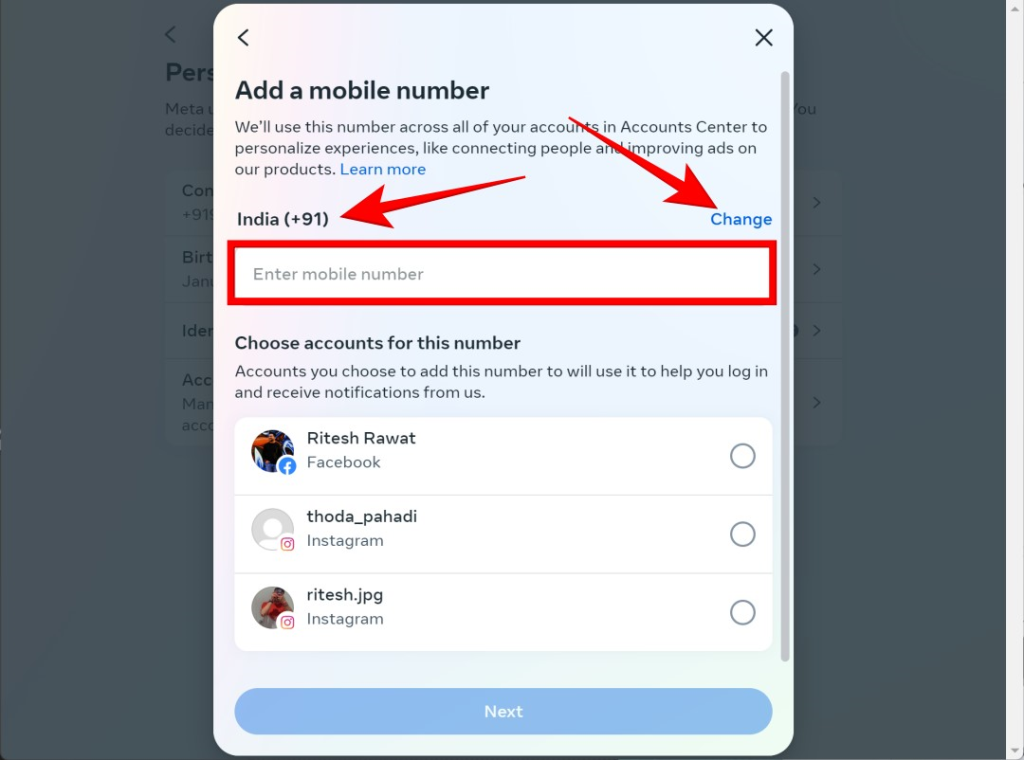
2. All the accounts linked to the contact number are listed here. Select the one that needs to be updated and click on Next.
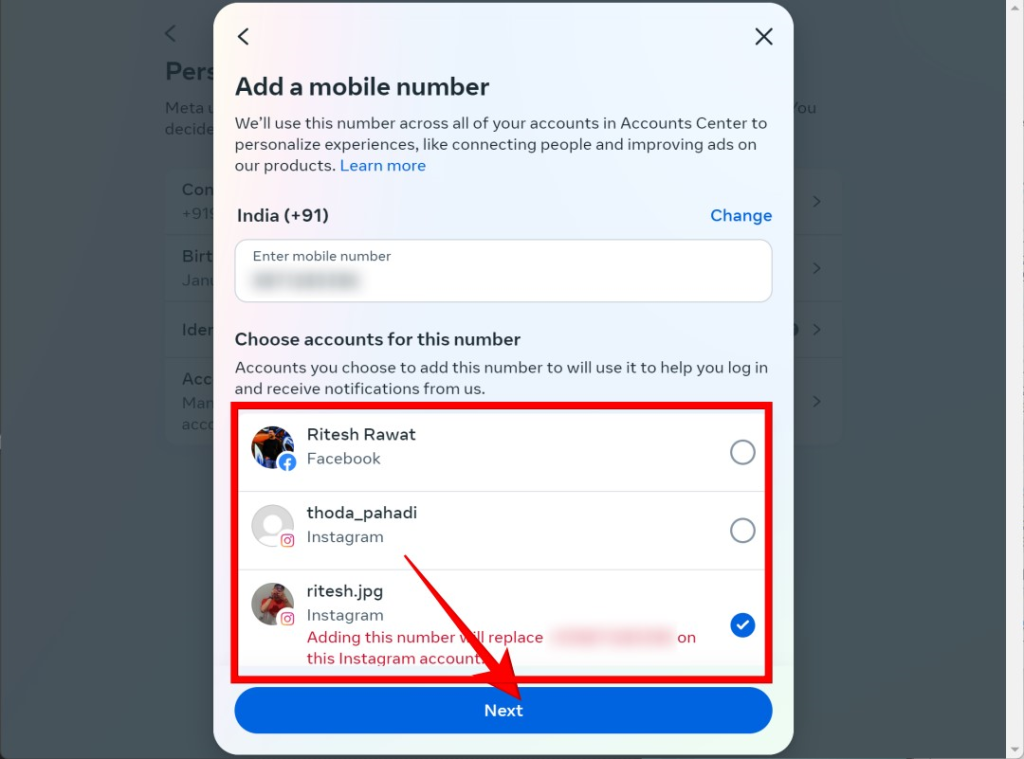
3. Enter the code sent from Instagram on the new contact number and click on Next.

4. You will be confirmed for the successful update of the new contact number. Just like when we were trying to update the number on mobile, we didn’t receive the confirmation code on the new contact number this time too.
Tip: To avoid risking your personal information, always log out of Instagram on all devices. Follow our guide to learn how to sign out of Instagram on all devices.
Update Email ID
To update your email address on the desktop, follow the steps mentioned below.
1. Enter your new email address.
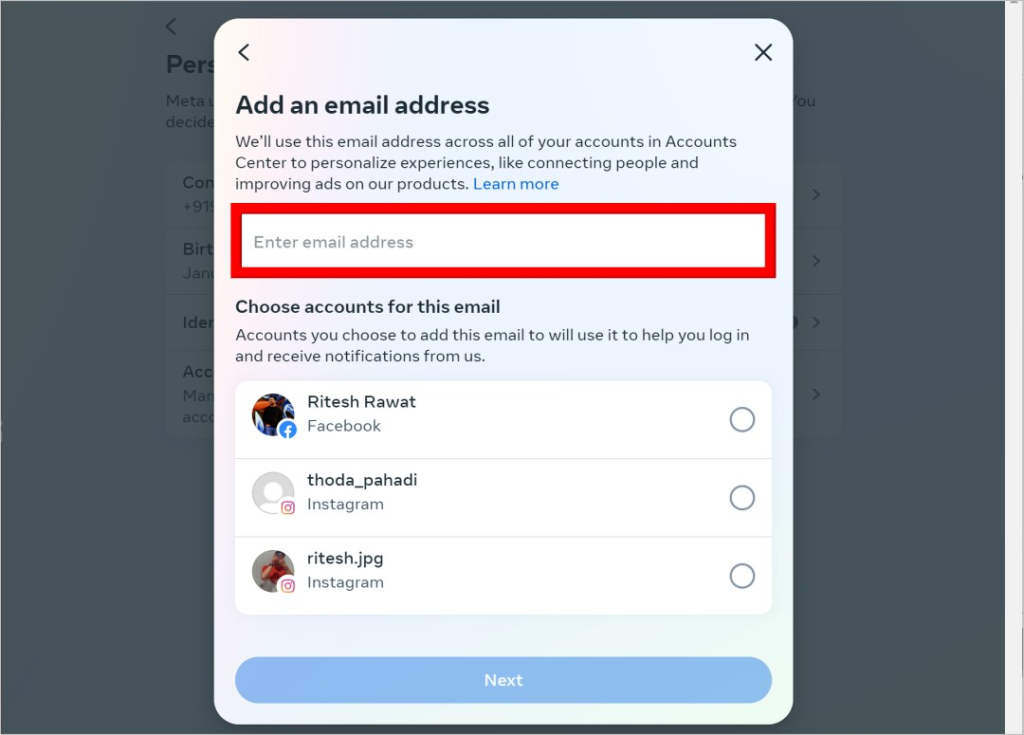
2. Select the account to change the email address and click Next.

3. Enter the confirmation code sent by Instagram on the new email address and click on next.

4. You will see a confirmation message saying the new email address has been linked to the following Instagram account after getting updated.

Tip: If you don’t have access to your phone to get the verification code and still want to log in, here’s every way possible to log in to Instagram without verification codes.
Insta Update
By ensuring that contact information is up-to-date, you enhance the platform’s capacity to authenticate your identity as required, thereby preventing unauthorized access. Protect your Instagram account and enjoy seamless login with this essential security measure.