Are you in a situation where you urgently need to send multiple documents but don’t know how? Well, the solution is right there in your pocket. Yes, I’m talking about your smartphone. With your Android phone, you can easily scan multiple documents and save them as a PDF without paying a single penny. All under 2 minutes. So, here’s how to quickly scan documents into PDF with your Android phone.
Table of Contents
How to Scan Documents on Android
In this guide, we’ll be using the Document Scanner by Lufick on our phone to scan documents. We’re choosing this app over popular alternatives like Adobe Scan, Microsoft Lens, and CamScanner because of its intuitive interface and robust feature set, all of which are available for free. In contrast, other document scanning apps might be more expensive, require you to sign in, or present privacy and security concerns. So, without any further delay, let’s get started.
Quickly Scan Document
1. Download the Document Scanner app on your Android phone.
2. Once done, open the app and then tap on the Camera icon to scan the document.
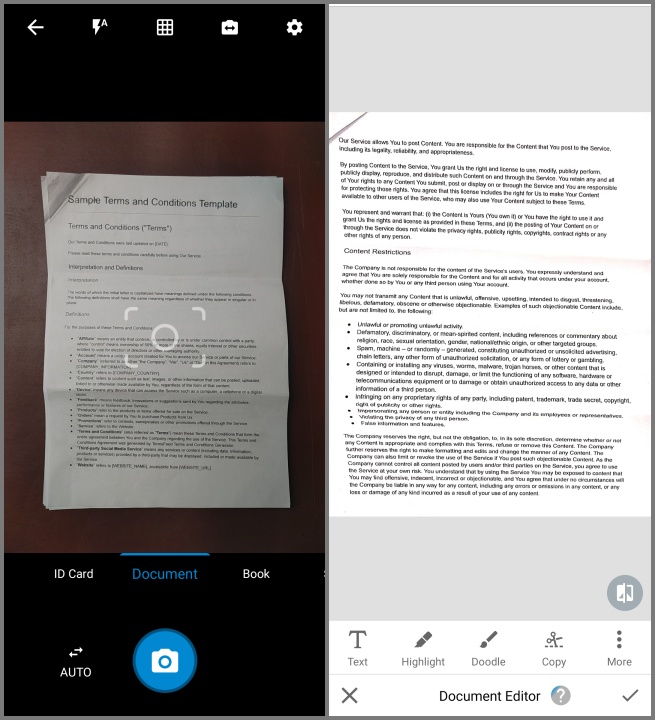
3. Now, point your camera toward the document, and it will automatically detect the edges and capture a photo. If you prefer, you can also manually scan the document by turning off the Auto feature and using the Camera shutter icon to take a photo of the document.
4. As seen in the screenshot below, it accurately detected the edges, even though the surface color closely resembled that of the document.
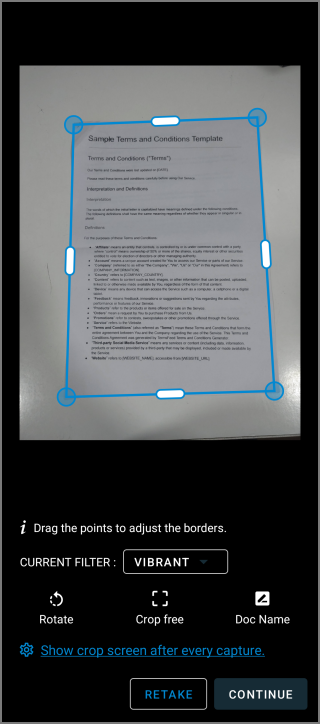
While it may occasionally miss the edges, thankfully, you can manually adjust the document’s edges by dragging the circular icon. You can even tap on the Retake button to rescan the document.
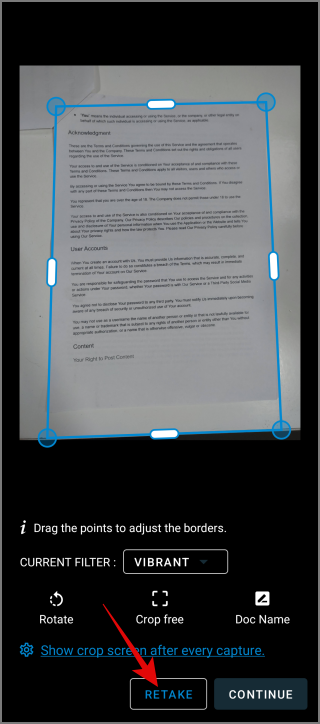
5. Once you’re done adjusting, hit the Continue button to scan more documents from your phone.
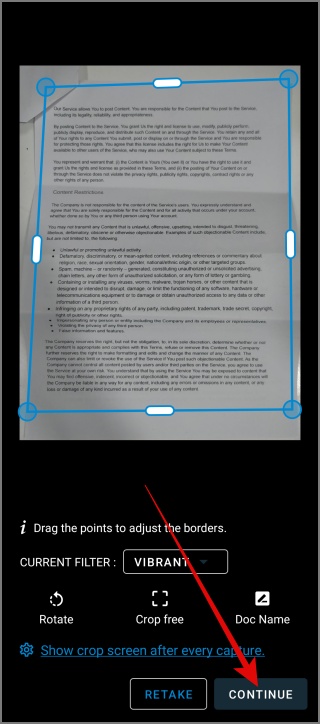
6. After scanning through all the documents, simply tap the Checkmark (tick) icon to review your documents.
Edit Document
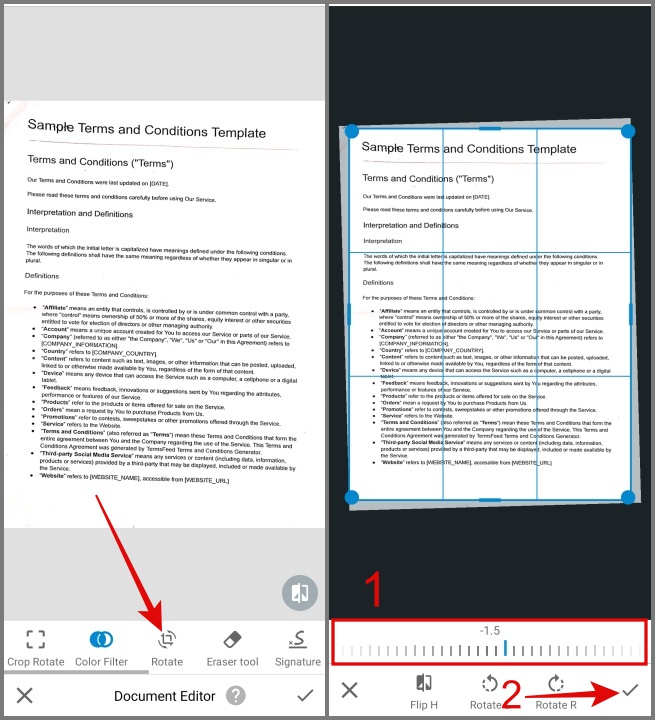
Now that you’re on the editing screen, here we will primarily focus on enhancing the documents we have scanned from our Android phone. In the settings, you will find features like color filters, rotate, doodle, signature, and more.
Document Alignment:
In case the document you scanned appears tilted, you can use the Rotate feature to straighten it. To do that, simply navigate to Edit > select Last Edited Document and tap Rotate.
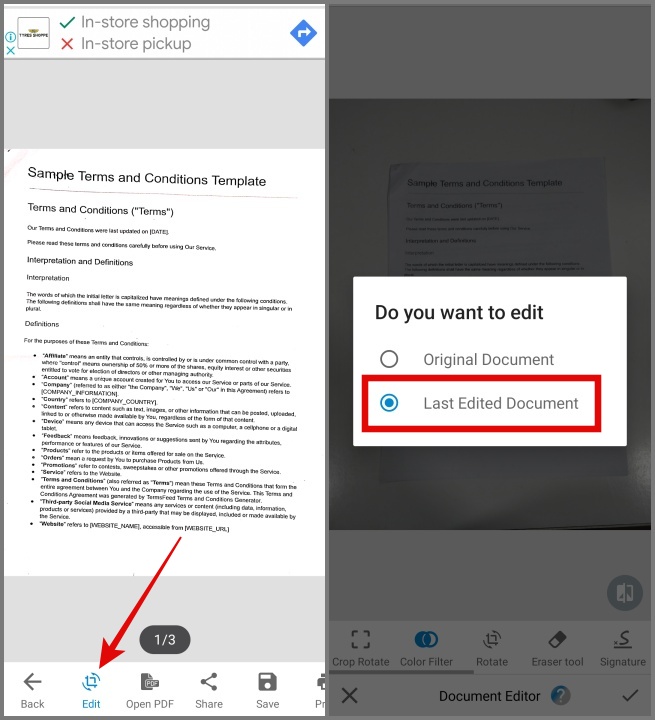
Then, drag the slider to properly align the document. After that, tap on the Tick icon, then tap it again to save the changes.
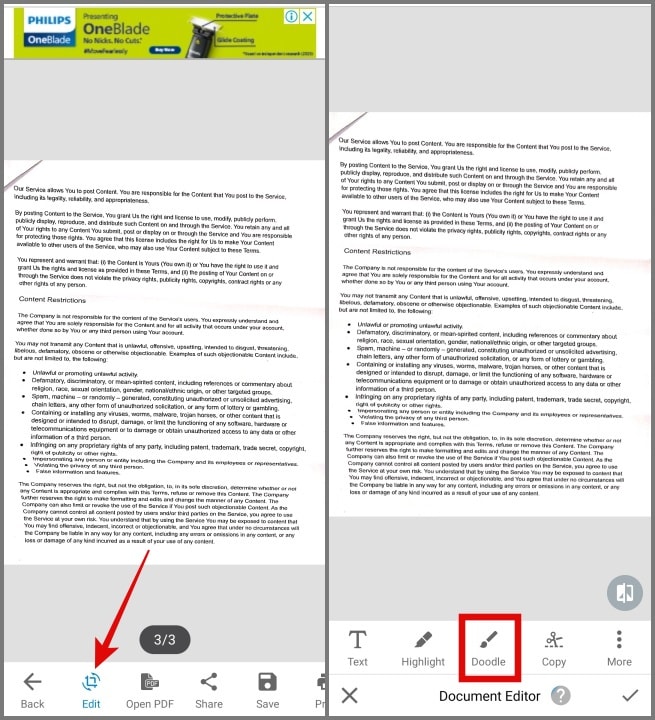
Unwanted Mark:
Another common issue you might encounter after scanning is a black line caused due to marks of document folds. Use Doodle to remove such lines.
1. Go to the Edit section again, slide the toolbar to the right, and then select Doodle.
2. Use the Color Picker tool to match the brush color with the document background color you’re working on. In most cases, it is white.
3. Once done, hit the Brush icon, adjust its size as per your preference, and then drag it over the black line or any other unwanted marks.
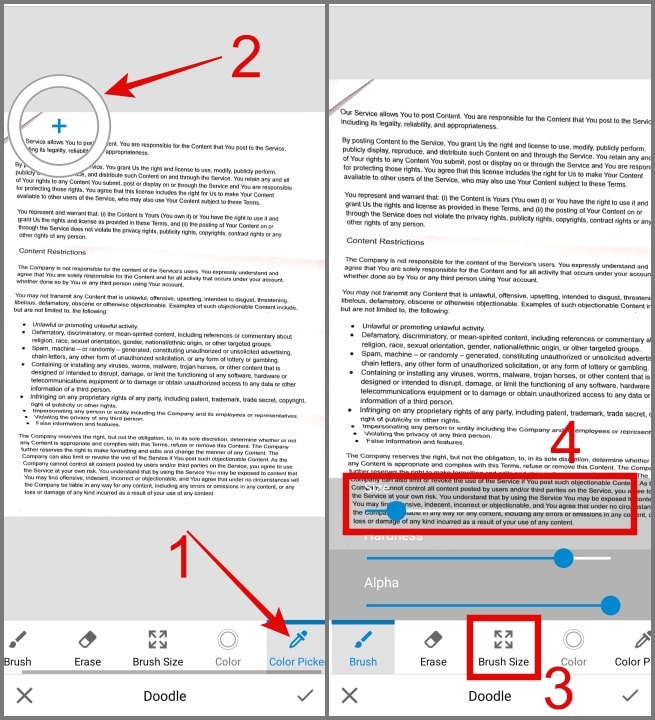
4. After you are done, tap on the Tick icon, then tap it again to save the changes.
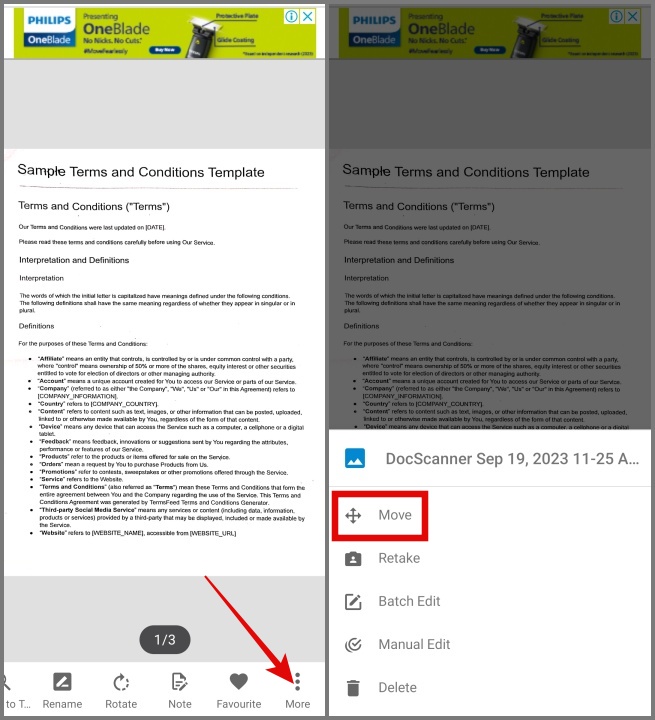
Reorder the Documents:
It is easy to reorder the document pages if you realize they are not in the right order once the scanning and editing parts are done.
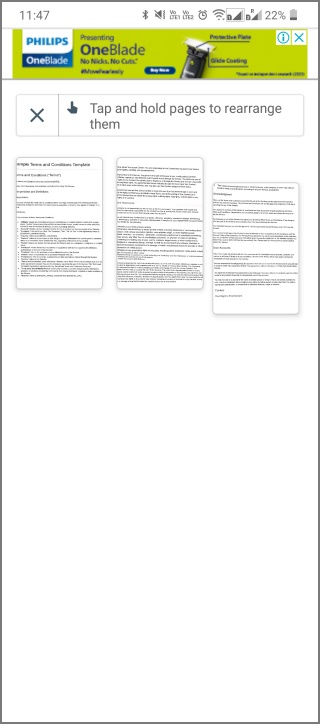
1. Simply slide to the end of the Toolbar, then tap on the More icon (3-dotted icon) and select the Move option.
2. Now, tap and hold the pages to rearrange the document. That’s it!
One major issue you might encounter is the inability to preview the document before moving it. This can be particularly challenging for users with many scanned documents.
Save Documents as PDF
Now that you’re done with the scanning and editing the documents, the next step is to save all the scanned documents in a single PDF file.
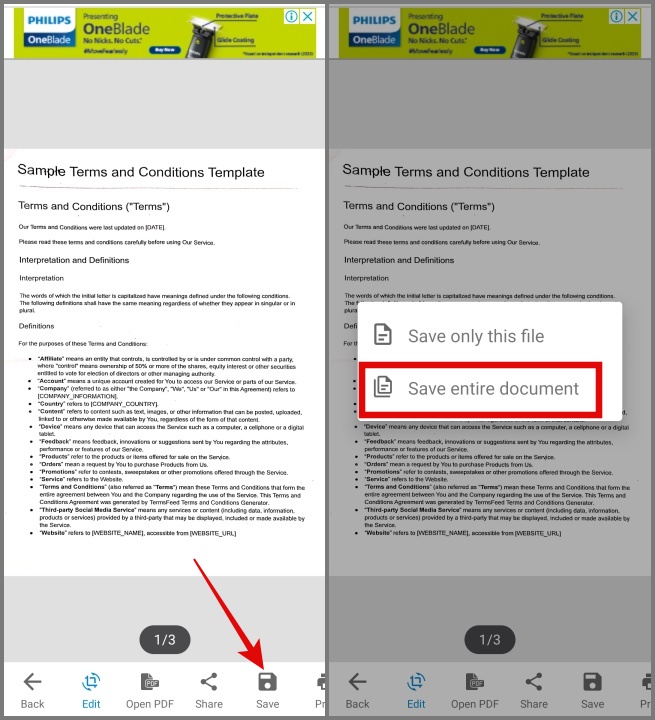
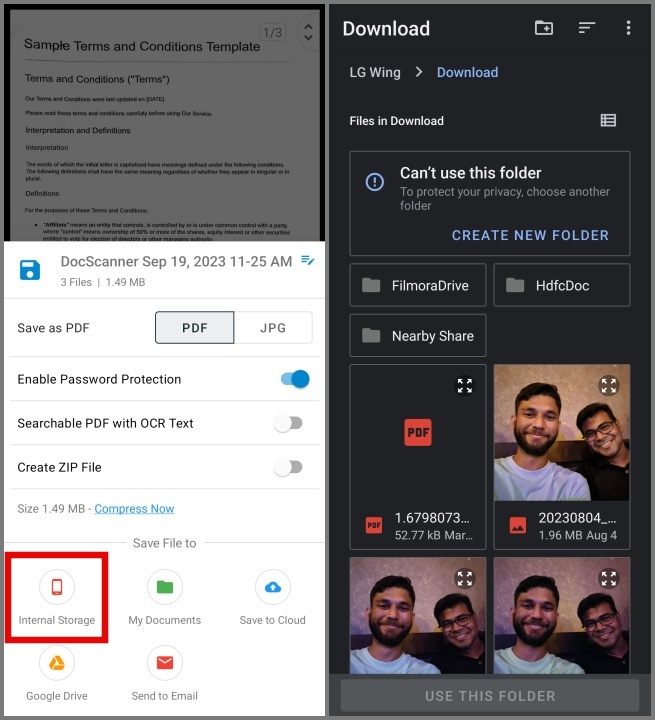
1. In the toolbar, you’ll find an option called Save. Tapping on it will display two more options: Save only this file and Save entire document. Select Save entire document to create a PDF document containing all your scanned documents.
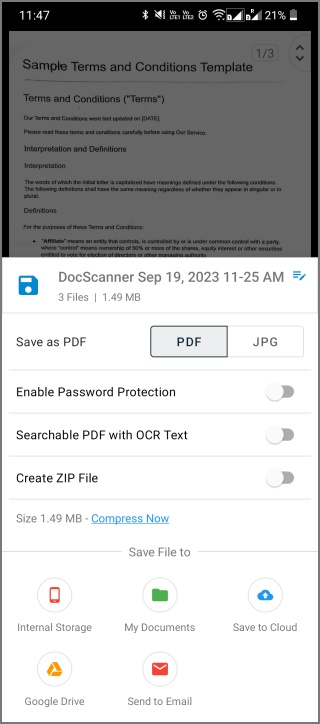
2. Next, select the PDF button next to the Save as PDF setting.
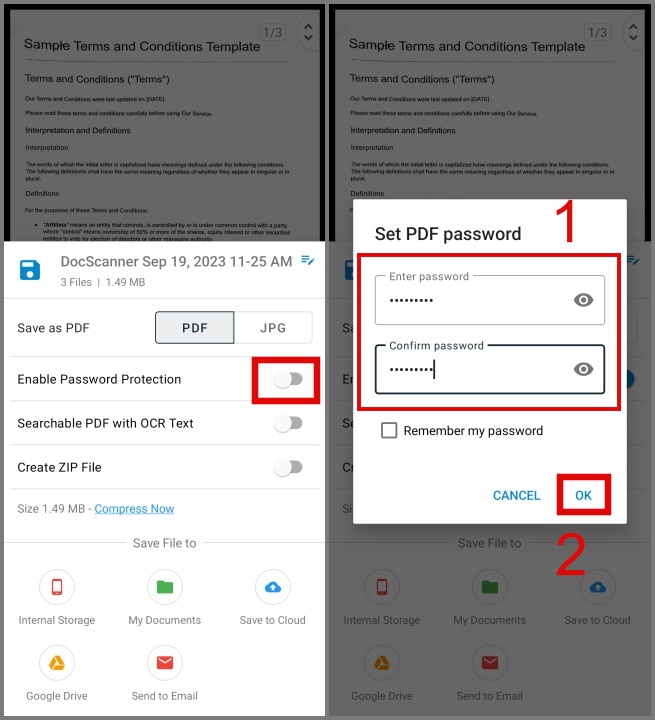
3. Optional: If you also wish to password-protect the PDF file, enable the toggle next to Enable Password Protection, enter the password, and then hit OK.
4. Next, select the destination where you want to save your PDF, such as internal storage, email, or cloud storage.
5. We selected the Internal Storage option. Tapping on it will allow you to choose the file location.
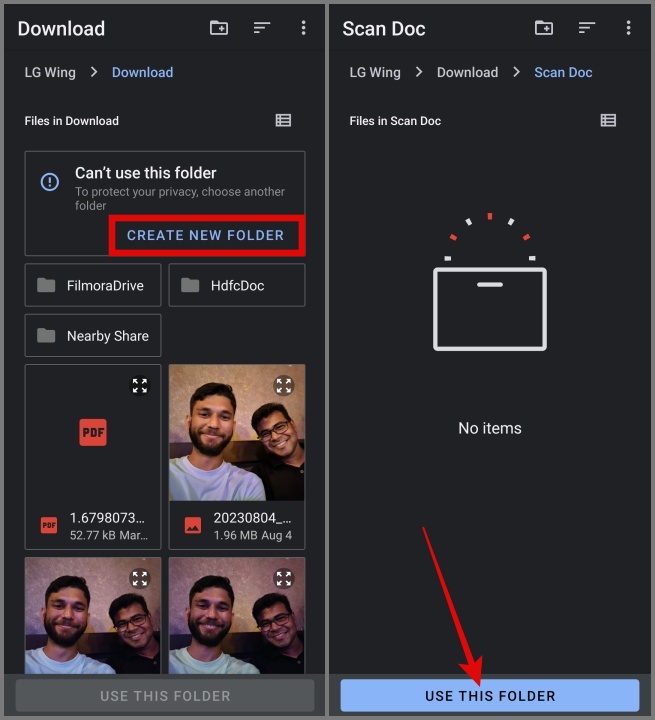
6. Next, tap the Create New Folder button, name the folder, and then tap the Use This Folder button.
7. If you see a message asking for access, just tap Allow.
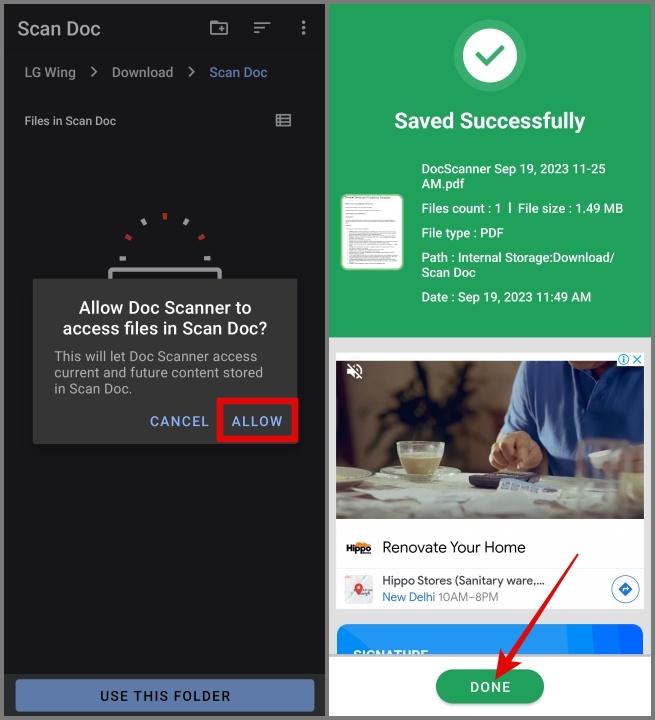
That’s it. You’ve successfully created a PDF of your scanned documents using only your Android phone.

Tips and Tricks for Scanning Documents
There’s no perfect document scanning app on the internet that doesn’t require some customization to fit specific needs, and the Document Scanner is no exception. Here are a few tips and tricks to help optimize the scanning process for various types of documents and situations.
1. Ensure there’s ample lighting and try not to use flash, as it might create shadows or uneven lighting. While the app can partially emulate a document-like experience even in low lighting conditions, adequate lighting remains essential.
2. Clean your phone’s camera lens as dust and smudges may affect scan quality.
3. Keep your hand steady while capturing the image or else you will get a blurry picture.
4. Ensure you scan the document from a distance. Capturing a close-up shot may introduce shadows in your document scans, potentially delivering results like this.

5. Place the document on a flat surface to avoid distortion and also ensure that the pages are not folded or creased.
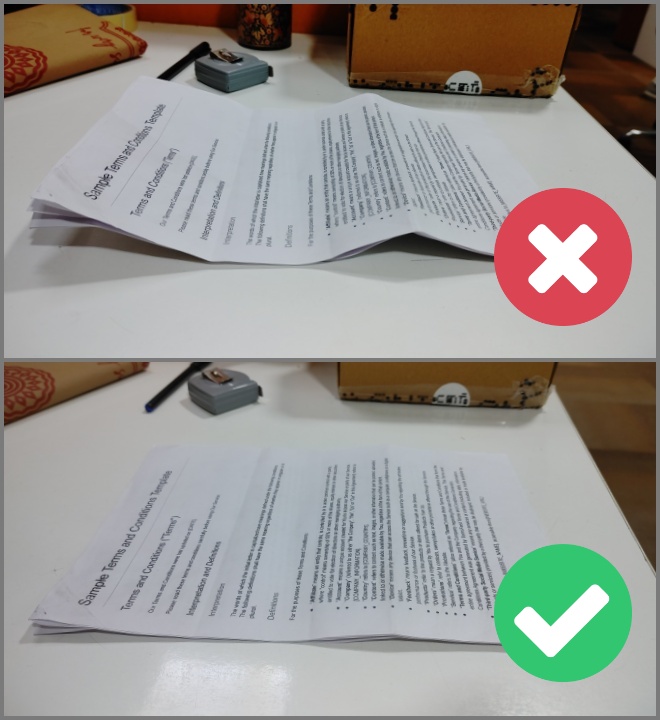
However, for testing purposes, we folded the document to observe the outcome. Surprisingly, the app performed well. While some lines may appear slightly distorted, the text remains legible and visible.
Alternative Document Scanning Apps
If we were to recommend another document-scanning app, it would be Adobe Scan. It offers an intuitive interface and a feature set similar to that of the Document Scanner app. In most cases, it even outperforms the Document Scanner app, but the only thing that is holding down the app is its limitations in the free plan.
In the free plan, you can only scan up to 25 documents, and there is no option to add password protection to PDFs or compress files. To remove these restrictions, you have to subscribe to its premium plan which costs $9.99 per month or $69.99 per year.
FAQs
1. Is there any premium service offered by the Document Scanner?
The free plan would be more than enough for most users. However, if you want to get rid of ads, upload documents to the cloud, add signatures, convert images to text, etc., you can join their premium plan (up to $10.99).
2. Are there any privacy and security risks involved when using a document-scanning app?
It’s always recommended to exercise caution when using third-party scanning apps, especially for sensitive documents. Make sure the app you use has a strong reputation for privacy and security. For instance, the widely popular document-scanning app, CamScanner, was discovered to have sent malware to phones. So far, we haven’t heard any such news about Document Scanner, Microsoft Lens, or Adobe Scan.
3. Can I add a signature to the scanned documents?
If you wish to add your signature to the documents, you can do so, but this feature is available only in the premium plan. However, there are some good PDF editor apps for Android that you can use to sign documents.
Scanning Documents on the Fly
It can be challenging when you urgently need to scan and send a document, and you’re already short on time. Fortunately, there are many good document scanning apps like Document Scanner that allow the user to scan the document for free, without any additional steps like sign-ups.
Did you know you can easily convert multiple images into PDF files on your Android phone? It’s quick and easy.