Published: September 23, 2026

Silent Hill: Townfall doesn’t waste much time throwing puzzles at you. Part 1 - Arrival drops you in the foggy town with no guidance, forcing you to explore, follow strange clues, and figure out what to do next on your own. If you’re stuck at any puzzle, this guide covers all the Silent Hill Townfall Part 1 puzzle answers, including clues, item locations, codes, and steps to clear Arrival.
Part 1 – Arrival
Before we jump in, a quick note on how Silent Hill: Townfall names its sections. “Part 1 – Arrival” is the part name shown when Simon wakes up near the shore at the beginning of the game. The “Cold Open” chapter name appears later on the loading screen after you call 100 at the phone booth. It’s a little confusing since the game doesn’t exactly go out of its way to explain this naming system, so I’ll use the Part and Chapter names shown in-game throughout this guide to make everything easier to follow.
Chapter 1: Cold Open
Location: Shorefront District – South
After passing the St. Amelia board, you'll see the red mist appear ahead of you. Walk toward it and pass through the mist to reach the next area.
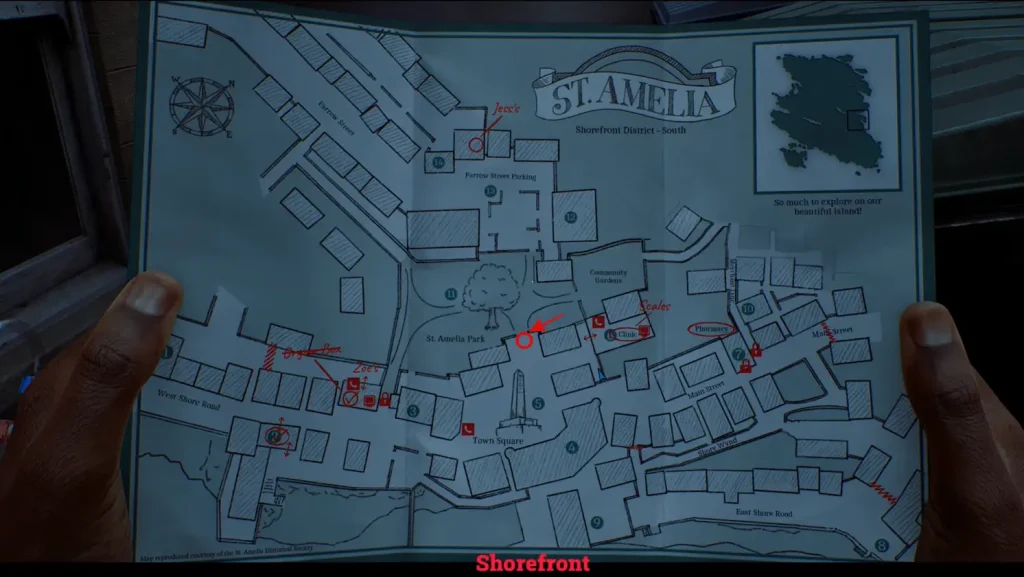
Key Item: Shorefront Map
Once you pass through the red mist, continue forward and you'll find the Shorefront Map. Simon will automatically pick it up to reveal the layout of the town.
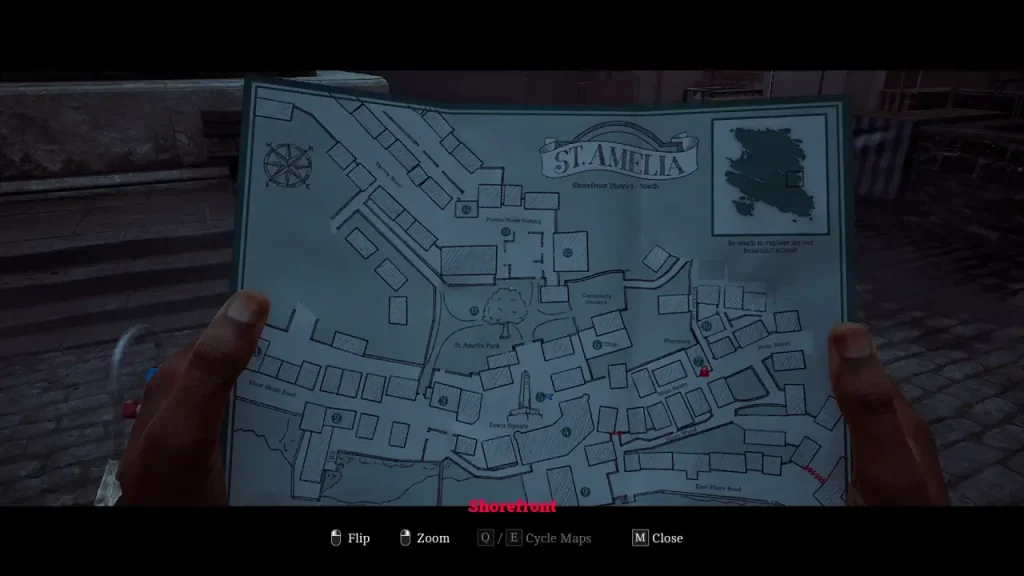
Puzzle: Phone Booth Puzzle
After getting the map, continue past the Town Square monument until you find a phone booth. Enter the booth and inspect the Your Local Services flyer beside the phone.
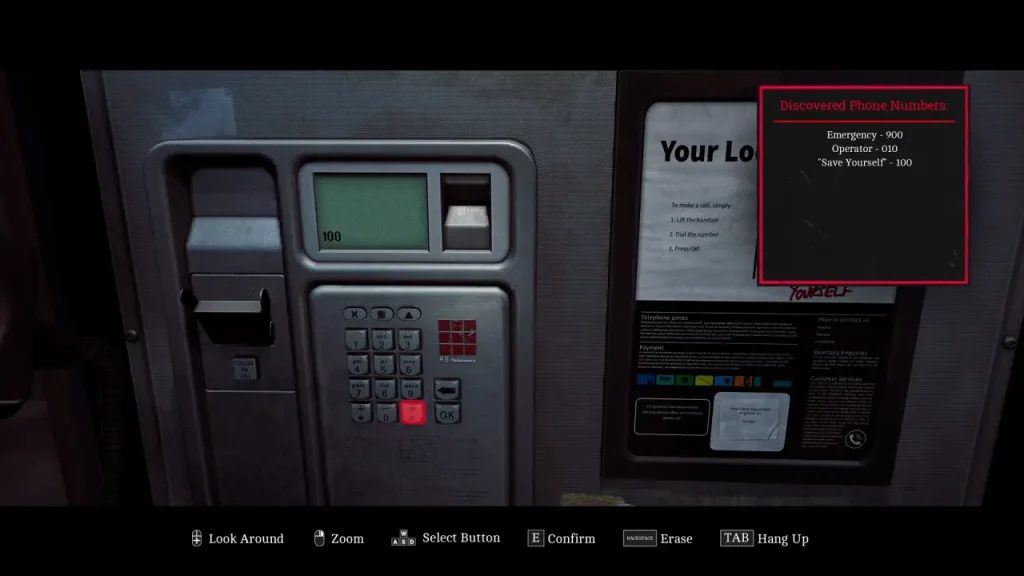
The flyer lists three numbers:
| Number | Service |
|---|---|
| 900 | Emergency Services |
| 010 | Operator |
| 100 | Save Yourself |
Solution: Call 100.
You can call all three Phone numbers, but 100 is the number that triggers the next cutscene and progresses the story.
Next Step: After the cutscene, simply follow the path through the town. There are no complicated puzzles during this section, leading into the next part of the game.
Chapter 2: Escape
After the phone booth cutscene, you’ll wake up in a dark room with a locked door. Unlock it and head through the creepy hallways and grimy ducts until you reach Room 204.
Inside, you’ll find the CRTV, which is easily one of the most important tools in Silent Hill: Townfall. You’ll be using it to uncover clues and solve several puzzles throughout the game.
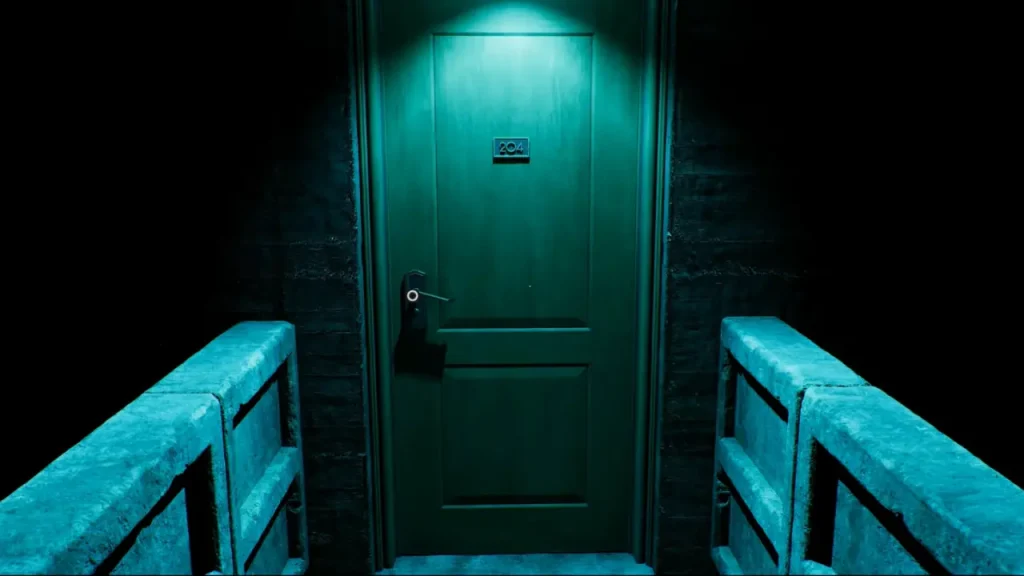
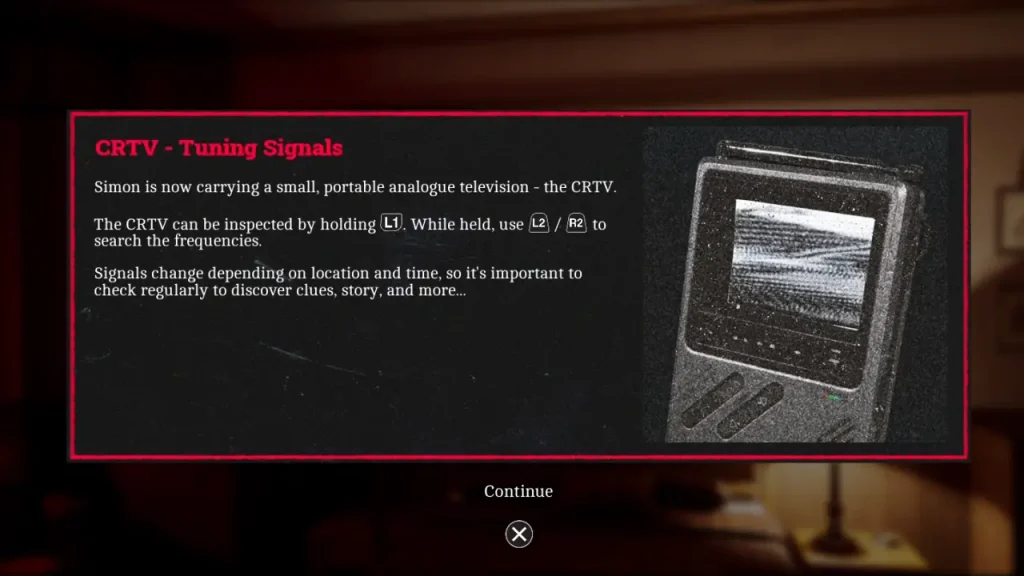
Puzzle: Room 204 Door
There’s a door beside the bed with a rotating three-part lock. It asks for a date, month, and year.
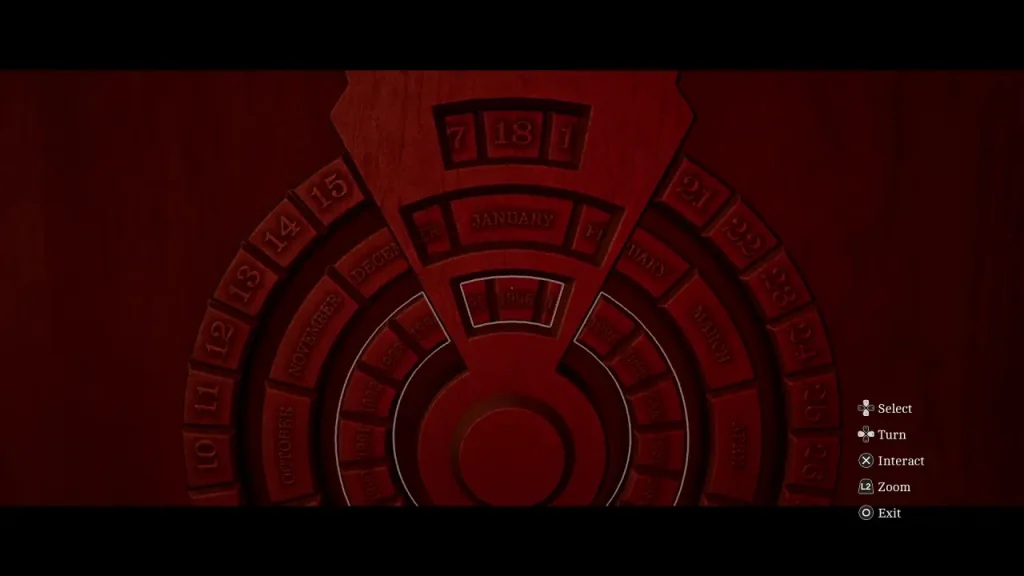
Solution:
| Wheel | Answer |
|---|---|
| Date | 18 |
| Month | January |
| Year | 1996 |
The clues for the date are found on the CRTV and the Room Service Card sitting on the table in the room.
Enter 18 / January / 1996 to unlock the door.
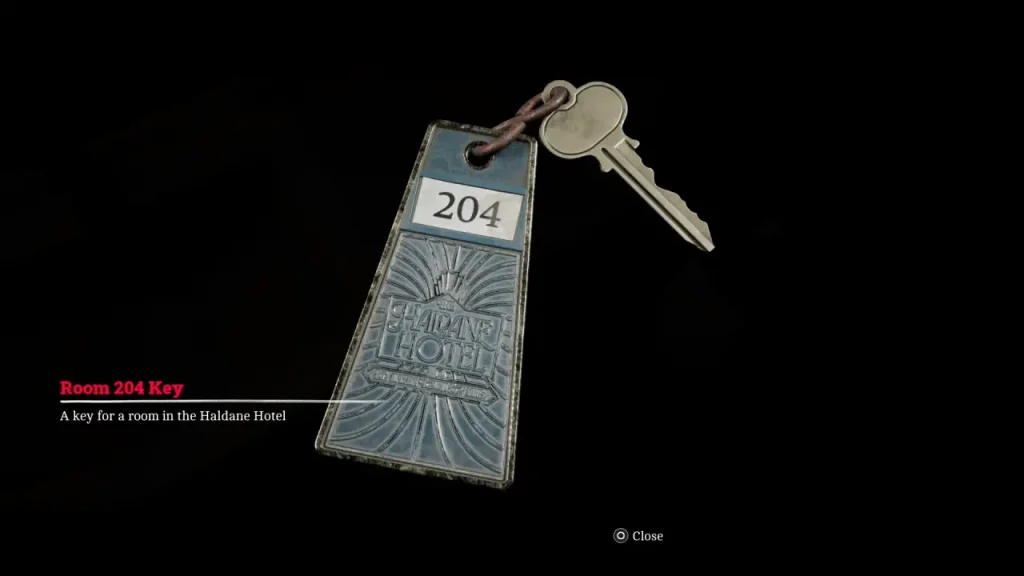
Once inside, head to the bathroom. You’ll find the Room 204 Key beside the sink. Pick it up to progress to the next section.
Chapter 3: A Connection
Shorefront District – South > Zoe’s House
After completing the Room 204 puzzle, you’ll need to make your way to Zoe’s House. To find it, pull out your CRTV and look for the locked signal showing a video of Zoe and her home. You can follow the route shown in the video, or use our map below to find the house more easily.
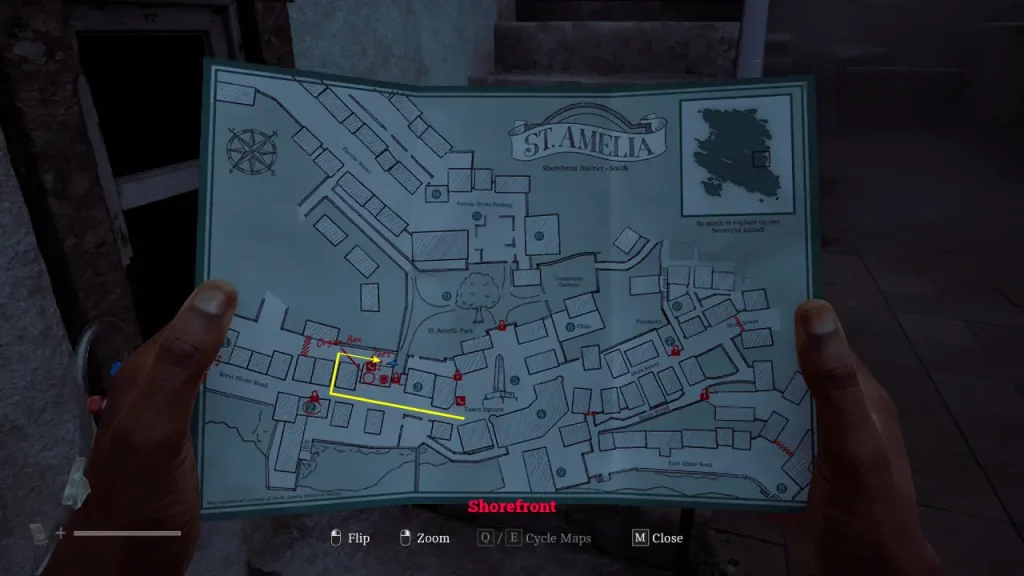
Once you reach Zoe’s house, there are a few things you’ll need to collect before you can get the power back on.
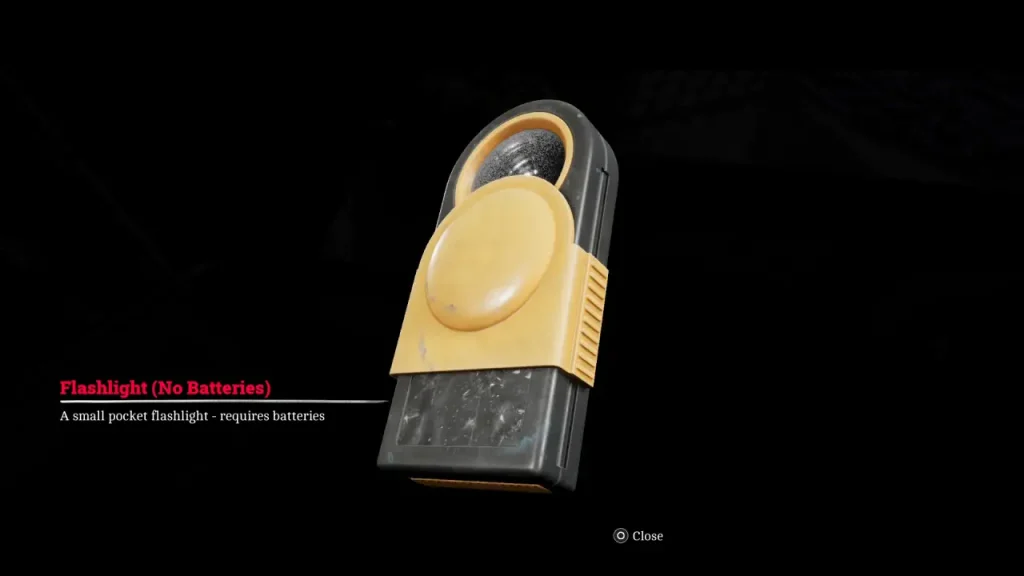
Key Item: Flashlight (No Batteries)
Area: Zoe’s House
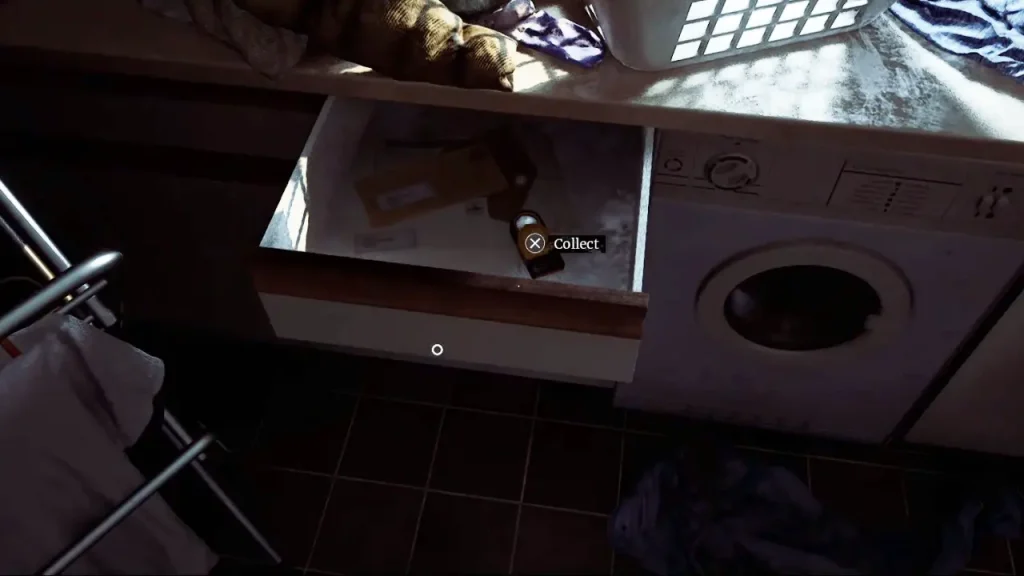
Inside Zoe’s house, check the drawer to the left of the organ box to find the flashlight. As the name suggests, it doesn’t have any batteries yet.
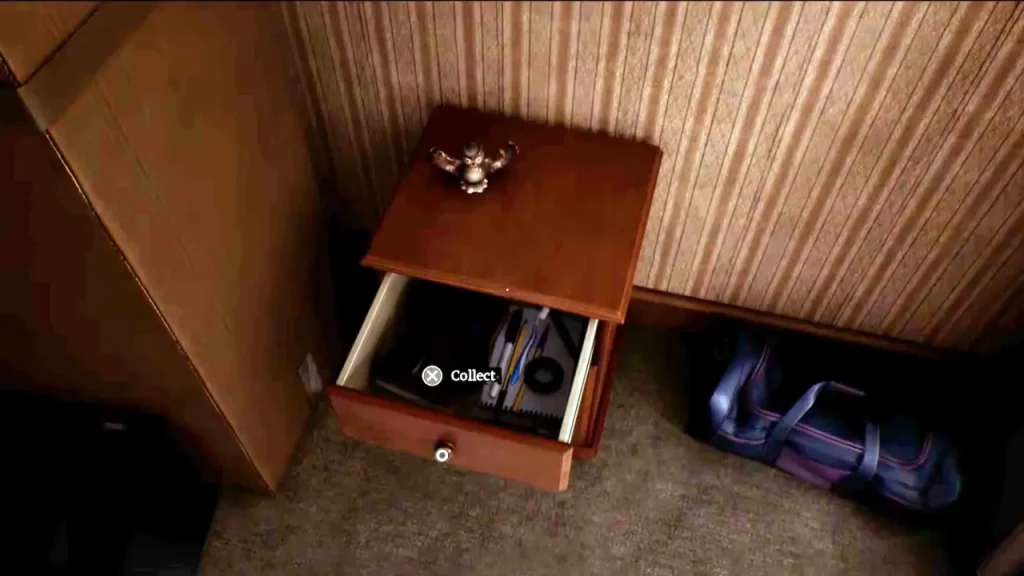
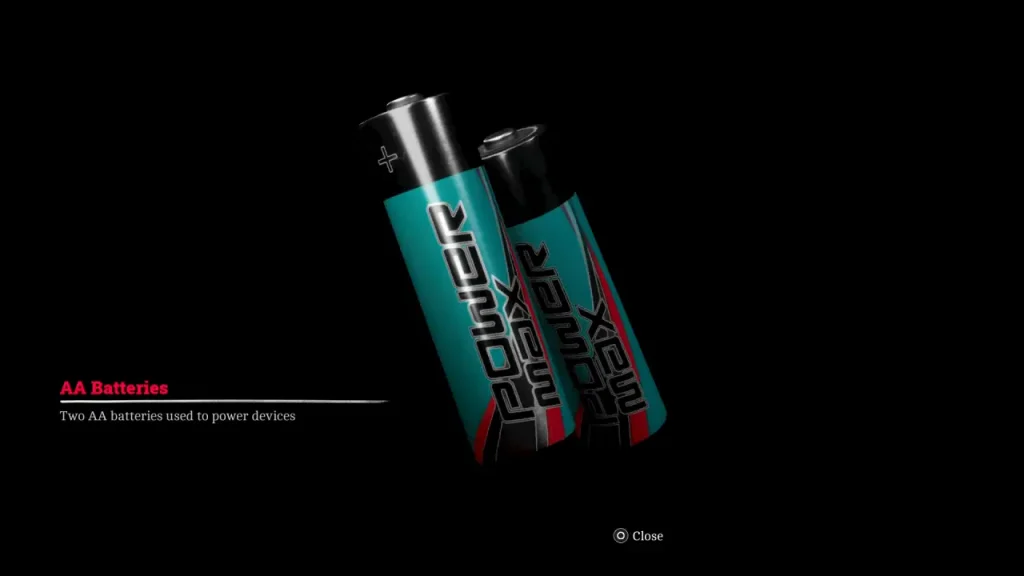
Key Item: AA Batteries
Head upstairs and enter the room on the left. Check the drawer of the small cabinet to find the AA batteries.
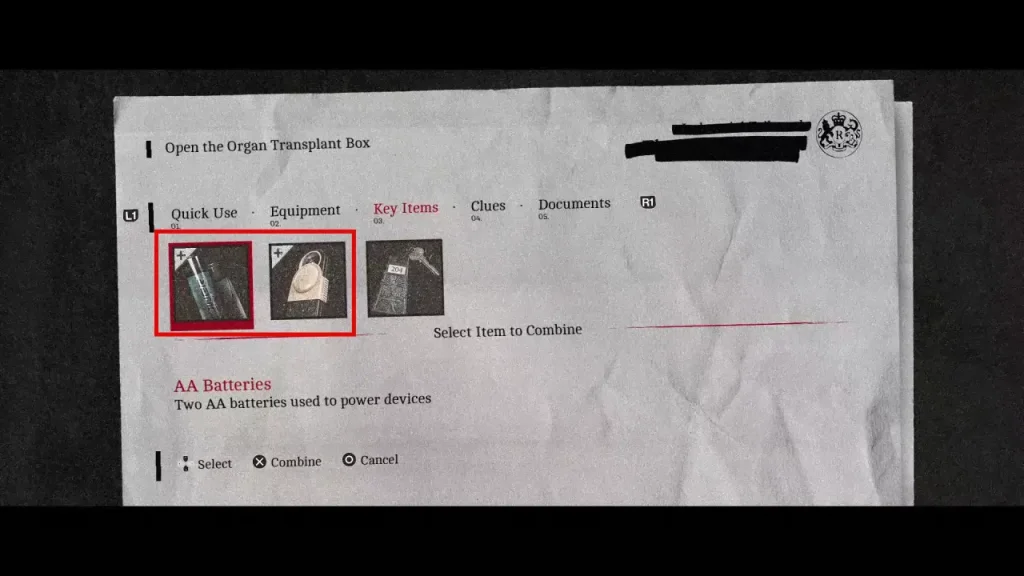
Combine the AA Batteries with the Flashlight (No Batteries) in your inventory to get a working flashlight.
Finding the Organ Transplant Clue
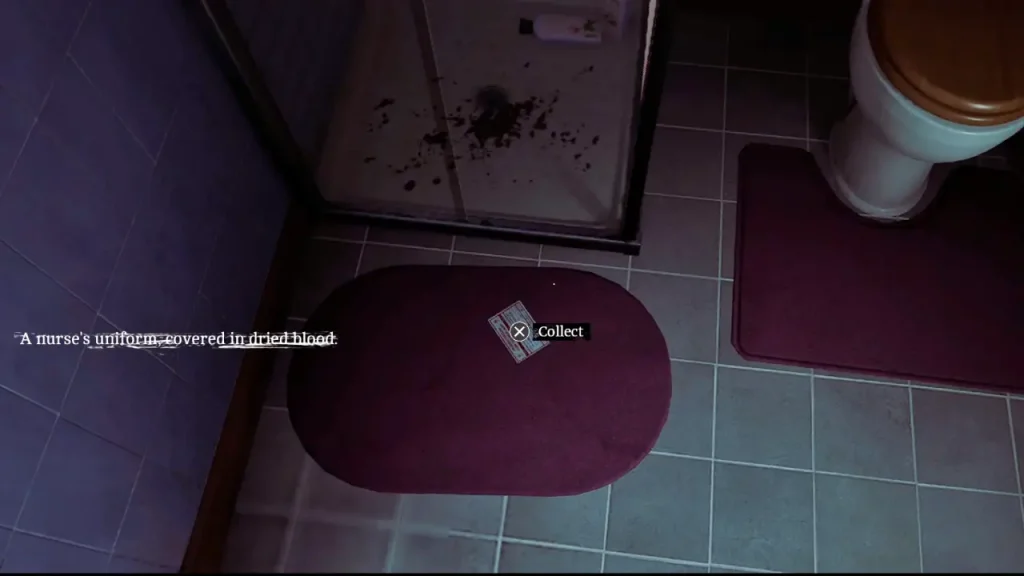
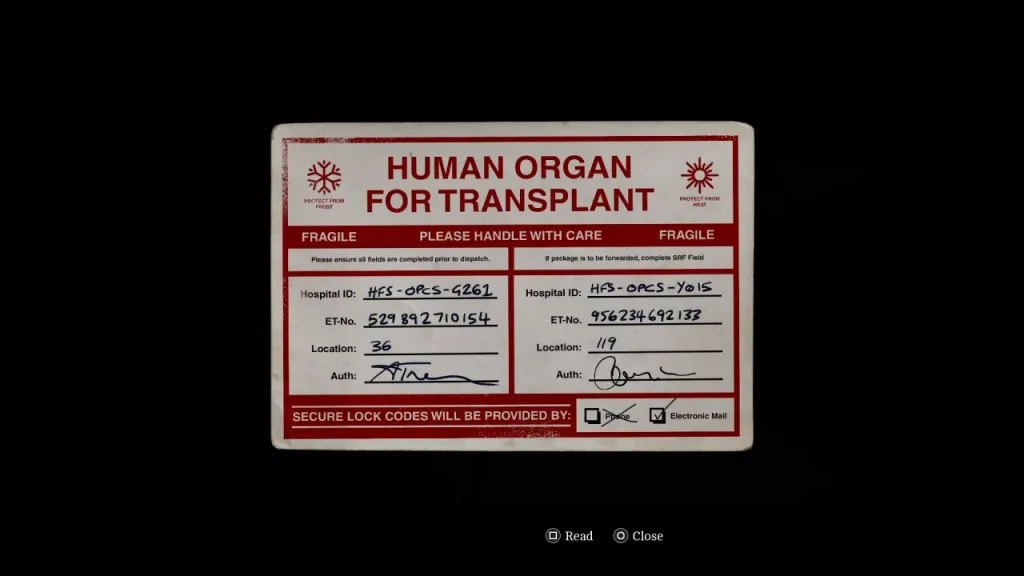
Head upstairs again and enter the room on the right. On the bathroom floor, you’ll find an Organ Transplant Card.
Clue: Organ Transplant Card
The card mentions that the code for the organ transplant box will be sent through electronic mail. You’ll need to keep this clue in mind for later.
There’s a computer in the opposite room, but there’s no power in the house, so you can’t use it yet.
Restoring Power to Zoe’s House
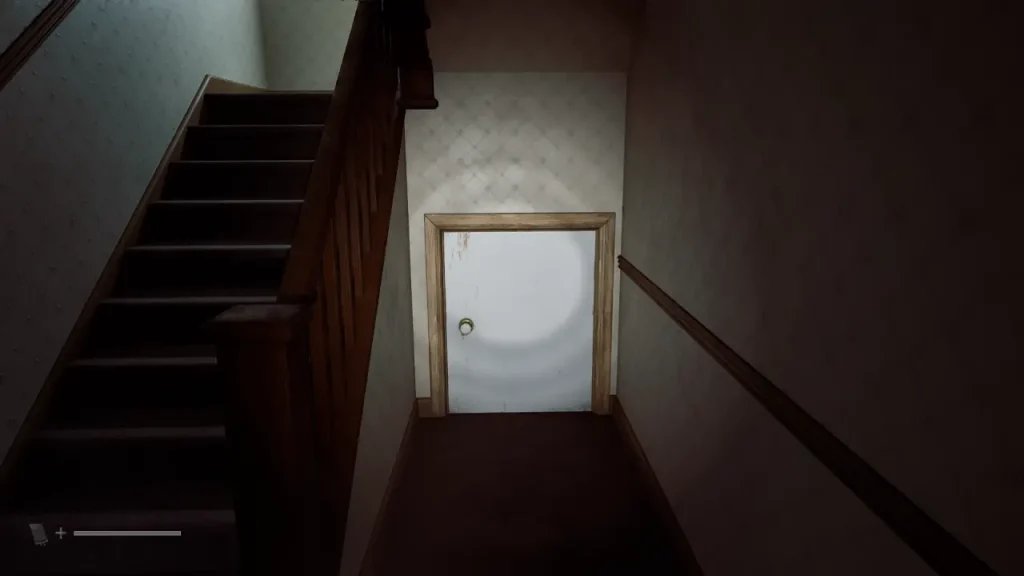
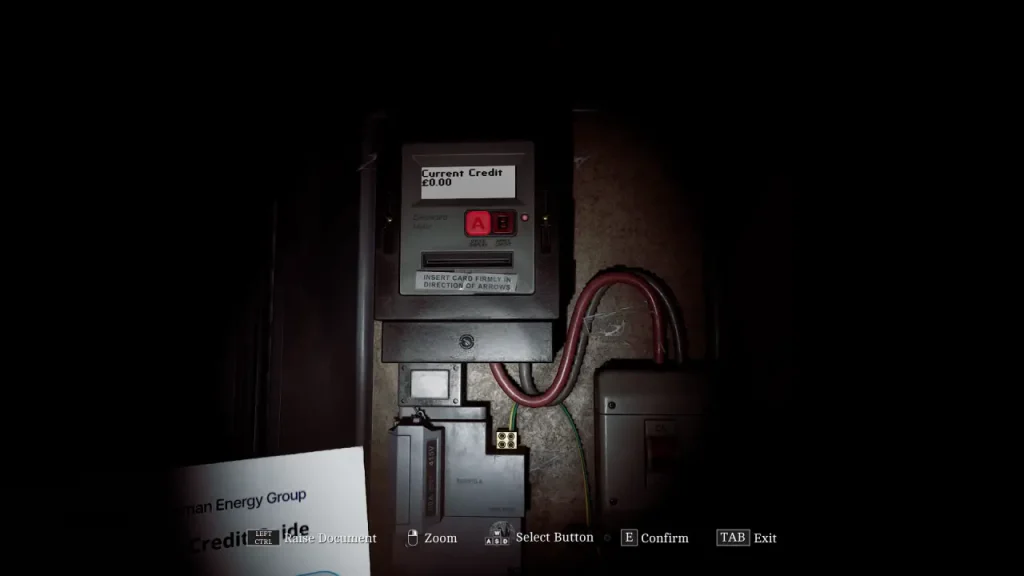
To figure out what’s wrong with the power, head downstairs and enter the basement. Look for the small square opening beside the stairs and crouch to enter the crawlspace. Use your flashlight to find the electricity meter.
The meter needs a recharge card to get it running. Luckily, there’s a paper on the floor nearby explaining how to recharge it.
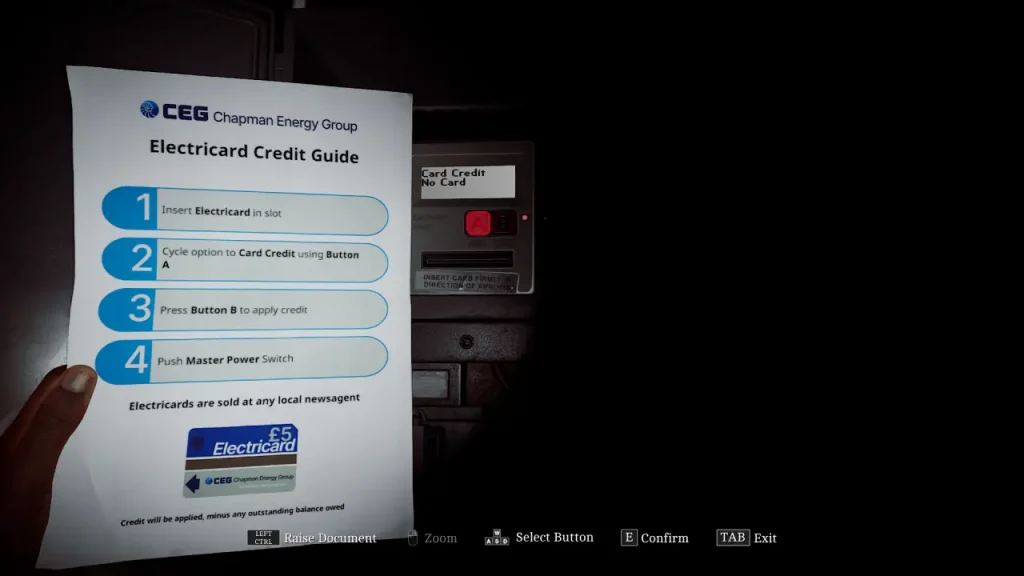
Clue: Power Card Credit Guide
Area: Zoe’s House
The guide tells you that you need to get the recharge card from Peters Newsagent. That gives you your next objective: find Peters Newsagent and get the card needed to restore power to Zoe’s house.
Getting the Prepaid Power Card
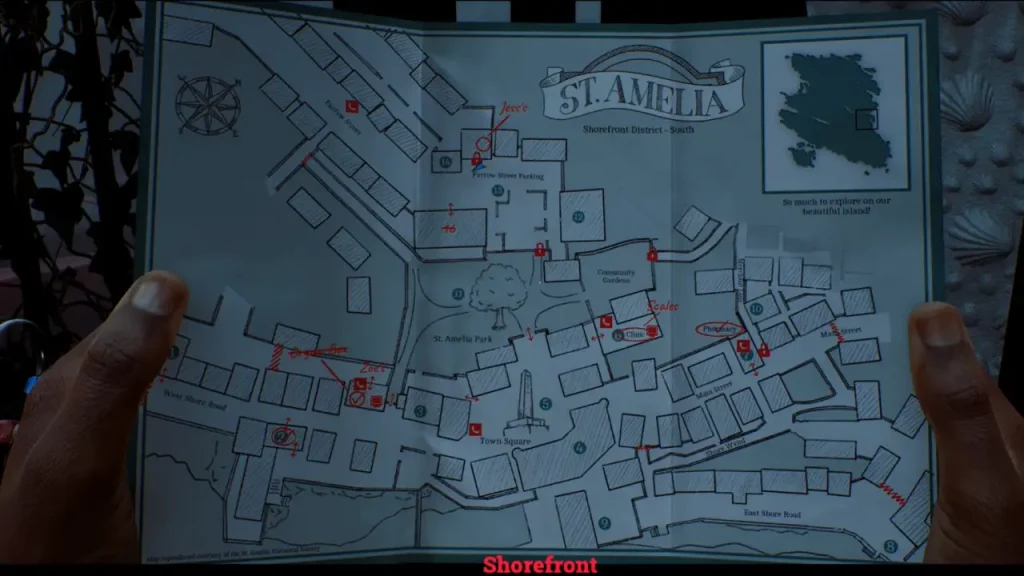
To restore power at Zoe’s house, you’ll first need to find the Prepaid Power Card. Open your map and look for Peters Newsagent, marked as 2.
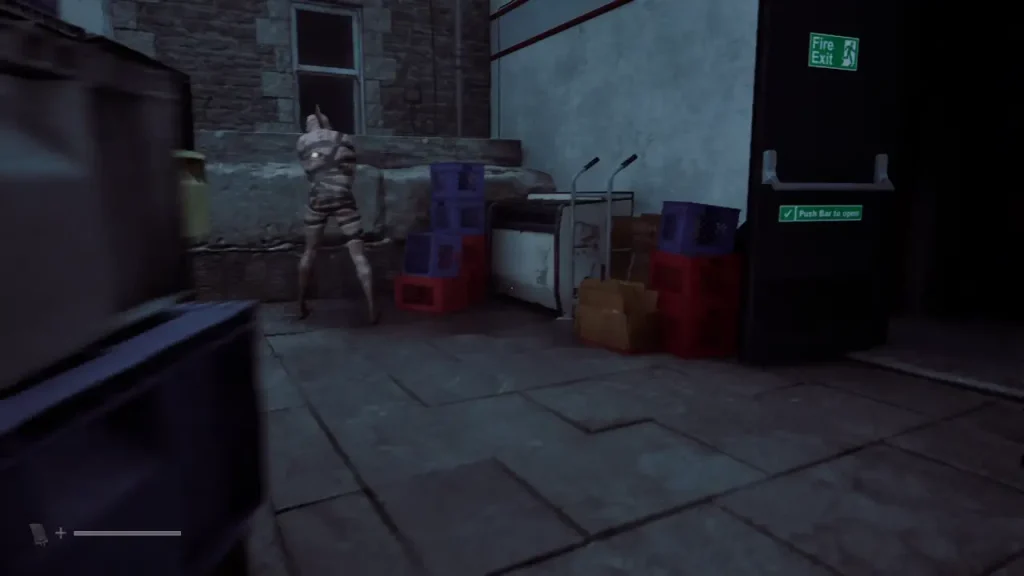
The front door is locked, so head around to the back entrance. There’s a Tentacle Creature patrolling the area, and since you don’t have any weapons yet, your best option is to sneak past it and enter through the back door.
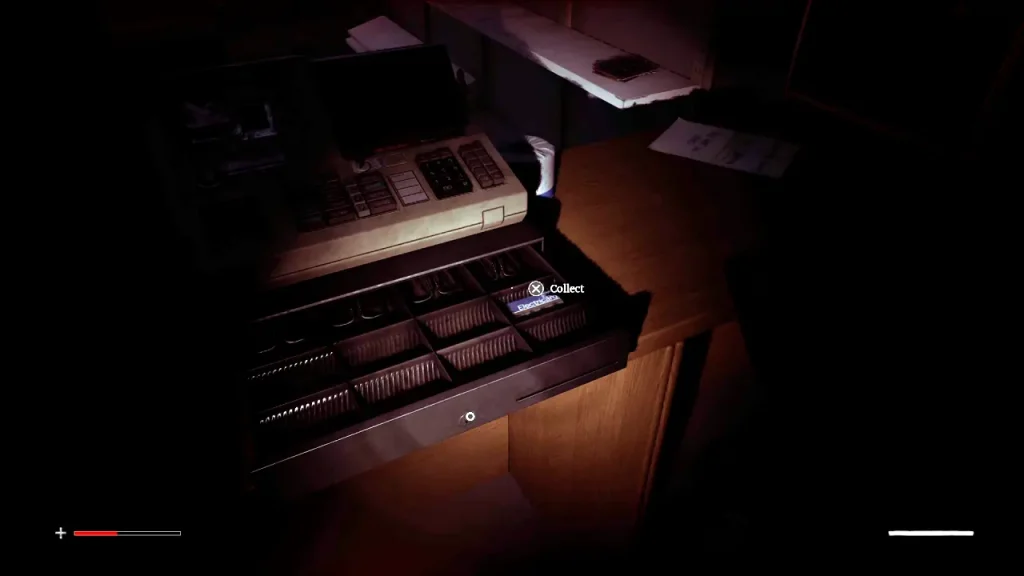
Inside Peters Newsagent, check the drawer to find the Prepaid Power Card.
Puzzle: Restoring Power
Take the card back to Zoe’s house and return to the electricity meter in the basement.
Follow these steps:
- Insert the Prepaid Power Card into the slot at the bottom of the display.
- Press Button A until the screen shows “Card Credit.”
- Press Button B.
- Press the Main Switch at the bottom right.
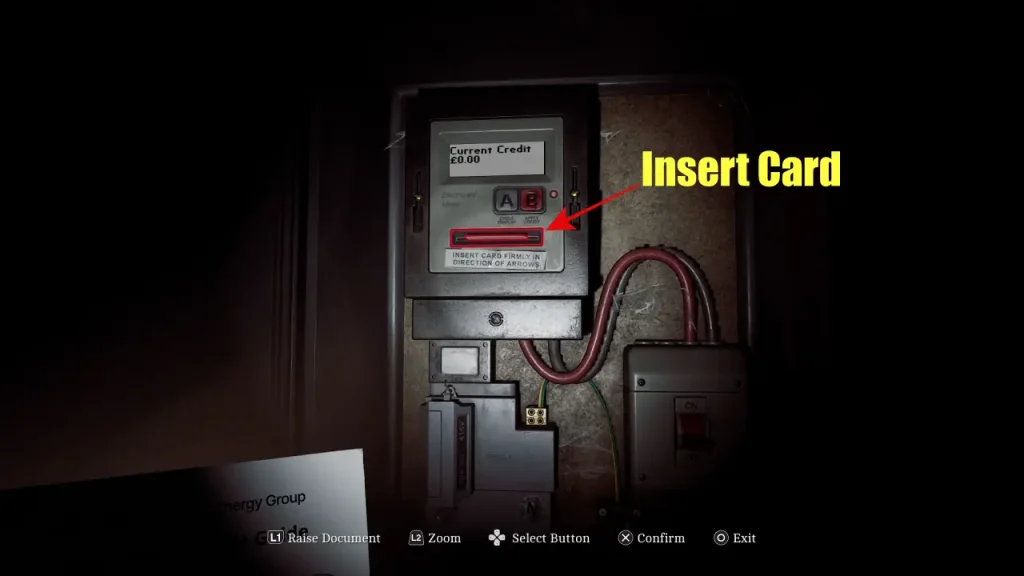
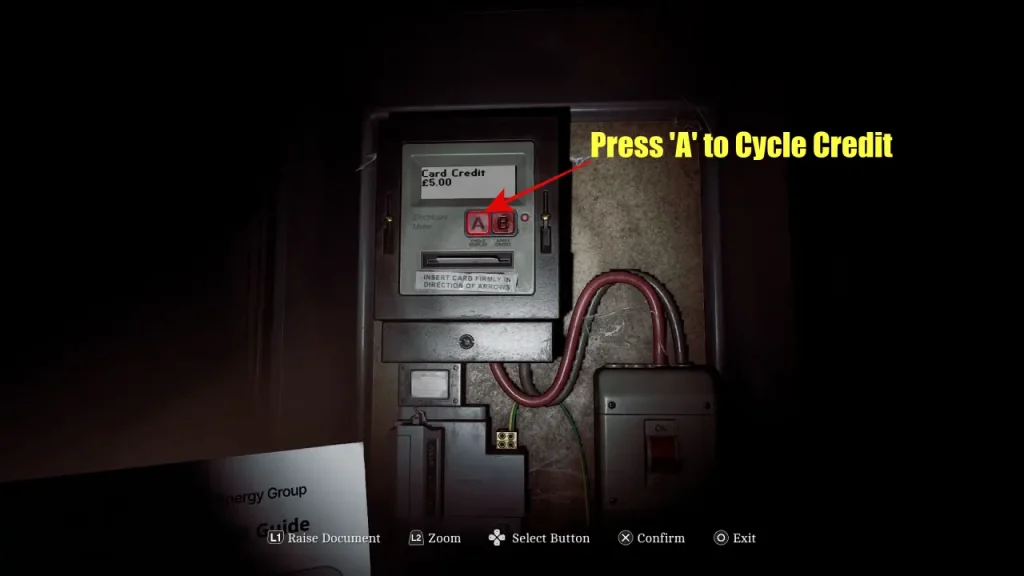
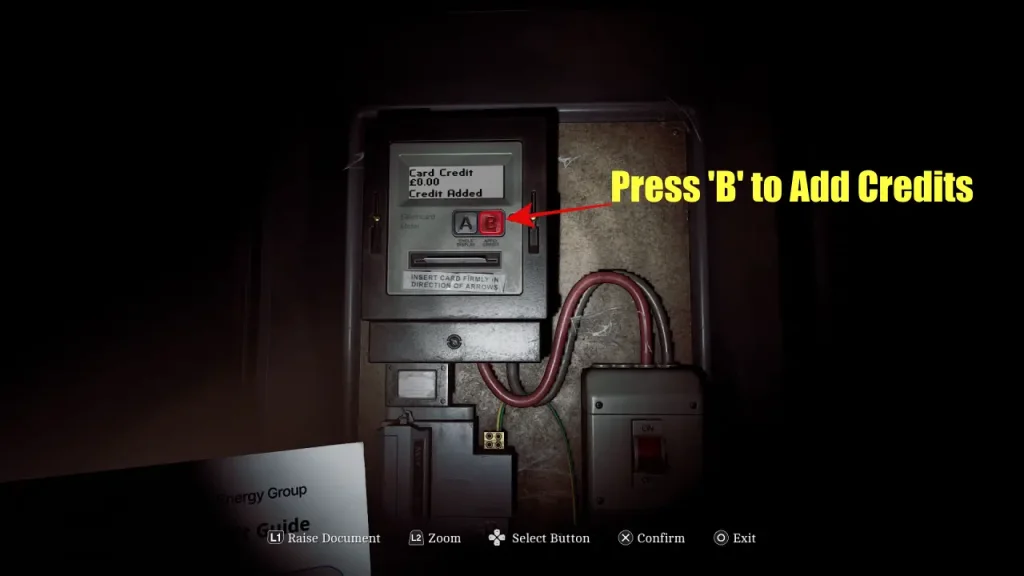
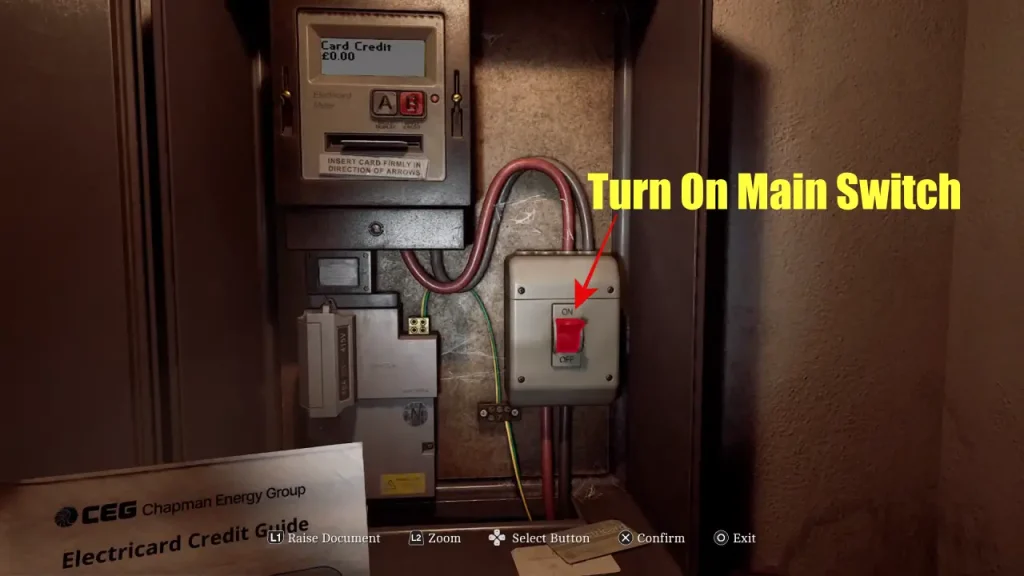
The power will now be restored to Zoe’s house.
Checking Zoe’s Email
With the electricity back on, head to the computer on the ground floor in the room on the left.
Refresh the inbox and open the middle email. The email contains the clue you need to open the organ transport box.
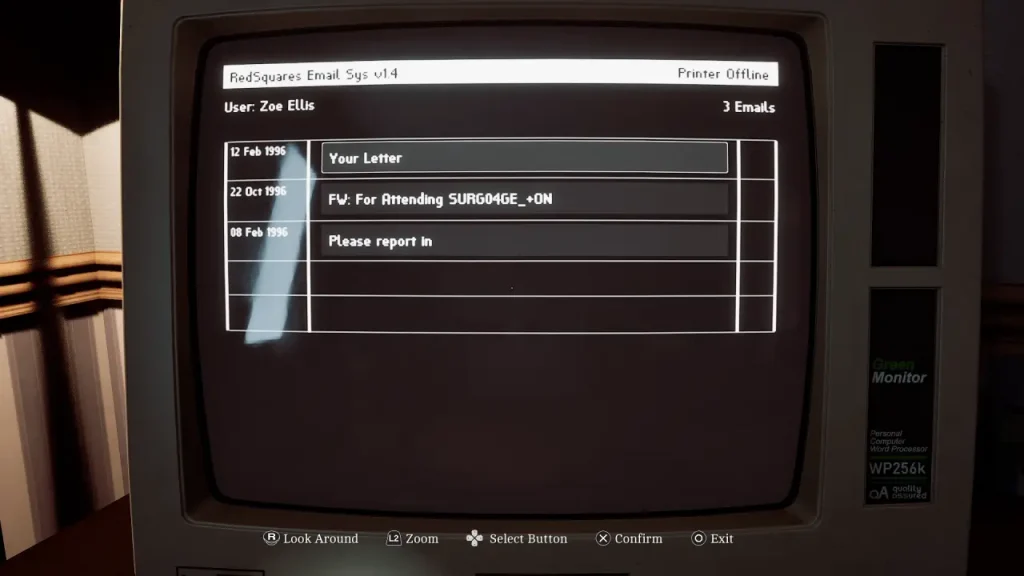
Clue: Zoe’s Email – “For Attending…”
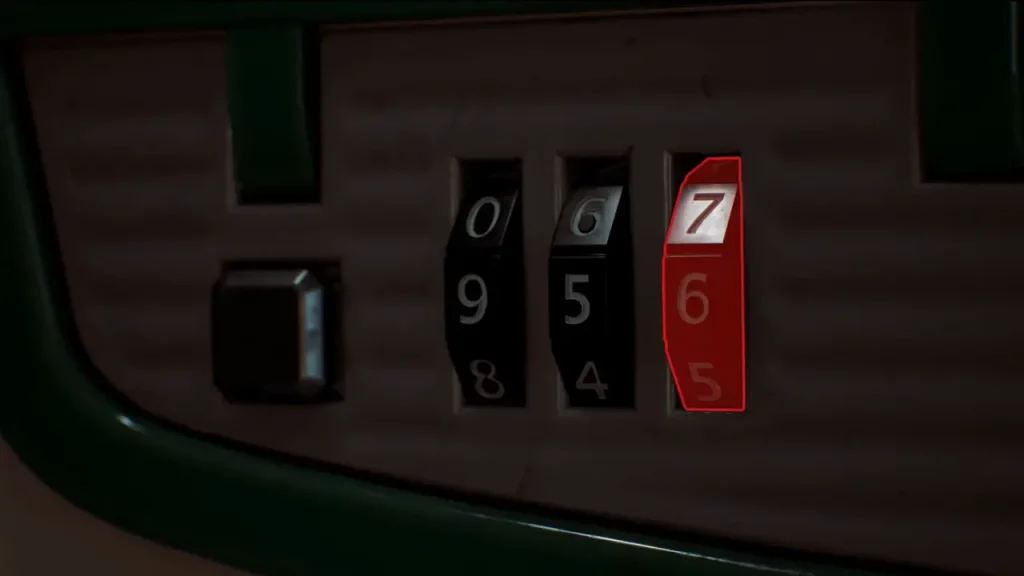
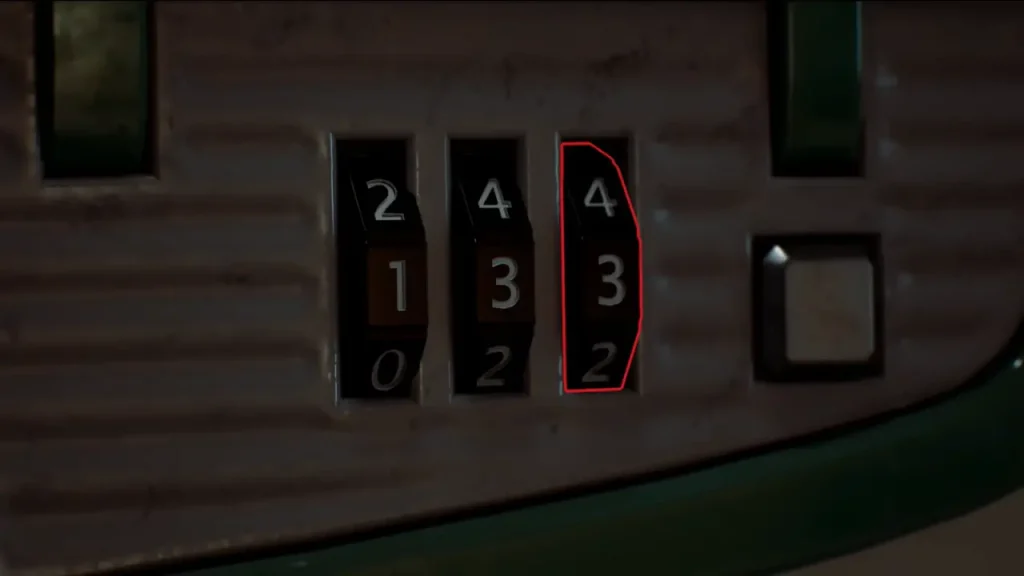
Puzzle: Organ Transport Box
Head to the kitchen and interact with the organ transport box.
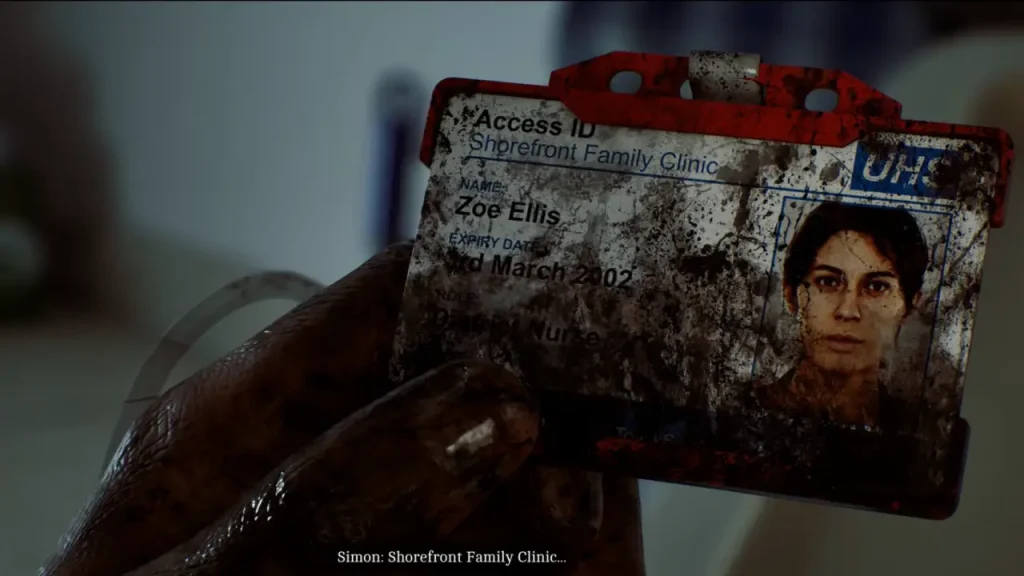
The email tells you to use the first three and last three digits of the ET number shown on the Organ Transplant Card.
Solution:
| Left | Right |
|---|---|
| 956 | 133 |
Enter 956 on the left and 133 on the right to open the box.
Key Item: Zoe’s Lanyard
The Zoe’s Lanyard is automatically obtained after opening the organ transport box.
Shorefront Family Clinic
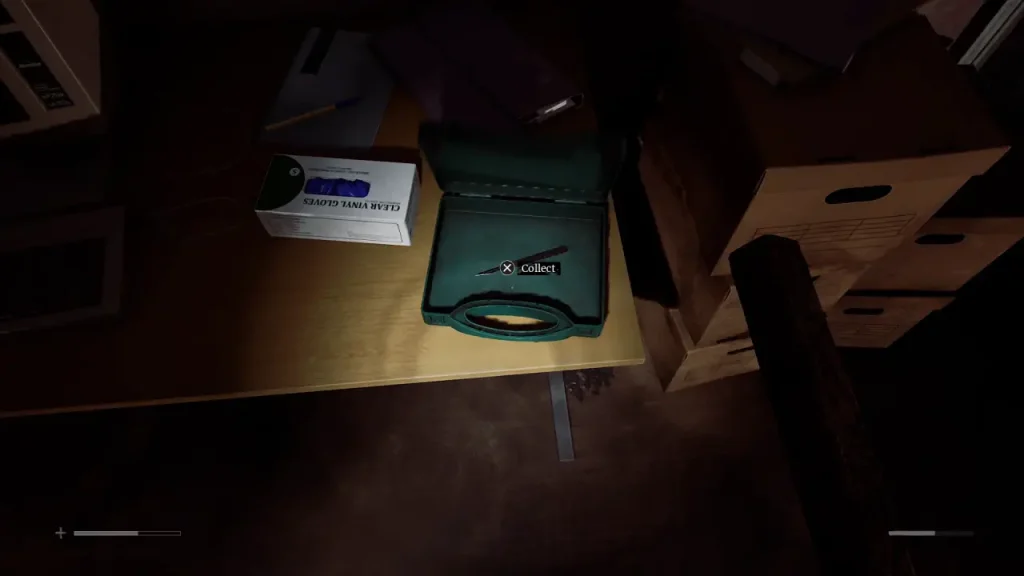
Equipment: Scalpel
After getting Zoe’s Lanyard, head to the Shorefront Family Clinic. Since you now have Zoe’s lanyard, you can get inside without any trouble.
You can explore the clinic’s rooms to find some collectibles, but your main objective is to reach Zoe’s Cabin, where you’ll find a Scalpel that will come in handy later.
Puzzle: Clinic Reception Door
The reception room at the front of the clinic is locked. To open it, you’ll need the code written on a sticky note on Zoe’s Computer.
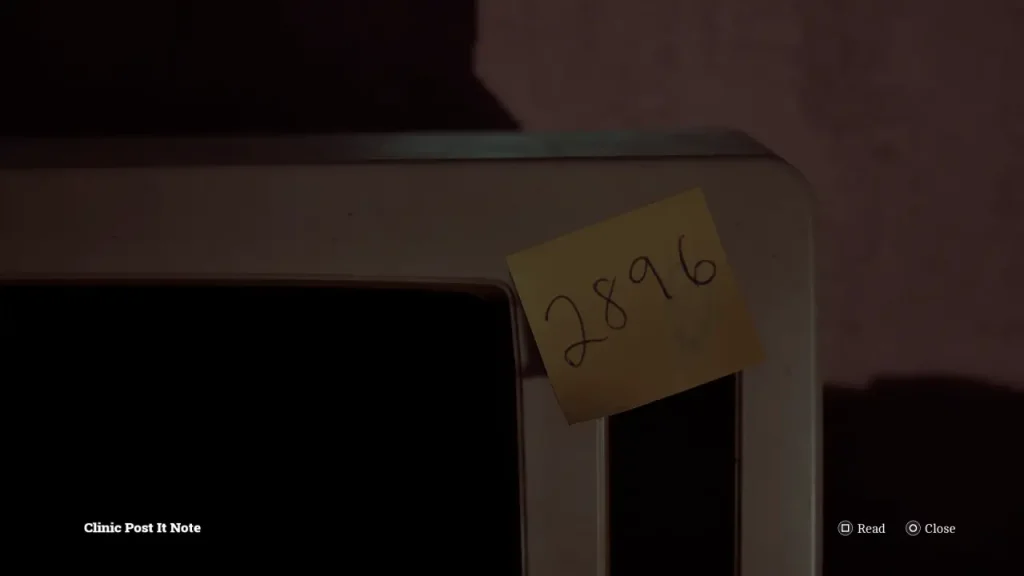
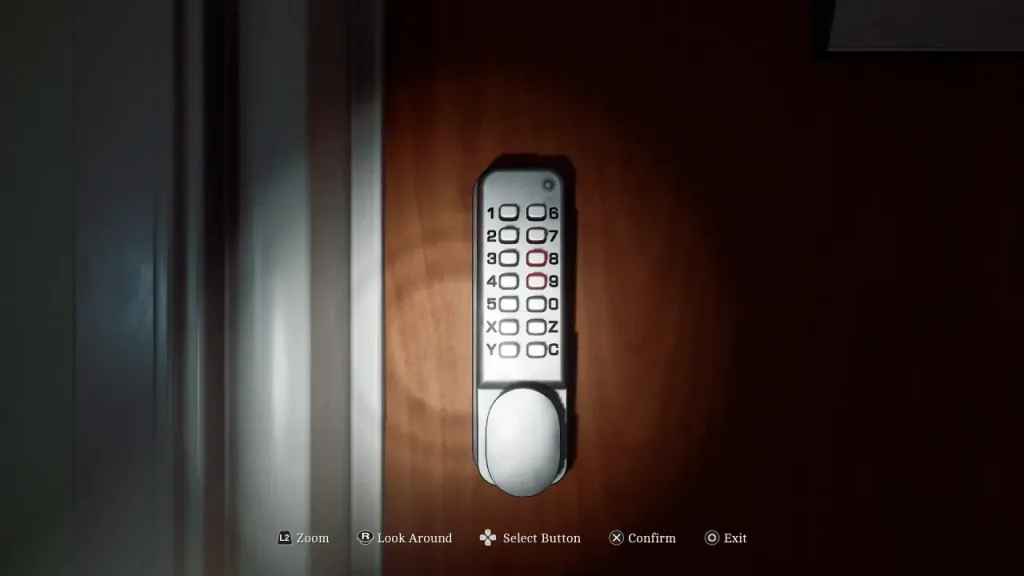
Solution: 2896
Enter 2896 on the keypad to unlock the reception room.
Inside, interact with the telephone and listen to the voice note. It reveals where you need to head next: the Pharmacy.
Locked Door – Pharmacy
Once you reach the Pharmacy, the front door is locked. Interact with it and choose to use the Scalpel to force your way inside.
Puzzle: Rusty Locker
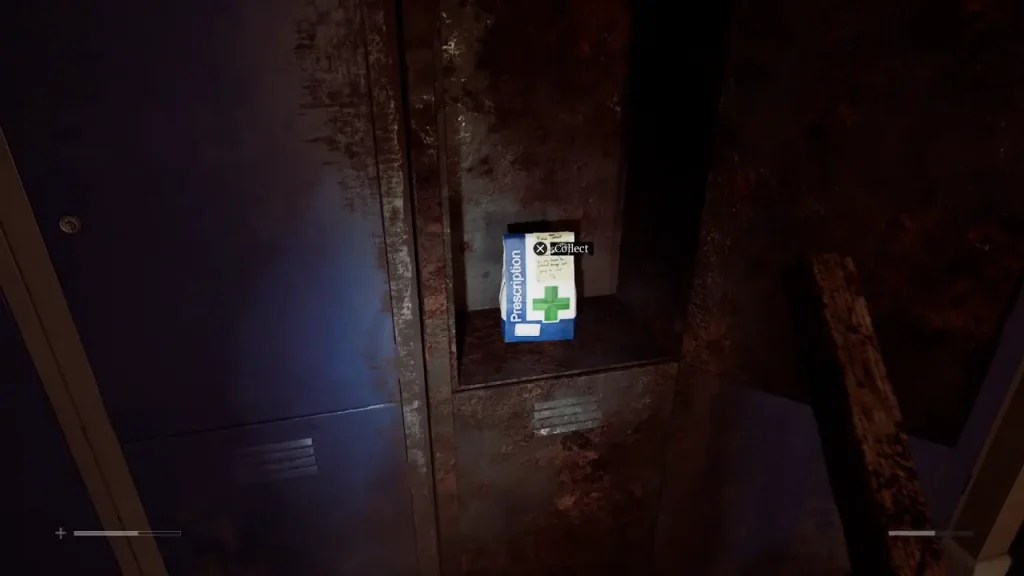
Key Item: Prescription Dosage Error
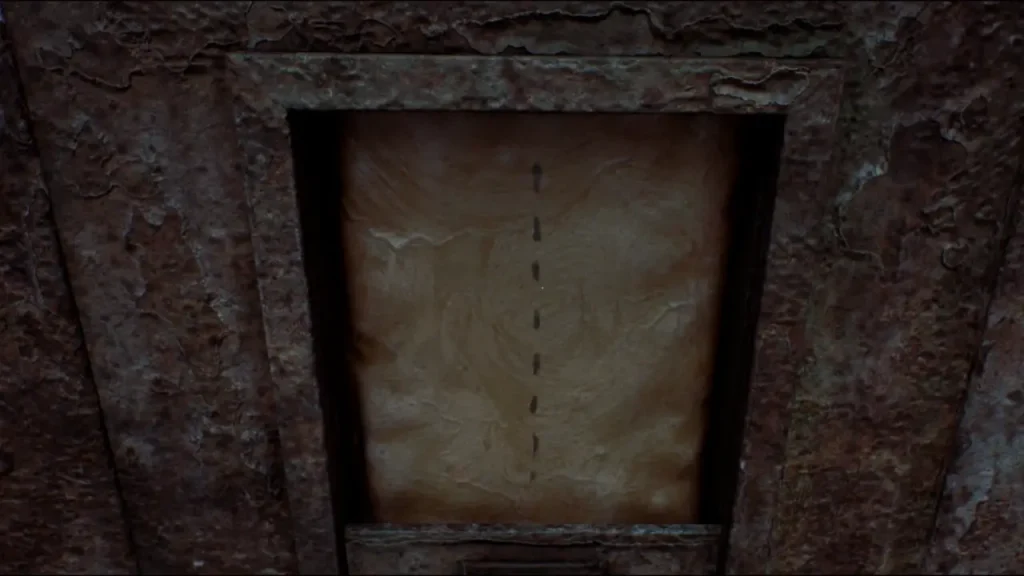
Head to the back room of the Pharmacy and interact with the rusty locker. You’ll need to enter a four-digit code.
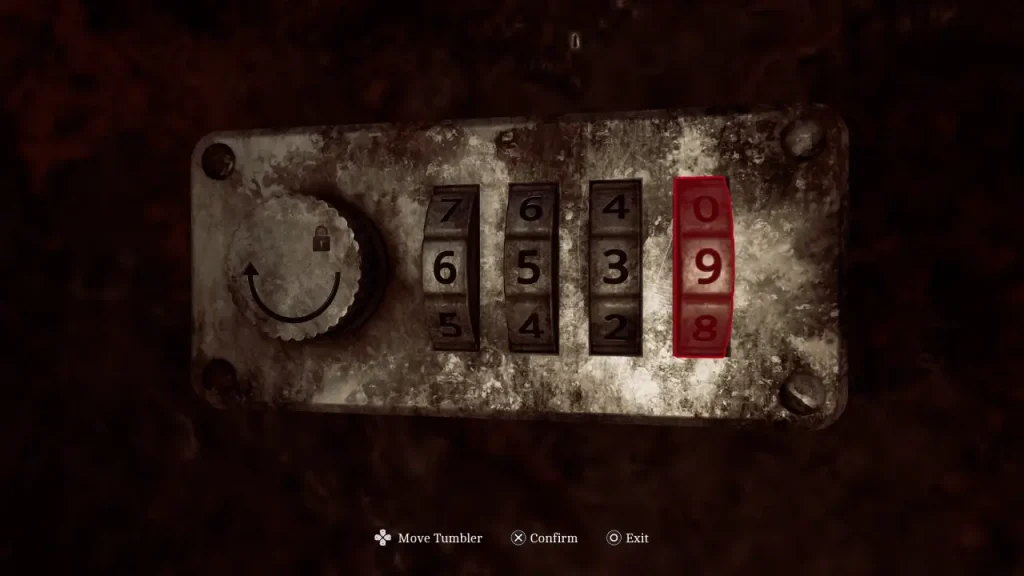
Solution: 6539
The code comes from the numbers shown on the posters around the Pharmacy. Check the CRTV broadcast to see the order in which the numbers should be entered.
Enter 6539 to open the locker and continue your progress.
Locked Door – St. Amelia Park
Head to the south side of St. Amelia Park and interact with the locked door. Choose to use the Scalpel to open it.
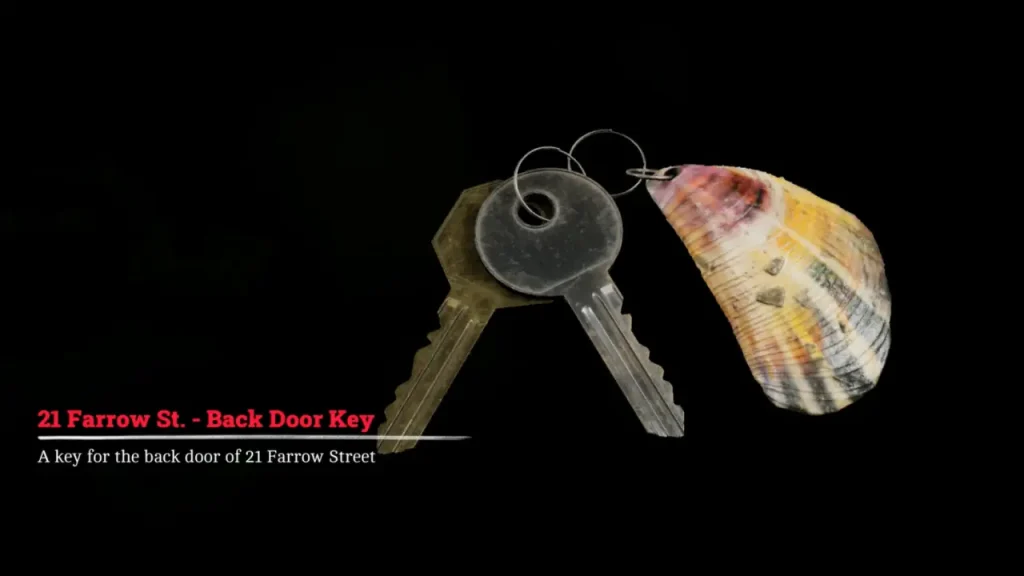
Finding the 21 Farrow St. Back Door Key
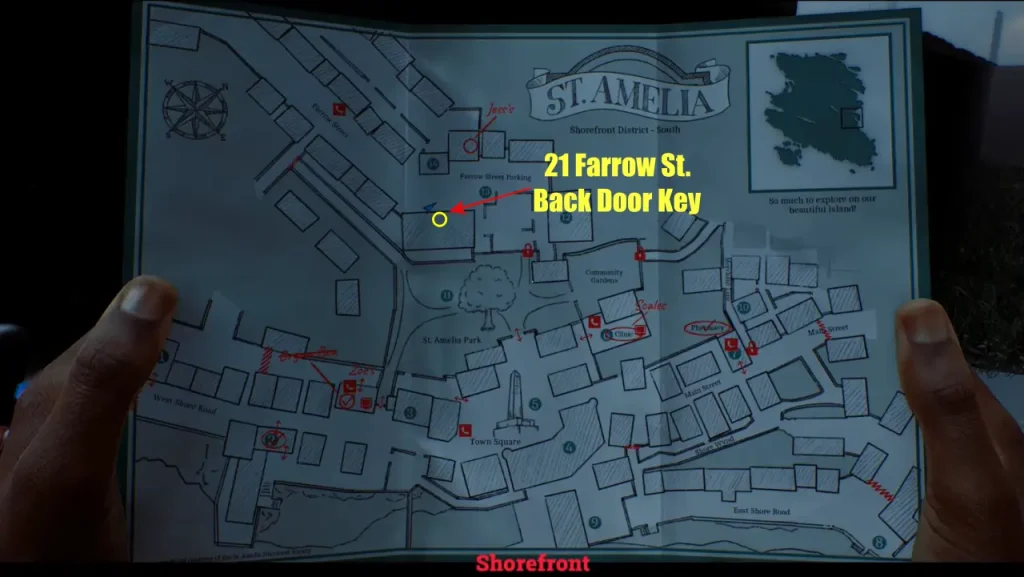
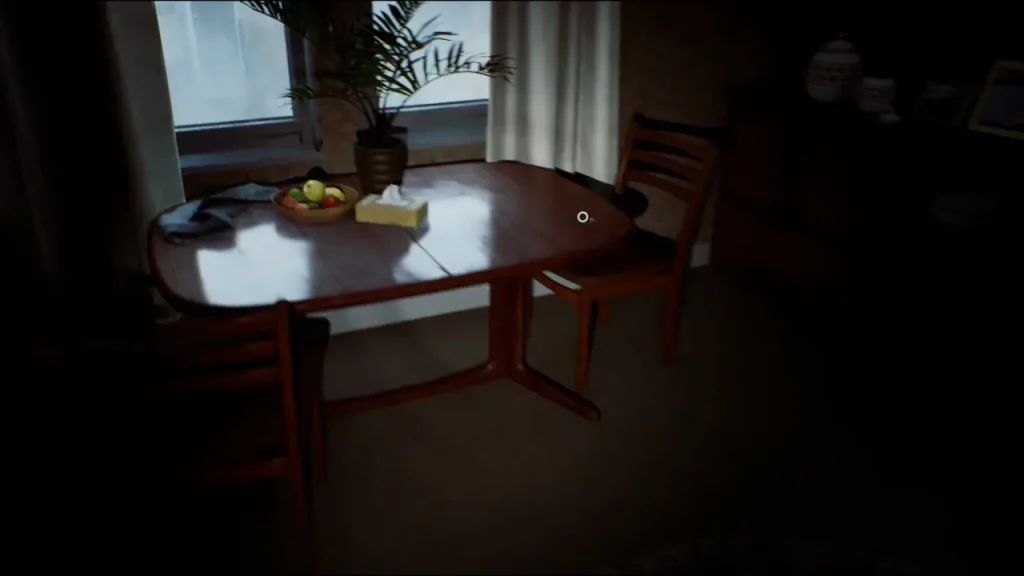
Once inside the area, head to the apartment building opposite of the building marked 14. Go up to the second floor and enter apartment 1/2.
You’ll find the 21 Farrow St. – Back Door Key on the table in the living room.
Locked Door – Jess’s House
Take the 21 Farrow St. – Back Door Key to Jess’s house, located beside building 14.
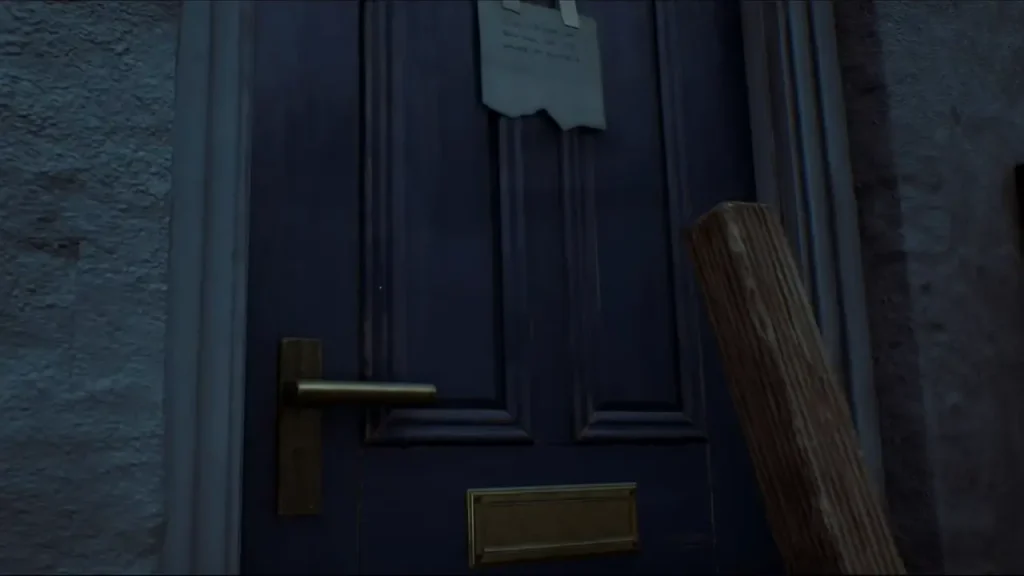
Head around to the back door and use the key to enter the house.
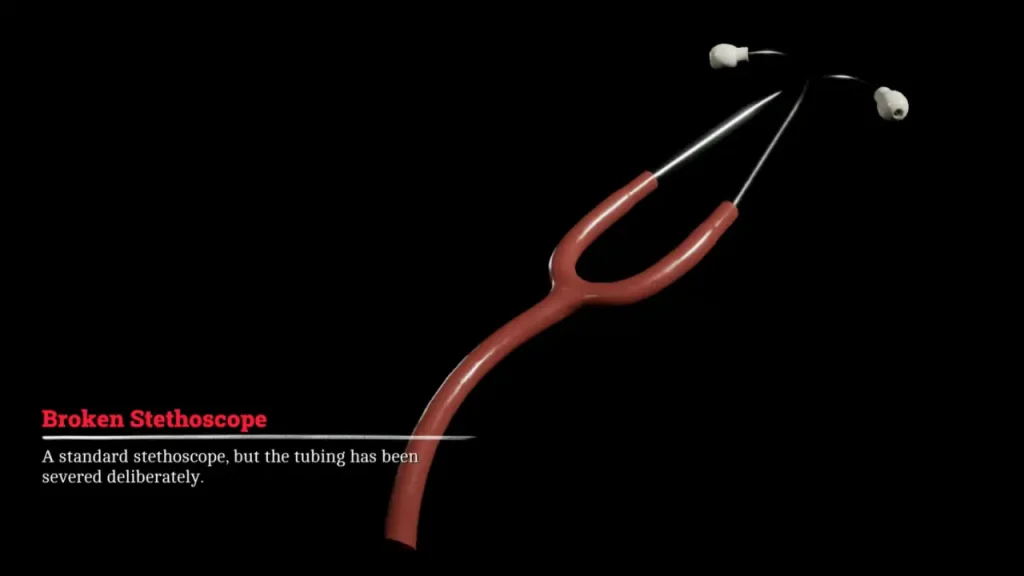
Key Item: Broken Stethoscope
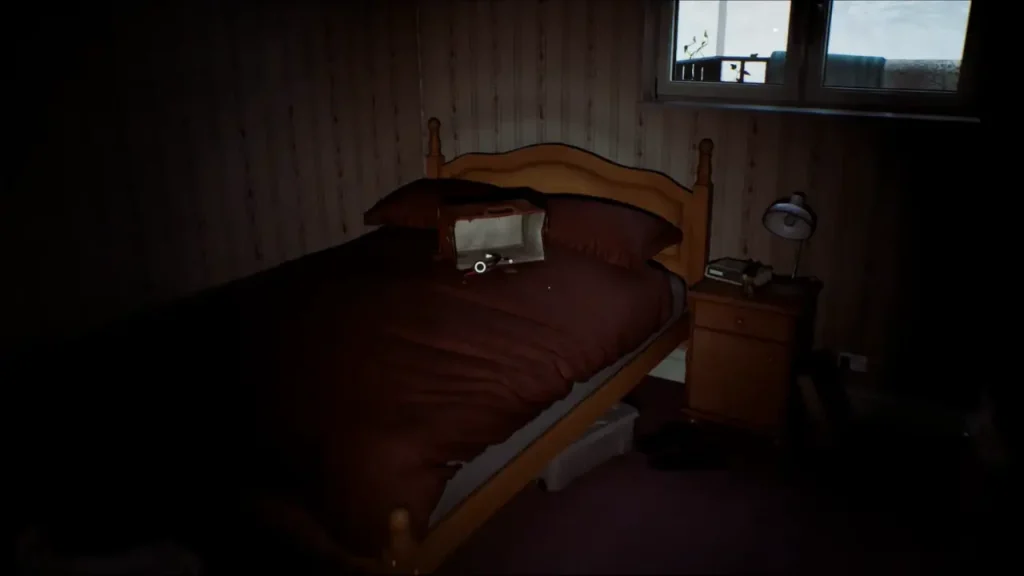
Inside Jess’s house, head to the bedroom. You’ll find the Broken Stethoscope lying on the bed.
Puzzle: Clinic Scales
With the Broken Stethoscope in hand, return to the Shorefront Family Clinic and head to the back room in the hallway marked Z Ellis.
Interact with the scales and place the items in the following positions:
| Position | Item |
|---|---|
| Left | Broken Stethoscope |
| Middle | Prescription Dosage Error Note |
| Right | Zoe’s Lanyard |
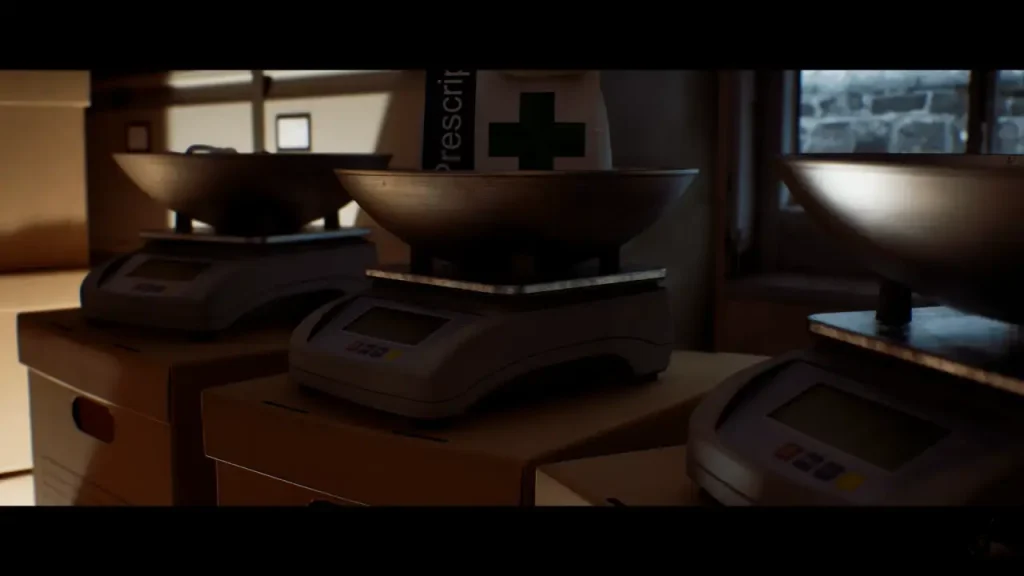
Place all three items correctly to solve the puzzle and continue.
And that wraps up Part 1 – Arrival. From figuring out the phone booth numbers to chasing down clues through Zoe’s house, the Pharmacy, and the Clinic, Townfall wastes no time teaching you that pretty much anything can be a puzzle. If you made it this far without getting completely lost in the fog, congrats - you’re ready for what comes next.