Google Drive’s mobile interface has been updated. Previously, you could only scan and upload documents to Drive, but now the Android version offers more features such as editing and filtering. Additionally, the iOS version now allows you to scan and upload documents as well. However, there are some differences in the user interface of both apps. Let’s take a closer look at the refreshed interface and learn how to scan and add documents to Google Drive after making edits to your preference.
Table of Contents
How to Scan Documents in Google Drive on Android
The Google Drive app already comes pre-installed on your Android phone but you can download it from Play Store.
1. Open the Google Drive app and tap on the Camera icon. Now a camera viewfinder will open to scan the document. Point it toward the document you want to scan.
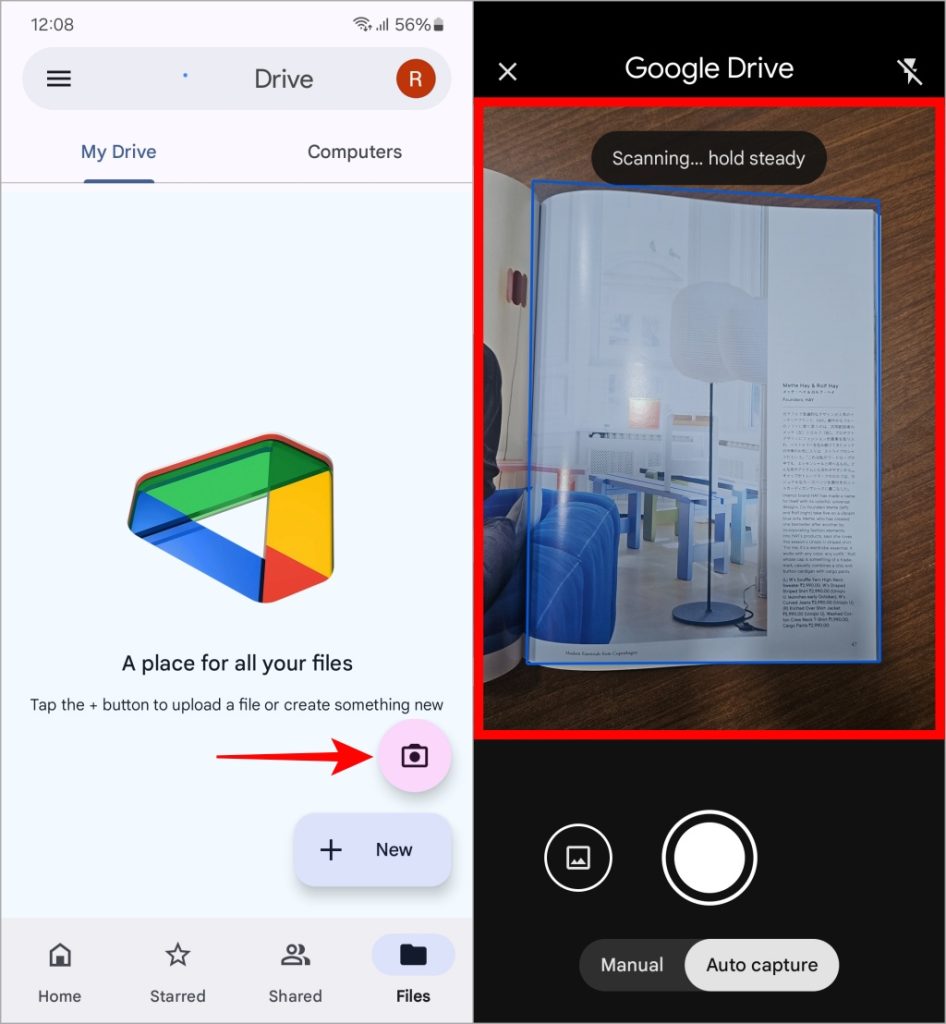
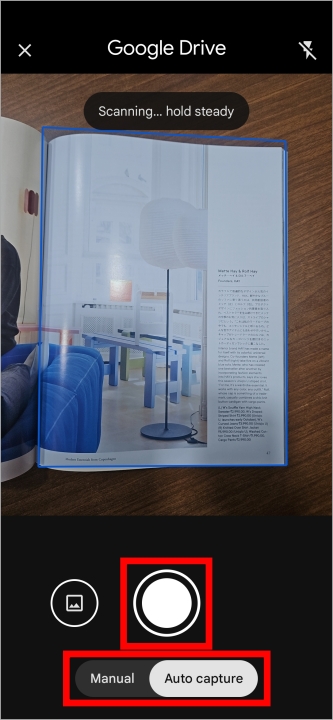
2. Here you can scan the document in the app using two different methods. The first option called Auto capture lets the app automatically scan the document for you. But for that, you have to hold steady for a few seconds. Alternatively, you can use the Manual option to scan the document. In both options, you have a camera shutter button to scan the document.
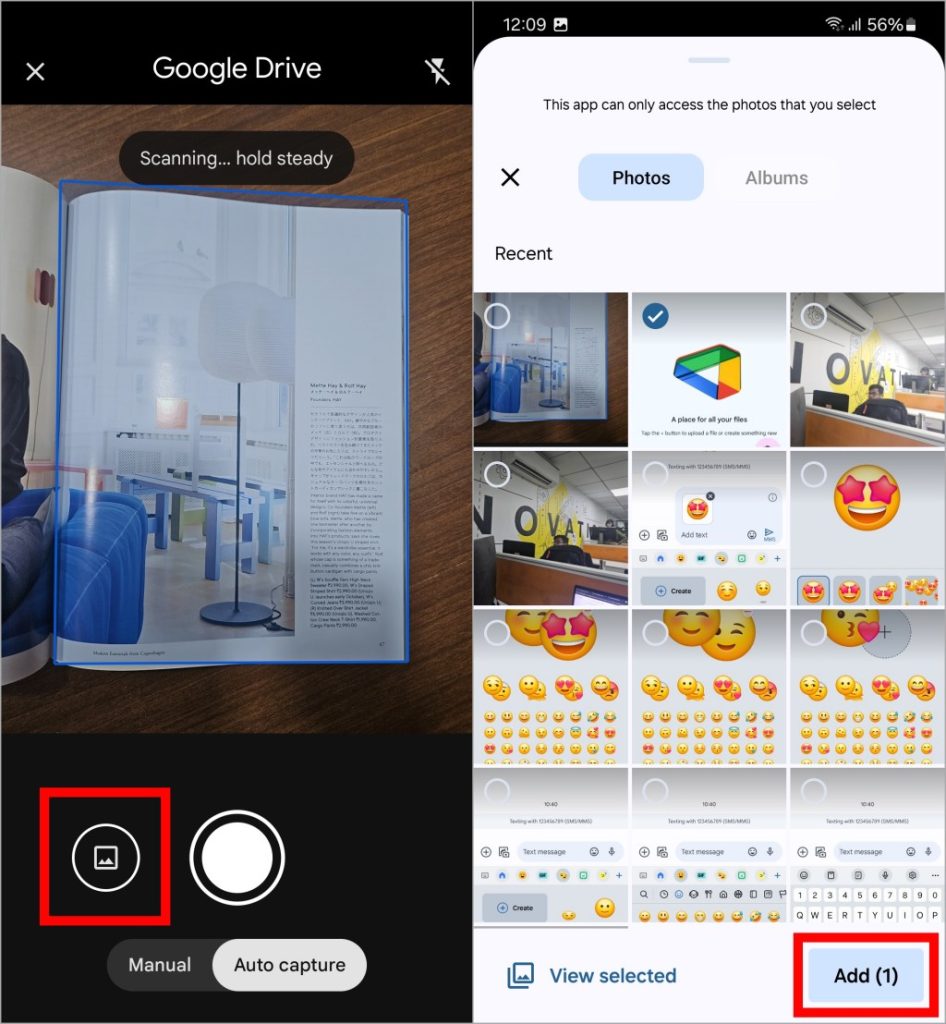
3. If you want to scan an existing image saved on your mobile, tap on the image icon on the left, select the image from your gallery, and tap on Add at the bottom of the screen.
Must Read: We have curated the best possible ways to scan documents on your Samsung Galaxy phone.
How to Edit Scanned Documents in Google Drive on Android
Now that you’ve finished scanning the document, it’s time to check what editing options you get natively with Google Drive’s scan feature.
1. If you want to remove a scanned page, select that page and tap on the Delete button on the bottom left. After that, again select Delete.
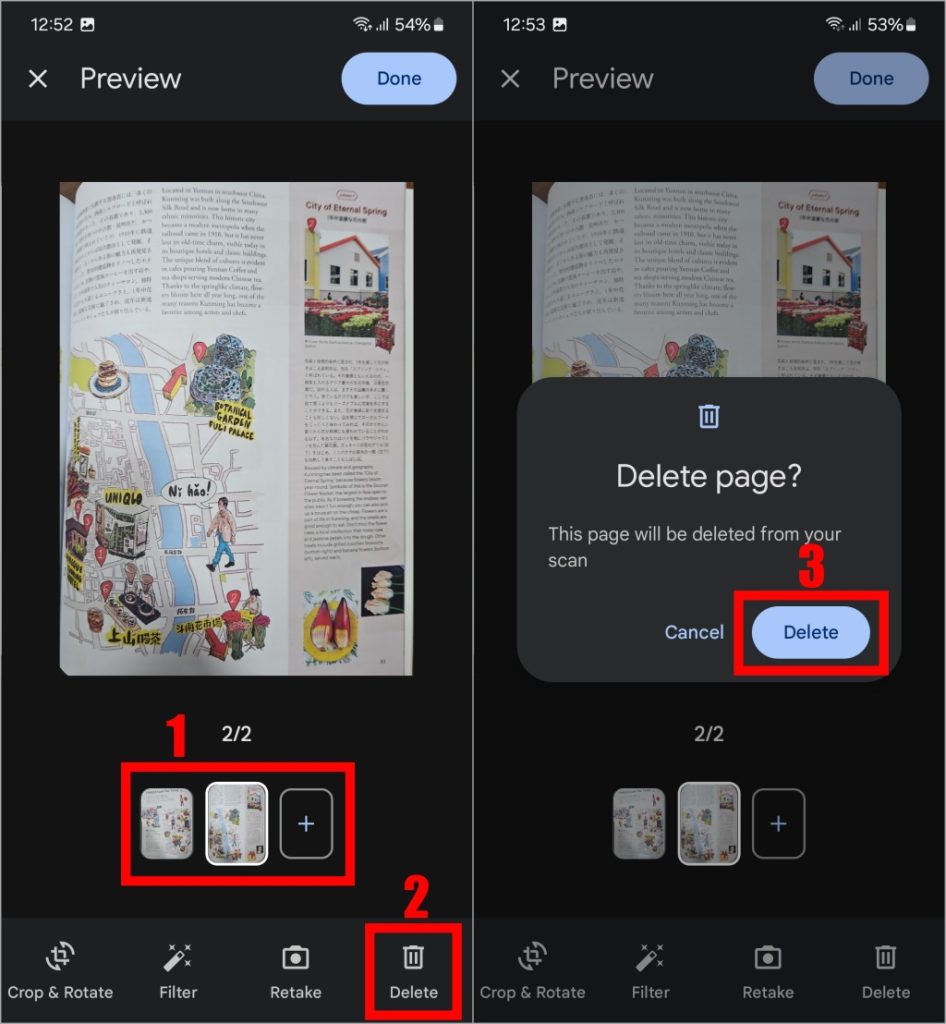
2. And if you want to scan more pages, just tap on the + icon next to the small preview of scanned sheets. Then you can scan your documents again to add them.
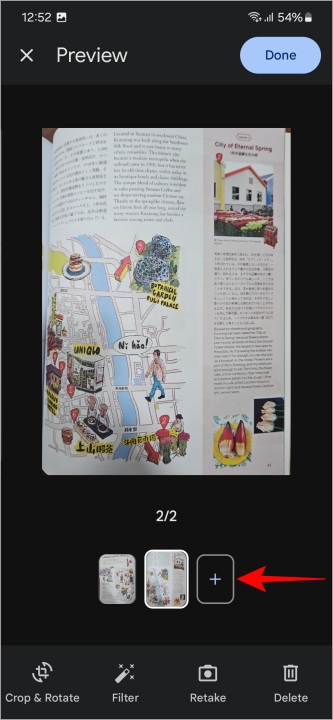
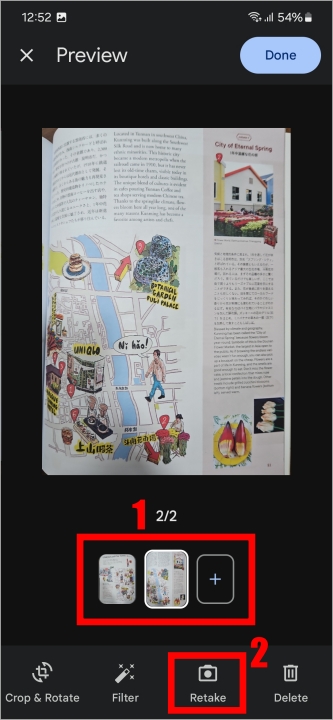
3. As of now, there is no way to rearrange the scanned pages in Google Drive. Instead, you can select the page you want to replace and then tap on Retake.
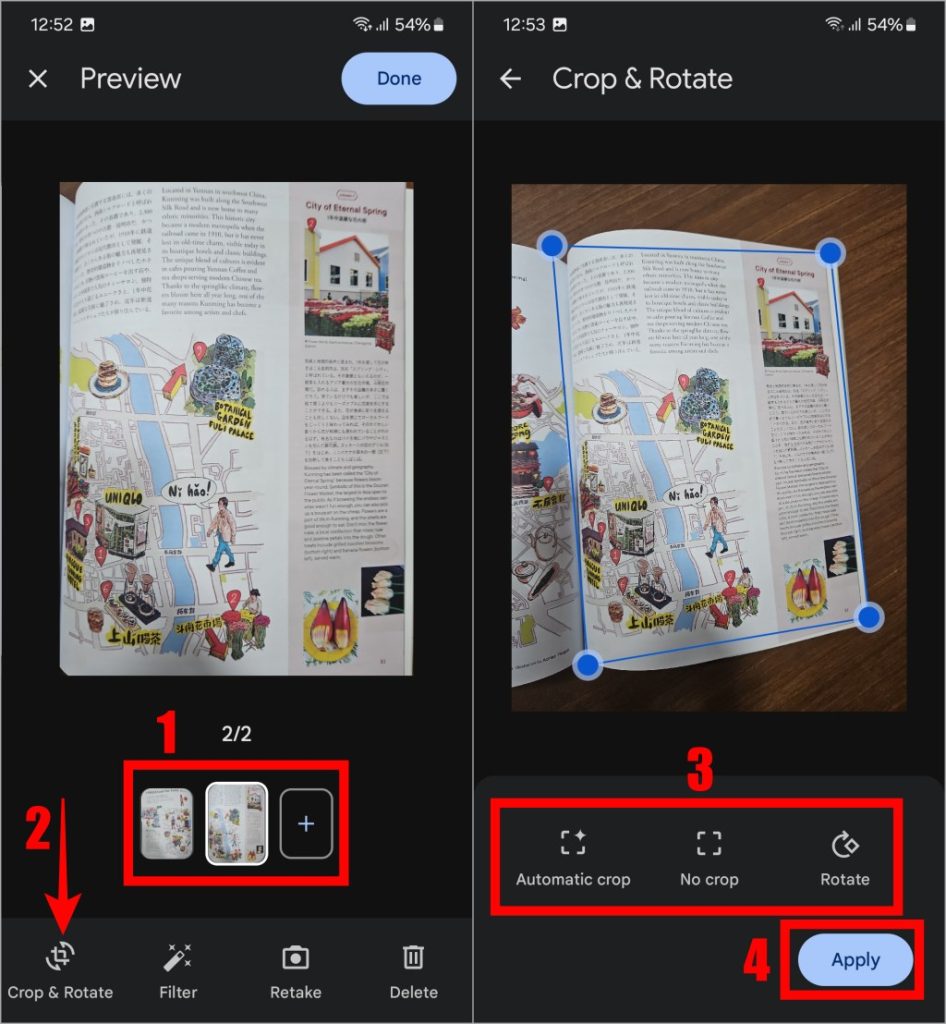
4. To crop or rotate the scanned document, first tap on Crop & Rotate and then select the option you want to perform. Once done, tap on Apply.
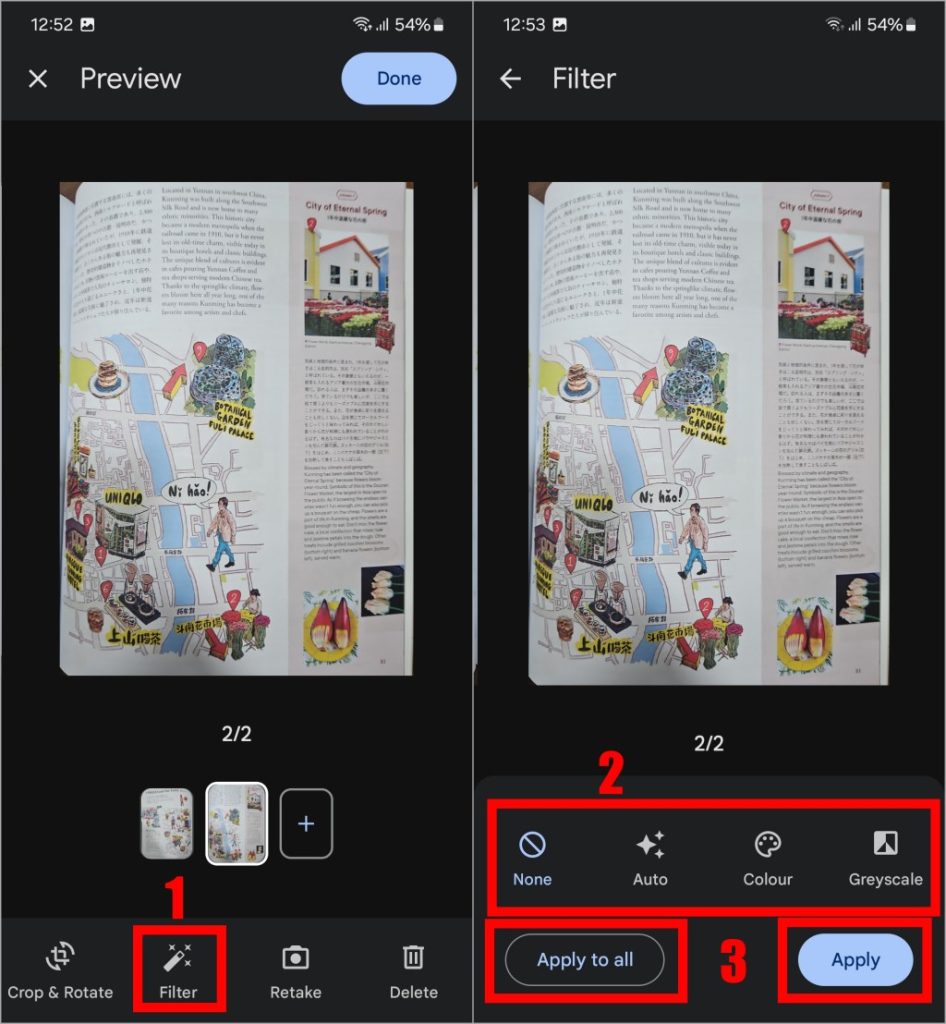
5. Google Drive also offers filters. Tap on Filter and then you can select Auto to enhance the document automatically, Color will make the colors pop in your document while Greyscale will turn it black and white. After that, tap on Apply to apply the filter only on the selected page or Apply to all to apply the filter on all the scanned pages.
How to Save Scanned Documents in Google Drive on Android
Once you are done editing scanned documents, it’s time to save the document in the Drive.
1. First tap on Done and then you land on the final stage of saving the image. But before saving the image, note that you can rename the document by tapping on the box labeled File name, so you can find it easily.
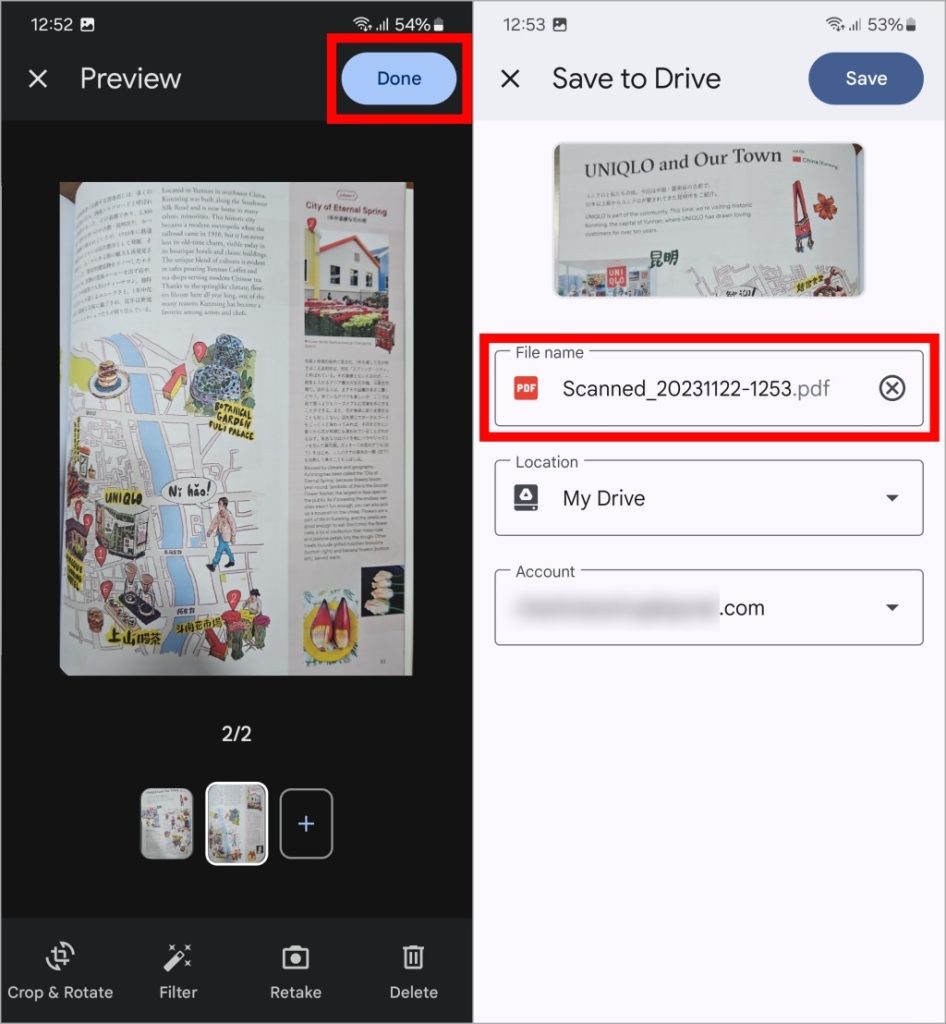
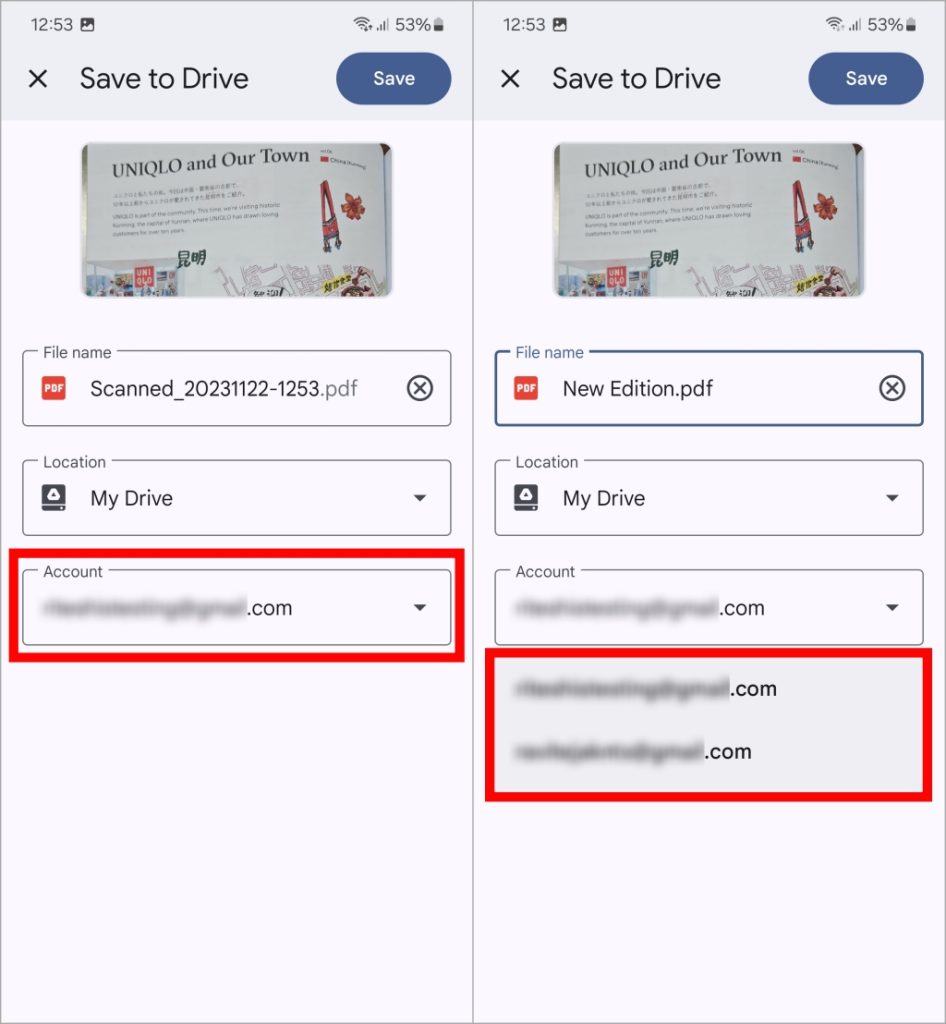
2. If you want to change the Google Drive account, tap on the email address and then select from the available account on your mobile.
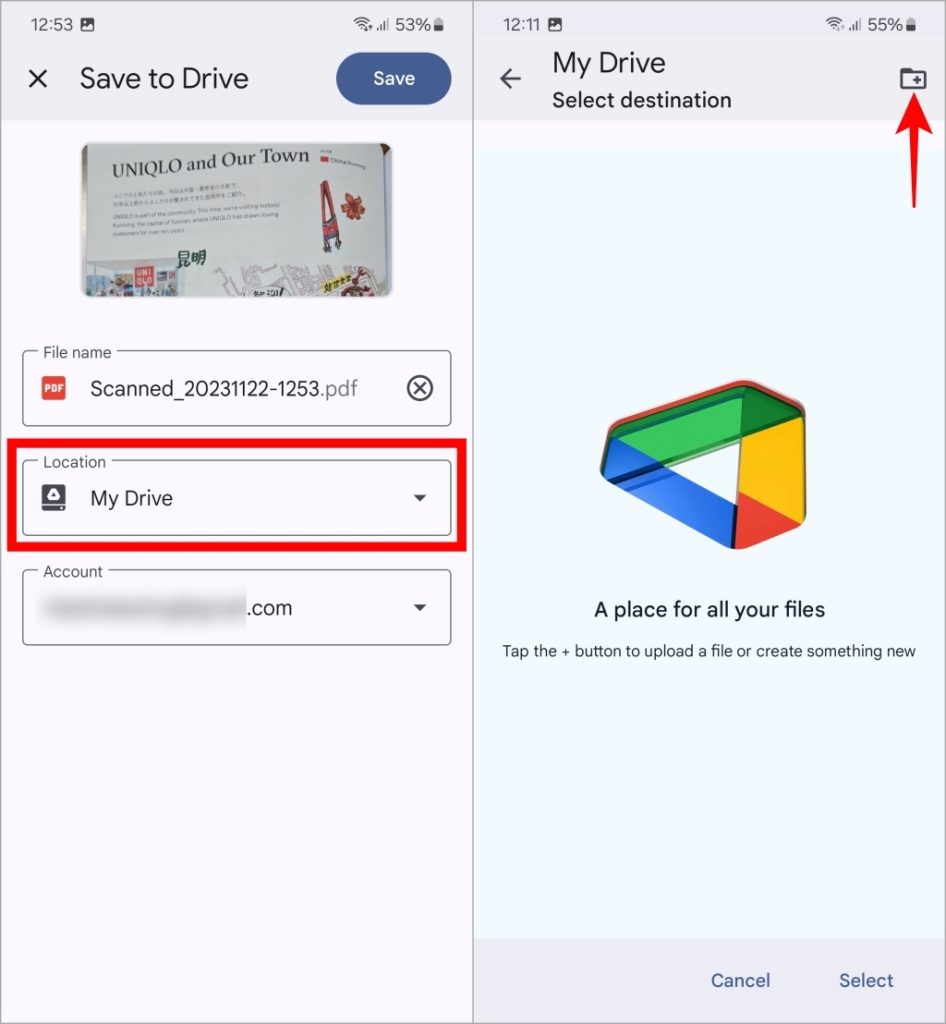
3. You can select Location to choose where you want to save the scanned document or create a new folder by tapping on the add folder icon on the top left.
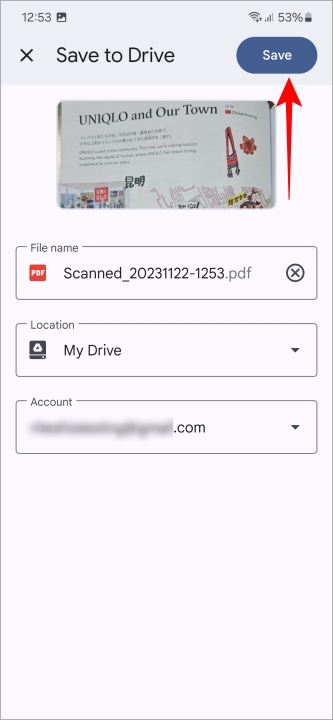
4. After finalizing the name and location, tap on the Save button at the top left to save the document in your Google Drive.
Pro Tip: Do you know you can scan documents like bills, receipts, etc., directly from your Android phone and easily send the document as an email right from your phone?
How to Scan Documents in Google Drive on iOS
While Google Drive comes pre-installed on Android, you have to download it separately from the App Store.
1. To start scanning a document, just open the Google Drive app and tap on the camera icon. This will launch a camera viewfinder where you can aim it at the document you wish to scan.
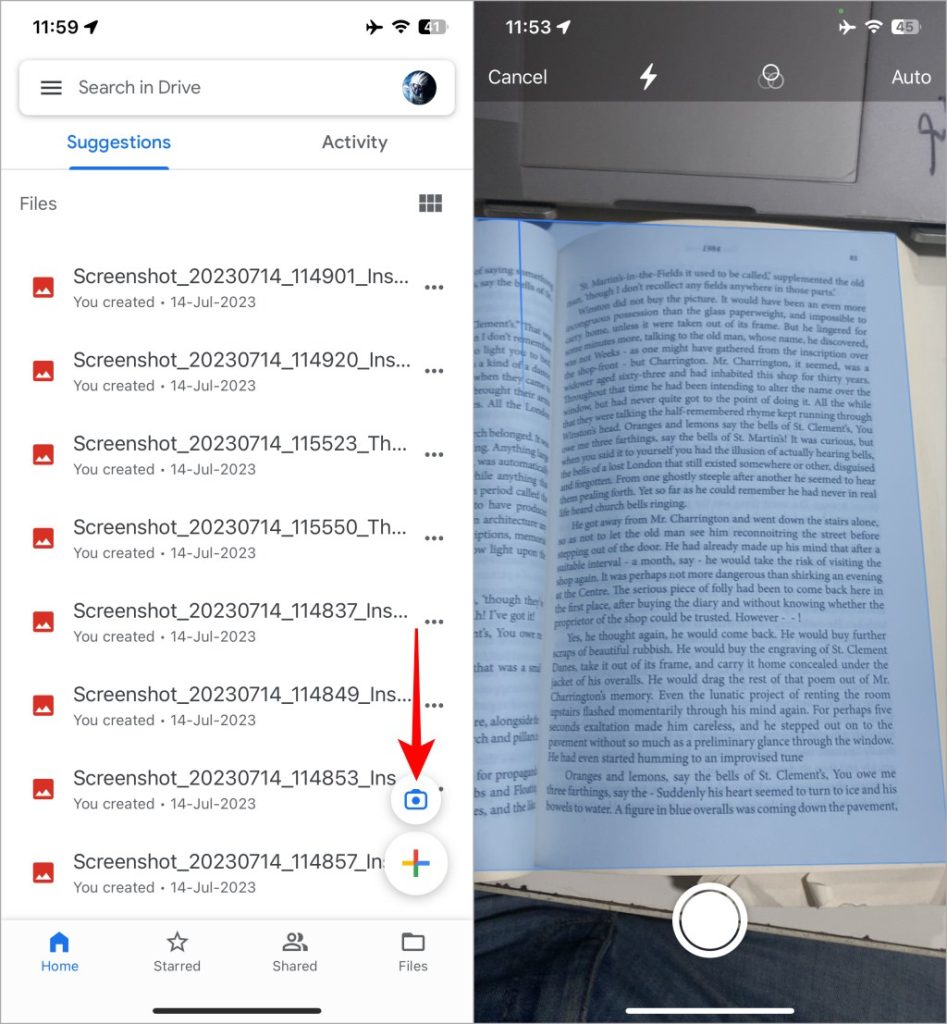
2. Here you can scan the document in the app using two different methods. By default, Auto is already selected which lets the app automatically scan the document for you. But for that, you have to hold steady for a few seconds. Alternatively, you can tap on Auto to switch to the Manual option for scanning the document. In both options, you have a camera shutter button to scan the document.
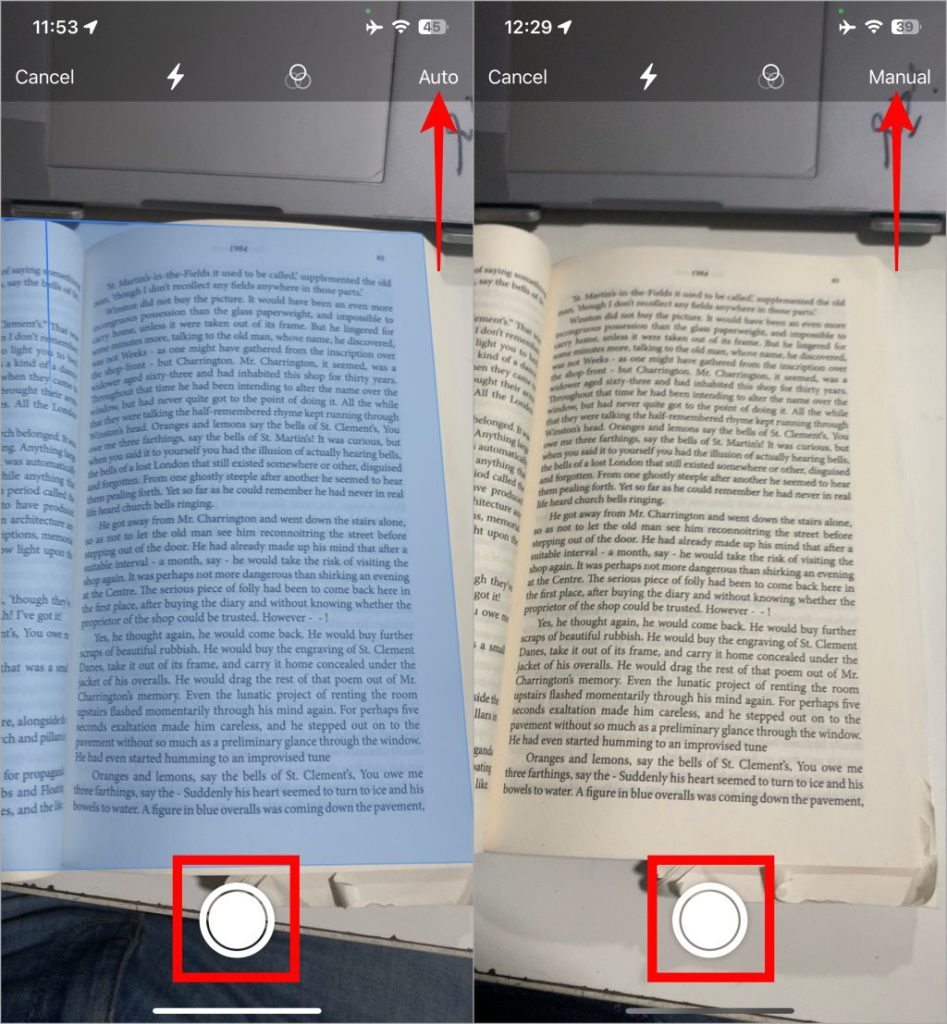
3. On iOS, you don’t have the option to scan an existing image saved on your mobile. You can tap on the filter icon to select the filters available for the scanned documents. Filters in the iOS version of the Drive app work a little differently. Colors will auto-adjust the color while Photo will keep the document in the original form.
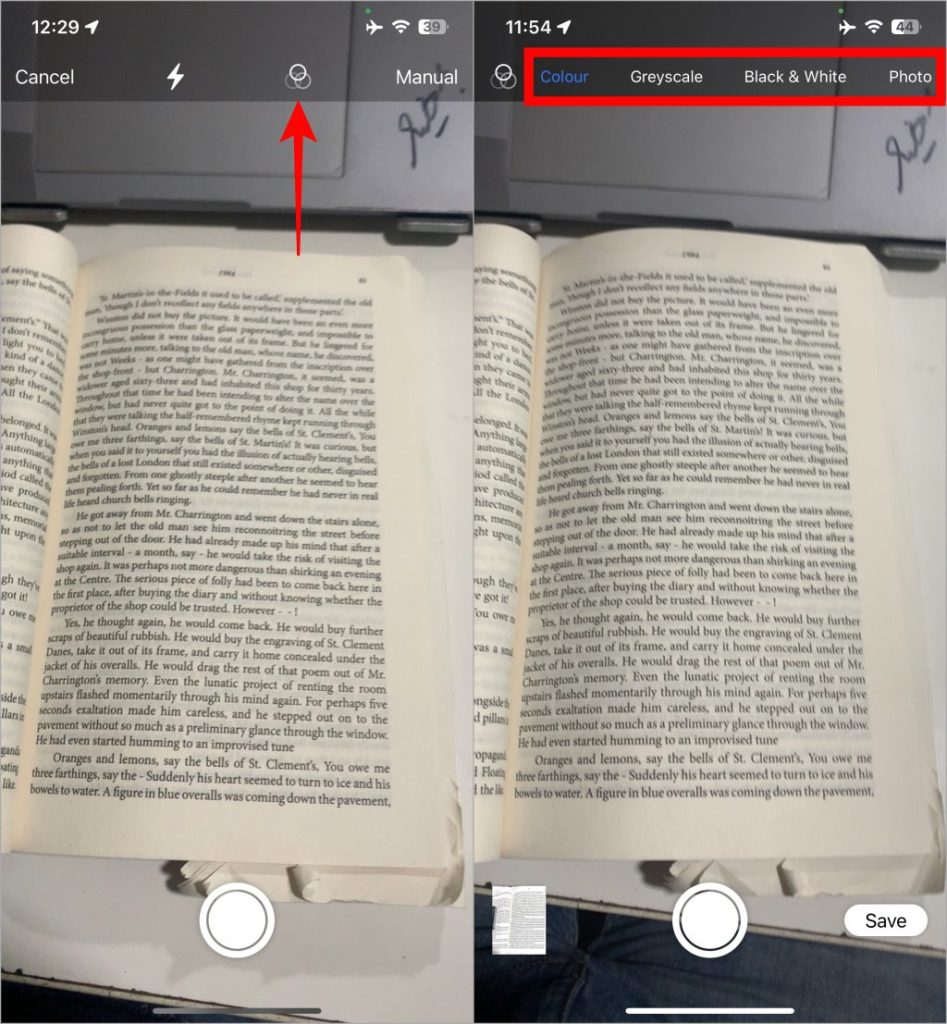
Grey will incorporate the grey range into the document, while Black & white will give the document a scanned-from-a-scanner-machine appearance. Here’s how these filters differ. It is advisable to avoid using Black & White for documents containing images.

Note: You won’t see any preview while selecting the filter while scanning. Once scanned, the document will have the filter applied to it.
How to Edit Scanned Documents in Google Drive on iOS
Now that you’re done scanning the document, let’s explore the editing options available in Google Drive’s scan feature on iOS.
1. To edit the scanned documents, tap on the image preview in the bottom left. Here you can swipe the pages to edit any of them. If you want to remove a scanned page, tap on the Delete icon in the bottom left.
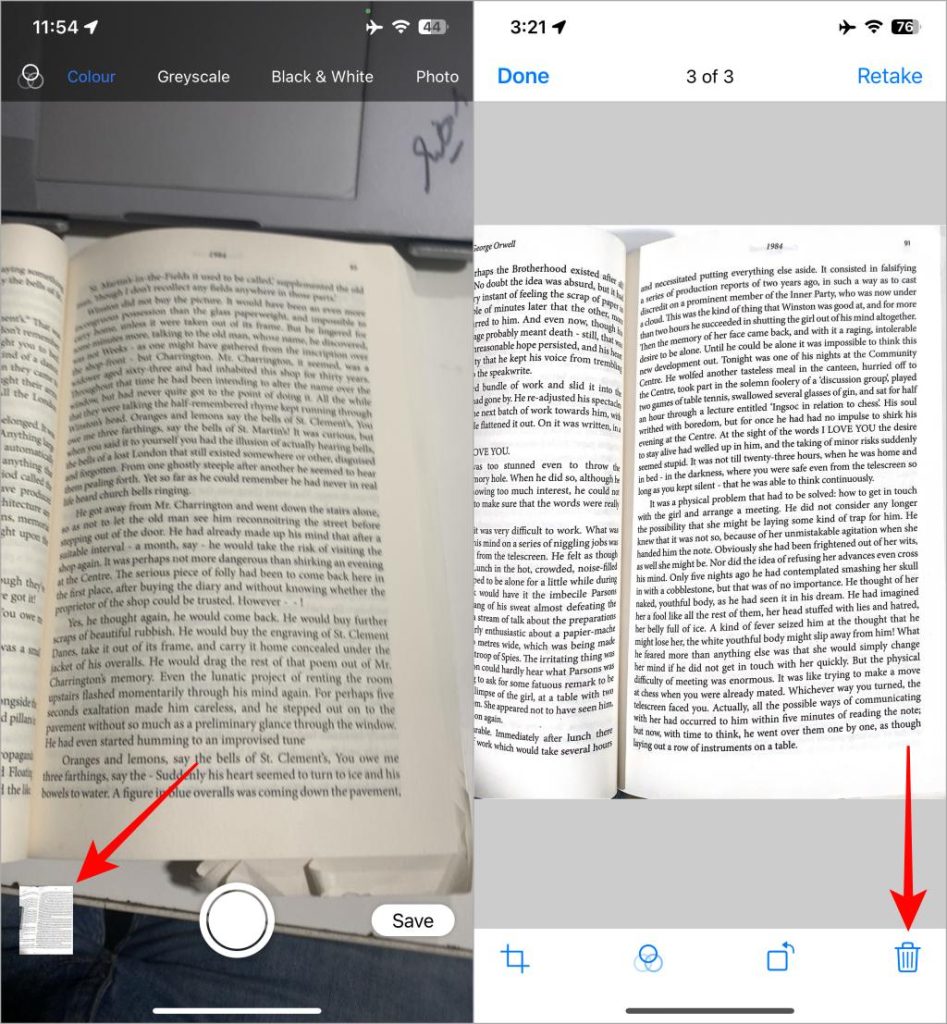
2. And if you want to scan more pages, just tap Done. Then you can scan new documents to add them.
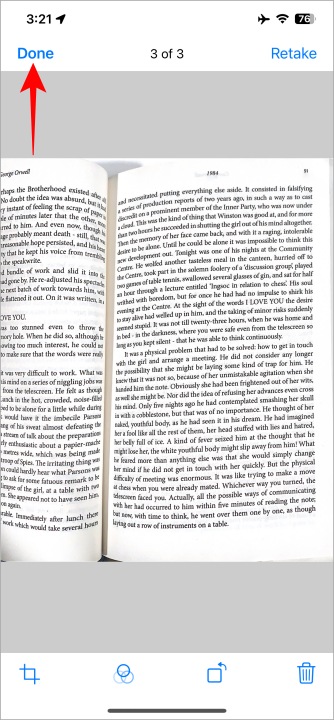
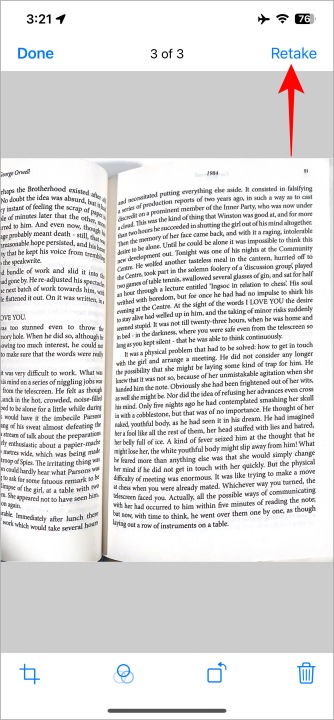
3. As of now, there is no way to rearrange the scanned pages in Google Drive. Instead, you have to tap on Retake on the page you want to replace.
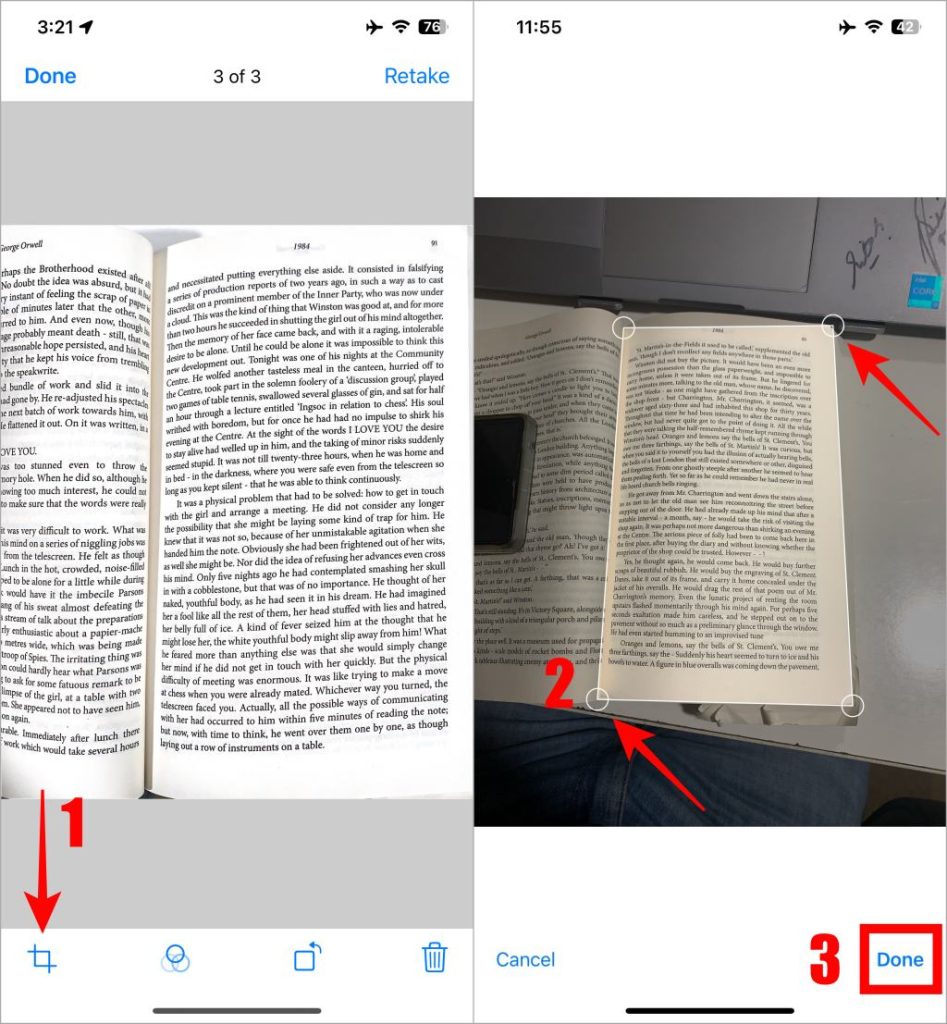
4. To crop the scanned document, first tap on the crop icon and then the corners to adjust. After that tap on Done.
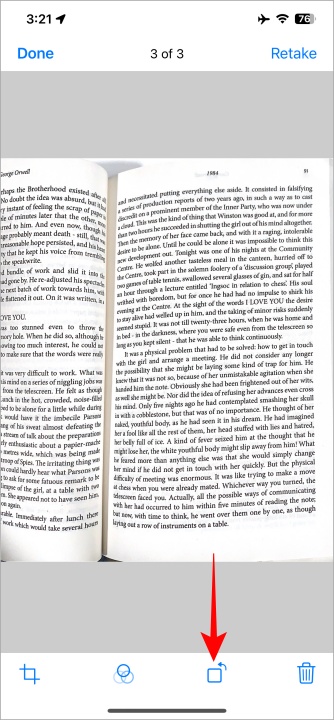
5. And to rotate the image, tap on the rotate icon and it will rotate the image immediately.
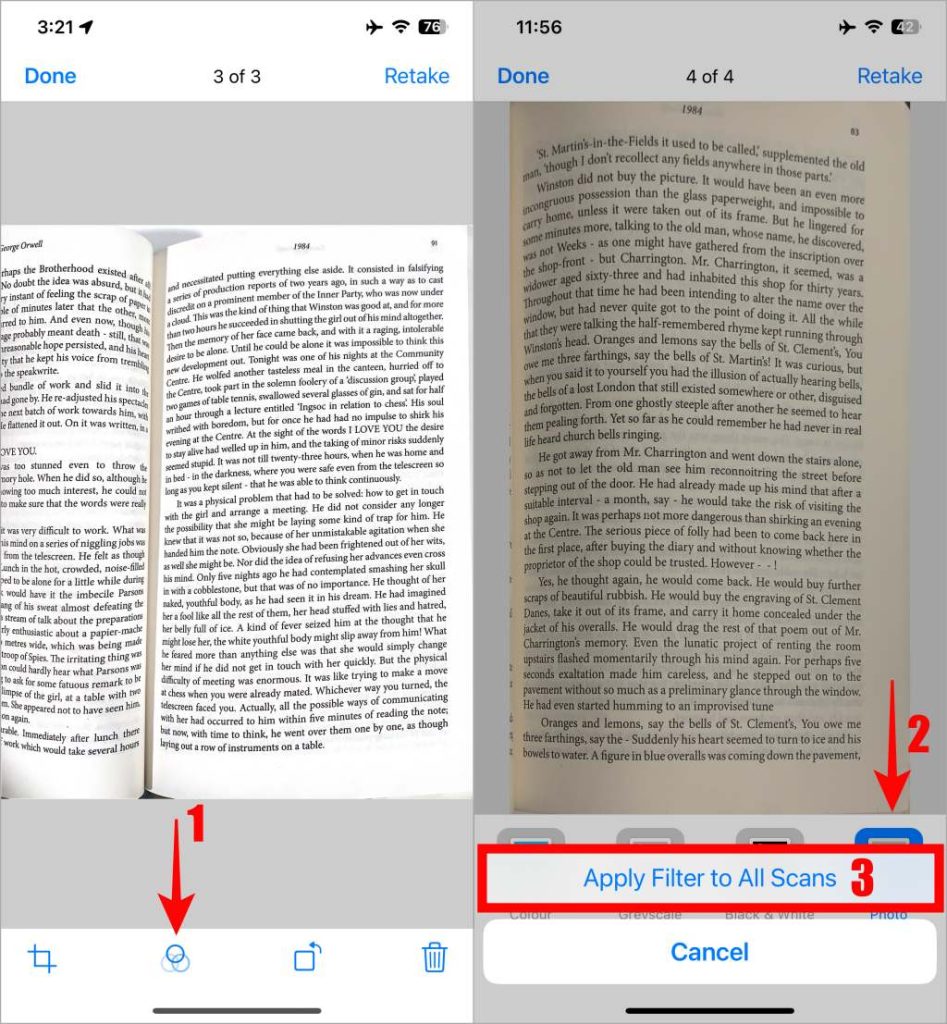
6. If you want to change the filter of the document, tap on the filter icon and select the filter you want to apply. To apply a filter on all the scanned pages, tap and hold the filter and select Apply Filter to All Scans.
Pro Tip: If you don’t like the scanning feature on Google Drive, here is a list of the best scanning apps for iPhone that would fit your needs.
How to Save Scanned Documents in Google Drive on iOS
Now that you’re done scanning the document, let’s explore the editing options available in Google Drive’s scan feature.
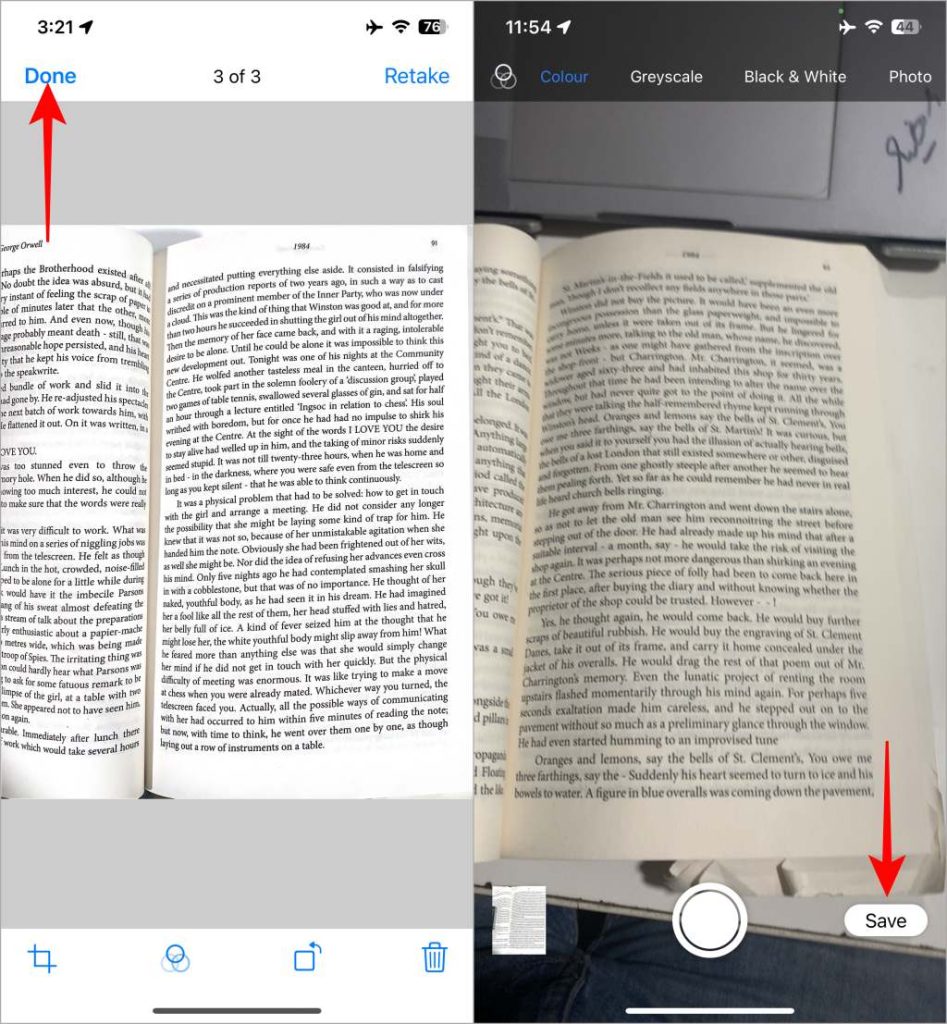
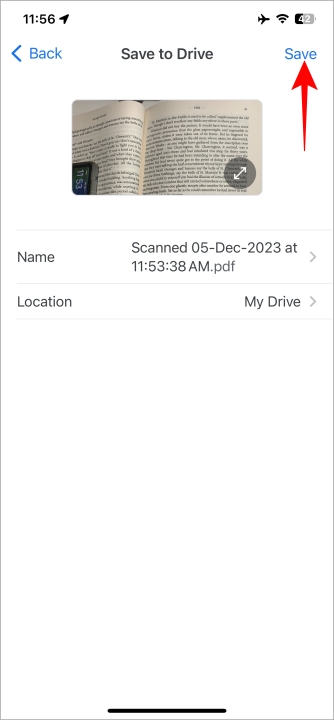
1. First tap on Done to exit from the edit mode and then you will land back on the viewfinder. Here tap on Save.
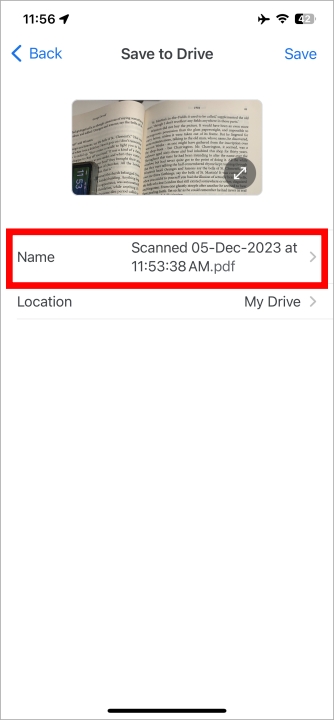
2. But remember, before saving the image, keep in mind that you have the option to change the document’s name by simply tapping on the box labeled Name. This way, you’ll be able to locate it easily.
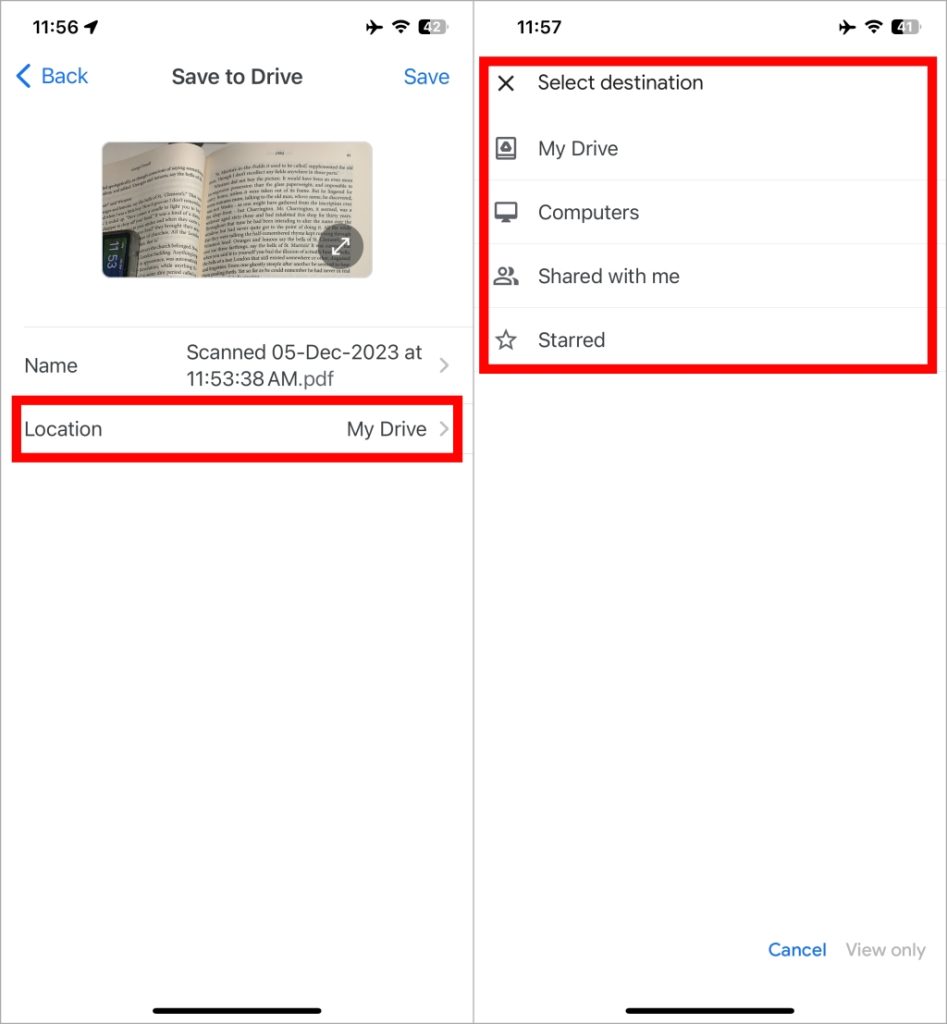
3. You can even select the desired location to save the scanned document in your Google Drive. Tap on Location and select the destination.
4. After finalizing the name and location, tap on the Save button at the top left to save the document in your Google Drive.
Pro Tip: If you forgot to rename your document, here are a few ways to find lost, missing, or deleted files in Google Drive.
FAQs
1. Can I use my default camera app to scan documents?
You can not use your default camera app to scan documents. But, you can add a Google Drive widget to quickly launch it to scan the documents.
2. How to scan documents to Google Drive on a laptop?
Scanning documents to Google Drive on a laptop is not possible. You can get the scanned document from your Android phone to the laptop in your Google Drive account.
Document Digitization
Google Drive is an excellent tool to scan and share documents easily. You can also easily add a Google Doc to a Shared folder in Google Drive, whenever you need to share it with someone.