macOS allows you to change the scrolling direction for the trackpad easily, but if you use an external mouse with your computer, macOS would change the scroll direction for that mouse as well. As of now, there is no native option to set different scroll directions for the mouse and the trackpad. But as always you can use a third-party app to get around this restriction. Let’s see how.
The Native Way
Although macOS has an option to change the scroll direction for mouse and trackpad, you can not change that setting independent of the other. For example, you can get the mouse and the trackpad to scroll naturally but you can’t have your trackpad scrolling naturally and your mouse scrolling the opposite way.
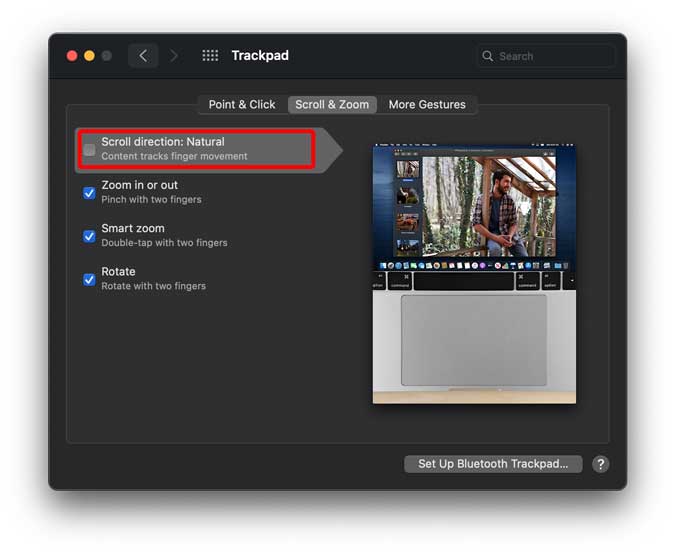
So, if you’re fine with losing the sense of direction on either of your pointing devices, here’s how to change it. Navigate to the Settings app on macOS, click the Trackpad icon from the list. Under the Scroll & Zoom tab, uncheck the box next to “Scroll direction: Natural”. That’s it, your trackpad and mouse will scroll in the non-natural direction.
Also Read: 5 Ways to Snap Windows on macOS with Ease
Set Different Scroll Direction For Mouse And Trackpad
Now that we’ve covered the basics, let’s move forward to the actual tool that would solve our problem. Mos is a simple utility app that lets you set a scroll direction for the external mouse independent of the trackpad. Go ahead and install the utility from the website using this link.

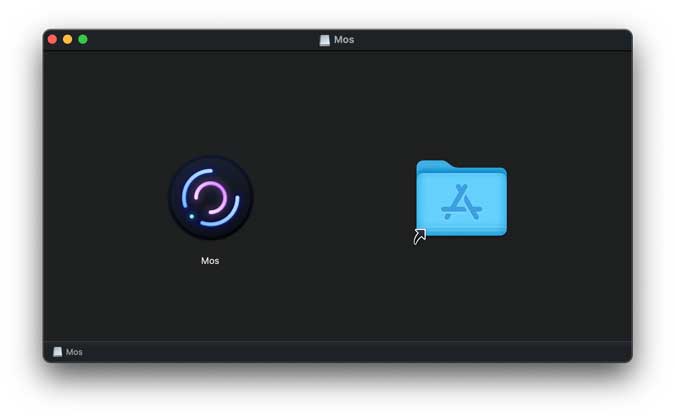
Once you have the file downloaded, install it to your macOS. It would open up a window as shown below. Simply click and drag the Mos icon onto the Applications folder right next to it.
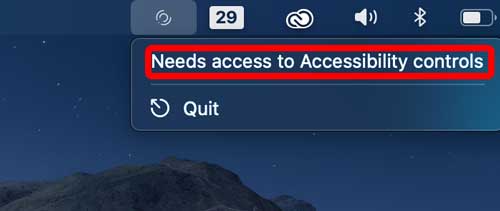
Once the app is installed, run the app and it would show up in the Menu Bar. It would need access to Accessibility Controls. Click the button “Needs access to Accessibility controls”.
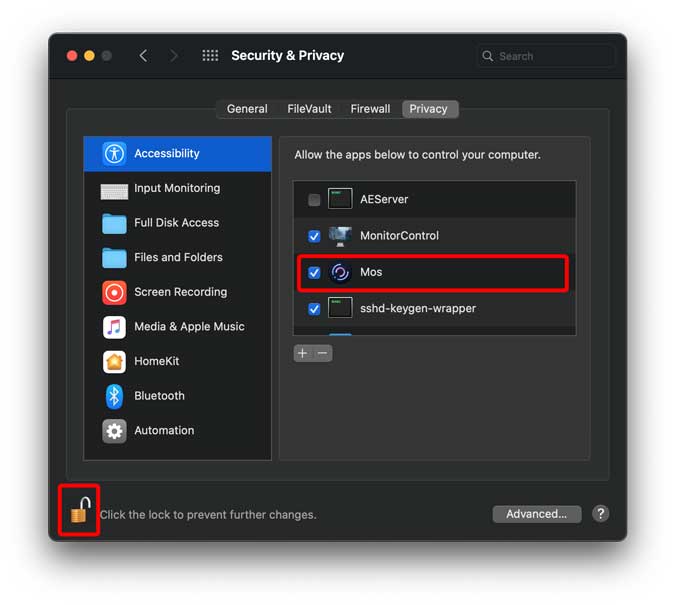
It would take you to the Privacy Settings and you’d find Mos in the Accessibility section. Check the box next to Mos and lock the Padlock to save the changes.
Now, click the Mos icon from the Menu Bar and you’d find the Preferences option. Click “Preferences” to open the Settings page.

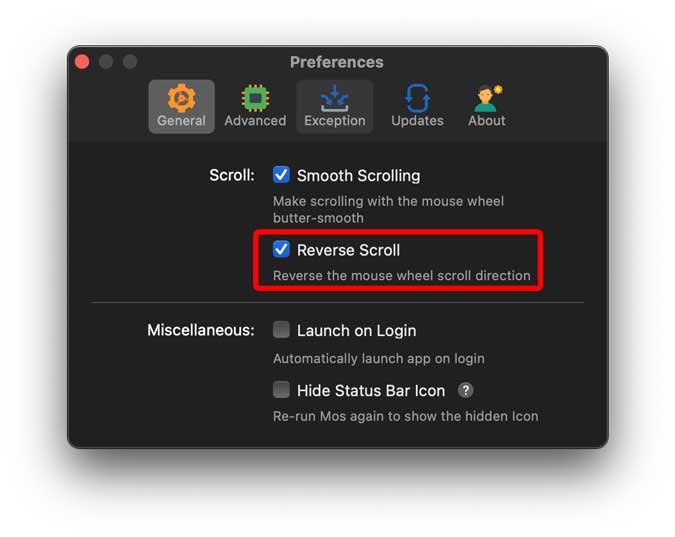
Under General, click the checkbox to enable Reverse Scroll for your mouse. That’s it, you can now use the mouse scroll wheel like any other computer without losing the scroll direction on the trackpad.
Must Read: 10 Best Menu Bar Apps for macOS That You Should be Using (2020)
The app is really good and is sufficient for your needs, but if you use an external tablet or need separate controls for horizontal and vertical controls then the next app gets the job done.
Alternate App
Scroll Reverser is another powerful utility that offers more refined scrolling controls for your computer. For instance, you can reverse scrolling for the trackpad, mouse, and even a drawing tablet with this utility. Plus you can also control horizontal and vertical scrolling, separately.
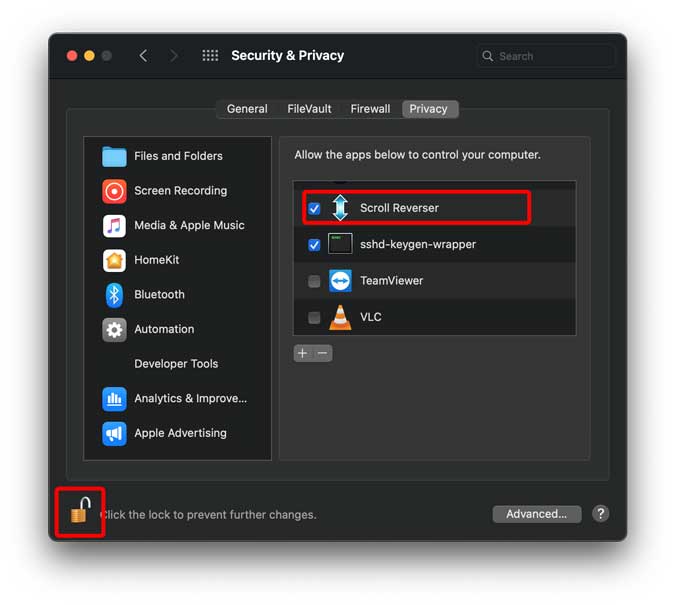
Go ahead and download the utility from the website. After installing the app, you won’t be able to see it in the Menu Bar just yet. We need to grant Accessibility permissions to the app. Open the Settings app> Settings & Privacy> Privacy> Accessibility. Check the box next to “Scroll Reverser” and lock the Padlock to save changes.
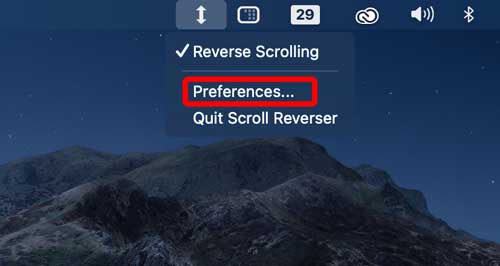
Open the Scroll Reverser app again, you’d see it in the Menu bar now. Click the Preferences button to open the settings page.
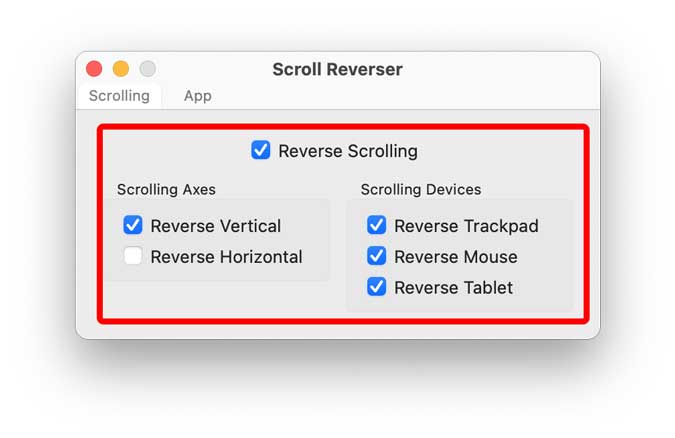
You can reverse the scrolling direction for the trackpad, mouse, and tablet. You can also change the scrolling direction for horizontal and vertical axes separately.
Read: 7 Best QuickLook Plugins for macOS
Final Words
These were a few ways to change the scrolling direction on macOS. I would recommend Mos if you just want separate controls for an external mouse but if you want separate controls for each axis and multiple devices the Scroll Reverser is a good option. Which one would you pick, let me know in the comments below?
Read: Top 10 Free macOS Apps to Boost Your Productivity