Apple now allows you to change your Apple ID to any country in the App Store. This is especially useful if you are a businessman or an expat, who travel between different countries. But while doing so, you always end up losing the sync between your other Apple devices. For instance, every time you change your country on the App Store’s, you lose your iCloud sync and all your purchase history (not the actual purchase obviously).
But what if I tell you, you can keep the best of both world? That is you can access the iOS App Store for the region you frequently fly to without affecting your main Apple ID that you use for iCloud sign-in. Well, turns out there’s a simple workaround for that. Let’s check it out.
Changing your Apple ID on your iPhone / iPad
The trick here is to keep two separate Apple IDs, one for iCloud and another for App Store. While you set up a new iPhone or iPad you are asked to sign in from an Apple ID or create a new Apple ID if you are a new user. Eventually, you put the same Apple ID wherever asked and end up using a single ID to sign-in iCloud and App Store. Well, that’s not necessary and here are the steps to change that.
Read: 11 Best Utility Apps for iPhone To Boost Your Productivity
Step 1
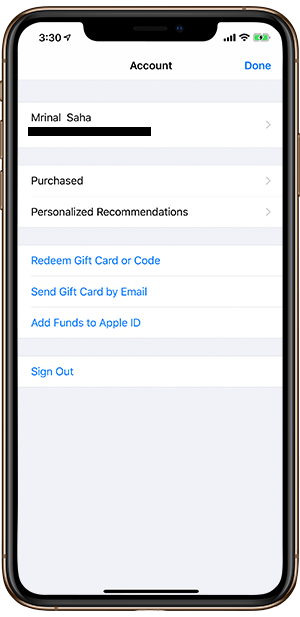
Open the App Store on your device and click on the Profile icon on the top right corner of the screen. It might be your picture if you’ve set one or a simple silhouette icon. You should be able to see your account information on this page.

Step 2
If you are already signed in from an Apple ID, click on ‘Sign Out‘ at the bottom of the screen. Or simply go to ‘Create Apple ID’ to set up an Apple ID with the desired country and region settings.
Step 3
A new window will open, look for an option that says, Create New Apple ID at the bottom of the log-in screen. If you don’t see such option, restart your App Store application. It worked for us. You may ignore this if you already have another existing Apple ID set to a different country or region.

Step 4
Clicking on the link will redirect you to ‘Create Apple ID‘ page. You may set up a new Apple ID with the desired country and region setting as a one time process.

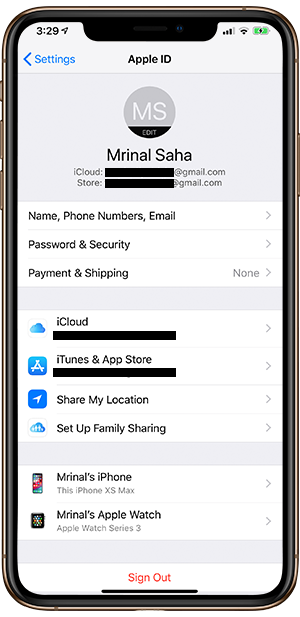
Once you finish creating a new Apple ID you’ll be logged-in with the newly created ID in the App Store. Now if you go back to settings and click on your name on the top of the screen you’ll see two separate Apple ID’s for iCloud and App Store. This way any data sync between your Apple devices won’t be affected while you’ll also enjoy the benefit of downloading apps from different stores. To switch back to your domestic Apple ID you can simply Sign out and Log in with your main Apple ID.
Changing App Store ID in macOS
The process to separate the iCloud ID and Apple ID in macOS is more or less similar. Here are the steps to do so.
Step 1
To get started, open your iCloud, you can do a spotlight search by pressing ‘cmd+space’ and type ‘iCloud’. It will bring up a couple of results and suggestions. The first option should be the desired one.

Alternatively, you can open iCloud settings by going to System Preferences > iCloud. You can manage your iCloud settings or Sign Out and Sign In from a different ID from this window. Log in with the same ID as your other devices to keep the cloud data in sync. Keeping the same Apple ID on your devices will help you sync the photos, documents, contacts etc on all the devices automatically.

Step 2
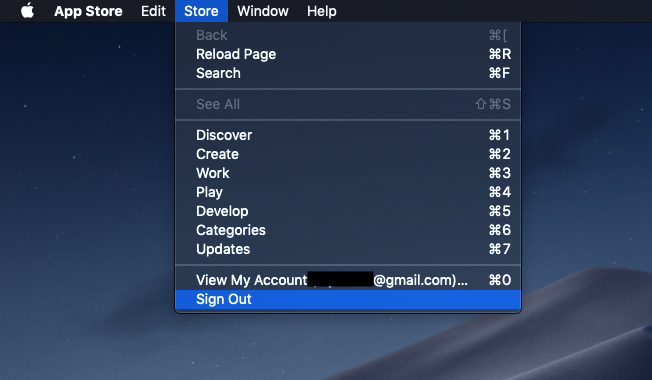
Open the App Store or iTunes on your Mac from the Launchpad or the App Dock at the bottom of the screen. On the left top corner of the Menu bar, click on Store. You will see ‘Sign Out’ at the bottom of the menu. Sign Out from your current Apple ID if you are using the same as iCloud.
Step 3
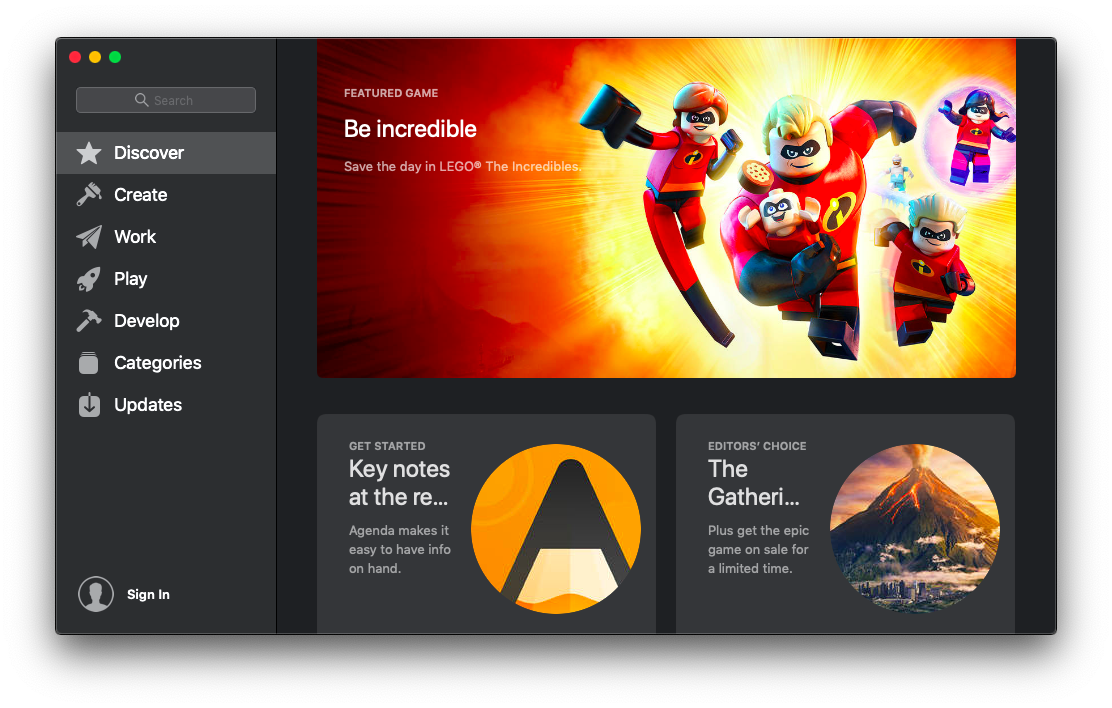
Sign In option must appear on the bottom left corner of the App Store window. Use the Apple ID you created for the App Store on your iPhone which has a different country or region. Or if you are a new user Create a new Apple ID for iTunes and App Store sign in.
Wrapping Up
So, there you go, that’s how you get desired apps from the region of your choice. The only hustle that we see here is having two different Apple IDs for iCloud and App Store. But considering the results, this one time process is worth it. Apple native option of Family Sharing in iCloud also addresses the issue to some extent but then it doesn’t work for solo users or even for family members when it comes to in-app purchases. Family sharing does allow app sharing and you can see apps that other family members have downloaded using their Apple ID. But the in-app purchases remain device specific, making them unusable for other members. Go ahead and try the method to get your favorite apps from a store of your choice and let us know your experience in the comments below.