Albums in Google Photos help in organizing pictures and videos. You can use albums to group pictures by place, trip, people, and more. Setting up Google Photos albums might seem intimidating but it’s not so. Your future self would thank you for doing this today. You can easily create albums, change their cover photo, rename photo albums, rearrange photo albums, and do much more. To get you started, let’s check the best tips and tricks to use Google Photos albums.
Note: Folders and albums have different meanings in Google Photos. Folders contain the local device photos whereas albums only have the items that are stored in cloud storage.
Table of Contents
1. Create an Album
Follow these steps to make an album in Google Photos.
1. In the Google Photos app, tap the Library tab at the bottom.
2. Tap on the New Album (+) button to make a new album.

3. Enter a name for the album in the Add a title box and tap on the Select photos button. Then, choose the photos that you want to add to the album.

2. Change Album Cover Photo
An album can be either identified by its name or the cover picture. Thankfully, you can customize both of them in Google Photos.
To change the album cover picture, follow these steps:
1. Open the album.
2. Tap the three-dot icon and select Change album cover. Select the photo that you want to set as the cover picture.

Pro Tip: Open the photo that you want to as the cover picture. Then swipe up on the picture and tap on Use as album cover.
3. Rename Photo Album
To change the name or title of the photo album, follow these steps:
1. Open the Google Photos album whose name you want to change.
2. Tap on the name. It will go into editing mode. Enter a new name for the album and press the checkmark icon at the top to save the changes.

4. Sort Photos in an Album
Don’t like the default order of the photos in your album? Not to worry. You can easily rearrange or change the sort order of pictures/videos in your album.
1. Open the Google Photos album.
2. Tap the three-dot icon at the top.
3. Choose Edit from the menu.

4. Tap on the Sort icon and choose the sorting mode. You can sort by oldest, newest, or recently added items.
5. Tap the Checkmark icon to confirm the changes.

Pro Tip: Know the meaning of various icons and symbols in Google Photos.
5. Rearrange Albums
In addition to rearranging pictures in an album, you can also rearrange albums according to the latest photo, last modified item, or album title in alphabetical order.
To do so, tap on the Library tab in the Google Photos album. Tap on the current sorting mode and choose the new sorting mode from the list.

6. Add Location or Map Between Pictures to an Album
Google Photos allows you to manually add a location or a map to albums. You can keep the location at the top of the album or between multiple pictures. What’s cool is that you can add multiple locations/maps in the same album.
To add a location or map to an album, follow these steps:
1. Open the album in the Google Photos.
2. Tap the three-dot icon and select Edit.
3. Tap the Location icon and choose from Location, Map, or Suggested locations from the bottom.

4. Then add the desired location. Once added, tap the Checkmark icon to save the changes.

5. To add more locations, repeat the steps.
Pro Tip: To change the position of the location card, tap the three-dot icon in the album and select Edit. Long press the location/map card and drag it to its position.
7. Add Text Between Pictures
To make your albums more interesting, you can add descriptive text between the pictures. You can have multiple text cards where each card will define a bunch of pictures.
To add text, follow these steps:
1. Open the album and tap the three-dot icon followed by Edit.
2. Tap on the Tt icon and enter the text in the box that shows up. Press the Checkmark icon. Similarly, add other text to the album.

Pro Tip. Once added, you can rearrange the text boxes and keep them in the preferred place. For that, enter the editing mode of the album by pressing the three-dot icon followed by Edit. Then, long-press the text and drag it to its preferred position.
8. Move Photos Between Albums
It’s quite tricky yet simple to move pictures between Google Photos albums. Allow us to explain. Unlike regular gallery apps where you will find a move button to move pictures between different albums, Google Photos doesn’t offer anything like that. Instead, you need to add pictures to the second album and remove them manually from the first album.
Google Photos stores one copy of your picture. Then, when you add a picture to an album, its shortcut is created in that album. That means you can have the same picture in multiple albums without affecting the storage. The same concept is used while moving pictures between albums.
Follow these steps to move photos between Google Photos albums:
1. Open the Google Photos album where you want to move the desired photos.
2. Tap on the Add Photos button and select the pictures that you want to move to this album.
3. Press the Add button. The selected photos will show up in the album.

4. Now, go to the original album having those photos. Long press on any of the pictures to select it. Then, select other pictures by tapping on them.
5. Finally, tap the three-dot icon at the top and select Remove from album.

Pro Tip: If you have to merge albums, you need to add all the photos from the first album to the second album and then delete the original album. To delete an album, open it and tap the three-dot icon at the top followed by Delete album.
You can share Google Photos albums with other Google Photos users as well as those who don’t use Google Photos. The latter is possible using links.
To share a Google Photos album, open it and tap on the Share button. Select the contact with whom you want to share the album, tap on Get Link, and then send the link of the album to your friend.

If someone has shared an album with you or you share an album with someone, you can hide it from the Library tab. For that, open the album and tap the three-dot icon. Select Hide from Library.

Tip: To unhide a hidden album in Google Photos, tap on the People icon at the top of the main screen of the app to go to the Sharing screen. Here you will see the hidden album. Tap on it. Then tap the three-dot icon and select Show in Library.
11. Add Photos to an Album Automatically
You can set up a live aka auto-updating album in Google Photos where pictures will be added automatically based on people or pets. For instance, if you want to keep all pictures of your kid in an album, select his/her face and Google Photos will automatically add future pictures to that album.
To set up a live album, follow these steps:
1. In the Google Photos app, tap the Add (+) icon at the top and select Album.

2. Tap on Select people & pets.
3. Then, select the face and confirm it.

Pro Tip: You can even set up a Partner account to share selected pictures with your partner automatically.
Bonus Tip: Use Locked Folder to Hide Photos or Videos
Google Photos offers a private folder where you can hide your photos and videos. The folder is protected using a code so that no one has access to your private photos.
To set up the Locked Folder, tap on the Library tab in Google Photos and press the Utilities option. Select Locked Folder. Follow the on-screen instructions to set up the folder.

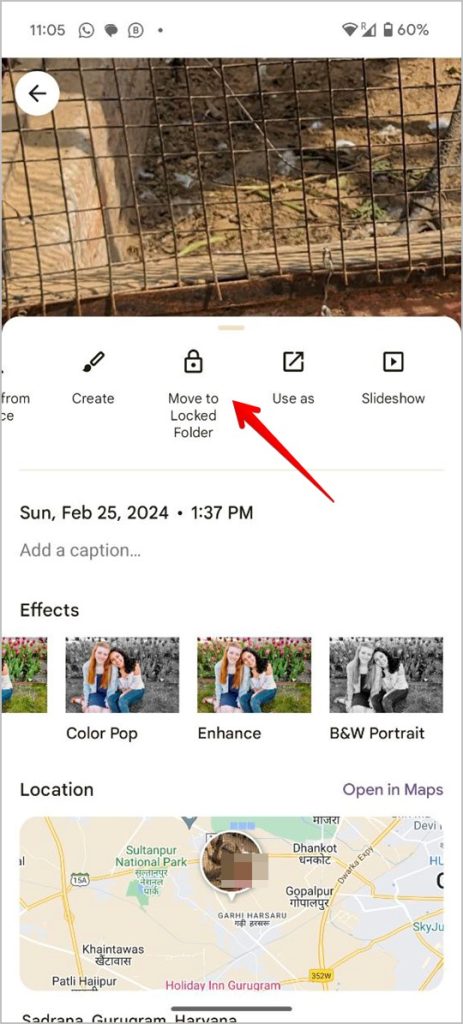
To add photos to the Locked folder, open any picture and swipe up. Select the Move to Locked Folder option. Learn how to save photos directly from Camera to Locked folder.
FAQs
1. Can you create sub-albums in Google Photos?
No, you cannot create sub-albums in Google Photos.
2. How many photos or videos can you add to an album?
You can add up to 20,000 photos or videos to one album.
3. Do Google Photos albums expire?
Yes, if you are inactive for at least 2 years at a stretch, your content will be deleted from Google Photos. However, Google will send you reminder emails before doing that.
4. Why can’t I edit an album?
Only the creator of the album can make changes to the album like changing its name, cover photo, etc.
Edit in Google Photos
Once you have organized your pictures and videos in Google Photos albums, you can use the app to edit them as well. For instance, you can create a collage, highlight video, or a movie in Google Photos.