What would the purpose of a voice or video call be if others can’t hear you? The issue mostly lies in the microphone in such cases. If people are unable to hear your voice from your Chromebook, don’t worry. In this post, we have covered 14 fixes that will help you in resolving the microphone not working issue on Chromebook. Let’s get started.
Table of Contents
1. Restart Chromebook
Many times, simply restarting the Chromebook should be enough to make its microphone work again. So let’s start by restarting the Chromebook.
On your Chromebook, click on time at the bottom-right corner of the shelf. Press the Shut Down icon. This will turn off your Chromebook. Wait for at least 30 seconds and then turn on the Chromebook as you would usually do. Check out interesting things about Chromebook login options.
2. Reset Chromebook Hardware
Next, you should try resetting your Chromebook’s hardware to fix the microphone. Don’t worry. You don’t need to open up your Chromebook and neither this method will delete your data. It will only restart hardware components like a camera (which could be affecting the microphone in some way), keyboard, touchpad, etc.
1. Turn off your Chromebook using the Shut Down button in the Quick Panel.
2. Press and hold the Refresh button and while keeping it pressed, press the Power button. Both buttons are on your keyboard.
3. When the Chromebook turns on, release the Refresh button.
3. Check Microphone Settings
The Chromebook’s microphone will not work or you might hear noise in your audio if the microphone is disabled or its sensitivity is kept too low or high. To fix it, follow these steps:
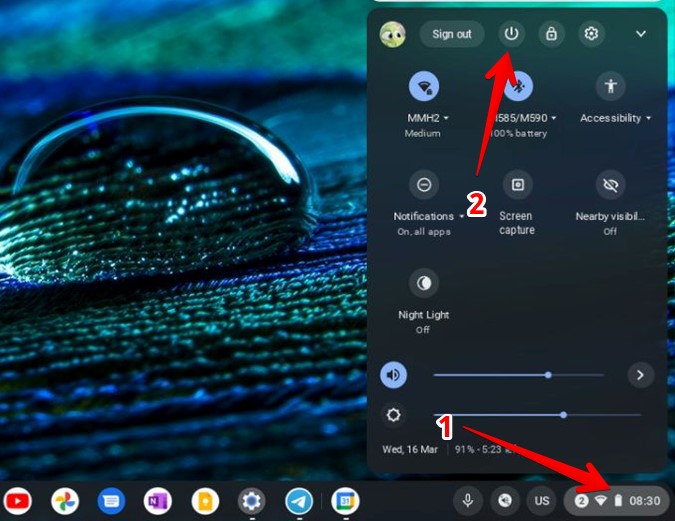
1. Click on time at the bottom-right corner of your ChromeOS.
2. The Quick Panel will open. Click on the arrow next to the Sound/Speaker icon.

3. On the next screen, make sure the Microphone icon is turned on. It should be highlighted. If it’s grey or shows a bar on it, click on it to enable the microphone.
4. Next, adjust the microphone volume and set it to the middle.

Pro Tip: Learn how to turn off voice on Chromebook.
4. Change Default Microphone in Chrome
If you use an external microphone with your Chromebook, you must check and make sure that the right one is selected in Chrome Settings.
1. Open Chrome on your Chromebook.
2. Click on the three-dot icon at the top and go to Settings.

3. Go to Privacy and security > Site settings.

4. Scroll down and click on Microphone under Permissions.

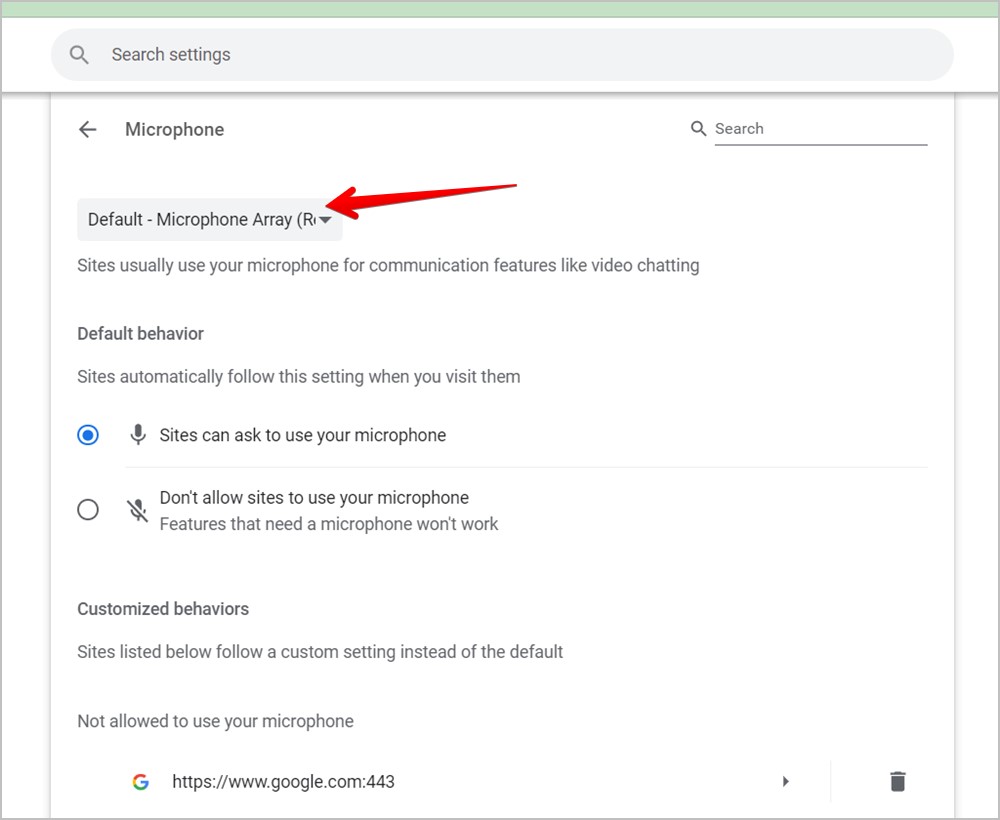
5. Click on the drop-down box that lets you select the default microphone and choose the microphone that you want to use.
5. Grant Microphone Permission in Chrome
If you are unable to use the microphone on a website or a web app, you must grant the microphone permission to it in Chrome as shown below.
1. Go to Chrome Settings > Privacy and security > Site settings > Microphone as shown in the above method.
2. Scroll down and enable “Sites can ask to use your microphone”.
3. Scroll down further and make sure the site where you are unable to use the microphone isn’t mentioned under the Not allowed to use your microphone section. If it is, click on the Trash icon next to it,

4. Alternatively, open the website in Chrome and click on the Lock icon next to the URL in the address bar. Enable the toggle next to the Microphone.

Pro Tip: Check out other ways to fix the microphone not working on Chrome.
6. Connect External Microphone Again
Often, when you remove the external microphone from your Chromebook, it still thinks that it’s connected to it and that’s why the microphone doesn’t work on your Chromebook. To fix it, you simply need to connect the microphone again to the Chromebook via the USB or 3.5mm jack and remove it again.
7. Disconnect Bluetooth Headphones
Do you use Bluetooth headphones or earbuds with your Chromebook? That could also be the reason for the Chromebook microphone not working. Basically, your Chromebook might still be connected to the Bluetooth device and that’s why you are unable to use the internal microphone.
To fix it, simply turn off Bluetooth on your Chromebook. For that, click on time at the bottom-right corner of your Chromebook and press the Bluetooth button to turn it off. It should say Off at the bottom.

8. Try in a Different App
If the microphone on your Chromebook isn’t working in any specific app, you should test the microphone in a different app. The Chromebook’s Camera app will be a good choice. You can even test it online at https://mictests.com/.
If the microphone works elsewhere, check the microphone settings in the problematic app or re-install it.
9. Update Chrome Browser
An outdated version of Chrome could be affecting the microphone capabilities on your Chromebook. Therefore, you must update it. Like ChromeOS, the Chrome browser is also updated automatically. However, this may not have happened if you don’t turn off your Chromebook frequently.
To update the Chrome browser manually on your Chromebook, follow these steps:
1. Open Chrome on your Chromebook.
2. Click on the three-dot icon at the top and go to Help > About Google Chrome.

3. Chrome will start looking for an update. Click on the Relaunch button to update Chrome, if an update shows up.

10. Update ChromeOS
You must also make sure that your ChromeOS is updated to the latest version. Go to Chromebook Settings and click on About Chrome OS from the left sidebar. Then, press the Check for updates button.

11. Disable Extensions
Chrome extensions, especially those related to audio and sound can also affect the normal functionality of the microphone on your Chromebook. You must disable each extension one by one to see if any one of them is causing problems with your microphone.
1. In the Chrome browser, click on the three-dot icon at the top and go to More Tools > Extensions.

2. Turn off each extension using its toggle.

3. Once you find the culprit, keep it disabled or uninstall it.
Tip: Check out the best Chrome extensions for productivity.
12. Reset Chrome
If the above methods didn’t help in fixing the microphone on your Chromebook, you should try resetting the Chrome browser. Doing so will reset the permissions, shortcuts, and other settings. It will also disable extensions and delete cookies. It will not affect your bookmarks, history, or saved passwords.
To reset Chrome, go to Chrome Settings > Reset and Clean up > Restore settings to their original defaults.

13. Reset Chromebook
Finally, you should reset or power wash your Chromebook to factory settings. Make sure to back up the Chromebook before your reset your device as it will delete the data on your Chromebook.
Go to Chromebook Settings > Advanced > Reset settings > Reset.

14. The Last Resort
If nothing helped you in fixing Chromebook’s microphone, you should contact the manufacturer and let them know about the microphone as it could be a hardware issue. If they ask for the model name, learn how to find out your Chromebook’s model.
Or, if you are okay with opening up your Chromebook, this YouTube video might help. Please try the method at your own risk.
Use Microphone on Chromebook
Once your microphone is up and running on Chromebook, know how to use speech-to-text. If you are a Discord lover, know how to get Discord on Chromebook.