It may not be that often, but there will be times when you need to mirror or cast your Android screen to your computer. There may be several reasons for this like wanting to record your screen, play android games on your PC, watch movies or videos on a bigger screen, or even giving a presentation of an app or a document directly from your Android device.
No matter what the reason is, it is relatively easy to cast your Android screen to PC regardless of whether your Android device is rooted or not. Let’s check those out.
Before we begin
None of the screen mirroring apps will let you play high-end motion games on your computer screen. Doesn’t matter whether it works on USB or Wi-Fi. The only thing that worked was chromecast. But for basic screencasting needs like presentation or app demo, these apps should work fine.
Cast Android Screen to PC
1. Connect App
Works with: Wi-Fi
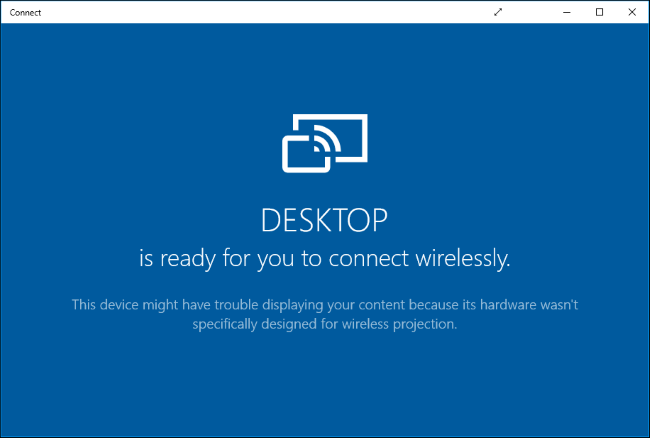
Since the August 2016 Anniversary Update, Windows 10 offers a native way to mirror your Android screen to Windows PC. Kind of like how you connect your Android with chromecast on your TV.
Requirement
- A PC running Windows 10 Aniversary update
- An Android device that supports Miracast
How it works: Just search for and launch the “Connect” app from Windows 10 start menu. Now, bring down the notification center on your Android device and select the option “Cast.” In some devices, you can find it in Settings > Display > Cast. You will see a list of all the devices that you can cast your Android device. In case, you don’t, tap on three vertical dots at the top right and select Enable Wireless Display option. Next, select your PC from the list, and you are good to go.
Pros: You don’t need to install any third-party software.
Cons: Only available on computers running Windows 10 Aniversary update. And in our testing, most Android phones do not support Miracast, since it’s direct competition to Google Chromecast. Also, even if you get it working, you won’t be able to control your Android phone from your PC.
Bottom Line: Of course, the Connect app in Windows 10 is pretty limited, and doesn’t work for all Android devices. However, if you are simply looking to watch some movies, pictures or give presentations, then the built-in Connect app in Windows 10 is not bad. However, if you need an option to mirror your Android Screen to another Android device, check out this list.
2. LetsView
Works with: Wi-Fi
LetsView is designed to work on Windows and can easily cast Android as well as iOS devices.
How it works: It works only with Wi-Fi which means you can not use it to cast your mobile devices via the Internet. The app simply refuses to let you connect. However, it automatically detects the server running on your PC. Simply allow the connection on your phone and it’s good to go. The latency is almost negligible that means you can easily stream content to the PC.
Pros: Supports Android and iOS devices, offers almost no latency during casting, record your screen, no watermark, 4k support.
Cons: Doesn’t work without Wi-Fi.
Bottom Line: If you want a one-tap solution for casting Android or iOS screen to your PC over Wi-Fi then it is worth it.
Get LetsView
3. Apowermirror
Works with: USB
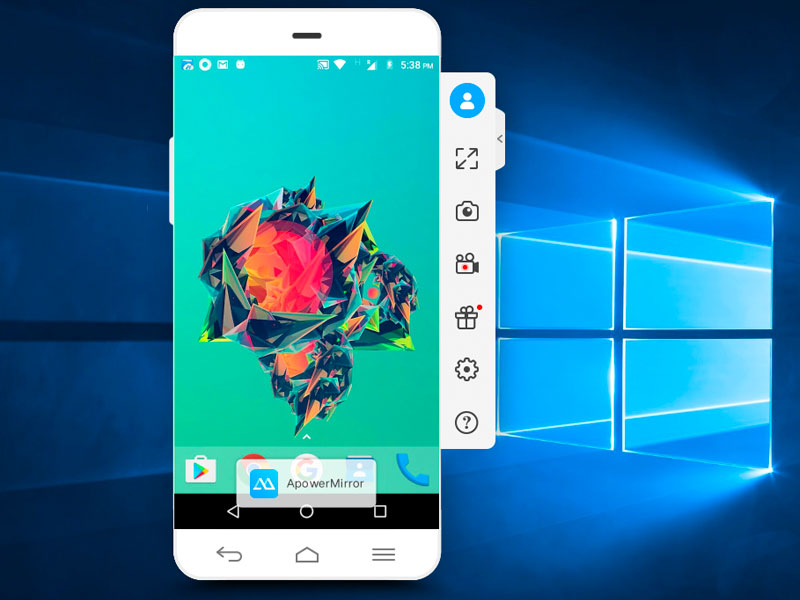
It’s a relatively new app. And unlike all the other apps on this list, Apowermirror not just only let you cast your Android screen on your PC, but you can completely control your Android smartphone from your computer. No Root required.
How it works: Install ApowerMirror – Mirror&Control app on your Android smartphone or tablet and open it. Next, install the Apowermirror PC suite on your PC. Now, open both software and connect your Android to your PC with a USB cable and follow the instruction. You will have to enable USB Debugging from Developer settings.
Pros: No on-screen watermark. Let’s you completely control your Android screen from PC. And gives you advance options like screenshots and recording etc.
Cons: There app forces you to create a free account to use more features. And after 3 days of creating your account, the app will force you to pay $29.95/year to use all features, that include screencasting as well. The app also works on Wi-Fi, but that is not reliable.
Bottom Line: Decent screencasting app with no watermark and many useful features. Still, it comes with a price and that price is too high, so we can’t recommend this app. But we do use the free version.
Install Apowermirror
4. Airdroid
Works with: Wi-Fi and Mobile Data
This one is the best way to cast your Android screen on any computer. Why? Well, until all the method we have seen are either paid, have intrusive ads, or doesn’t work reliably. But Airdroid changes all that.
How it works: The screen mirroring feature is hidden in the UI. So, here is how it works, download the Airdroid app from the Google Play Store and open it. Now, you can either create a new account or do tap on Skip. The app will give you an IP address, type that in your computer browser and you should see the Airdroid web UI. Next, click on the screenshot icon and you’ll see your Android screen. There is also a full-screen option.
Watch the following video, for step by step instructions on how to use Airdroid to mirror your Android screen.
Pros: It’s free, works on every platform and there are no intrusives ads or big watermarks on the screen. In fact, it can work wirelessly even without WiFi, which no other apps in this list can do.
Cons: You can not use the Airdroid screen mirroring feature to high-end motion play games on your computer. But this is something, you can only do with Chromecast.
Bottom Line: Hands down the best solution for screencasting.

Install Airdroid
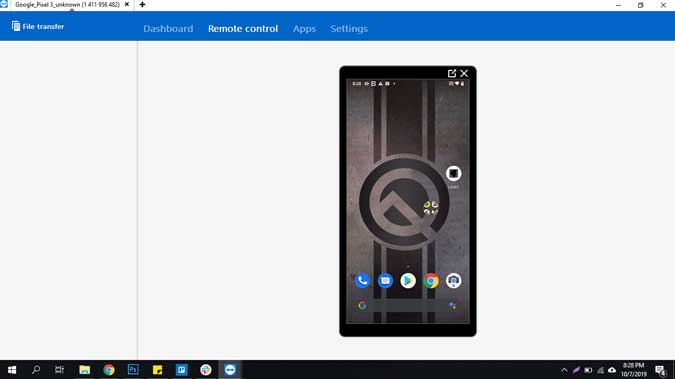
5. TeamViewer Host
Works with: Mobile Data
TeamViewer is a popular app to take remote access to your desktop computer using another computer. What if I told you can take control of your Android on a PC. Well, it won’t let you control the actual phone but you can still see the screen in real-time.
How to setup: We have a detailed guide here, but in short, you just install the TeamViewer Host on your smartphone from the Play Store. Log in to your TeamViewer account or create one in the Sign-up section. After you’ve created and authenticated the account. Go to login.teamviewer.com on your computer and sign in with the same credentials. You’ll see the option to connect to the smartphone if it is connected to the Internet you’ll get access to the mobile device on your computer.
Pros: It is free, works with the internet from anywhere in the world and the connection is secured with encryption. Plus, you don’t even have to install an app on the computer, it works with a web browser as well.
Cons: It doesn’t let you control the actual device but lets you transmit gestures and it shows up on the mobile device.
Bottom Line: Use this app if you want an easy solution to get the Android screen on a computer and you want to help the remote user with some settings. Obviously, you can’t control your Android from your desktop but if you ever want to control the desktop using an Android smartphone, you can check out this article.
Install TeamViewer Host (free)
6. Scrcpy
Works with: USB
Scrcpy is a new kid on the block that not only lets you mirror your Android screen on the computer but also lets you control it. There are 3 things that separate Scrcpy from all the other apps on the list. It’s free, works on every platform, and needs USB connection.
How to setup: Scrcpy is not exactly an app that you can run from your computer with one-click. It uses a USB connection and ADB. To get started, you can read this detailed article, but in general, you need to follow these steps.
- Set up ADB access on your computer and extract it under C:\adb
- Download the latest zip file from Github and extract it under the same file that we used before i.e. C:\adb
- Connect your smartphone or tablet to your computer with a USB cable
- Open up a command prompt or terminal inside C:\adb, and enter scrcpy. That’s it!
Pros: It is a free (no ads) and open source app, works on Windows, macOS, and Linux, low latency. and best of all control your smartphone with no computer’s keyboard and mouse.
Cons: Hard to set up for non-geeks, requires a USB connection to work.
Bottom Line: If you often use your smartphone along with the side of your computer and are familiar with ADB commands then Scrcpy is the best option for you. Compared to all the other methods, this was was the fastest with no visible lag.

Closing Words
In a nutshell, if you are comfortable with a USB connection between your computer and Android, Scrcpy is the best option out there. There are almost no lags, watermarks or intrusive ads, However, if you like no wires option, I’ll vouch for Airdroid. I hope that helps and if you think I missed any of the apps that you like then do comment below sharing your favorite apps to mirror Android screen to the computer.